Company profile and API settings
Manage your own account details, your company's registered information, and API access for outside systems that connect to your fleet.
Where to find it: your avatar in the header, then User Profile, Company › Edit Company Profile, or Company › Manage API Settings.
You click Submit on Edit Company Profile and a Submit Success message appears at the top of the screen.
User Profile
Your own account details – name, email, phone, and profile photo. Changes here apply only to your account. They do not affect other operators.
The screen has three parts: Personal data on the left, Mobile number on the right, and Account Permissions underneath.
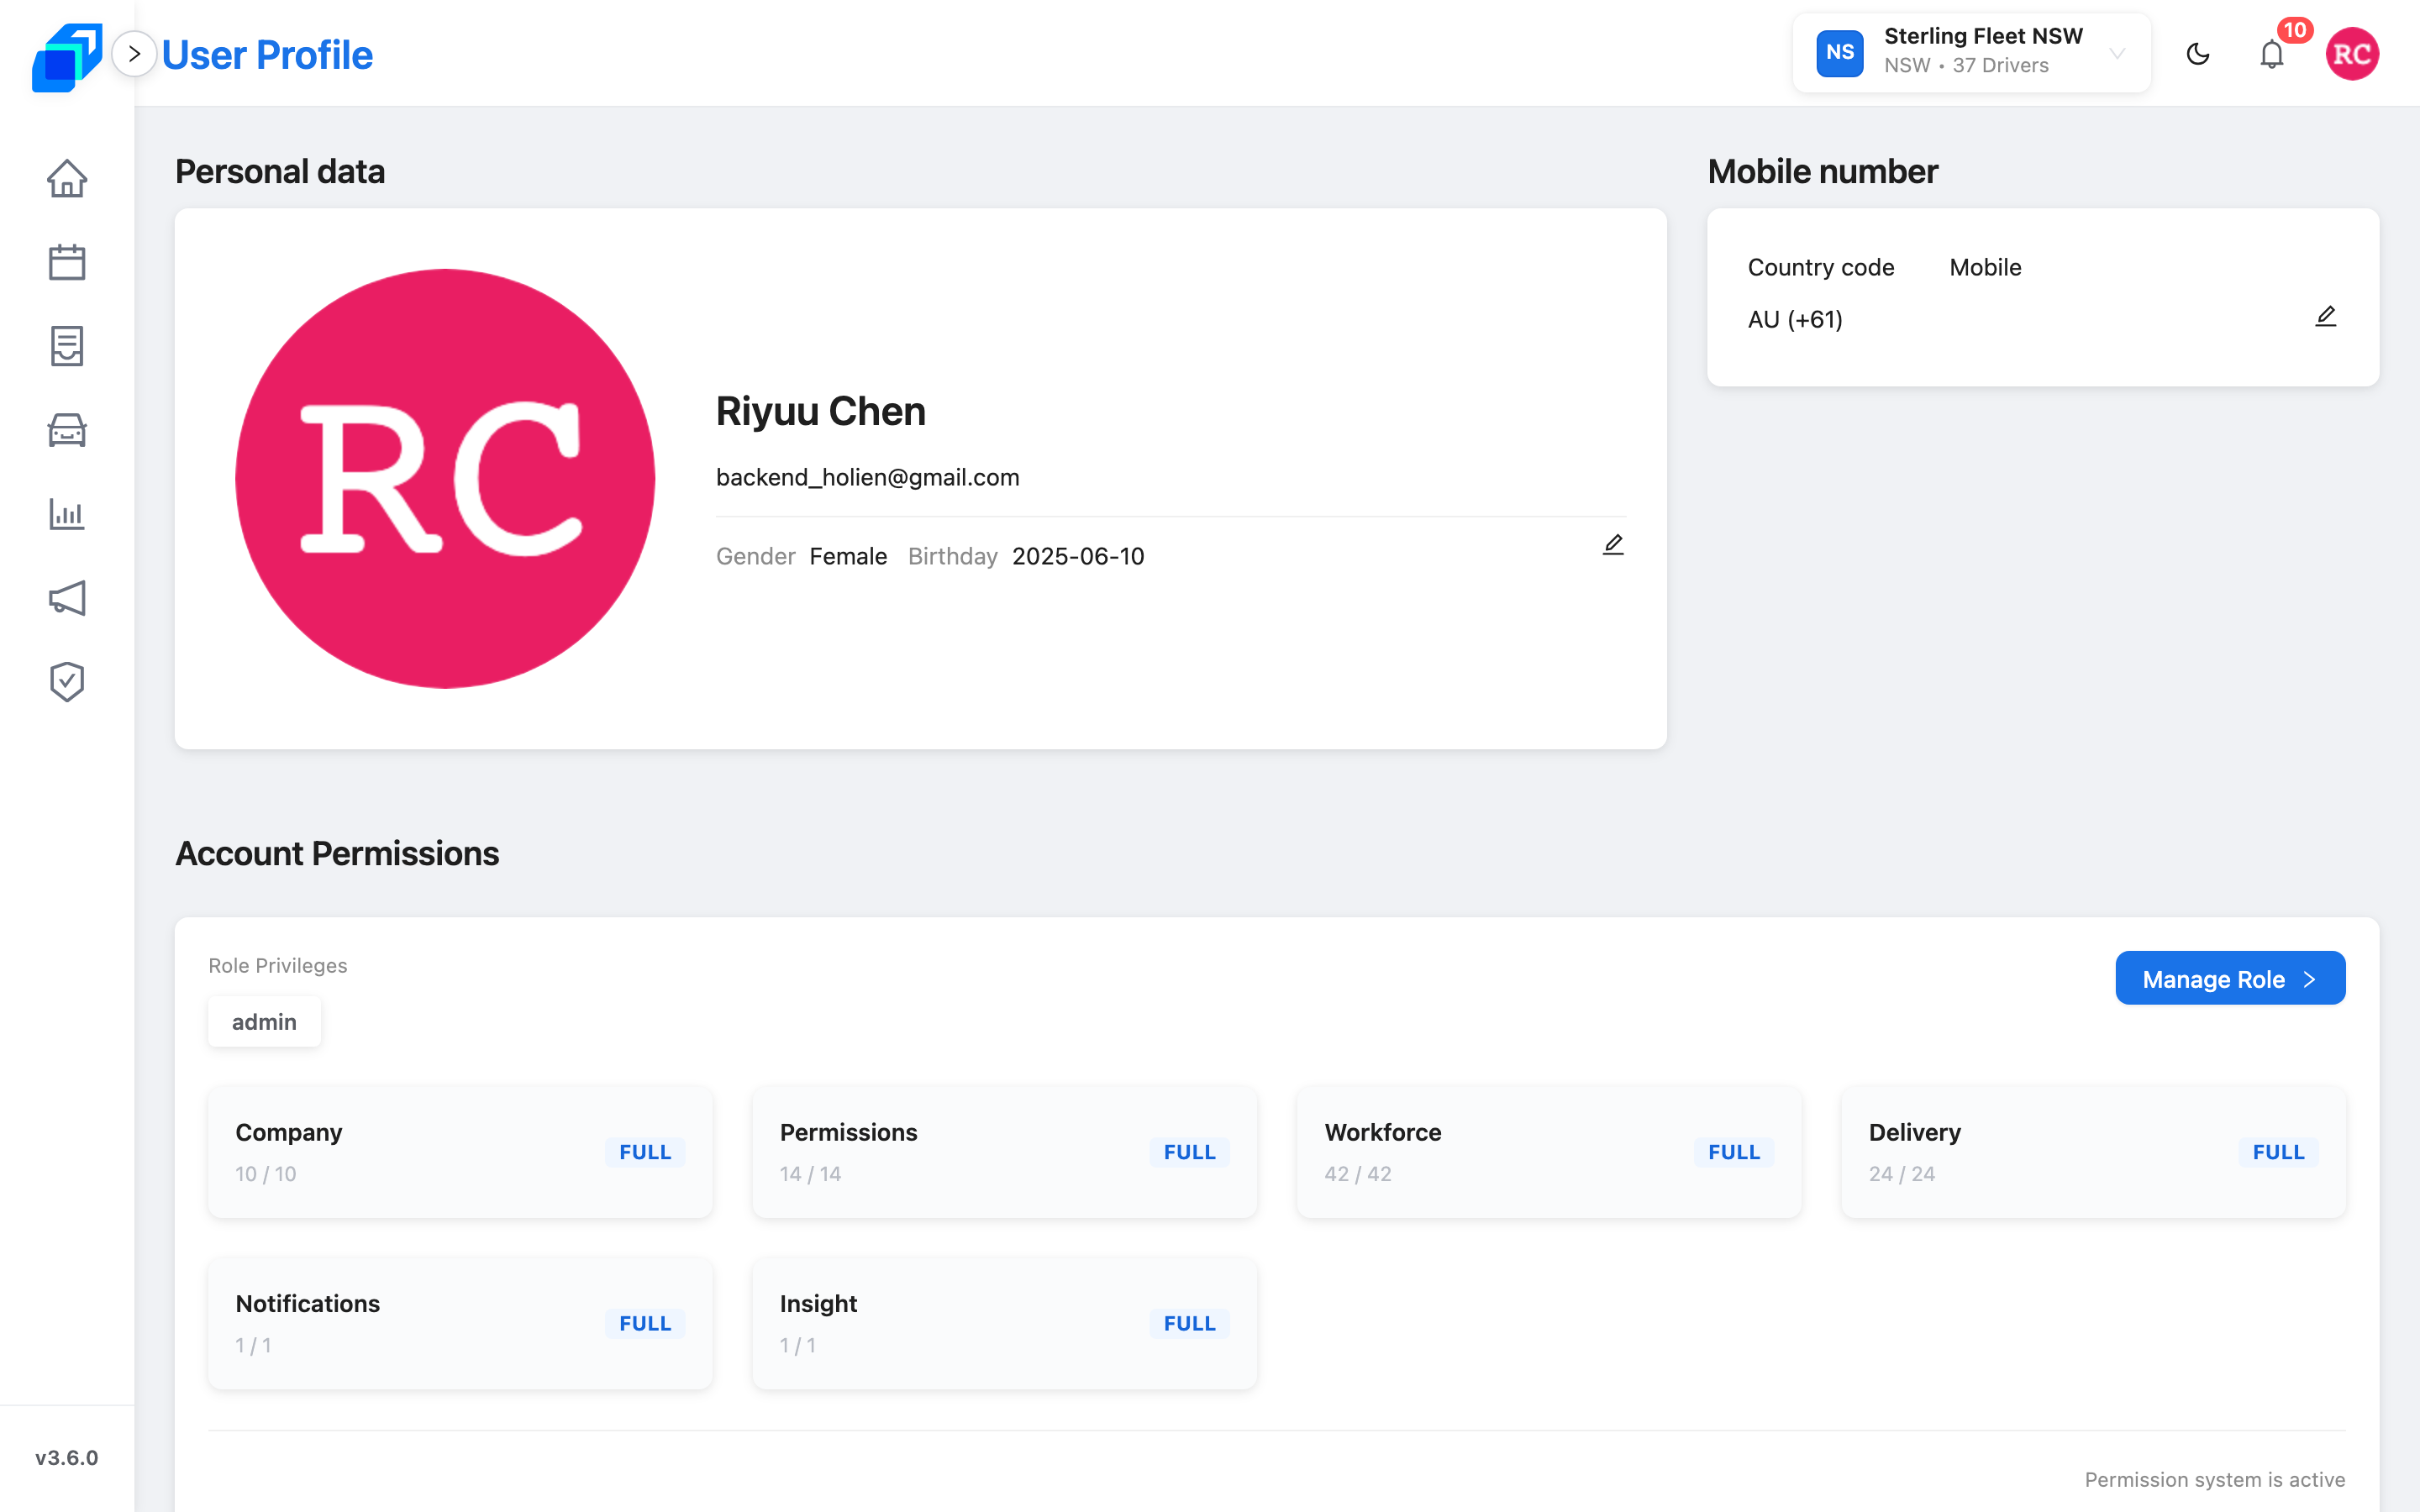
Edit your personal details
- Click the pencil icon on the Personal data card.
- Update your name – there are separate fields for First name, Middle name and Last name.
- Set the optional details – Gender (Male or Female), Title, Email and Birthday (date picker).
- Click Save. Cancel leaves the card unchanged.
Your name, email and details show on the card again with the new values.
To change your photo, click Upload avatar in the same form and choose a JPEG or PNG under 200 KB. Crop it in the dialog that opens, then click Confirm. Clear drops the photo you have now.
Your mobile number is verified by SMS, so keep it current. Changing it sends a one-time code to the new number before the change takes effect.
Change your mobile number
Your phone number lives in the Mobile number card on the right of the screen, not in the personal-details form.
- Click the pencil icon on the Mobile number card.
- Choose your country code, then type your new number.
- Click Send OTP – a code is sent by SMS to the new number.
- Enter the code in the OTP field.
- Click Submit.
The card shows your new Country code and Mobile number.
If the SMS does not arrive, use Resend OTP. The button counts down before it becomes available again.
Account Permissions
Below your personal details, the Account Permissions section lists every permission area your role covers. Role Privileges shows the roles you hold. Each area is a card showing:
- The area name, such as Company, Permissions, Workforce, Delivery, Notifications or Insight
- How many permissions you hold in it, written as a count like
10 / 10 - A coverage tag – Full, Partial or None
You cannot change your own permissions here. If your role lets you manage roles, the button in the corner reads Manage Role and opens the roles screen. If it does not, the button reads Check Matrix and opens a read-only view of what your roles grant.
Edit Company Profile
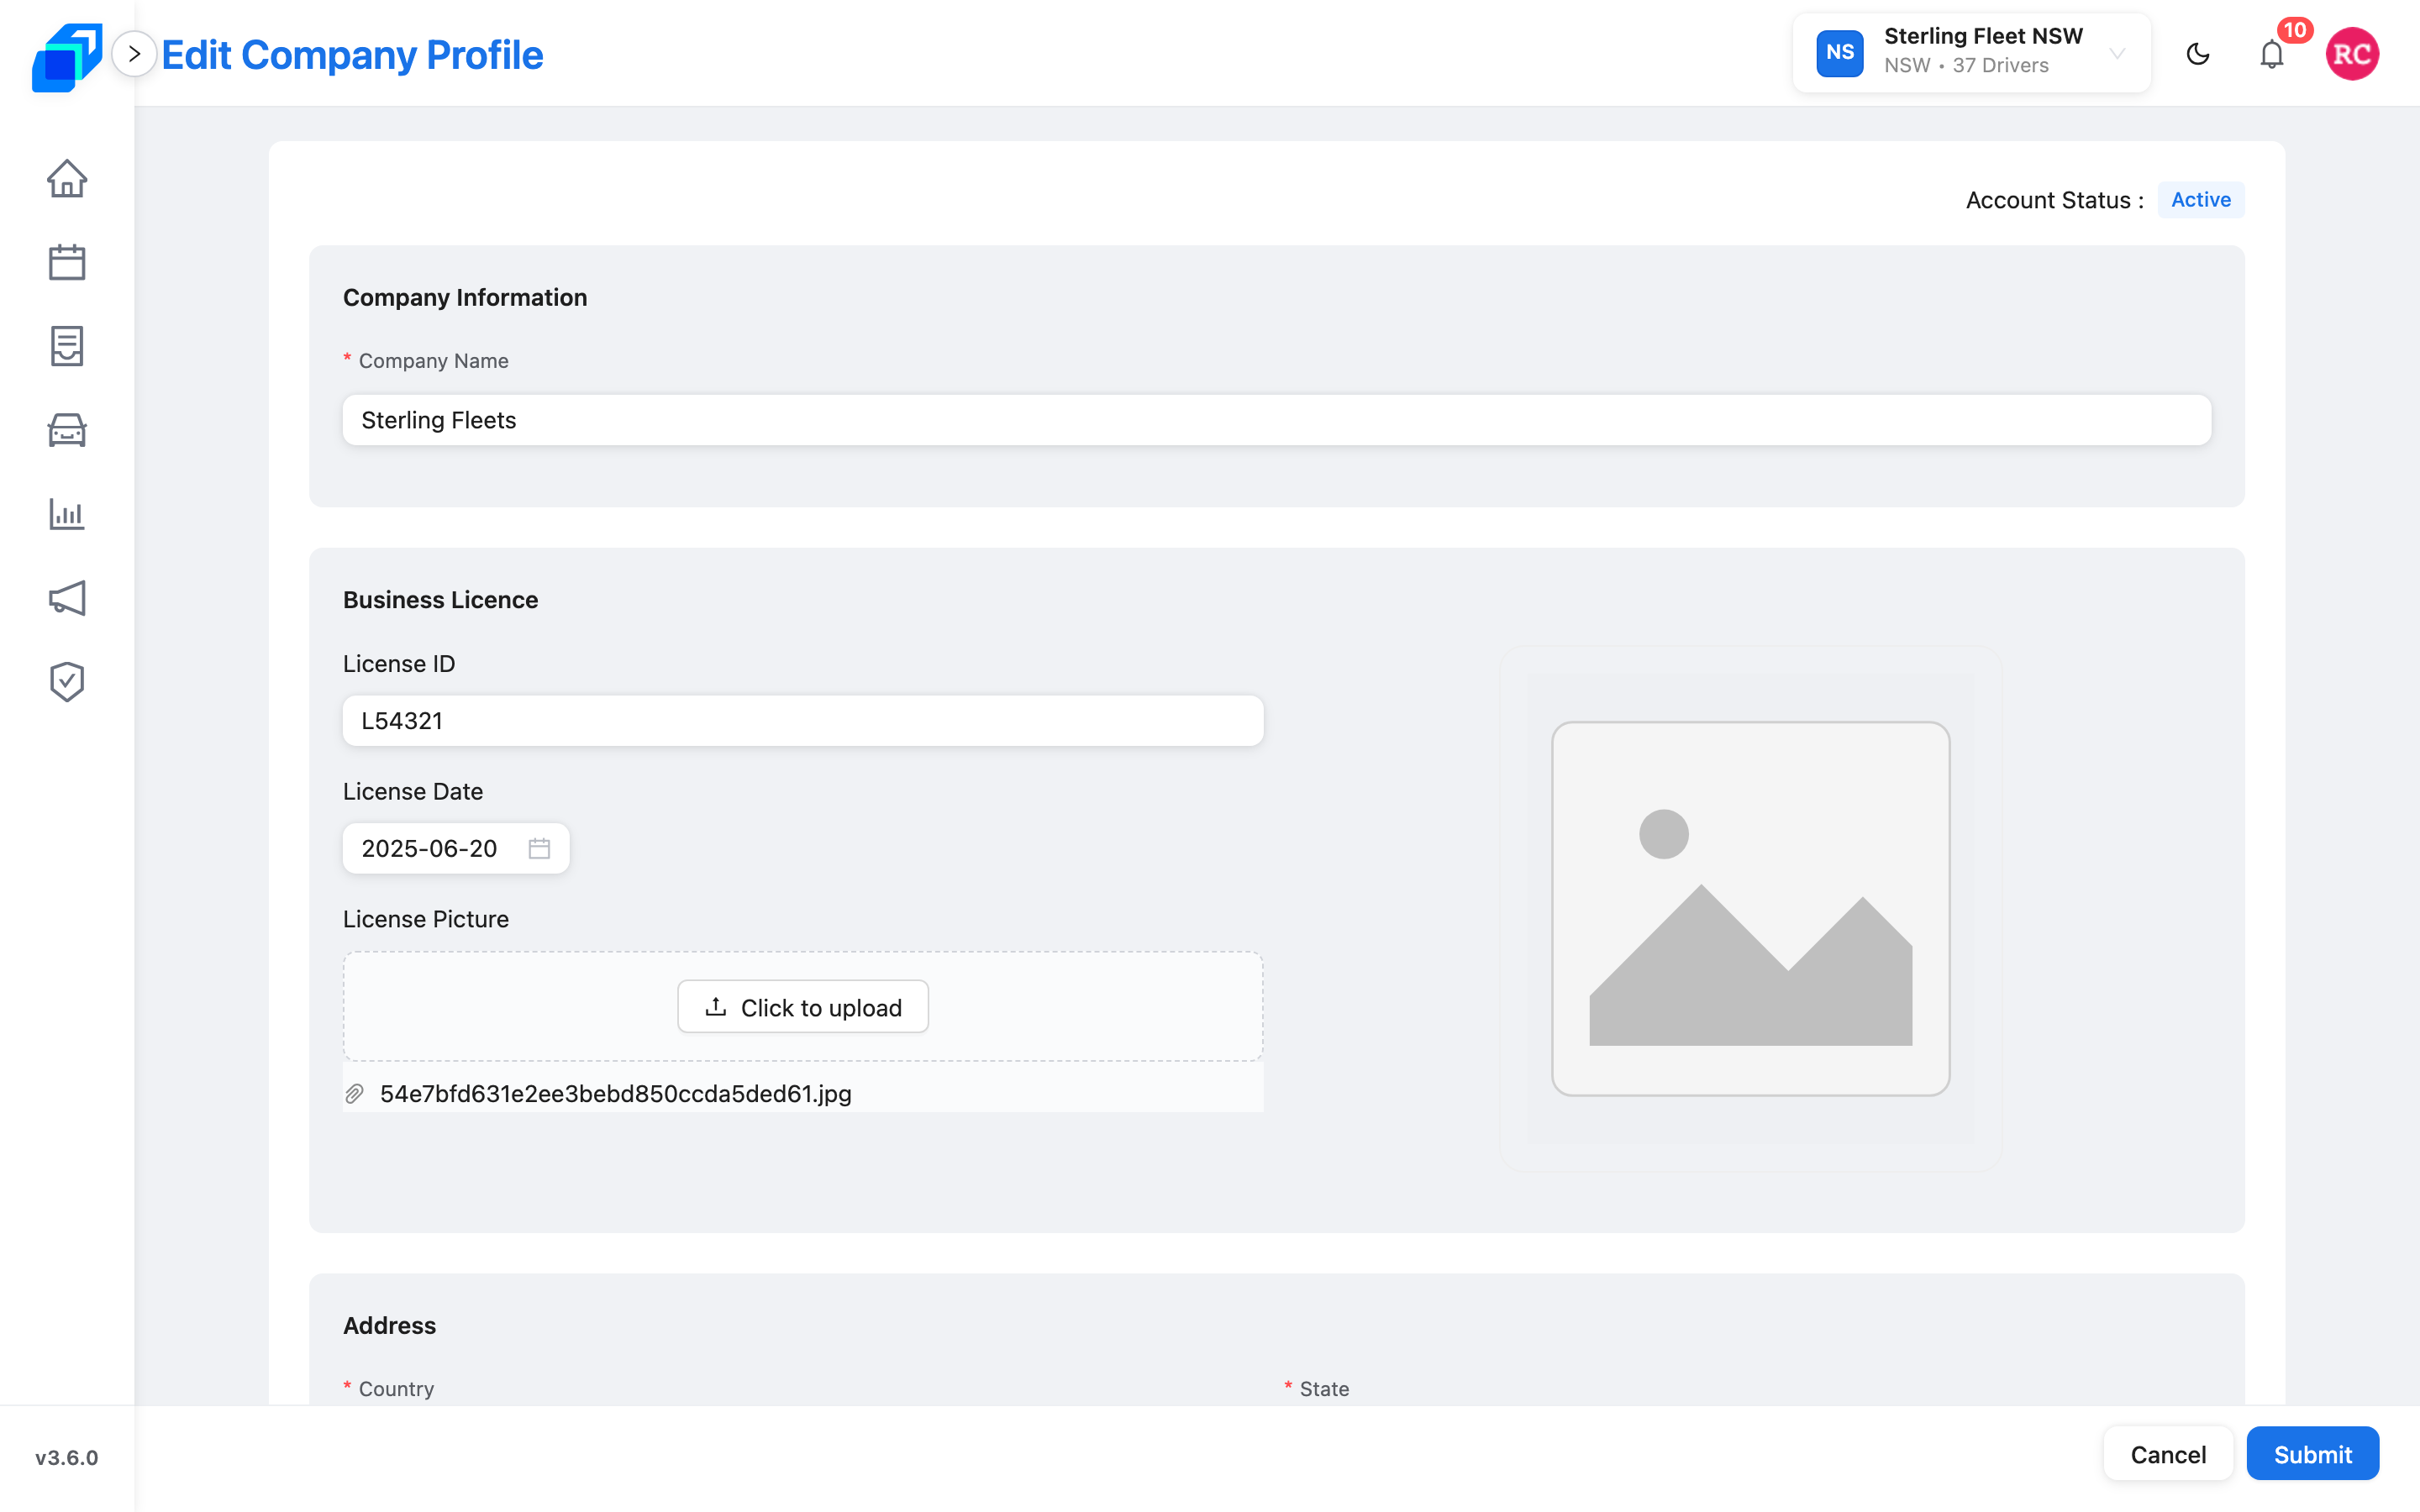
Edit your company's registered details – business name, business licence, and the official address. Account Status at the top of the form shows whether the company account is Active.
What you can edit
The form has three sections:
Company Information
- Company Name – your legal business name. This one is required.
Business Licence
- License ID – your business licence number.
- License Date – the date on the licence.
- License Picture – use Click to upload to attach a scan or photo.
The three licence fields travel together. Fill in one and the form asks for the rest before it will save.
Address
- Country, State, City, Postcode and Address – the registered address of the business.
Save your changes
- Check every field for accuracy.
- Click Submit at the bottom of the form. Cancel takes you back without saving.
- A Submit Success message confirms the update.
Changes to your company profile take effect immediately. Updating the business licence details may affect invoicing and compliance reporting.
Manage API Settings
Turn on API access so approved outside systems can connect to your fleet. Access is protected by credentials and a list of approved IP addresses.
Turn API access on
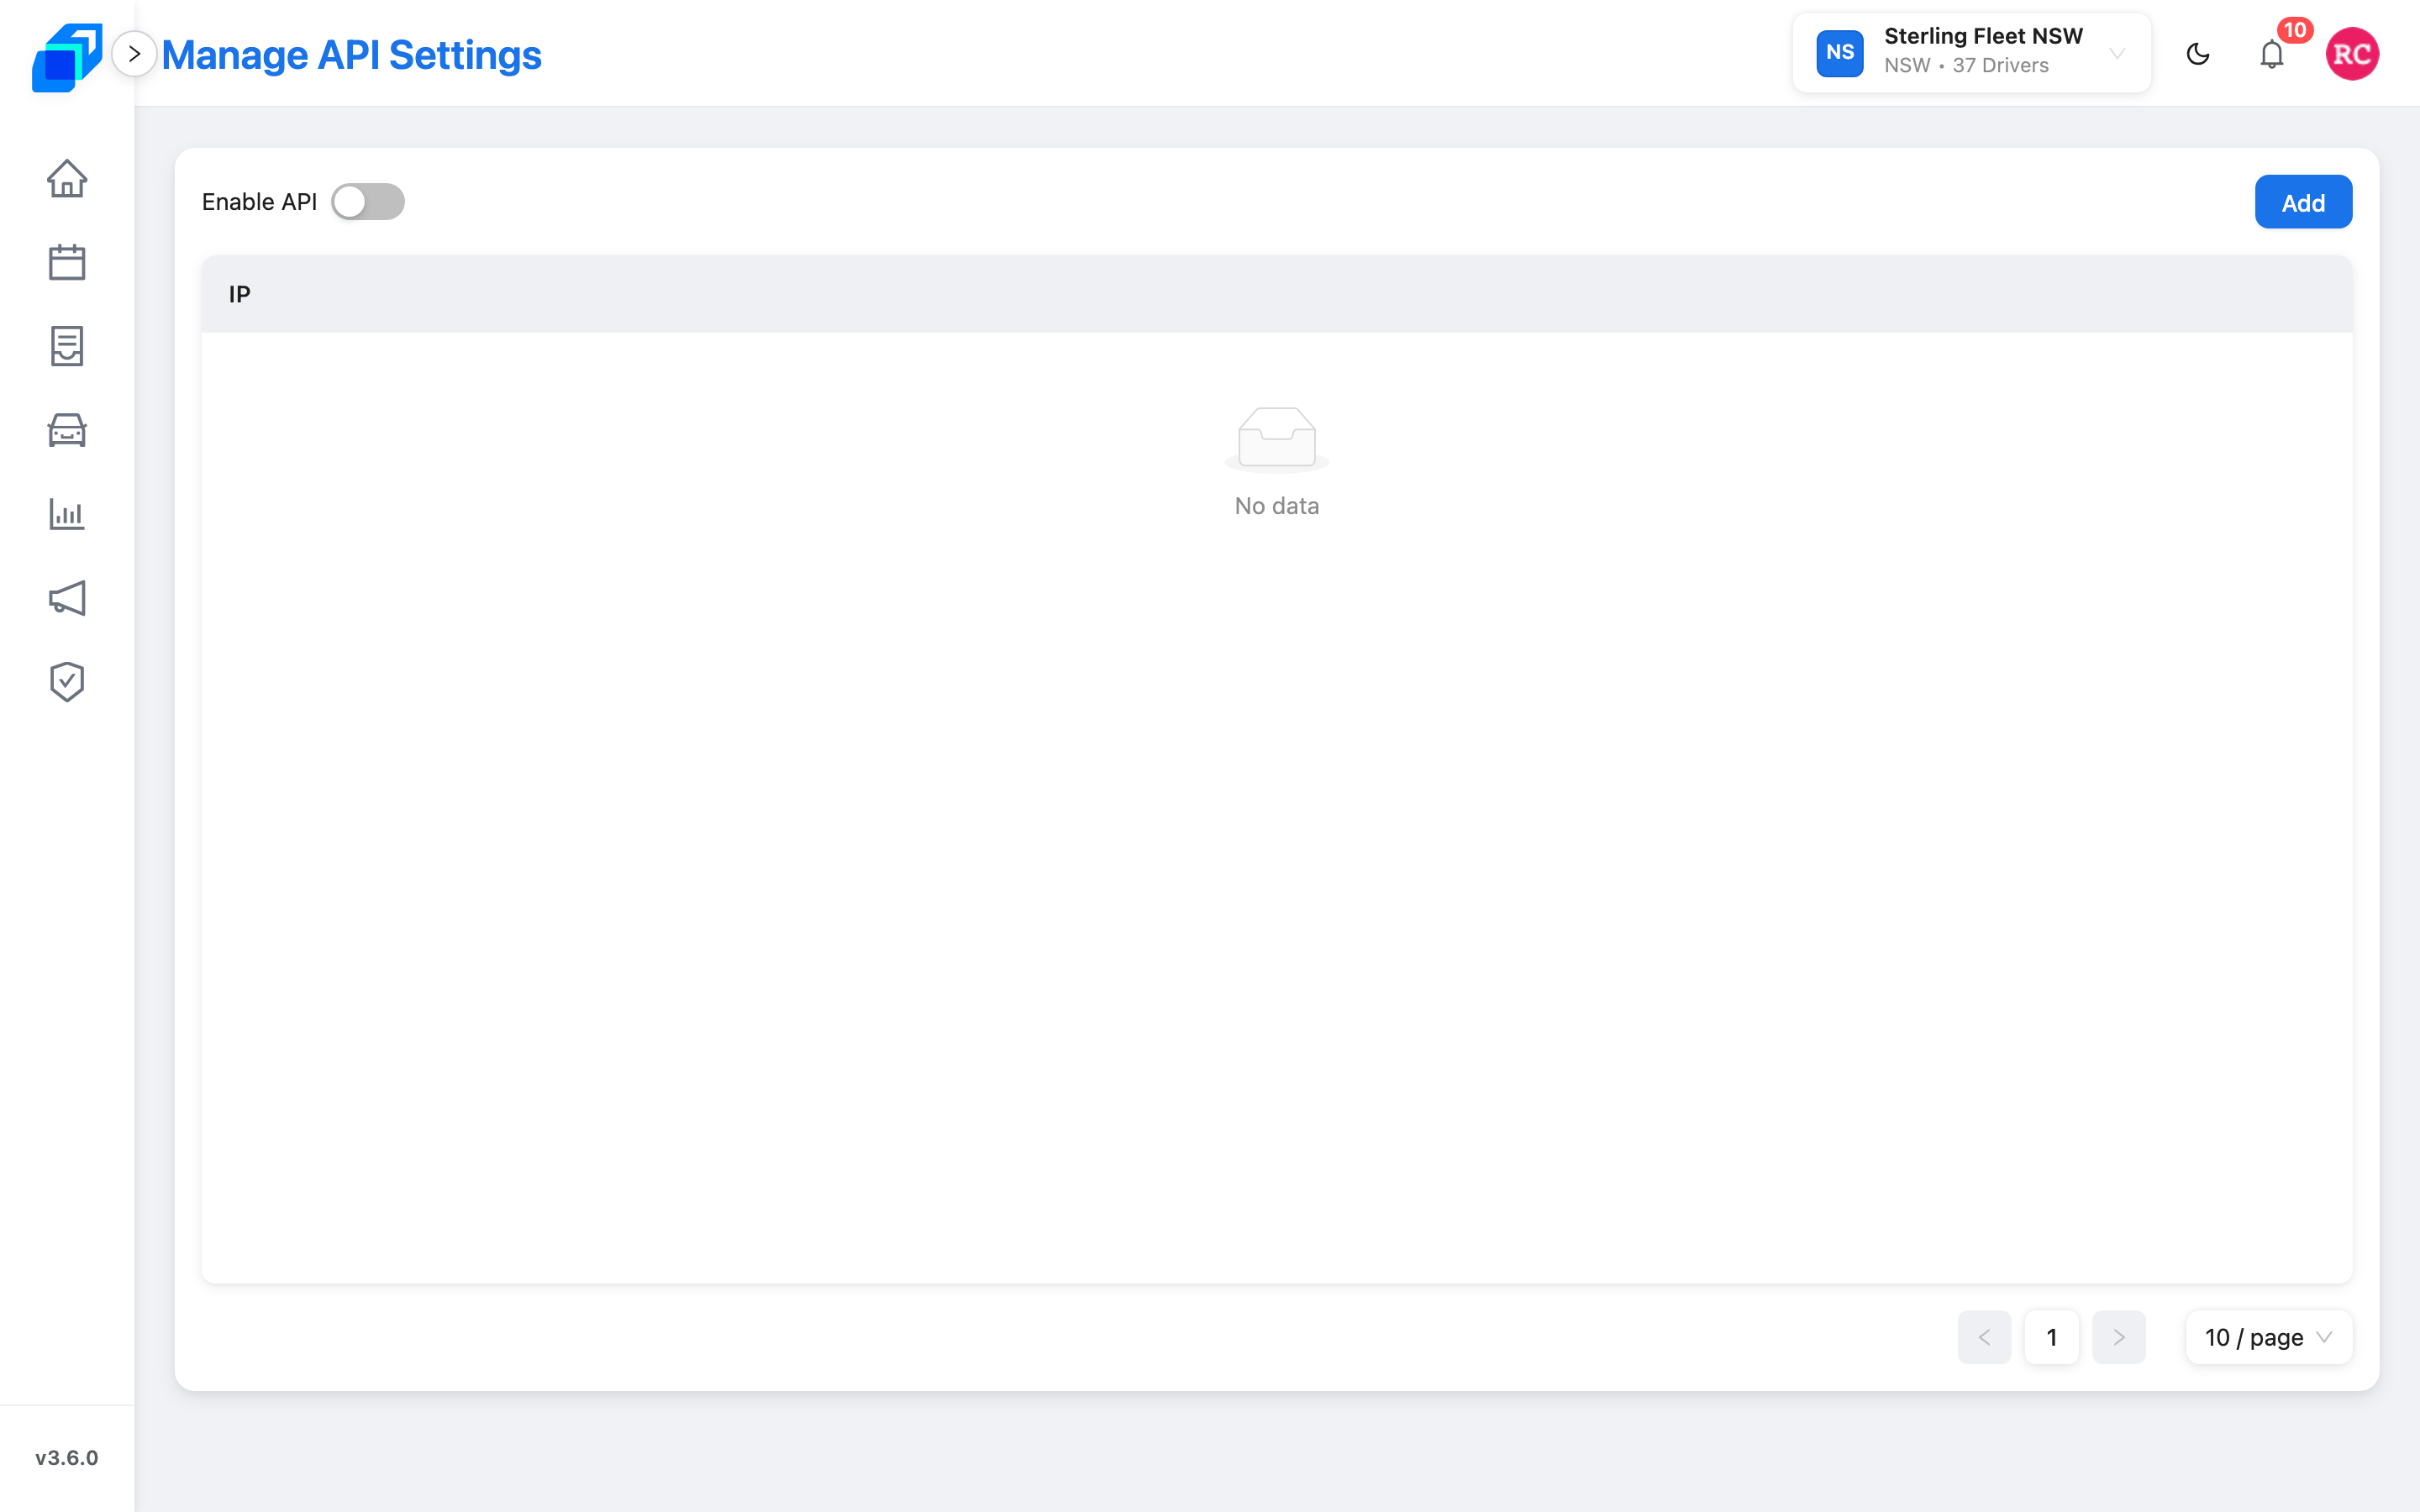
Enable API sits at the top left of the screen, as a switch.
- With the switch off, the credentials stay hidden.
- With the switch on, a line appears above the table showing API URI, API ID and API Secret. A credential that has not been issued yet reads None.
The three credentials are display-only – there is no field to type into:
- API URI – the address your integrations send their requests to.
- API ID – your company's identifier for API access.
- API Secret – the secret that goes with the ID. Treat it like a password and never share it.
Restrict access to trusted IP addresses
For extra security, list the IP addresses that may send API requests for your company. The table has a single IP column and an Edit and a Delete button on each row. It splits into pages once the list grows.
Add an address
- Click Add above the table. The Add IP dialog opens.
- Type the address in the Comma-separated IP addresses field. Plain IPv4 and IPv6 addresses only, for example
192.0.2.1– separate several with commas, up to 200 characters in total. - Click OK – the new address joins the table and an Add Success message appears.
Edit an address
- Click Edit on the row you want to change.
- Update the address in the Edit IP dialog.
- Click OK.
Delete an address
- Click Delete on the row.
- Check the address in the Delete IP dialog, then confirm with Delete.
- The address leaves the table right away.
An empty list means any IP address can connect with valid credentials. Keep the list populated, or switch Enable API off while nobody is using it.
Keeping API access safe
- The IP list is a second layer, not the only one – always use HTTPS and keep your API Secret safe.
- Changes take effect right away – adding or removing an address applies at once.
- Review access regularly – check your own integration logs for anything unauthorised, and remove addresses you no longer recognise.
Before you connect an outside platform, ask them for their outbound IP address or range. Add it to the list first, so their very first request is not refused.