Create a role
CREATE · SET UP
Add a role that already sits in the right group, with ticks copied from Manager or admin.
Where to find it: Permissions › Roles & Groups, then the plus control (it reads Create New Role).
The new role sits in its group on the left (not in Ungrouped), Permissions shows the views you ticked, and the people you ticked on Add Users appear on that role's Users list.
Set groups first: Roles. Copy an existing job unless this one is truly new.
1. Choose how to create – CREATE
Three steps: Start, Assign Permissions, Add Users. If the top bar shows only two, your role cannot manage users. Confirm & Create then sits on Assign Permissions; ask your fleet admin to add people to the role.
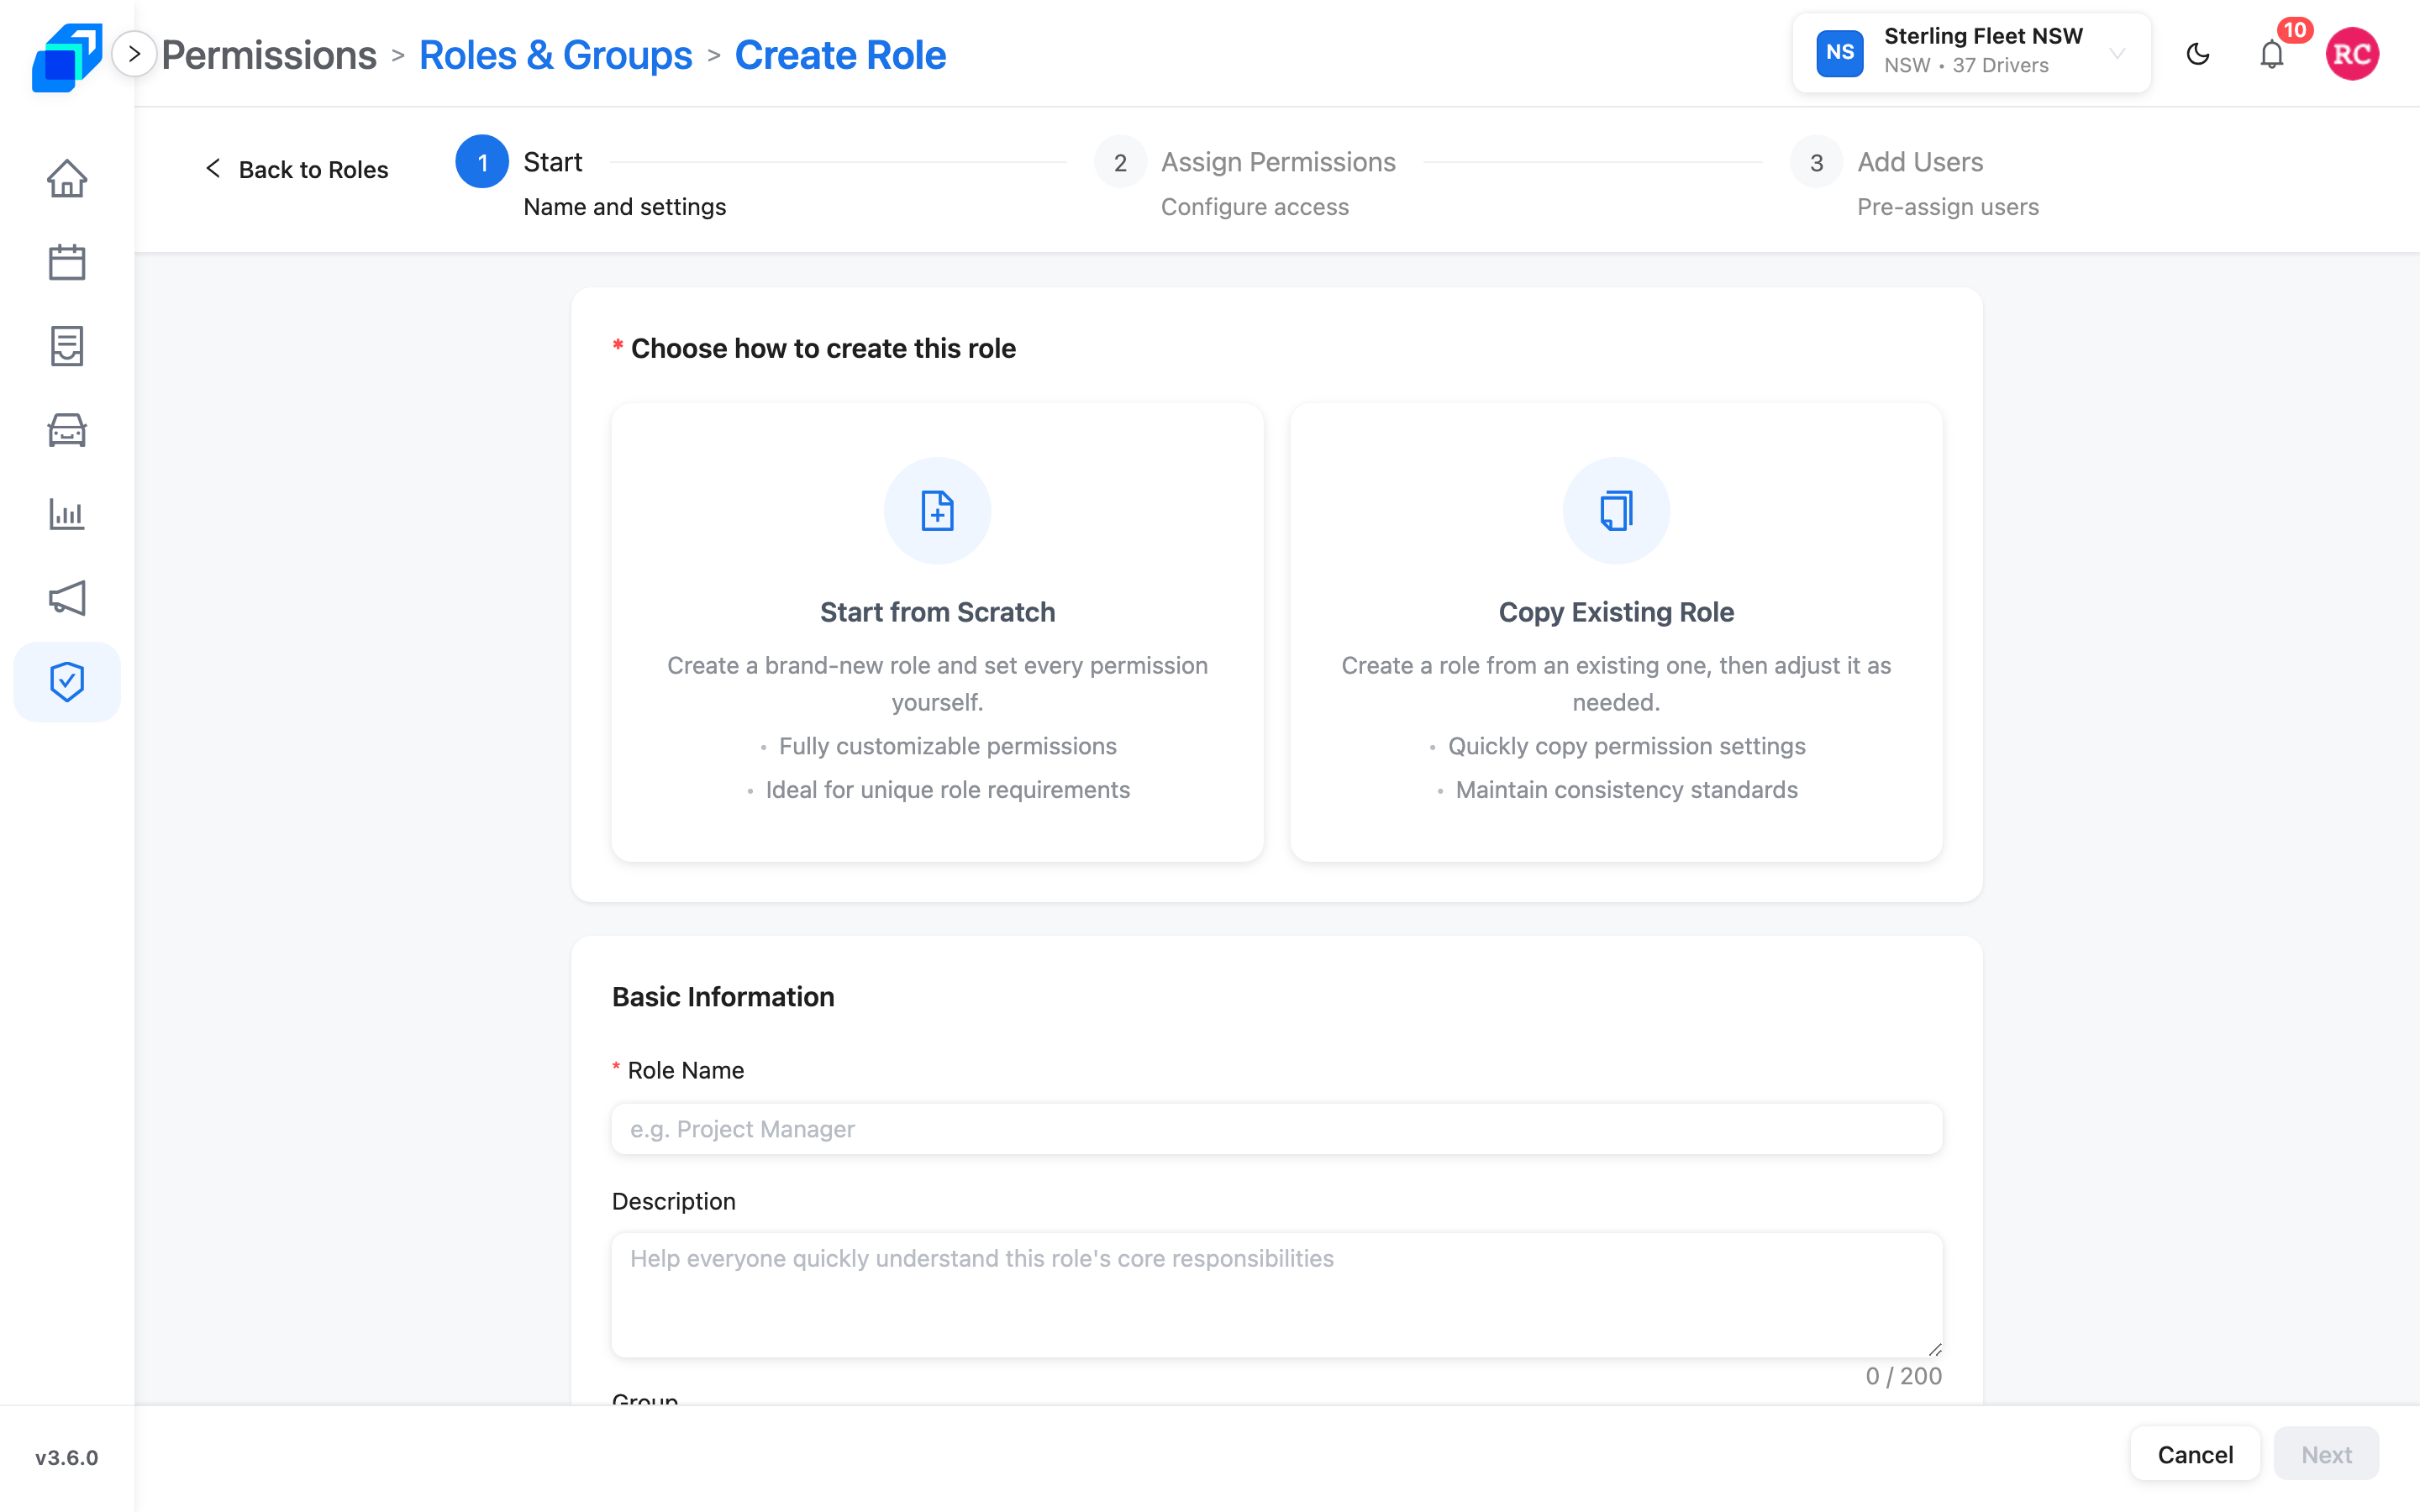
- Start from Scratch – you tick every view yourself. Use only for a job that is nothing like Manager.
- Copy Existing Role – pick Manager (Gerent layer) or admin (full set), then change ticks in step 2.
Prefer Copy Existing Role. That is how admin, Gerent, and Manager stay aligned.
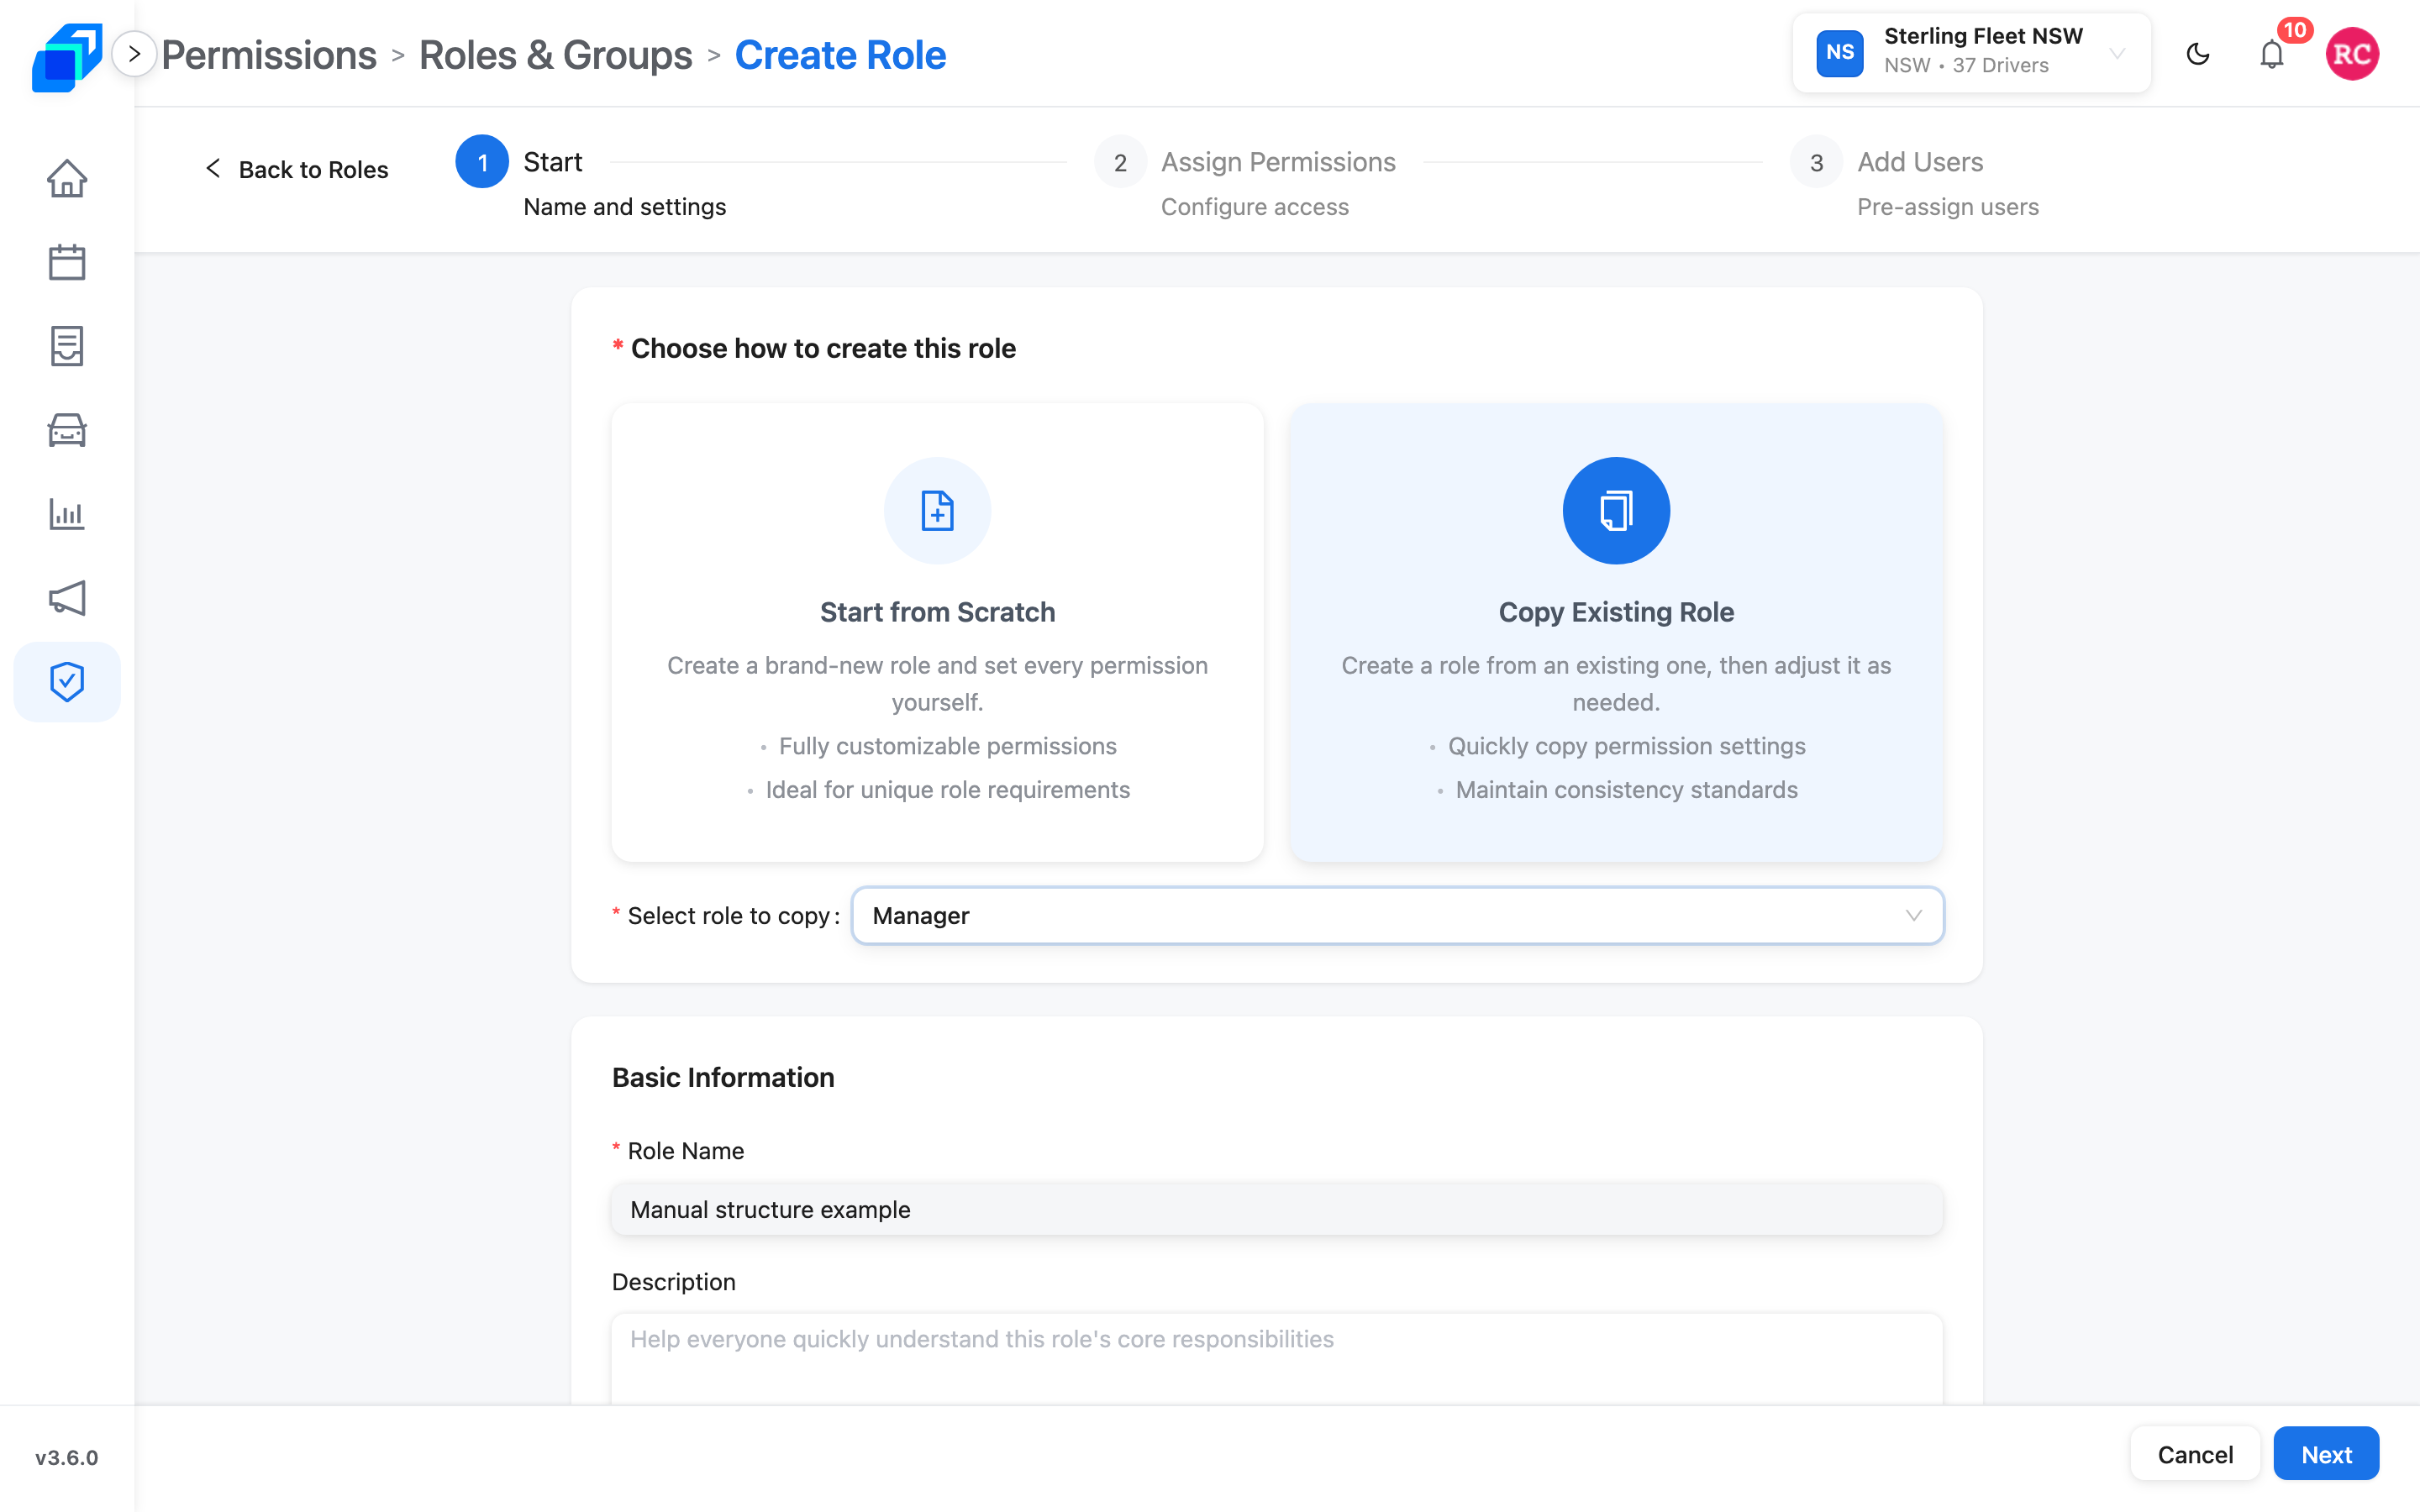
- Click Copy Existing Role.
- Select role to copy – Manager or admin. Next stays disabled until you choose one and name the role.
- Role Name – required, unique, up to 50 characters. A copy pre-fills as the copied name plus (Copy); replace it with the job's own name.
- Description – optional, up to 200 characters. A copy brings the copied role's description across; rewrite it for this job.
- Group – admin, Gerent, or Manager, not Ungrouped. A copy lands in the copied role's group; move it if this job sits elsewhere.
- Click Next. A name an active role already uses stops you here – Role name already exists. Please choose a different name. appears under the field.
2. Assign permissions – SET UP
You need at least one tick. Copied ticks from Manager or admin are already on.
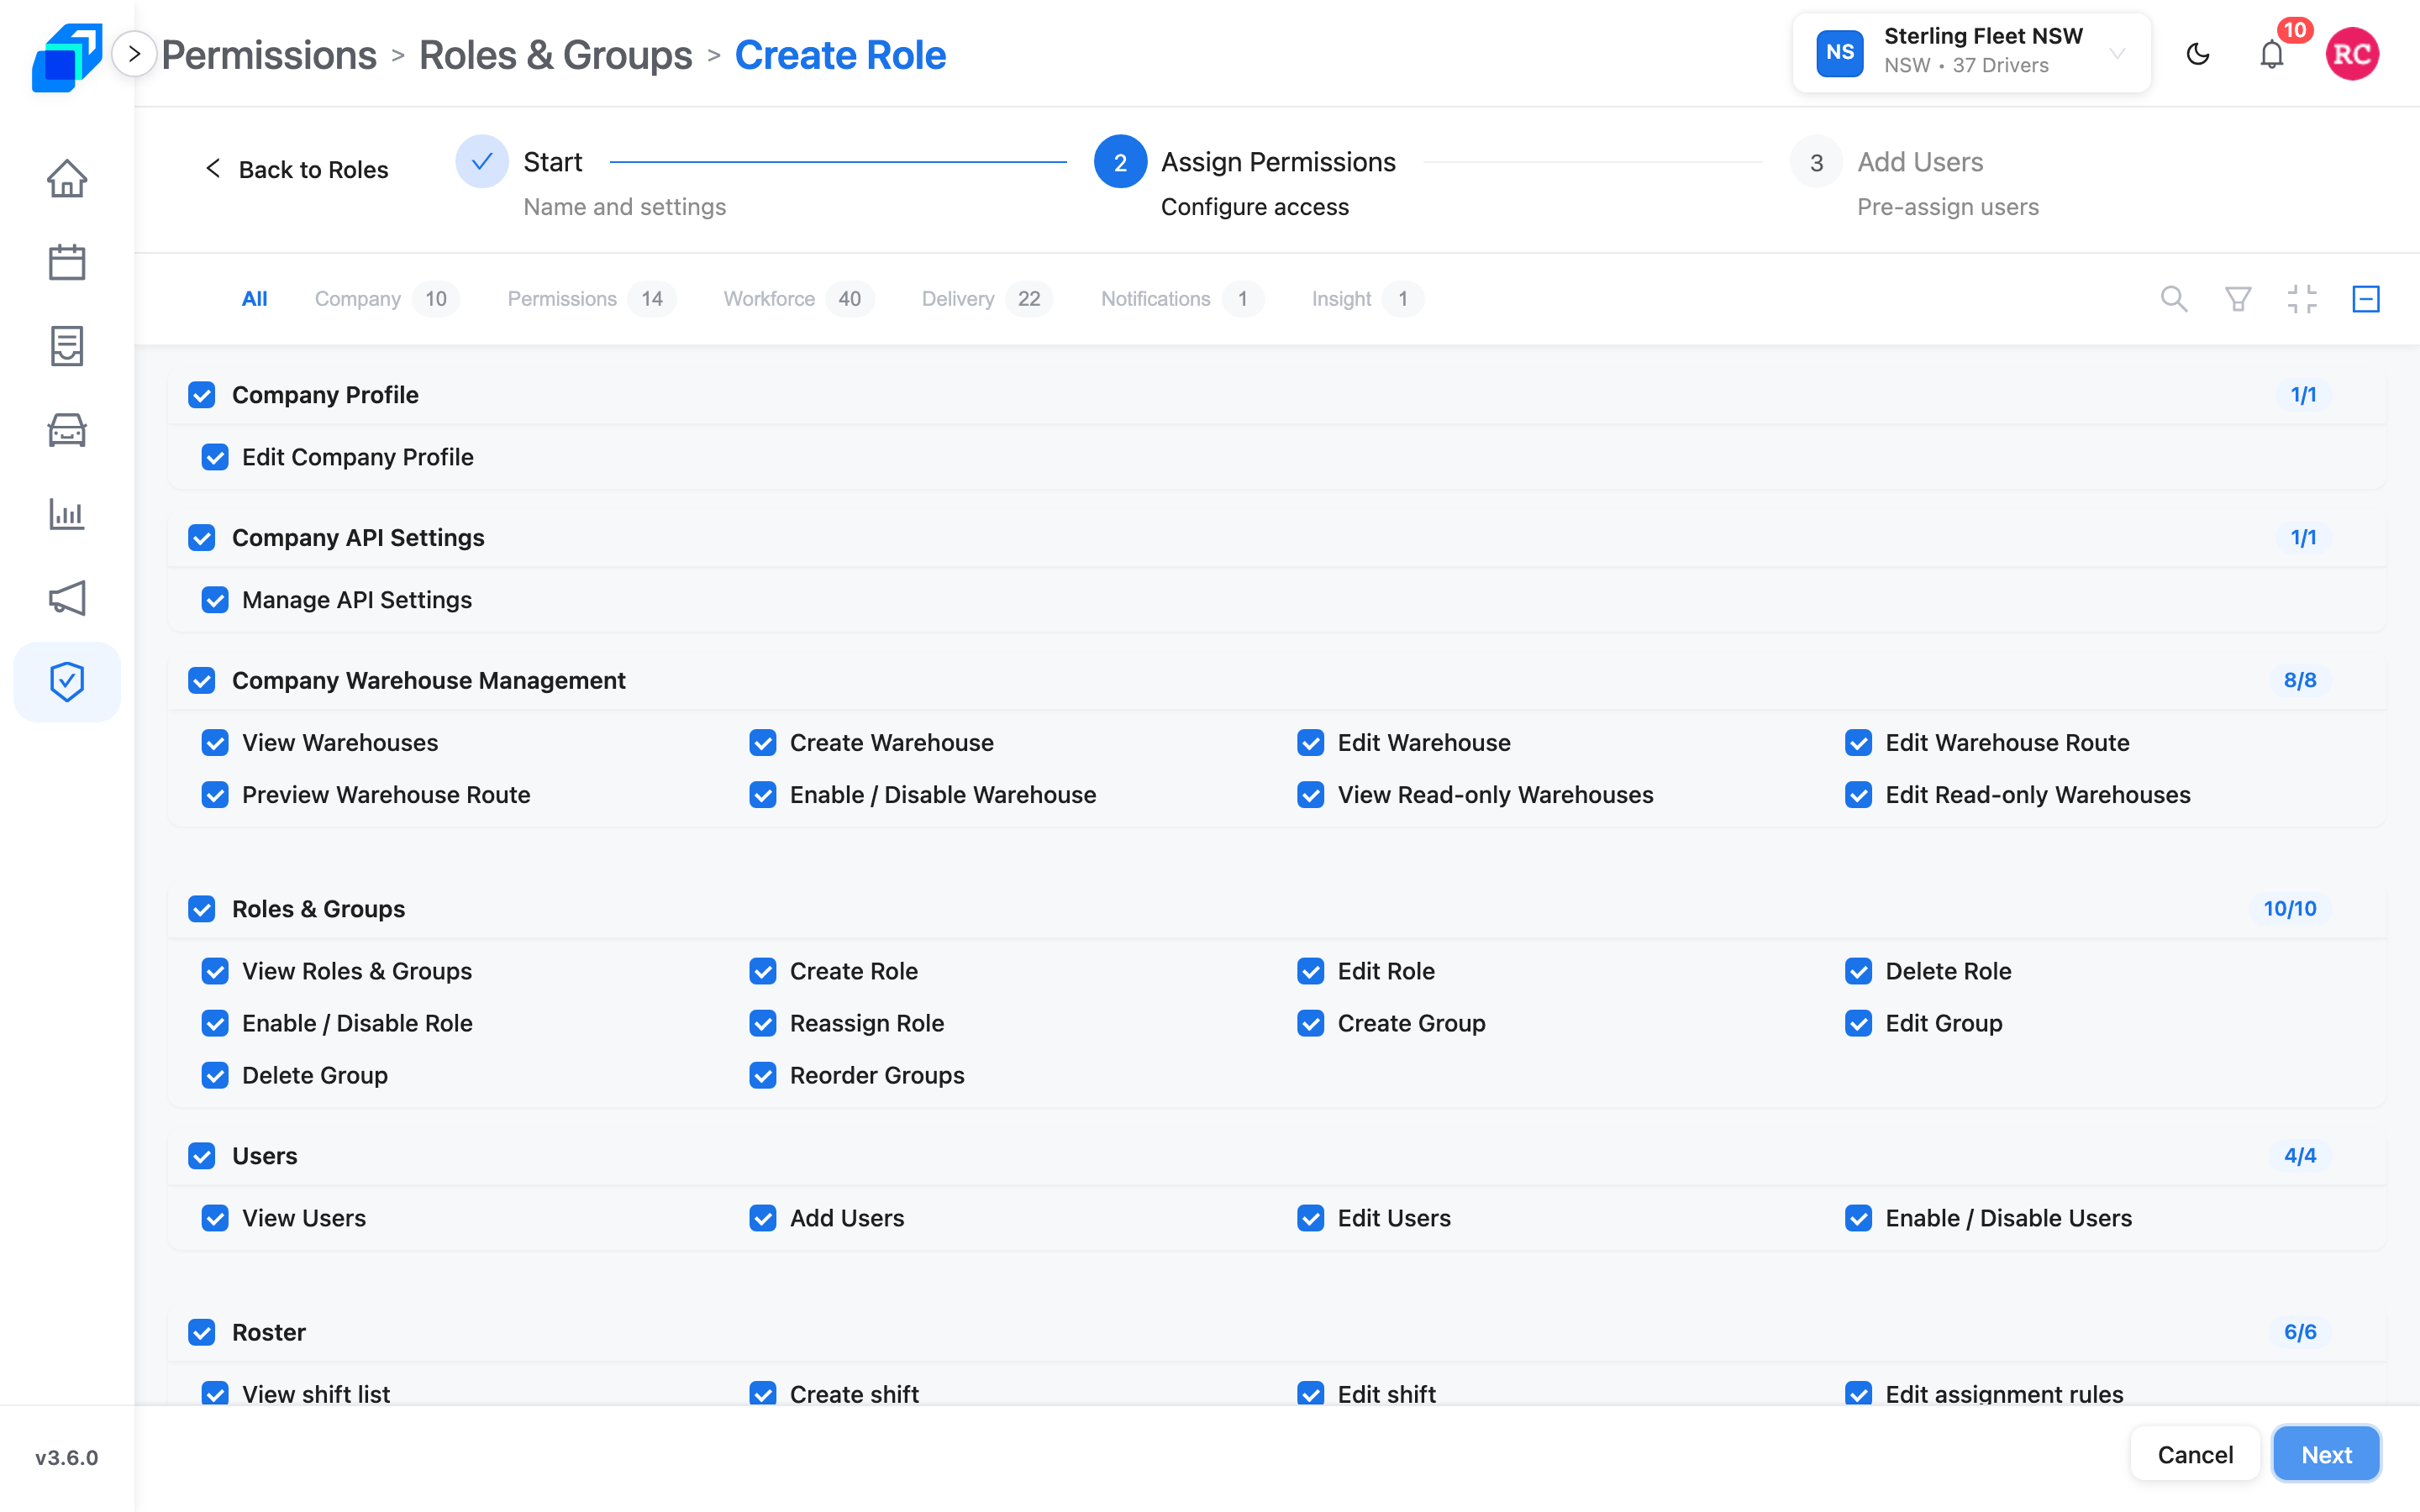
Chips at the top match the role page: All, Company, Permissions, Workforce, Delivery, Notifications, Insight. Click Delivery to tick only the day ( View Orders, Create Order, View Order Management, Add Pending Order, Simulate Route, Assign Route, View Run Sheets ).
For one tick in a long grid, click the search icon beside the chips and type part of its name into Search permissions.... The grid narrows as you type; No Results Found means nothing matches, so clear the box.
The square control to the right of the chips ticks every view in the chip you are on. On All, that is every view in the grid. Rest the pointer on it. It reads Select all permissions in all modules, or names the module – Select all permissions in "Delivery". It fills in solid once everything in that chip is ticked, and shows a minus when only some are. Use it for admin. For a dispatcher, leave it alone on Permissions and tick only the views that job needs.
Remove what this job must not see:
- Dispatcher: untick Create Role, Delete Role, Reassign Role, Create Group, Delete Group, Manage API Settings.
- Warehouse-only: keep View Warehouses and Edit Warehouse Route; untick Assign Route and Create Order.
Click Next.
3. Add people, then create – CREATE
Step 3 is Add Users (subtitle Pre-assign users). The role is not saved until you click Confirm & Create.
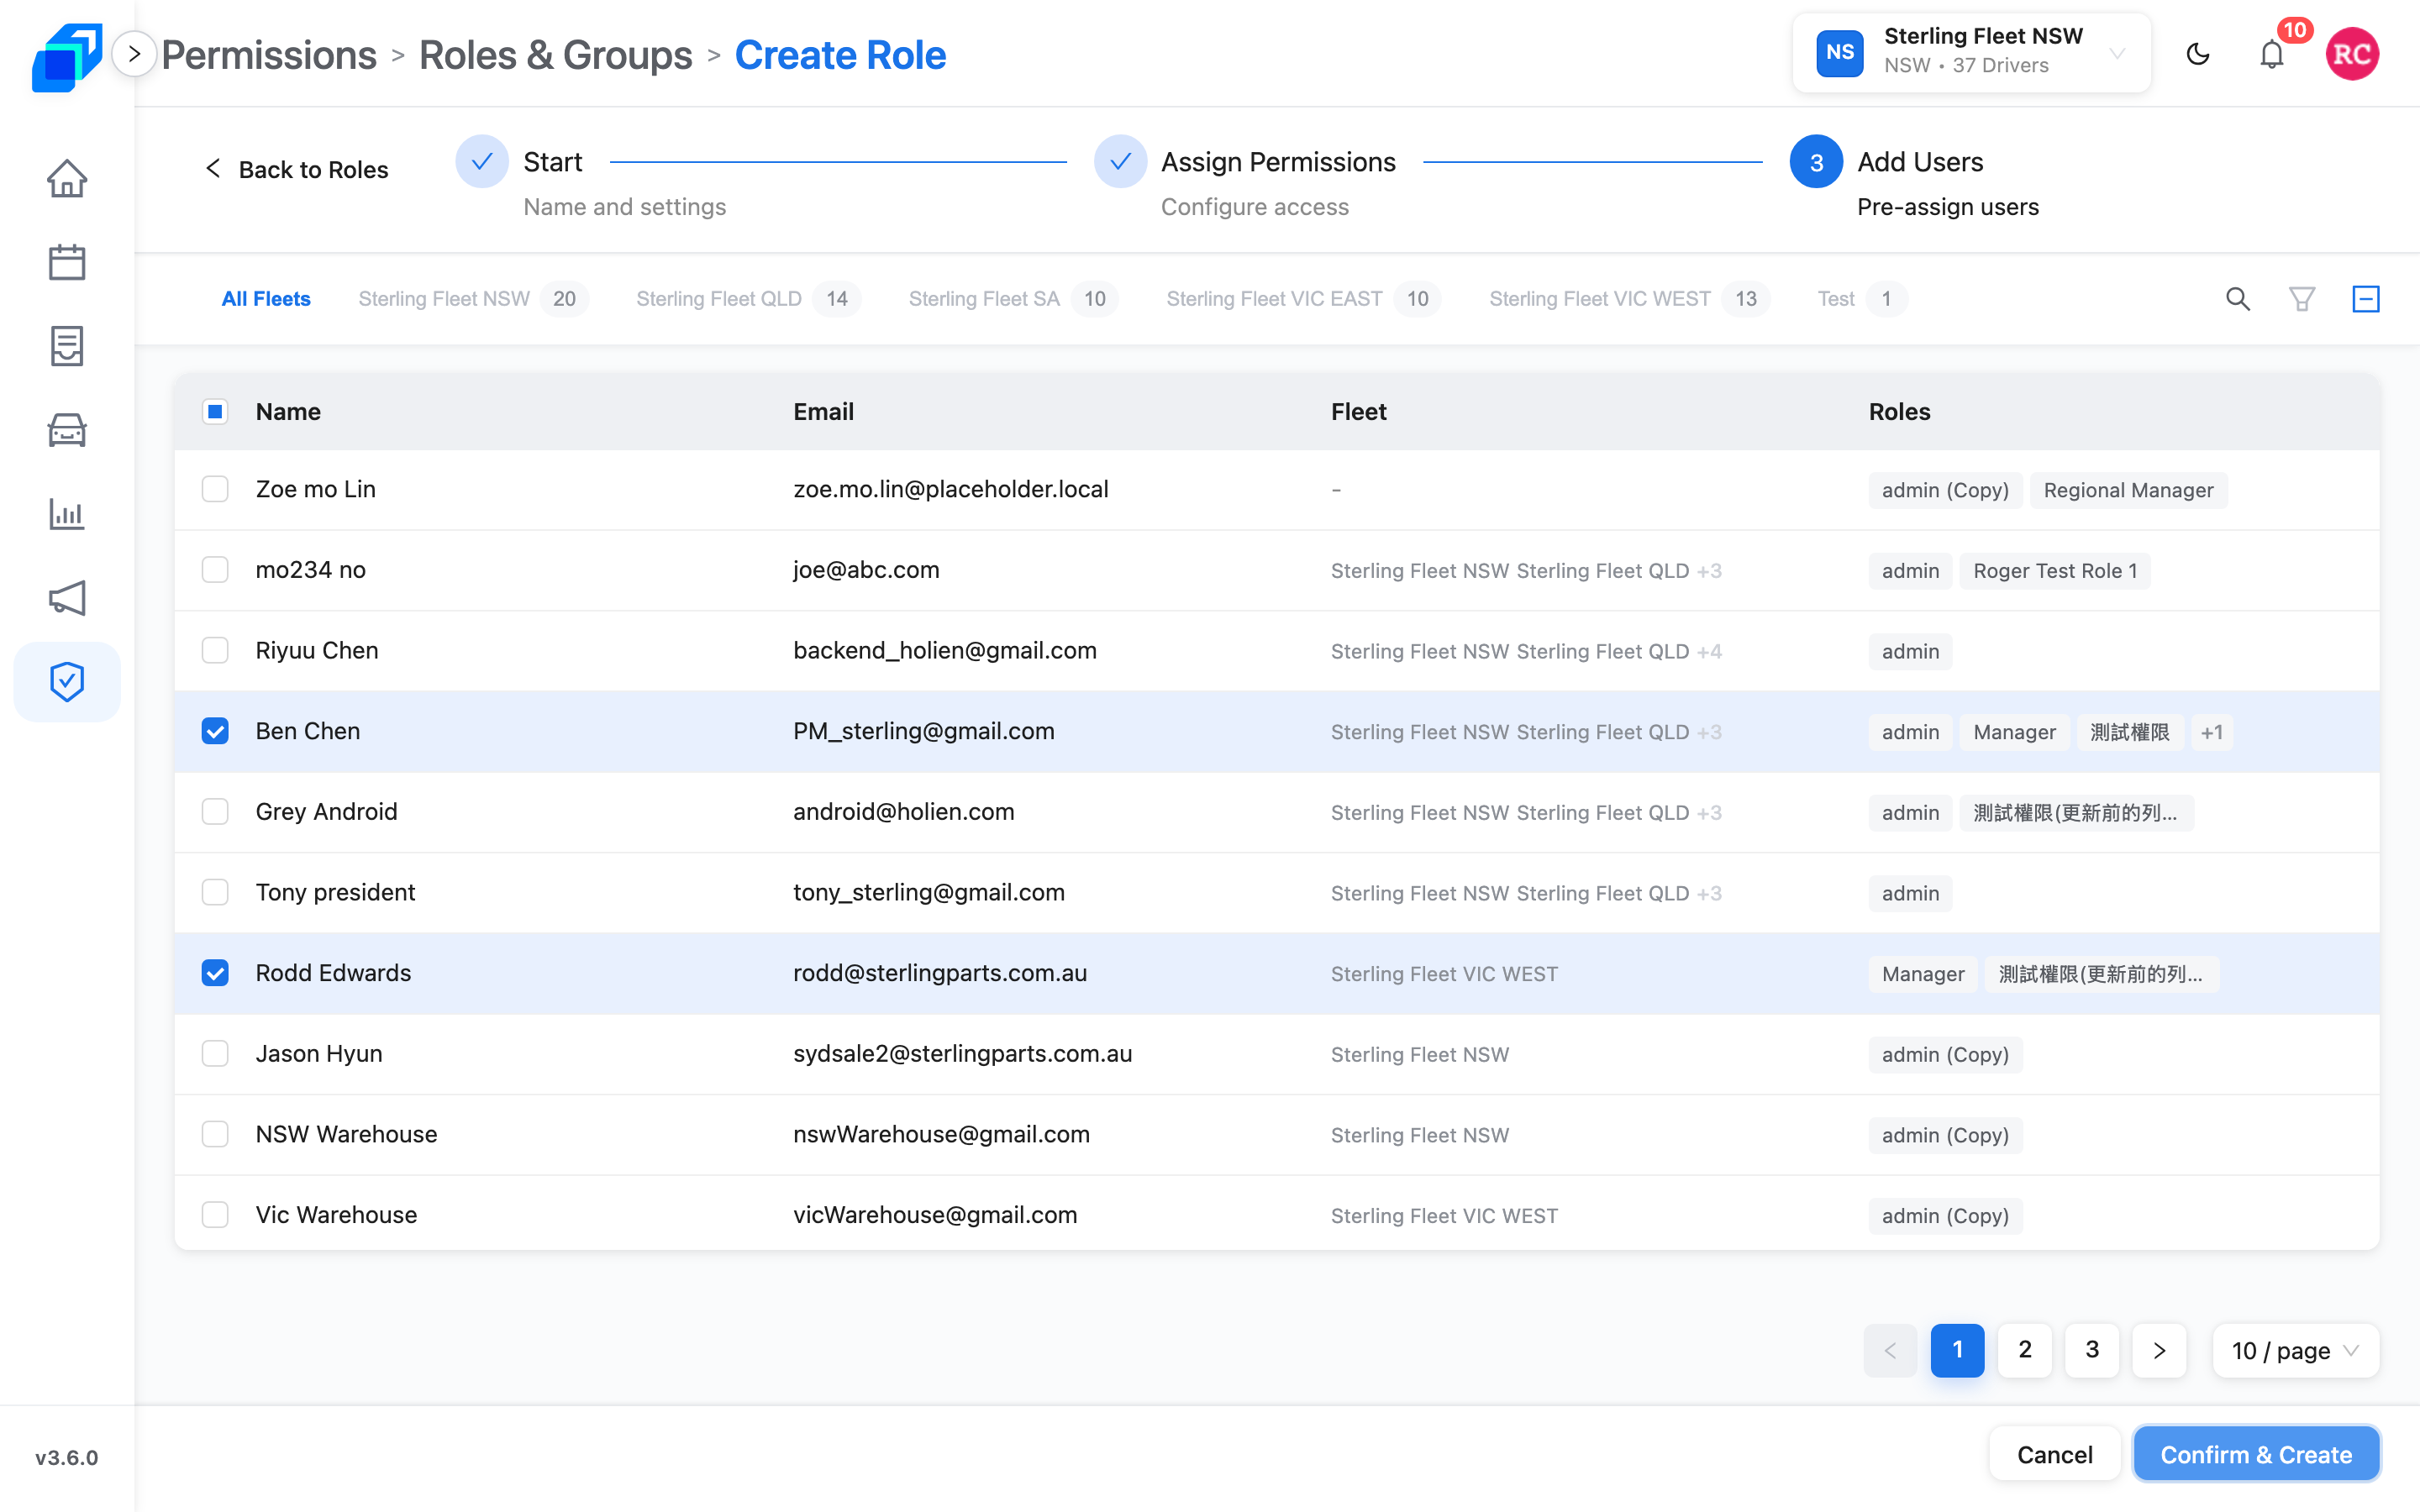
If you copied Manager, people already on Manager are ticked. Keep them if this job is the same team. Untick anyone who should not get the new ticks.
- Filter by fleet with the chips (All Fleets, then each fleet). Counts on a chip are how many people sit in that fleet.
- Search user name or email if the list is long.
- Tick a row to add that person. Click the row or the checkbox. The Roles column shows what they already hold – those roles stay.
- Filter the list to Selected or Unselected if you only want to review who you ticked.
- The square control on the right ticks everyone in the fleet you are looking at, on every page. On All Fleets it reads Select all users in all fleets; on a fleet chip it names that fleet. Use it only when this job is for the whole fleet.
- The list shows 10 people a page. Turn pages with the pager under the table, or show 20 or 50 a page – a person on page 2 is easy to miss.
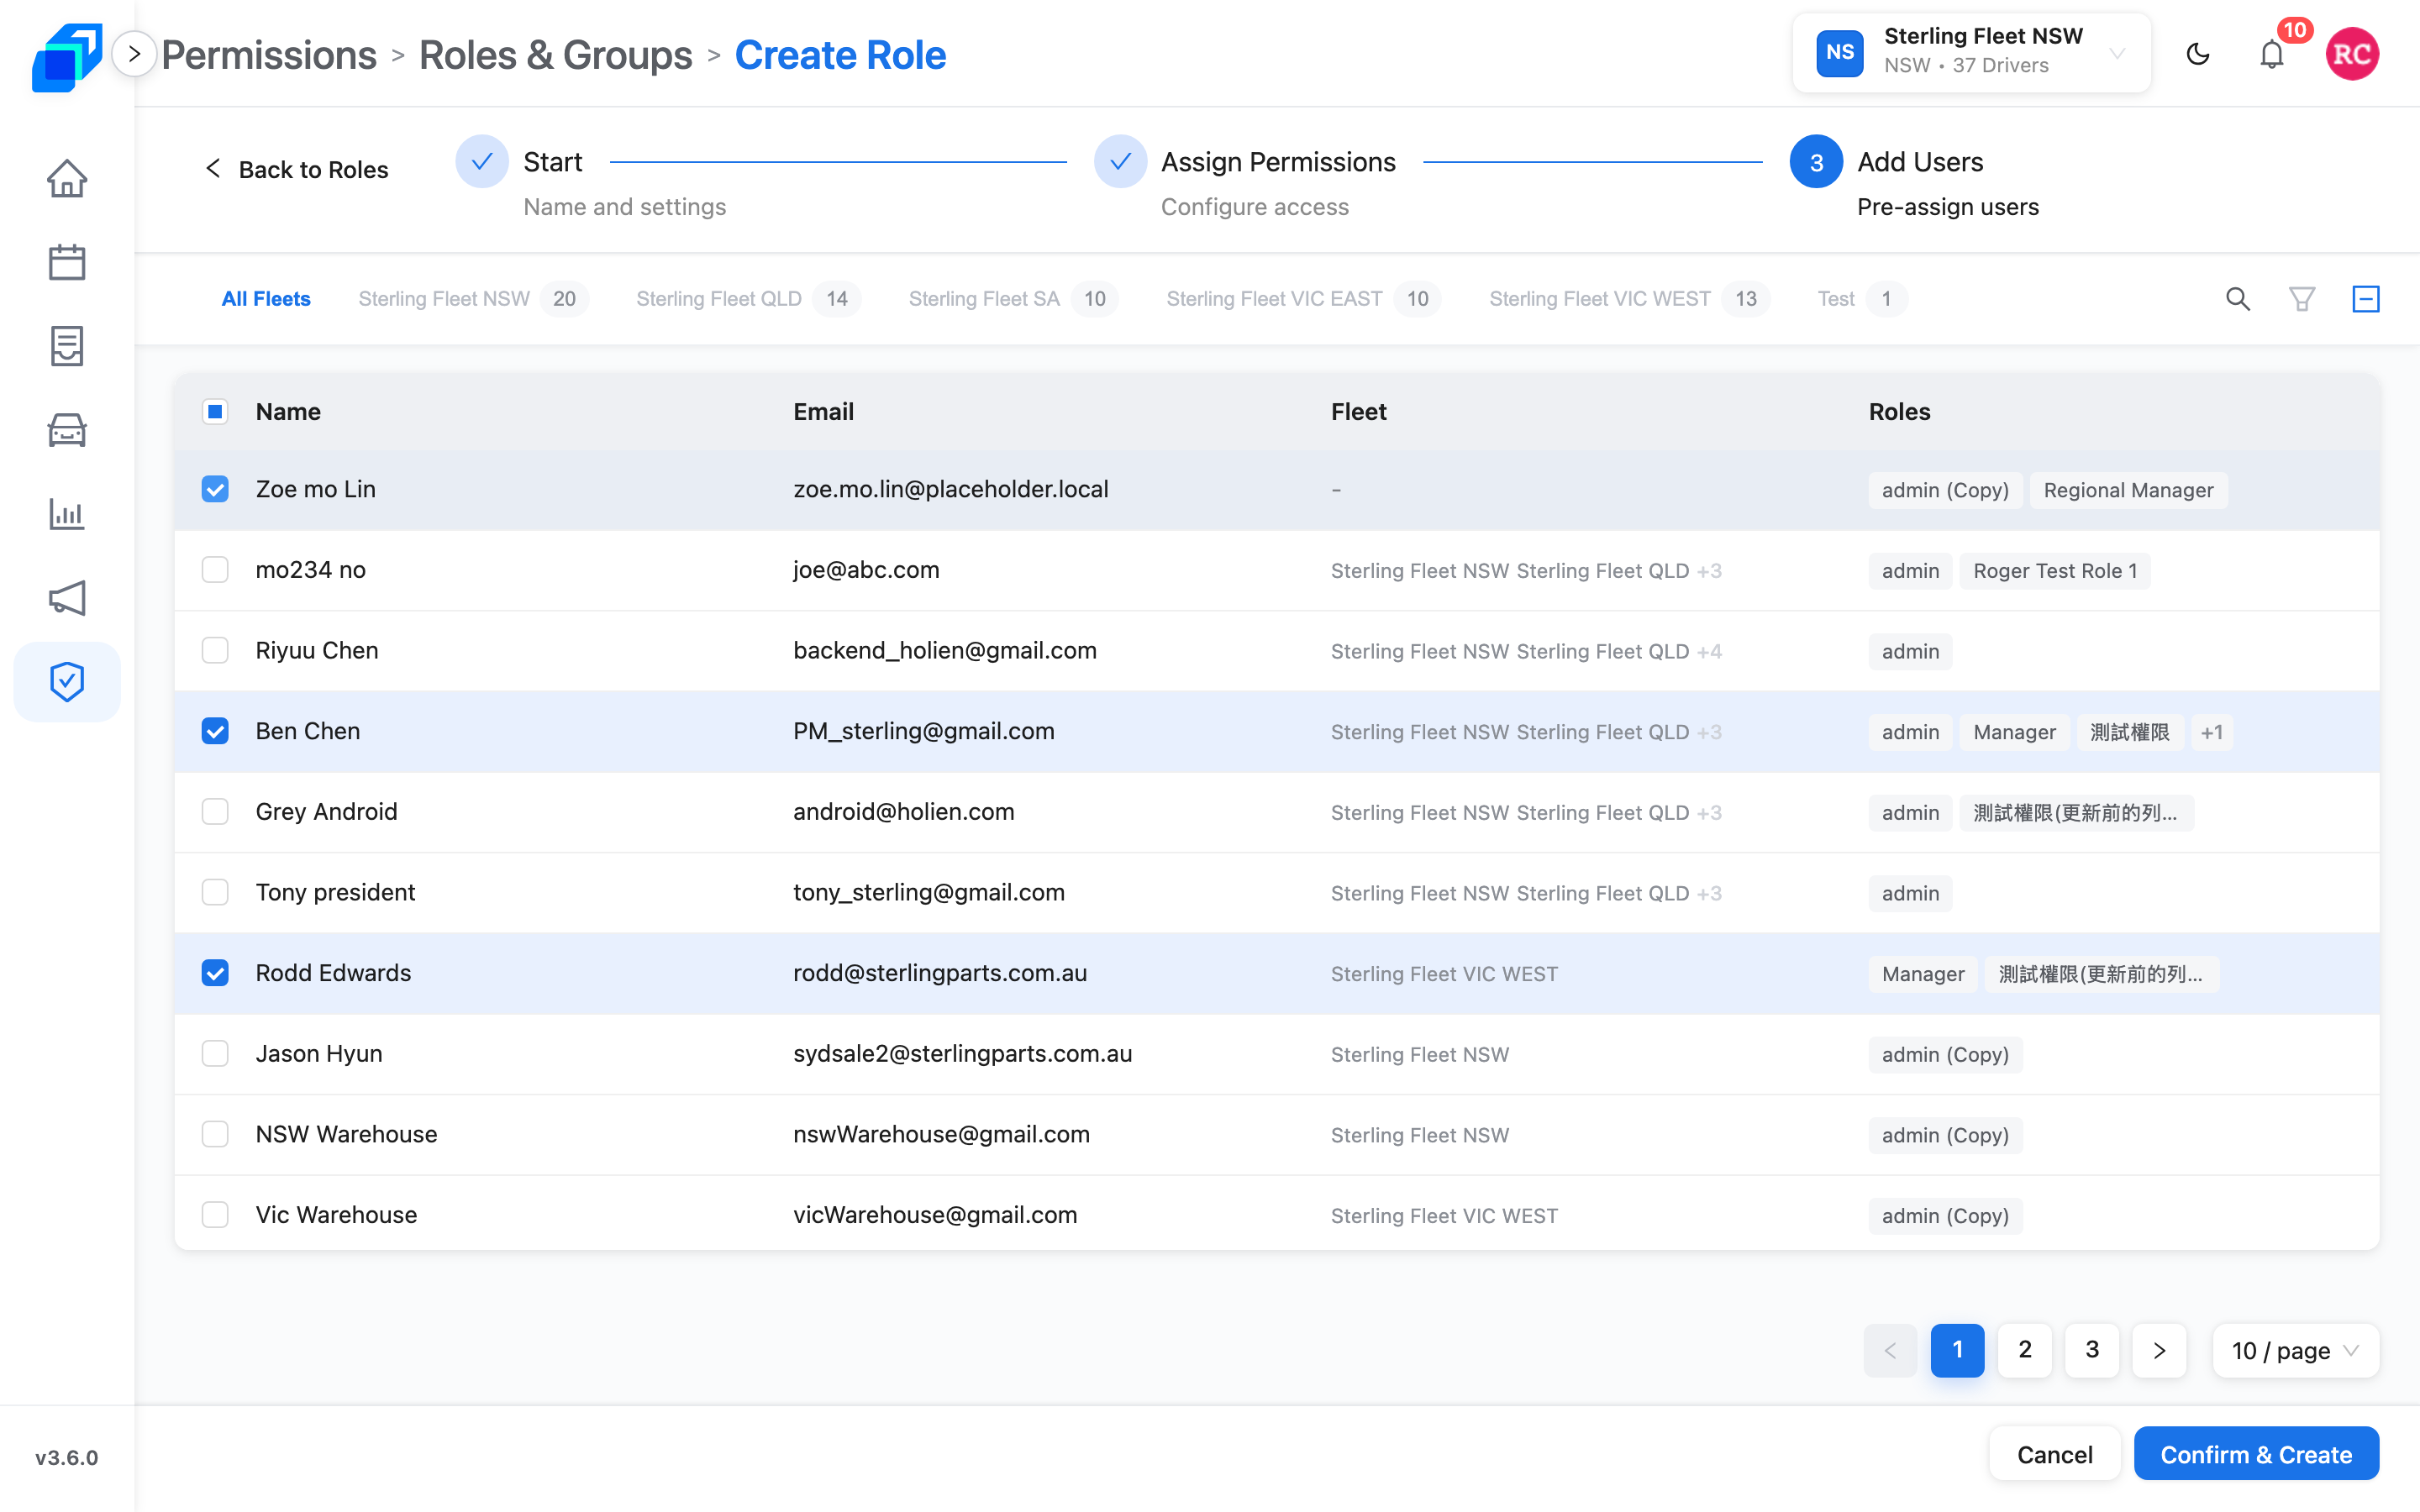
You may leave every box empty and still create. Add people later on the role Users list (Roles).
Click Confirm & Create. Role created successfully appears and you land on the new role. Open Users to check the names.
If Role created, but the selected users could not be added. appears instead, the role exists – open Users and tick them there.
Back out of the wizard
Once you have picked a method or typed anything, Cancel or Back to Roles asks Discard role creation?.
- Keep editing takes you back to the step you were on, with every tick still there.
- Discard role closes the wizard without saving.
Leaving with the browser back button or a left-menu link raises the same dialog.
Change the role after you create it
A wrong tick does not mean building the role again. Open the role and click Edit Role (custom Active roles only – to switch an Inactive role back on, see Roles).
- Change the ticks. At least one must stay on.
- Click Save. Confirm Permission Changes lists what is Added, what is Removed, and how many people this affects.
- Click Confirm. Role updated successfully appears, and everyone with the role gains or loses those views straight away.
Back out with Discard in the edit toolbar. It asks Discard changes? once a tick has changed – Discard drops your edits, Keep editing returns you to the ticks. With no tick changed it leaves edit mode straight away.
Next steps
- Roles – area catalogue, recommended ticks, Duplicate Role, Deactivate Role, reassign
- What you can see