Notifications
SenditGo tells you when something needs attention – a driver's application is waiting, a delivery hit a problem, a shift changed. All of it lands here.
Where to find it: the bell in the header, or Notification in the left rail.
The number on the bell drops as you read each one.
Two ways in, and they are not the same
The bell in the header opens a short panel over whatever you were doing. Use it to glance at what just arrived without losing your place.
Click a row in that panel to expand it in place; that marks it read. Click View in Center to open the same notification on the full page, with its panel already open. View all in Notification Center at the foot of the panel takes you to the full page without picking one.
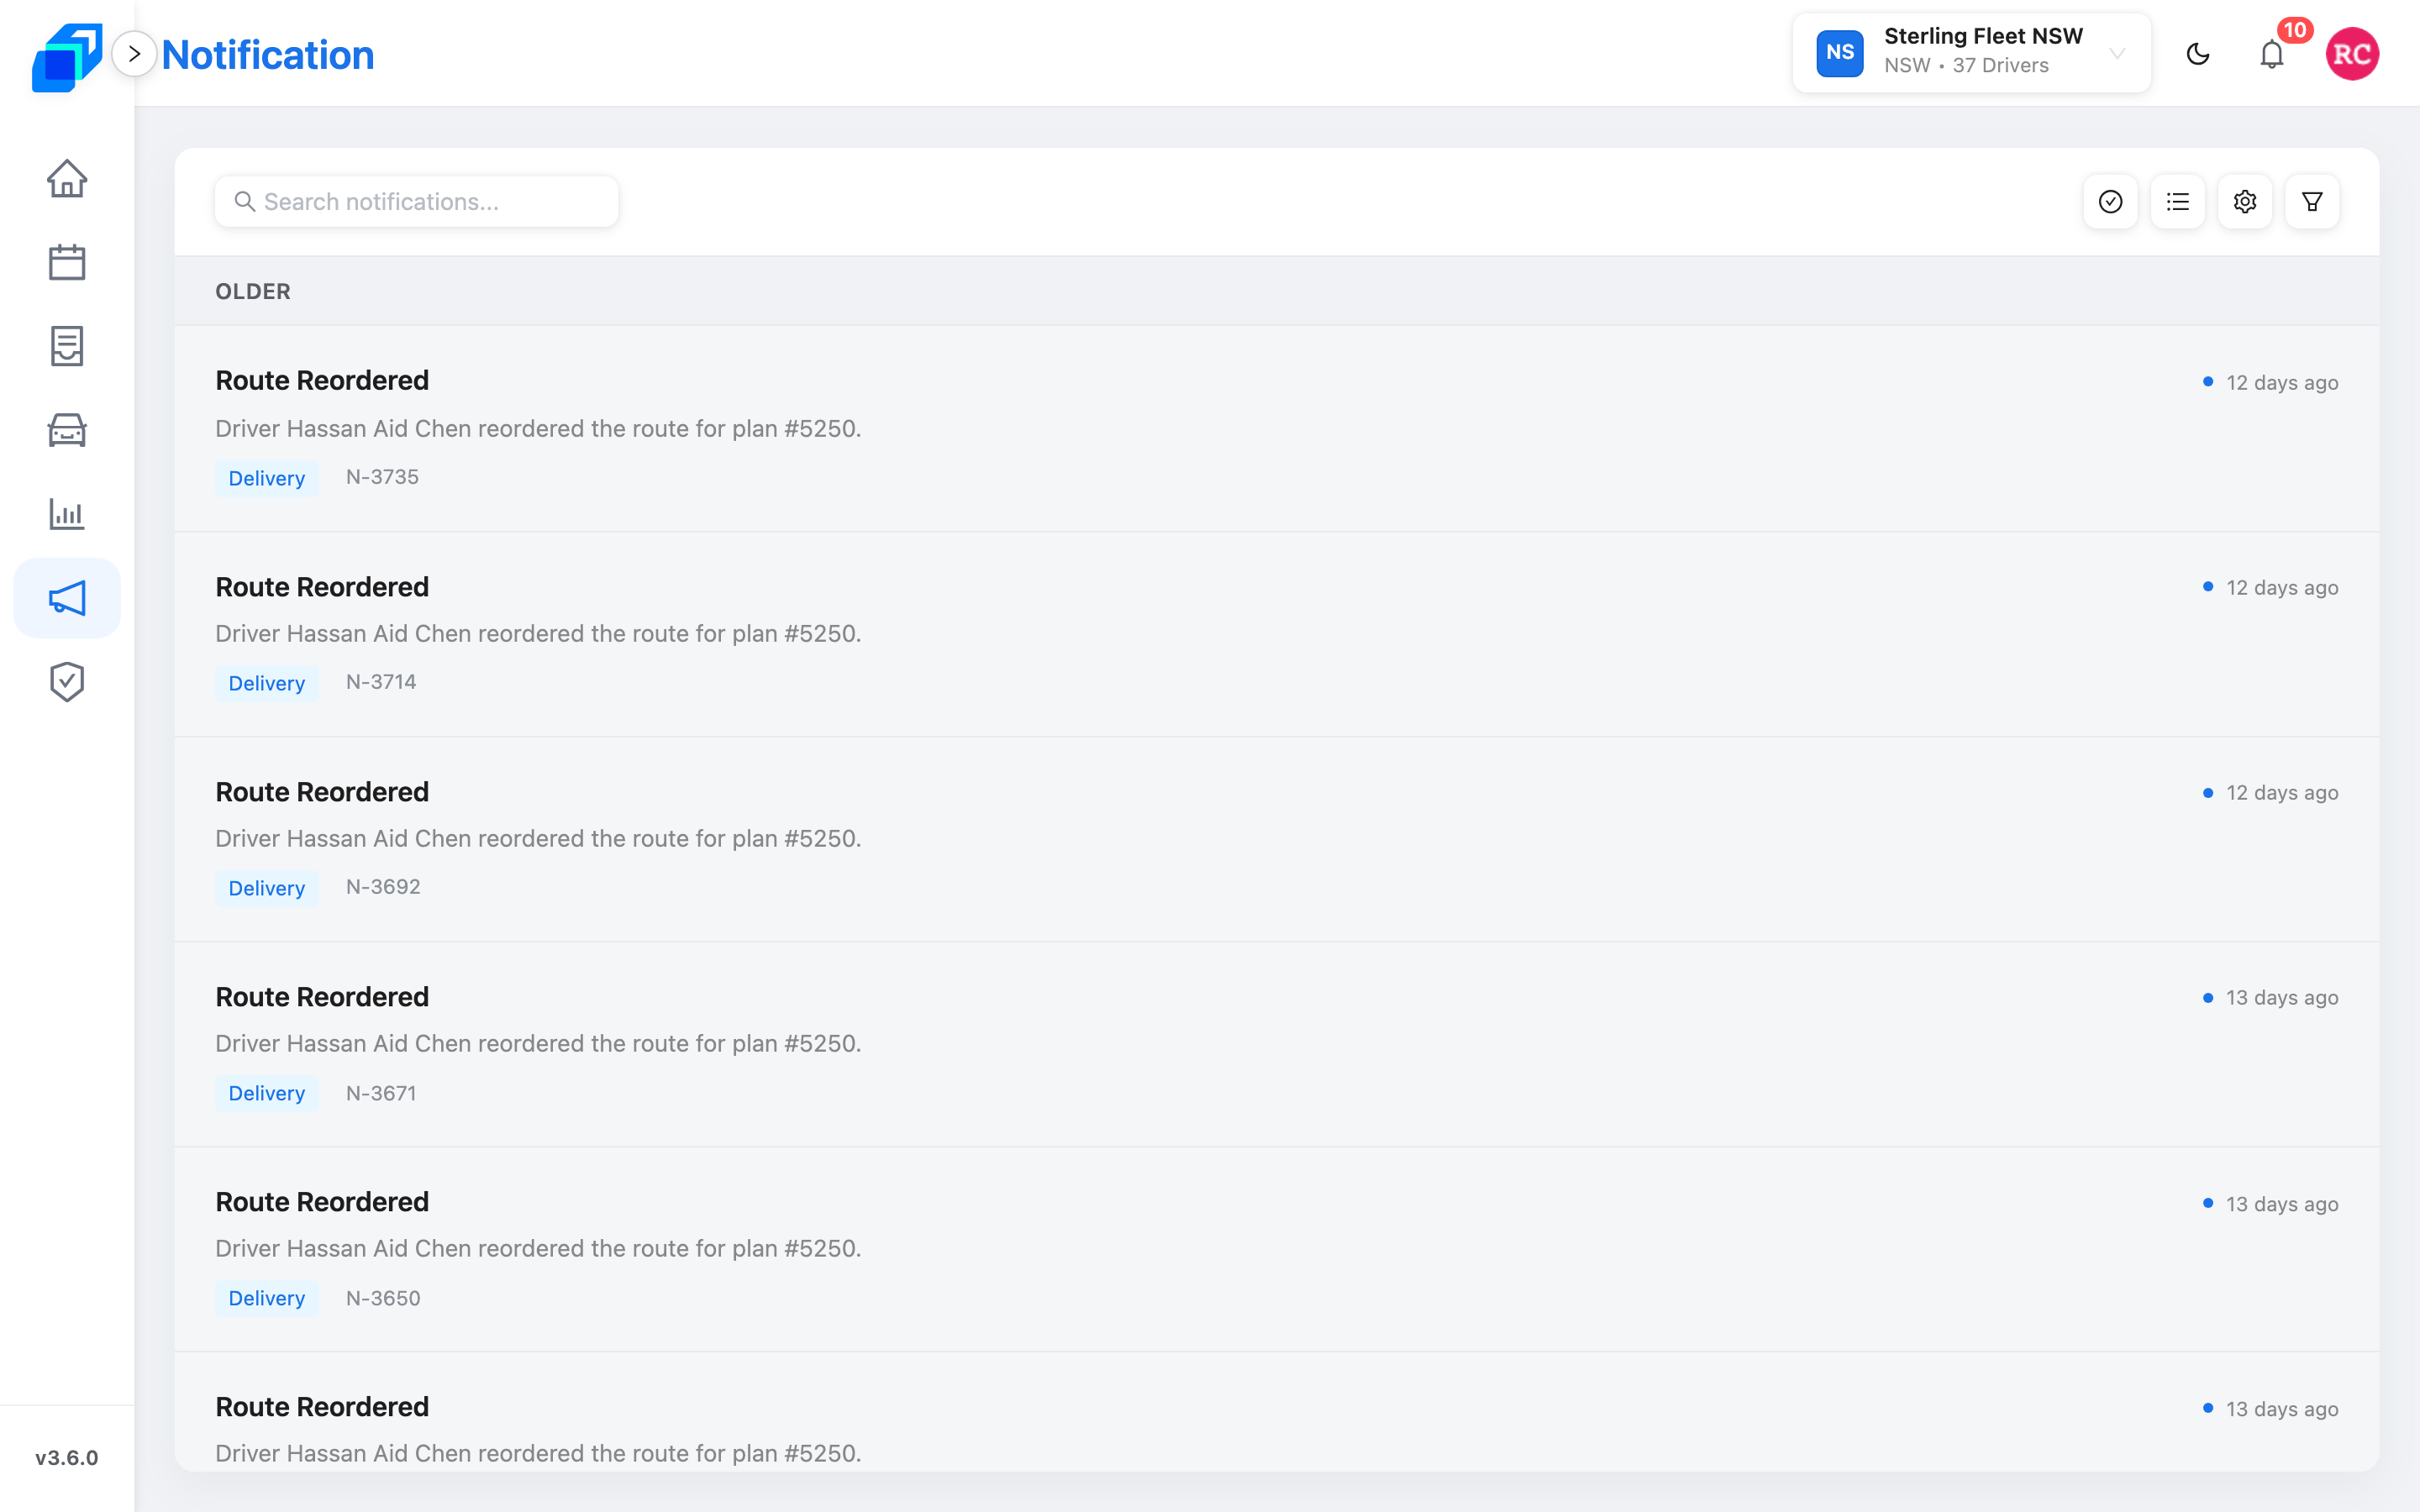
Notification in the left rail opens the full Notification Center. Use it when you want to search, filter, or work through a backlog.
Everyone can see both. There is no permission to turn off.
Reading one
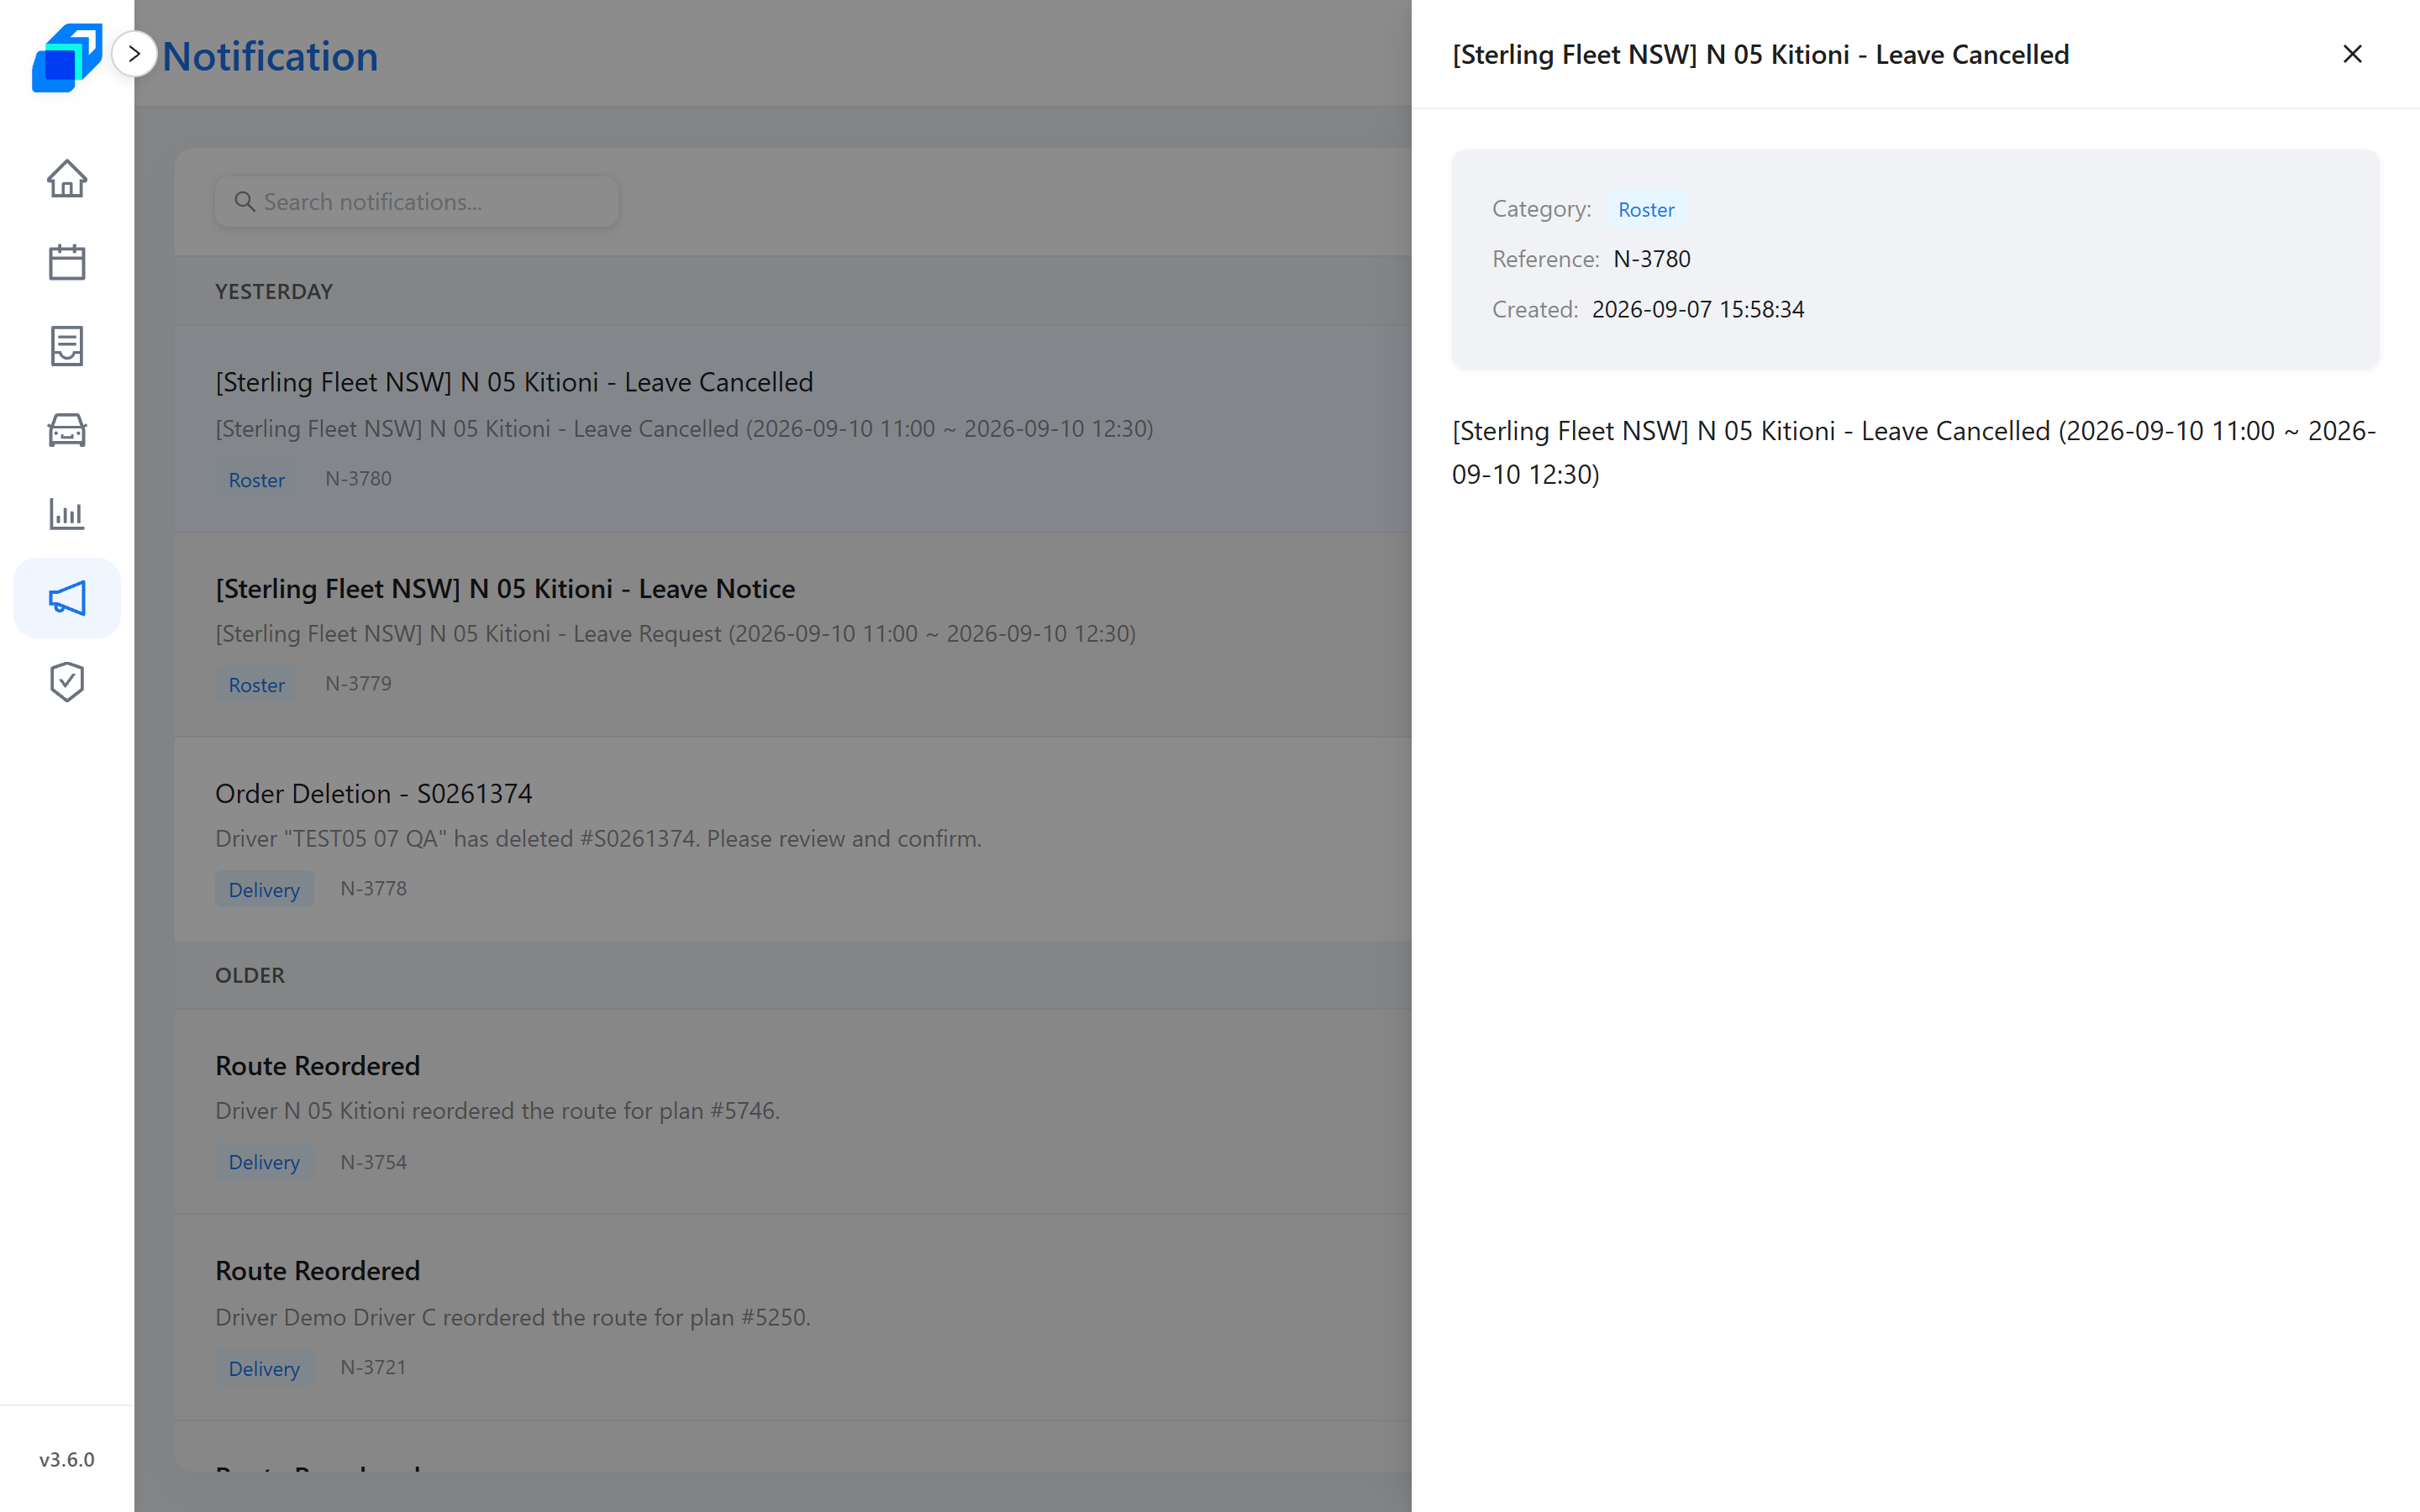
Click any row. The panel opens the full message and shows you:
- Category – which part of SenditGo it came from
- Reference – this notification's own ID. Quote it when you follow up with your team.
- Created – when it happened
- Link – only when the notification points somewhere. It shows the address itself; clicking it opens that page in a new tab.
To close the panel, click the X at its top right, or click another row to read that one instead.
An unread row carries a bold topic and a blue dot. Reading a notification marks it read on its own, and both markers clear. You do not need to do anything else.
When there are too many
The Notification Center gives you four tools, in the order you'll reach for them:
- Search – type into Search notifications... at the left of the toolbar. The list narrows as you type, matching the topic and the message body.
- Filter by – click the funnel icon, then choose All or Unread. Each option carries its own count.
- Category – in the same menu, click Driver, Delivery, Roster or System. Choose more than one to widen the net.
- Mark all as read – click the tick icon to clear the whole backlog at once. There is no undo, so use it when you have genuinely finished, not to make the number go away.
The tick icon appears only while something is unread, so a toolbar without it is the all-clear.
The funnel icon stays highlighted while any filter is on. If the list comes back empty, the page says No notifications found. That usually means a filter is still on from earlier, not that nothing arrived.
Making the important ones come first
Notification preferences lets you set which categories you want to see first.
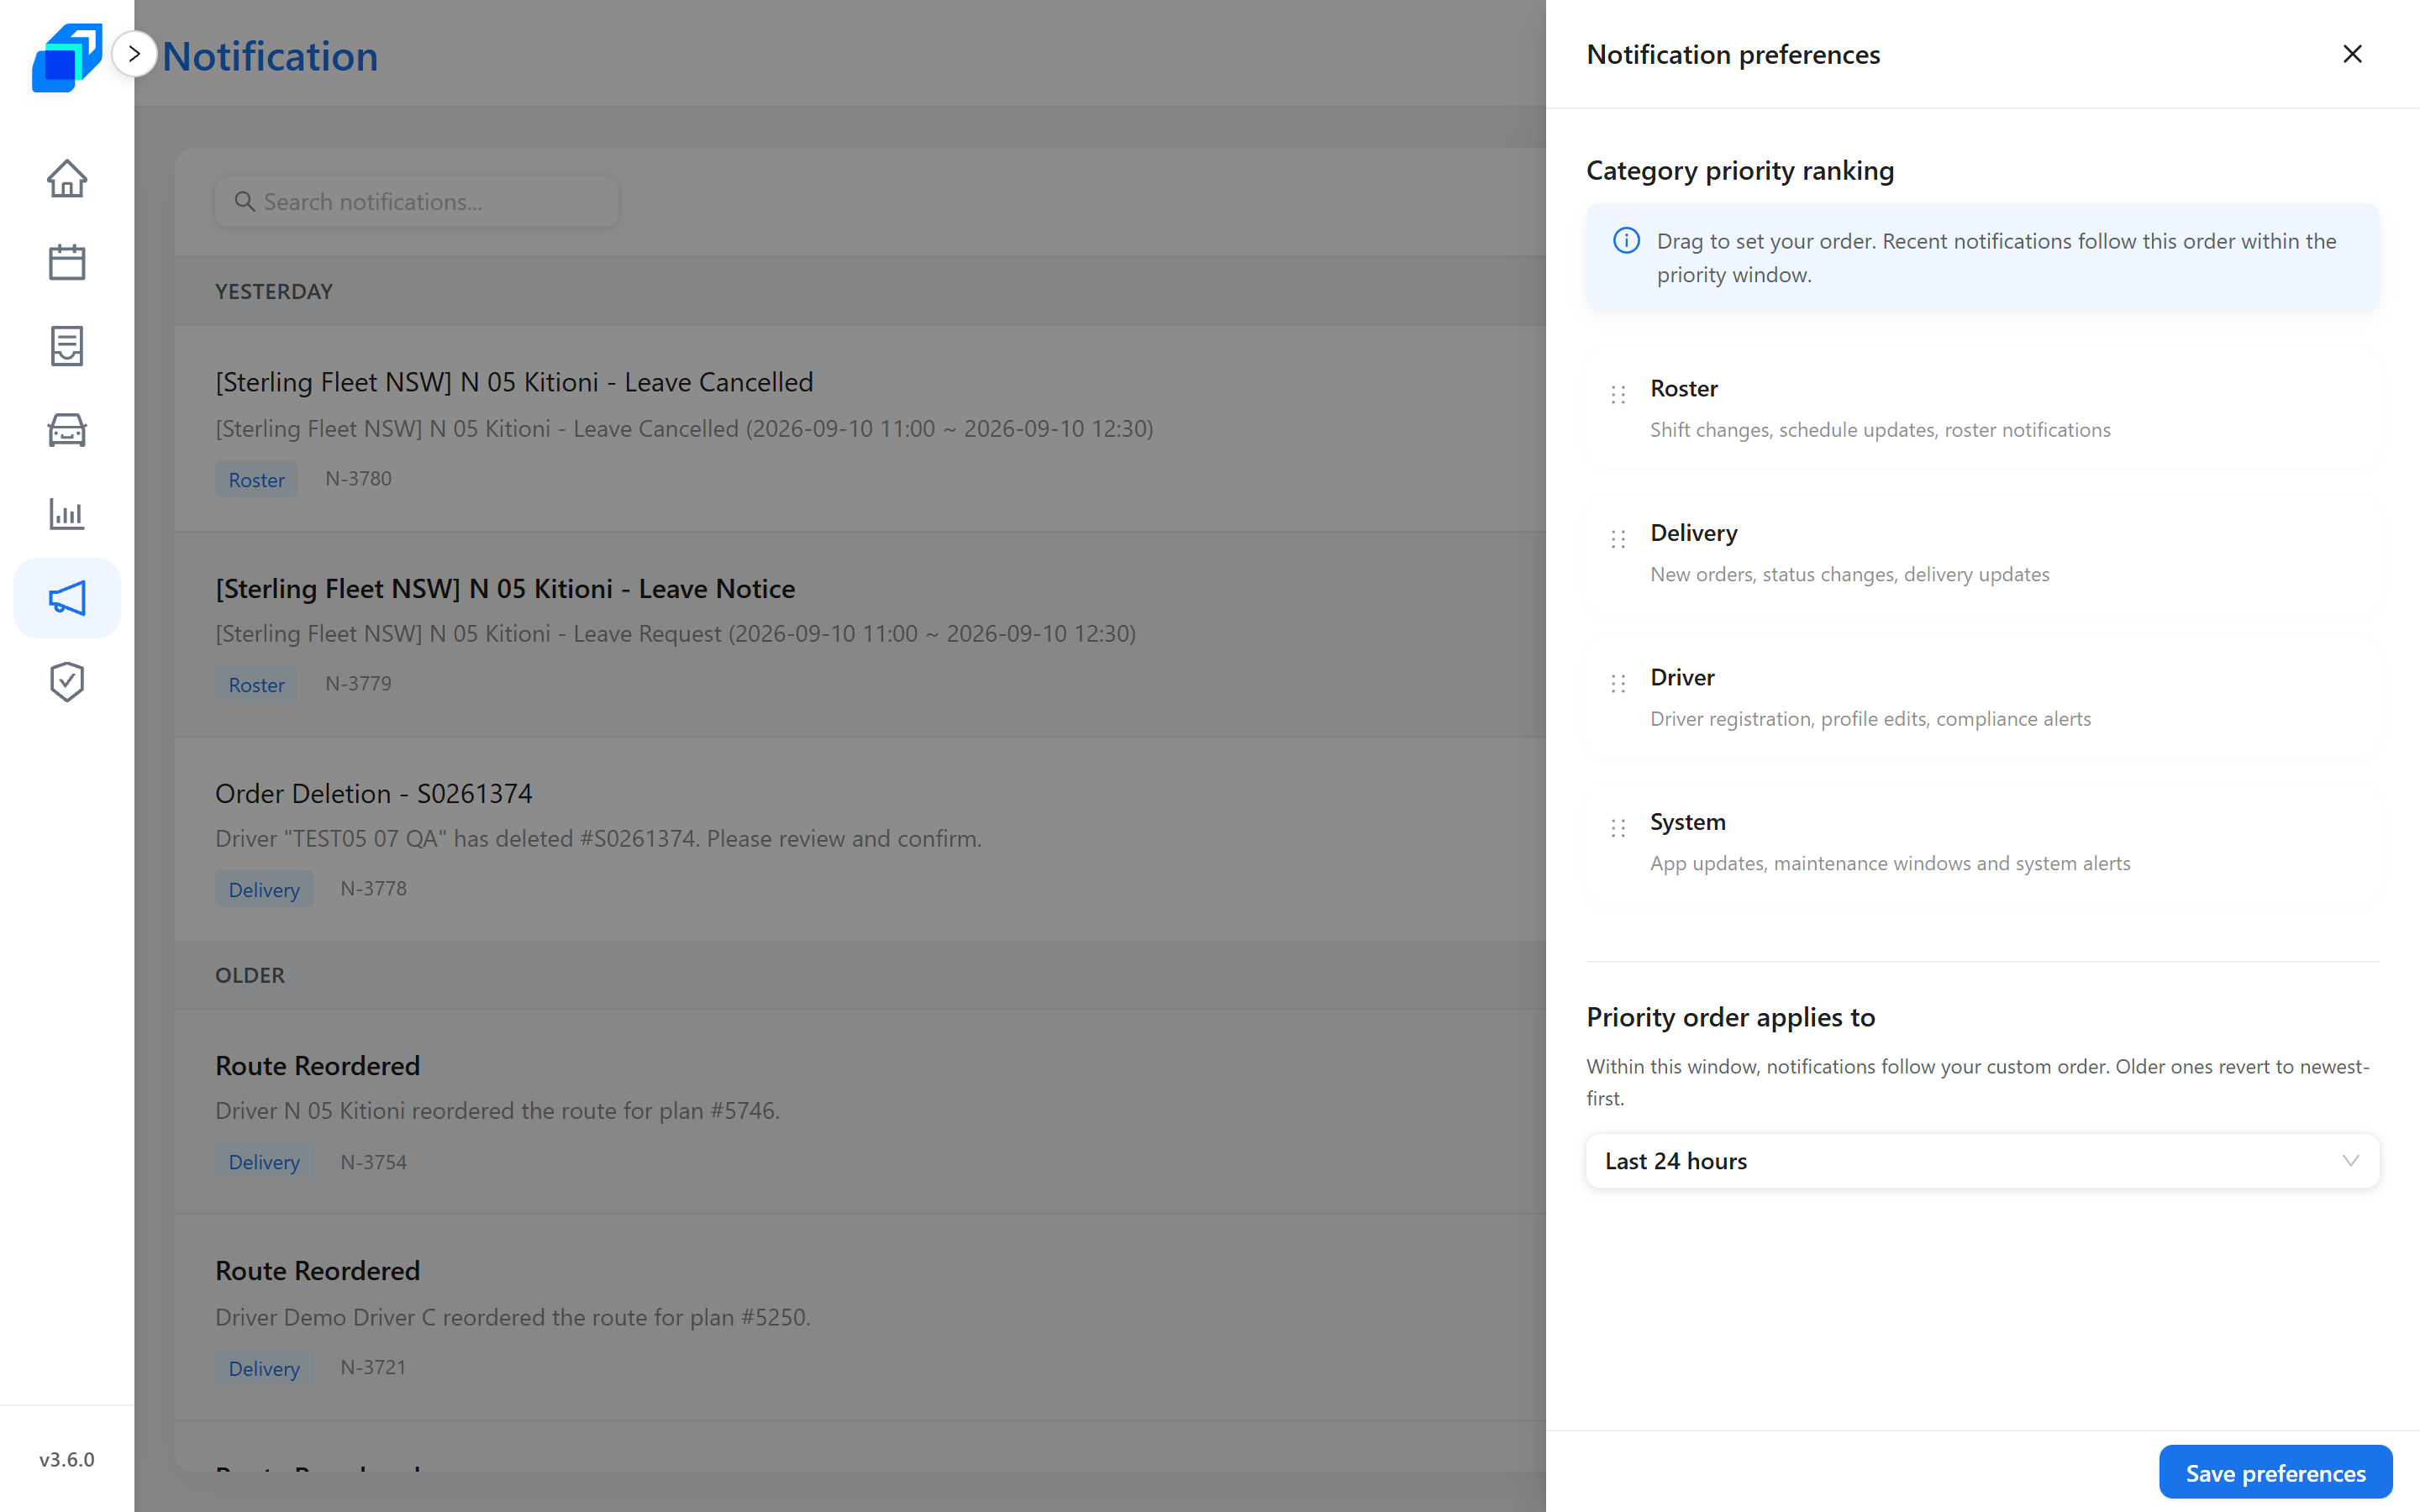
- Click the gear icon in the toolbar. The Notification preferences panel opens.
- Drag the four cards under Category priority ranking into the order you want.
- Choose a window under Priority order applies to:
- Nothing — always newest first – the ranking is off, and everything stays newest-first
- Last 24 hours, Last 3 days, Last 7 days, Last 8 days, Last 14 days or Last 30 days – your order applies inside that window
- Click Save preferences. A Preferences saved message confirms it.
Inside that window, notifications follow your order, and the newest comes first within each category. Anything older reverts to plain newest-first.
For example, put Driver first and choose Last 3 days. All Driver notifications from the past 3 days appear first, then the other recent ones in your order, then older ones newest first.
Closing the panel with unsaved changes raises Discard changes?. Click Keep editing to go back to your order.
The header bell always lists newest first, whatever order you save here. It is there to show what just arrived, not to rank it.
Two viewing modes
The list icon in the toolbar switches between two layouts:
- Standard view – the topic, a two-line preview of the message, the category tag and the reference
- Compact view – the topic and when it arrived, nothing more
Rest the pointer on the icon. It reads Compact view while you are in standard, and Standard view while you are in compact.
Compact fits more rows on screen for a long list. Standard shows enough of each to pick the one to open.