Managing warehouses and routes
Set up the warehouses your fleet delivers from, and the outbound routes that run between them.
Where to find it: your initials in the header, then Company › Warehouse.
Warehouse List
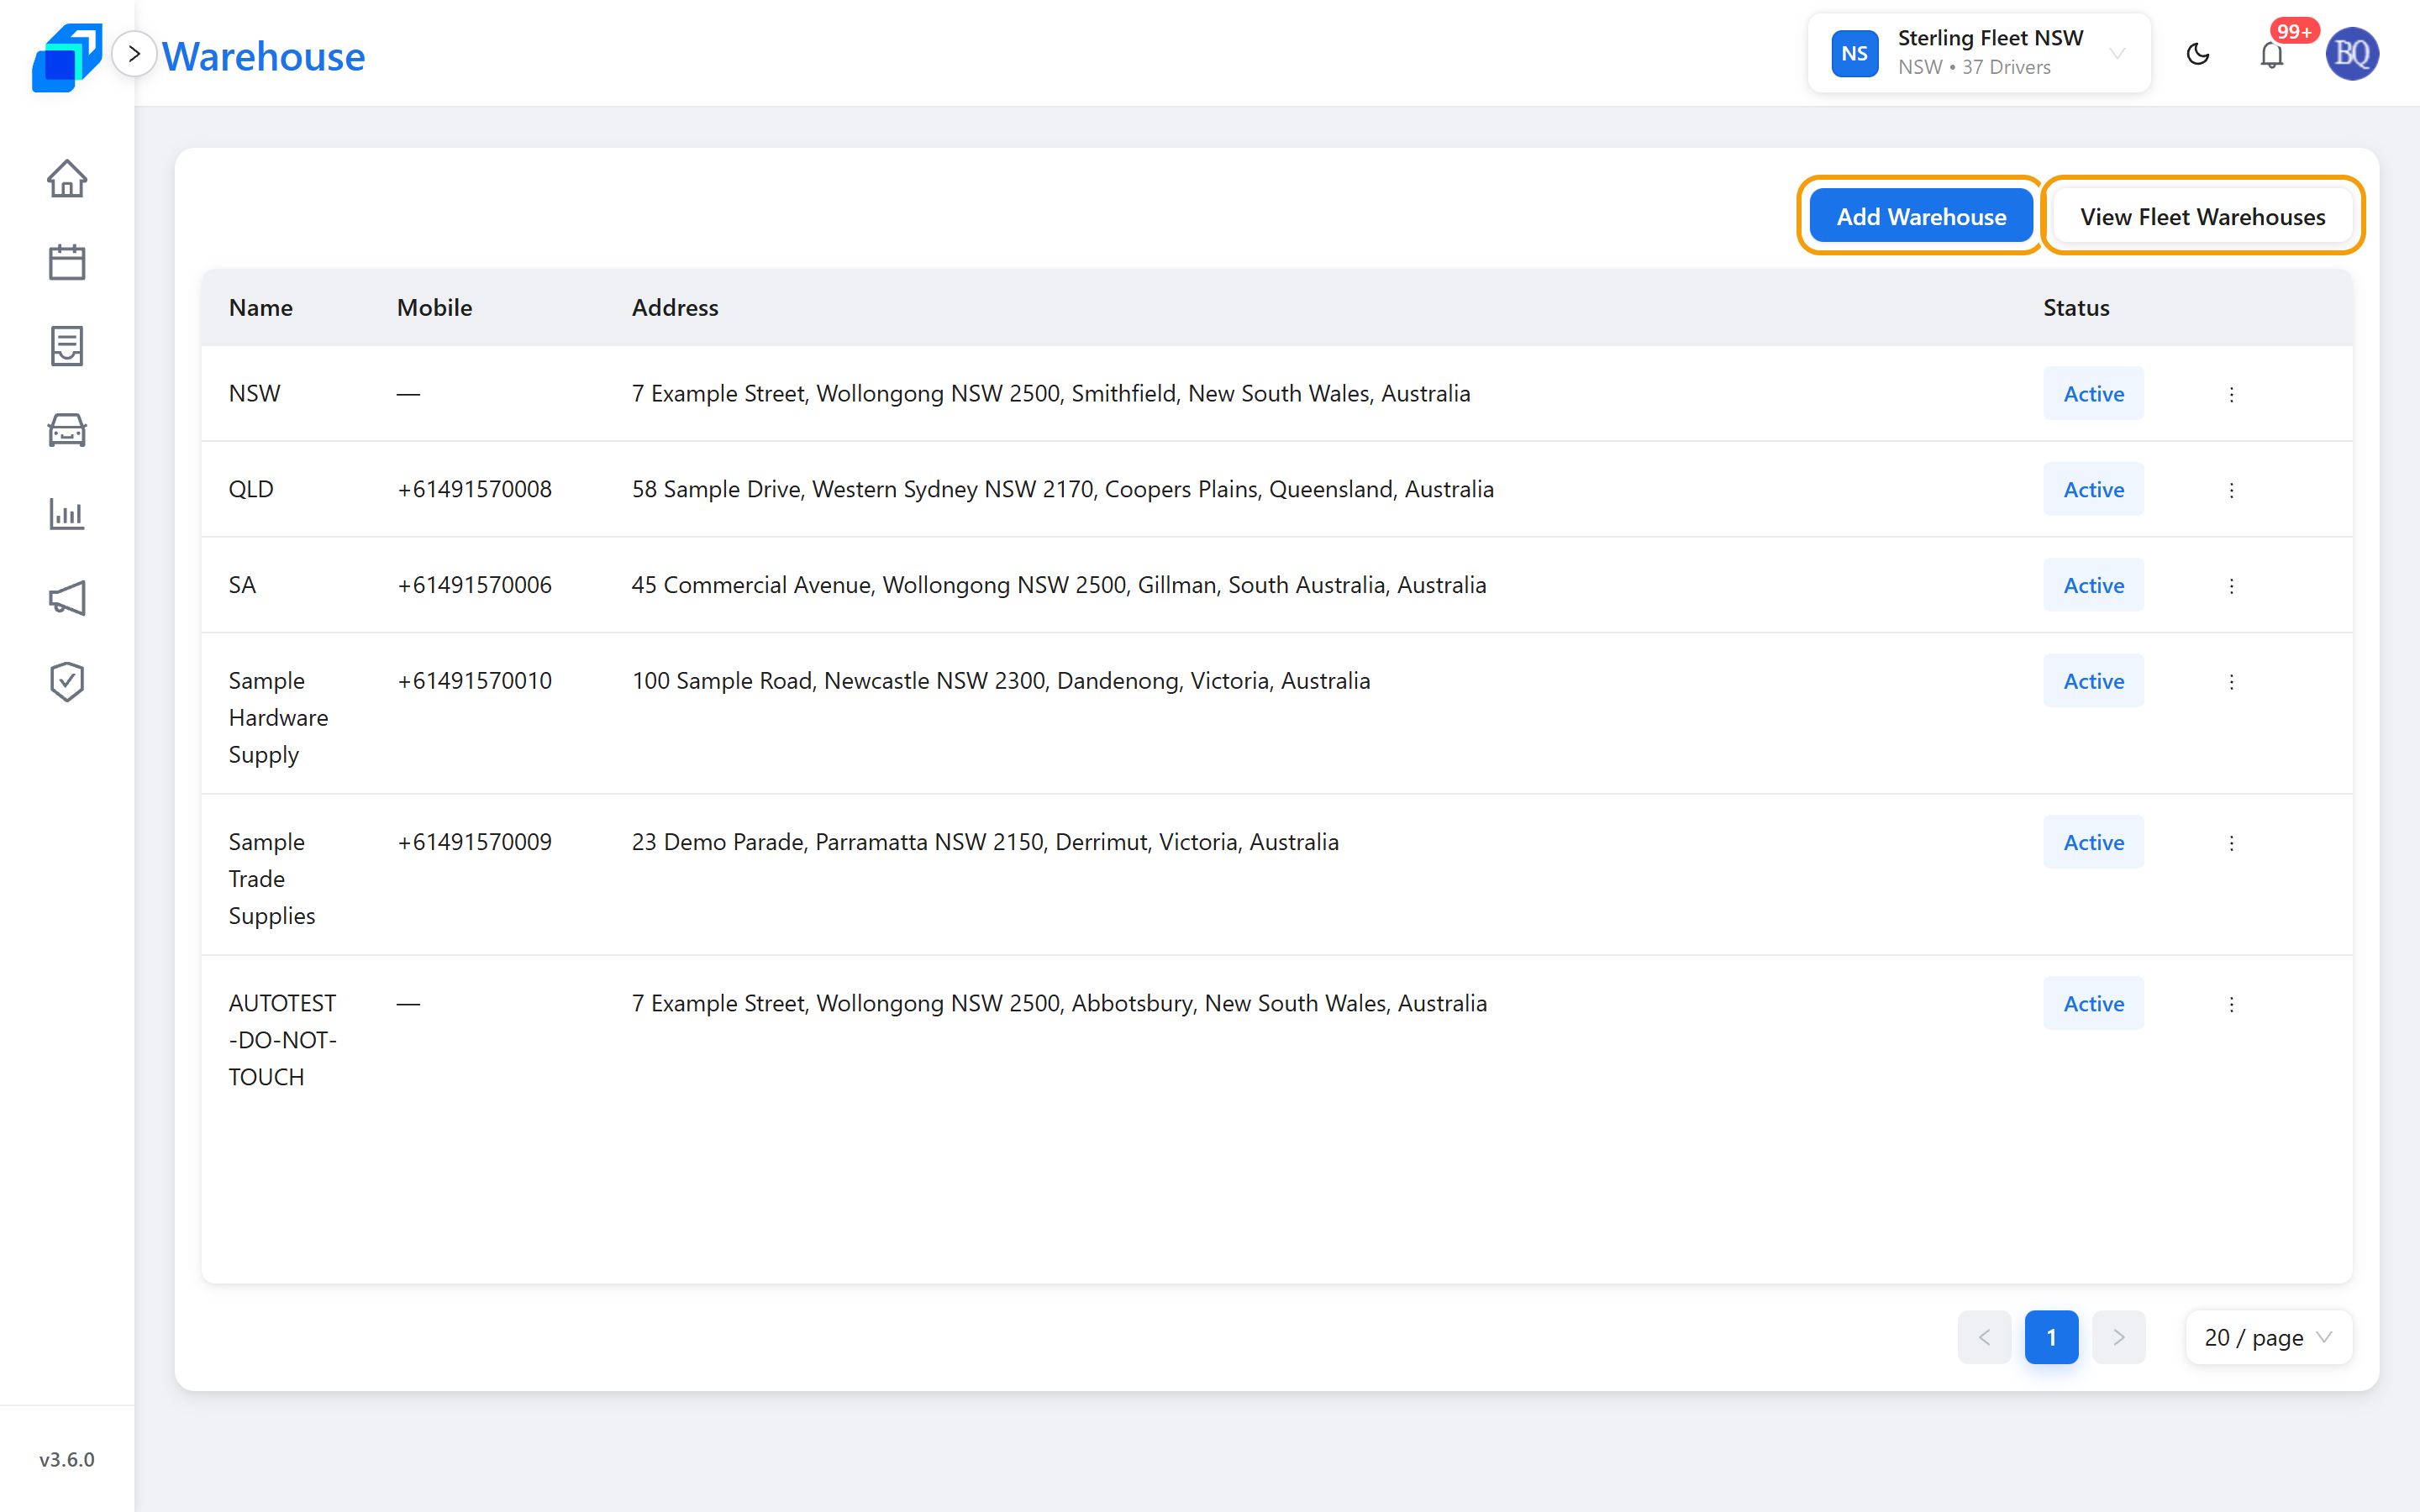
The list shows every warehouse set up on your account, with its contact number, address and status.
Columns
- Name – the warehouse name
- Mobile – the contact number for the site. A warehouse with no number shows a dash
- Address – the street address, then city, state and country
- Status – Active (blue) or Inactive (grey). This is a badge, not a button
Add a Warehouse
Click Add Warehouse (top right). The Add Warehouse dialog opens.
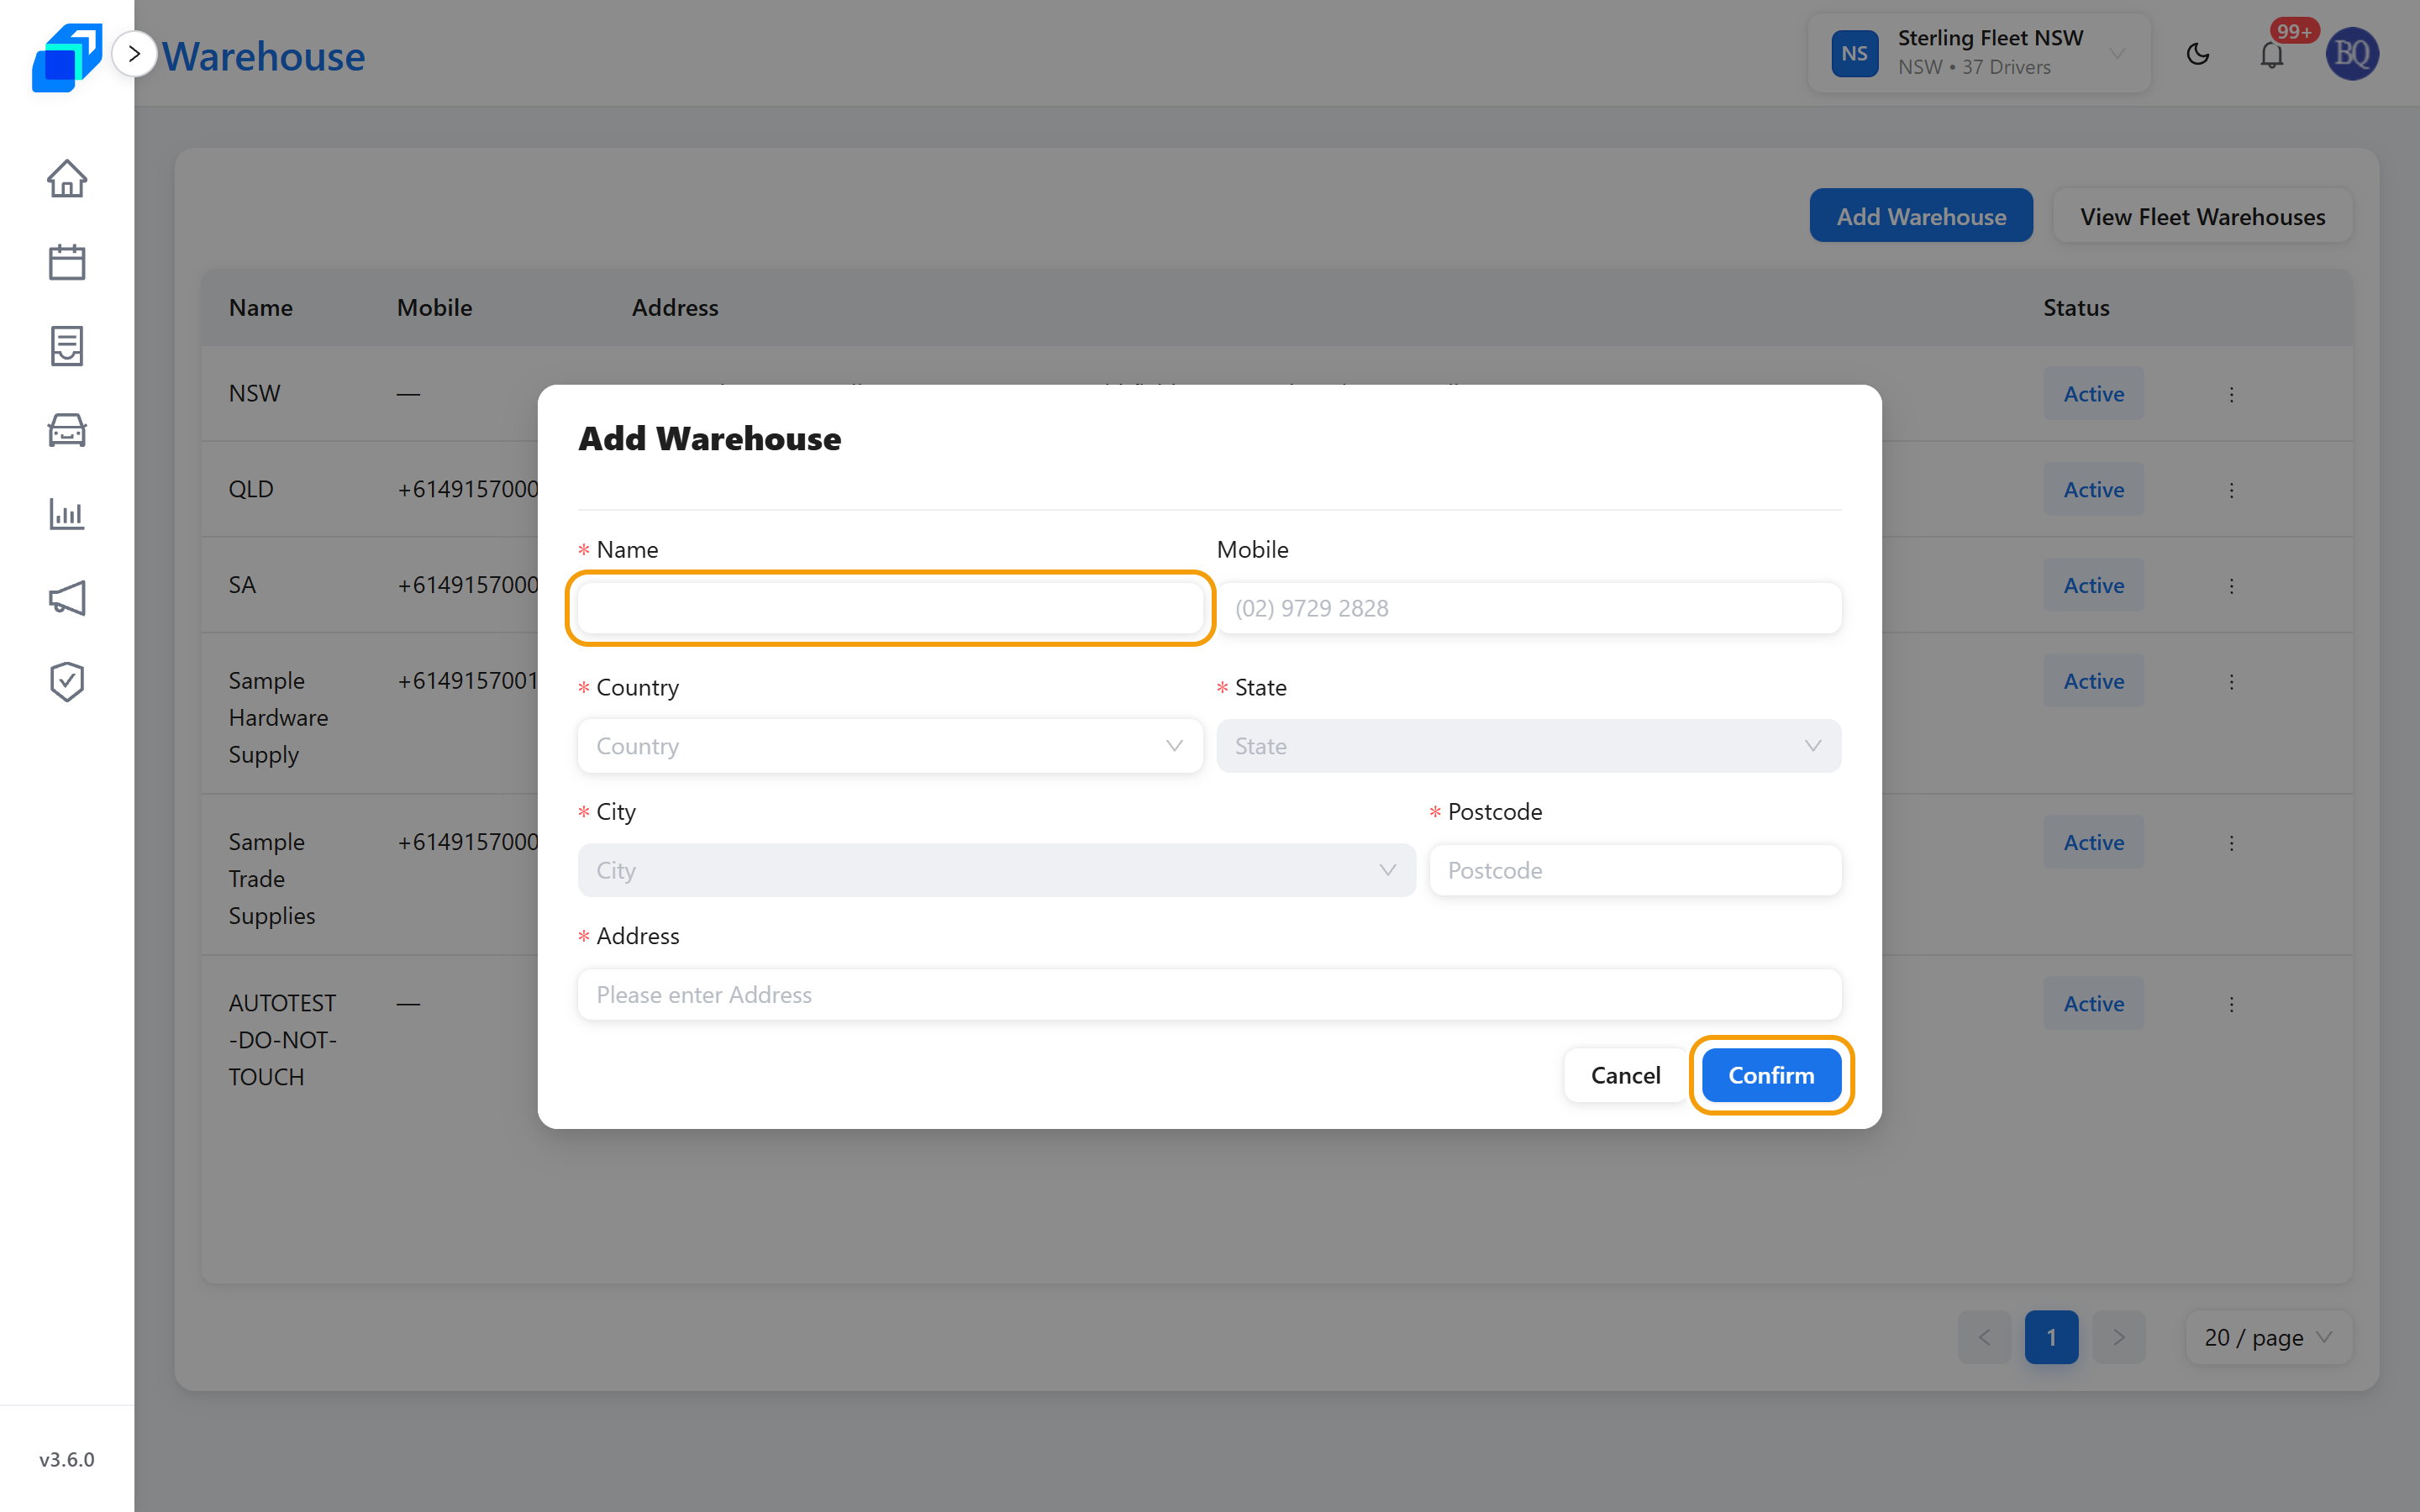
- Type the Name. This is the name the warehouse is known by everywhere else in SenditGo Carrier.
- Type a Mobile number for the site. This is the only optional field on the form.
- Choose the Country. Start typing to search the list.
- Choose the State. It stays disabled until you choose a country.
- Choose the City. It stays disabled until you choose a state.
- Type the Postcode.
- Type the street Address.
- Click Confirm.
Create Success flashes at the top of the screen, the dialog closes, and the new warehouse is a row in the list.
Give the new warehouse its outbound routes next.
Edit a Warehouse
Click the three dots in the warehouse row. The same menu carries all three row actions.
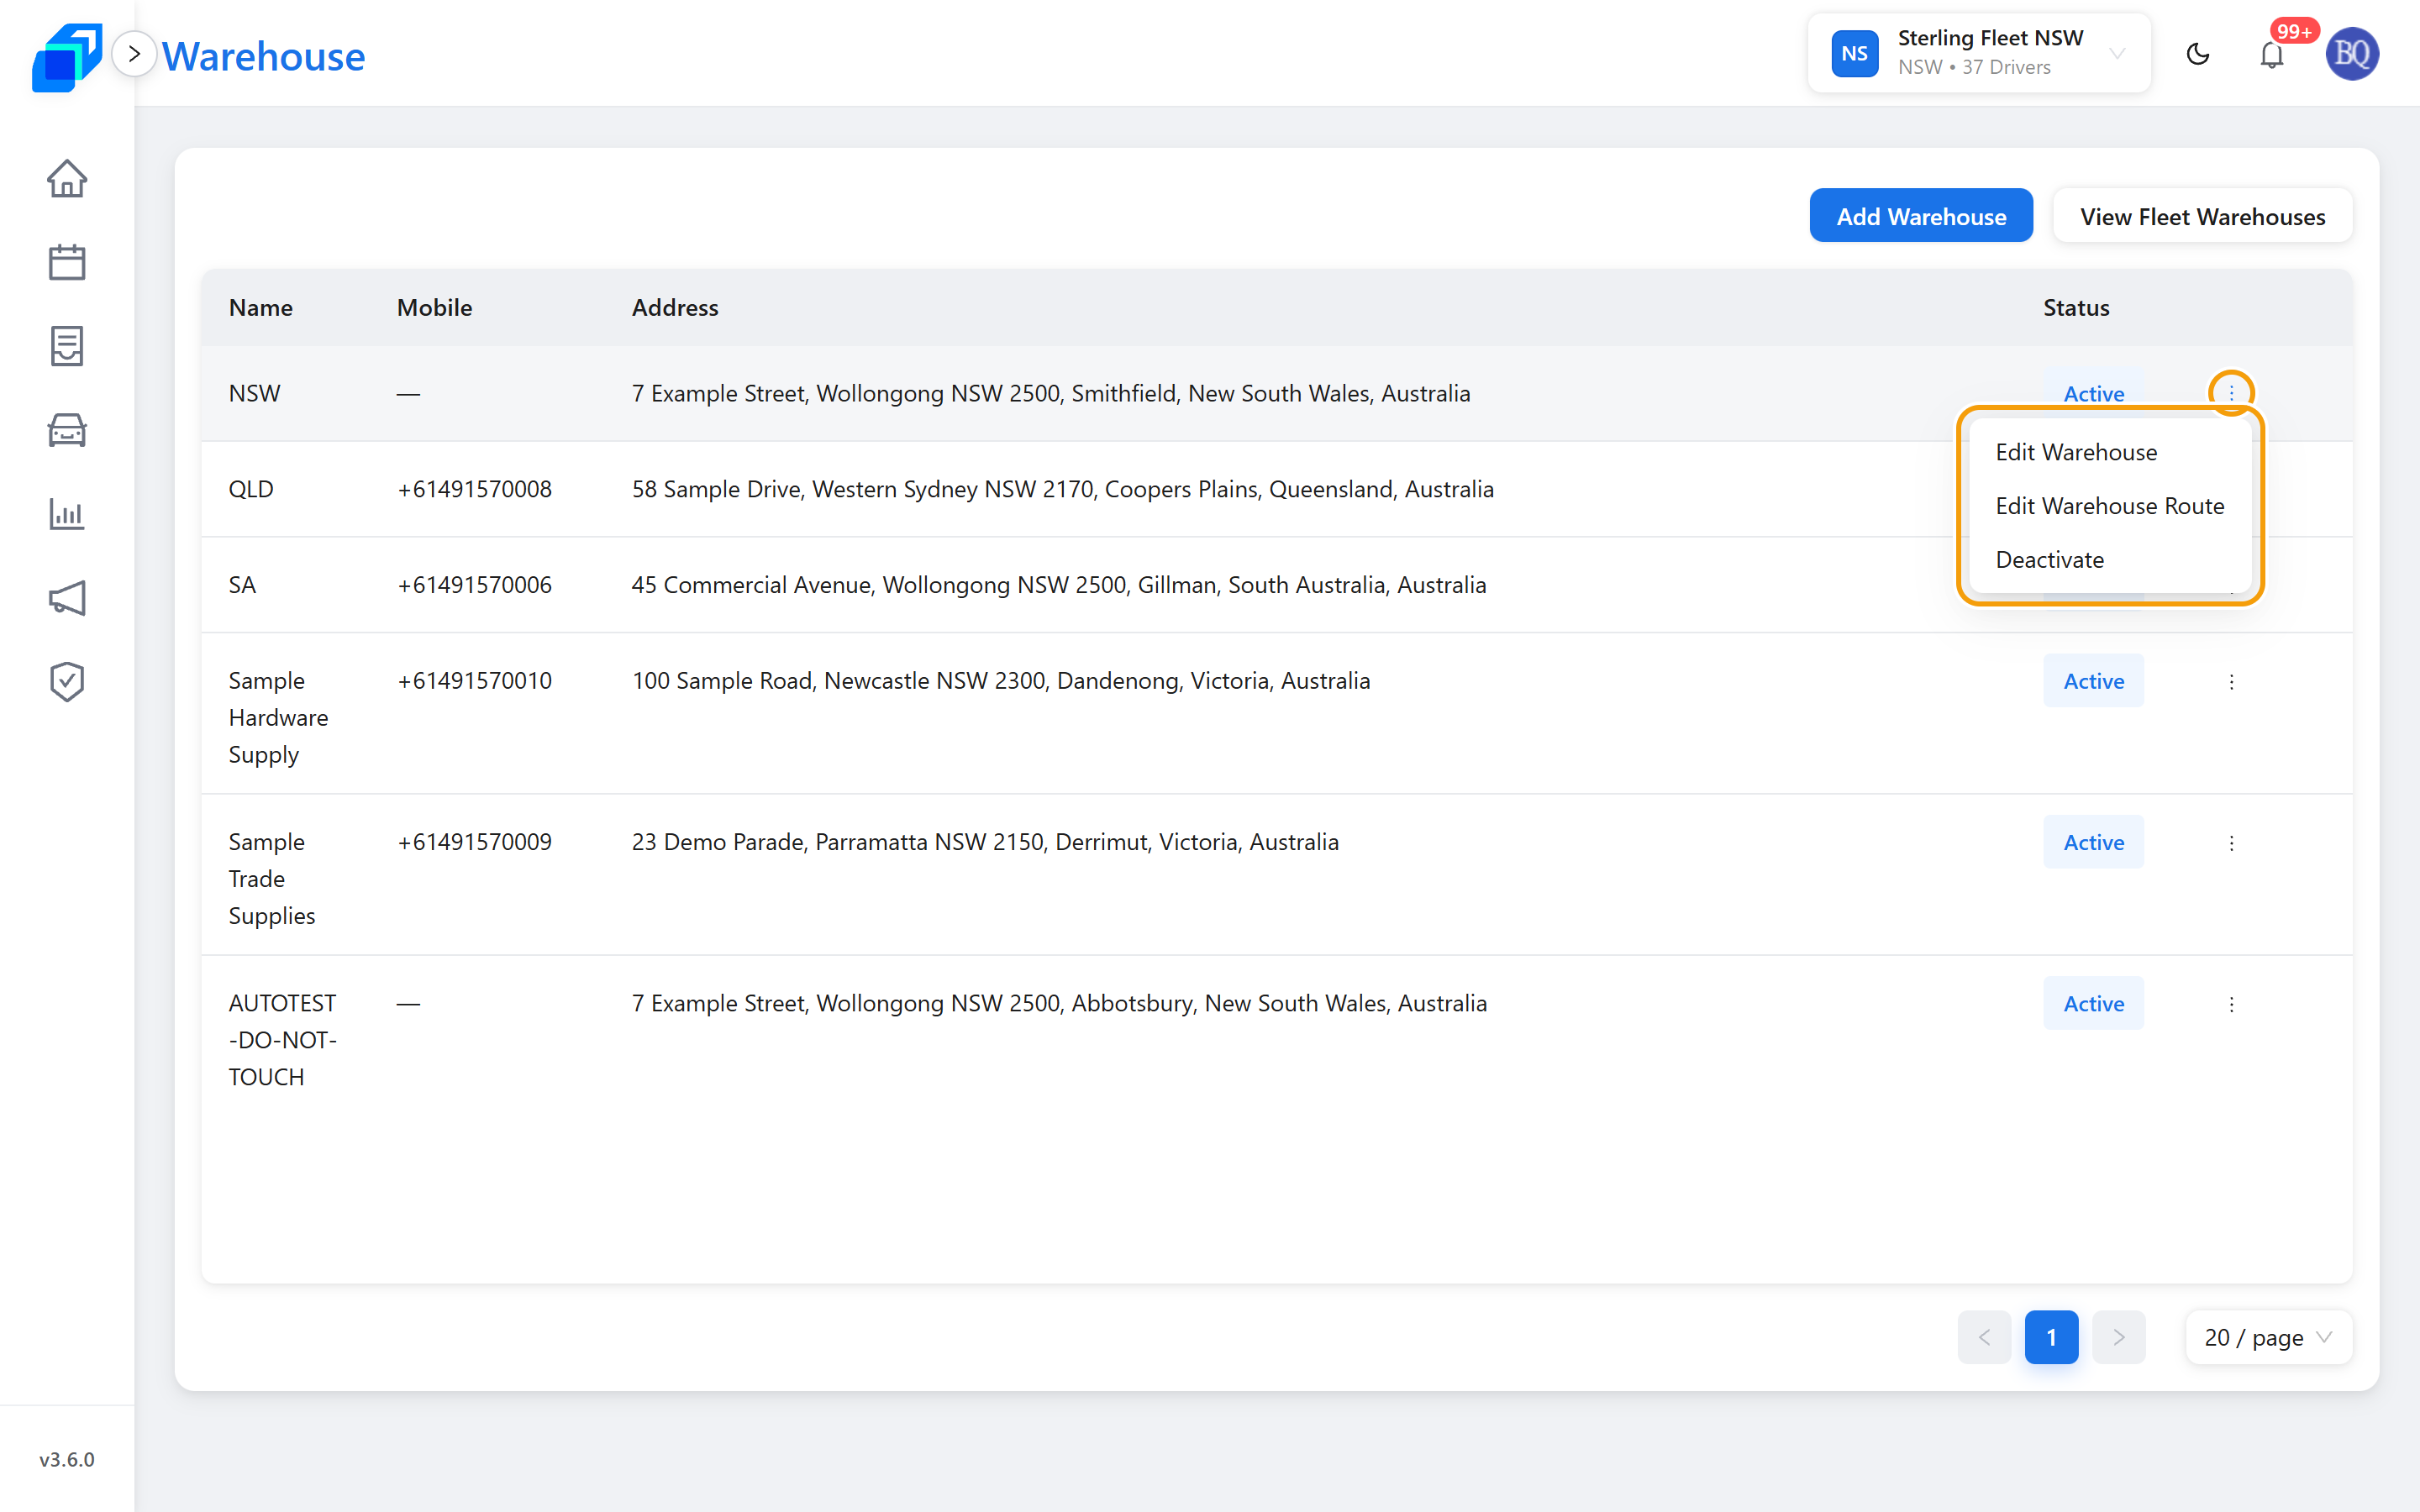
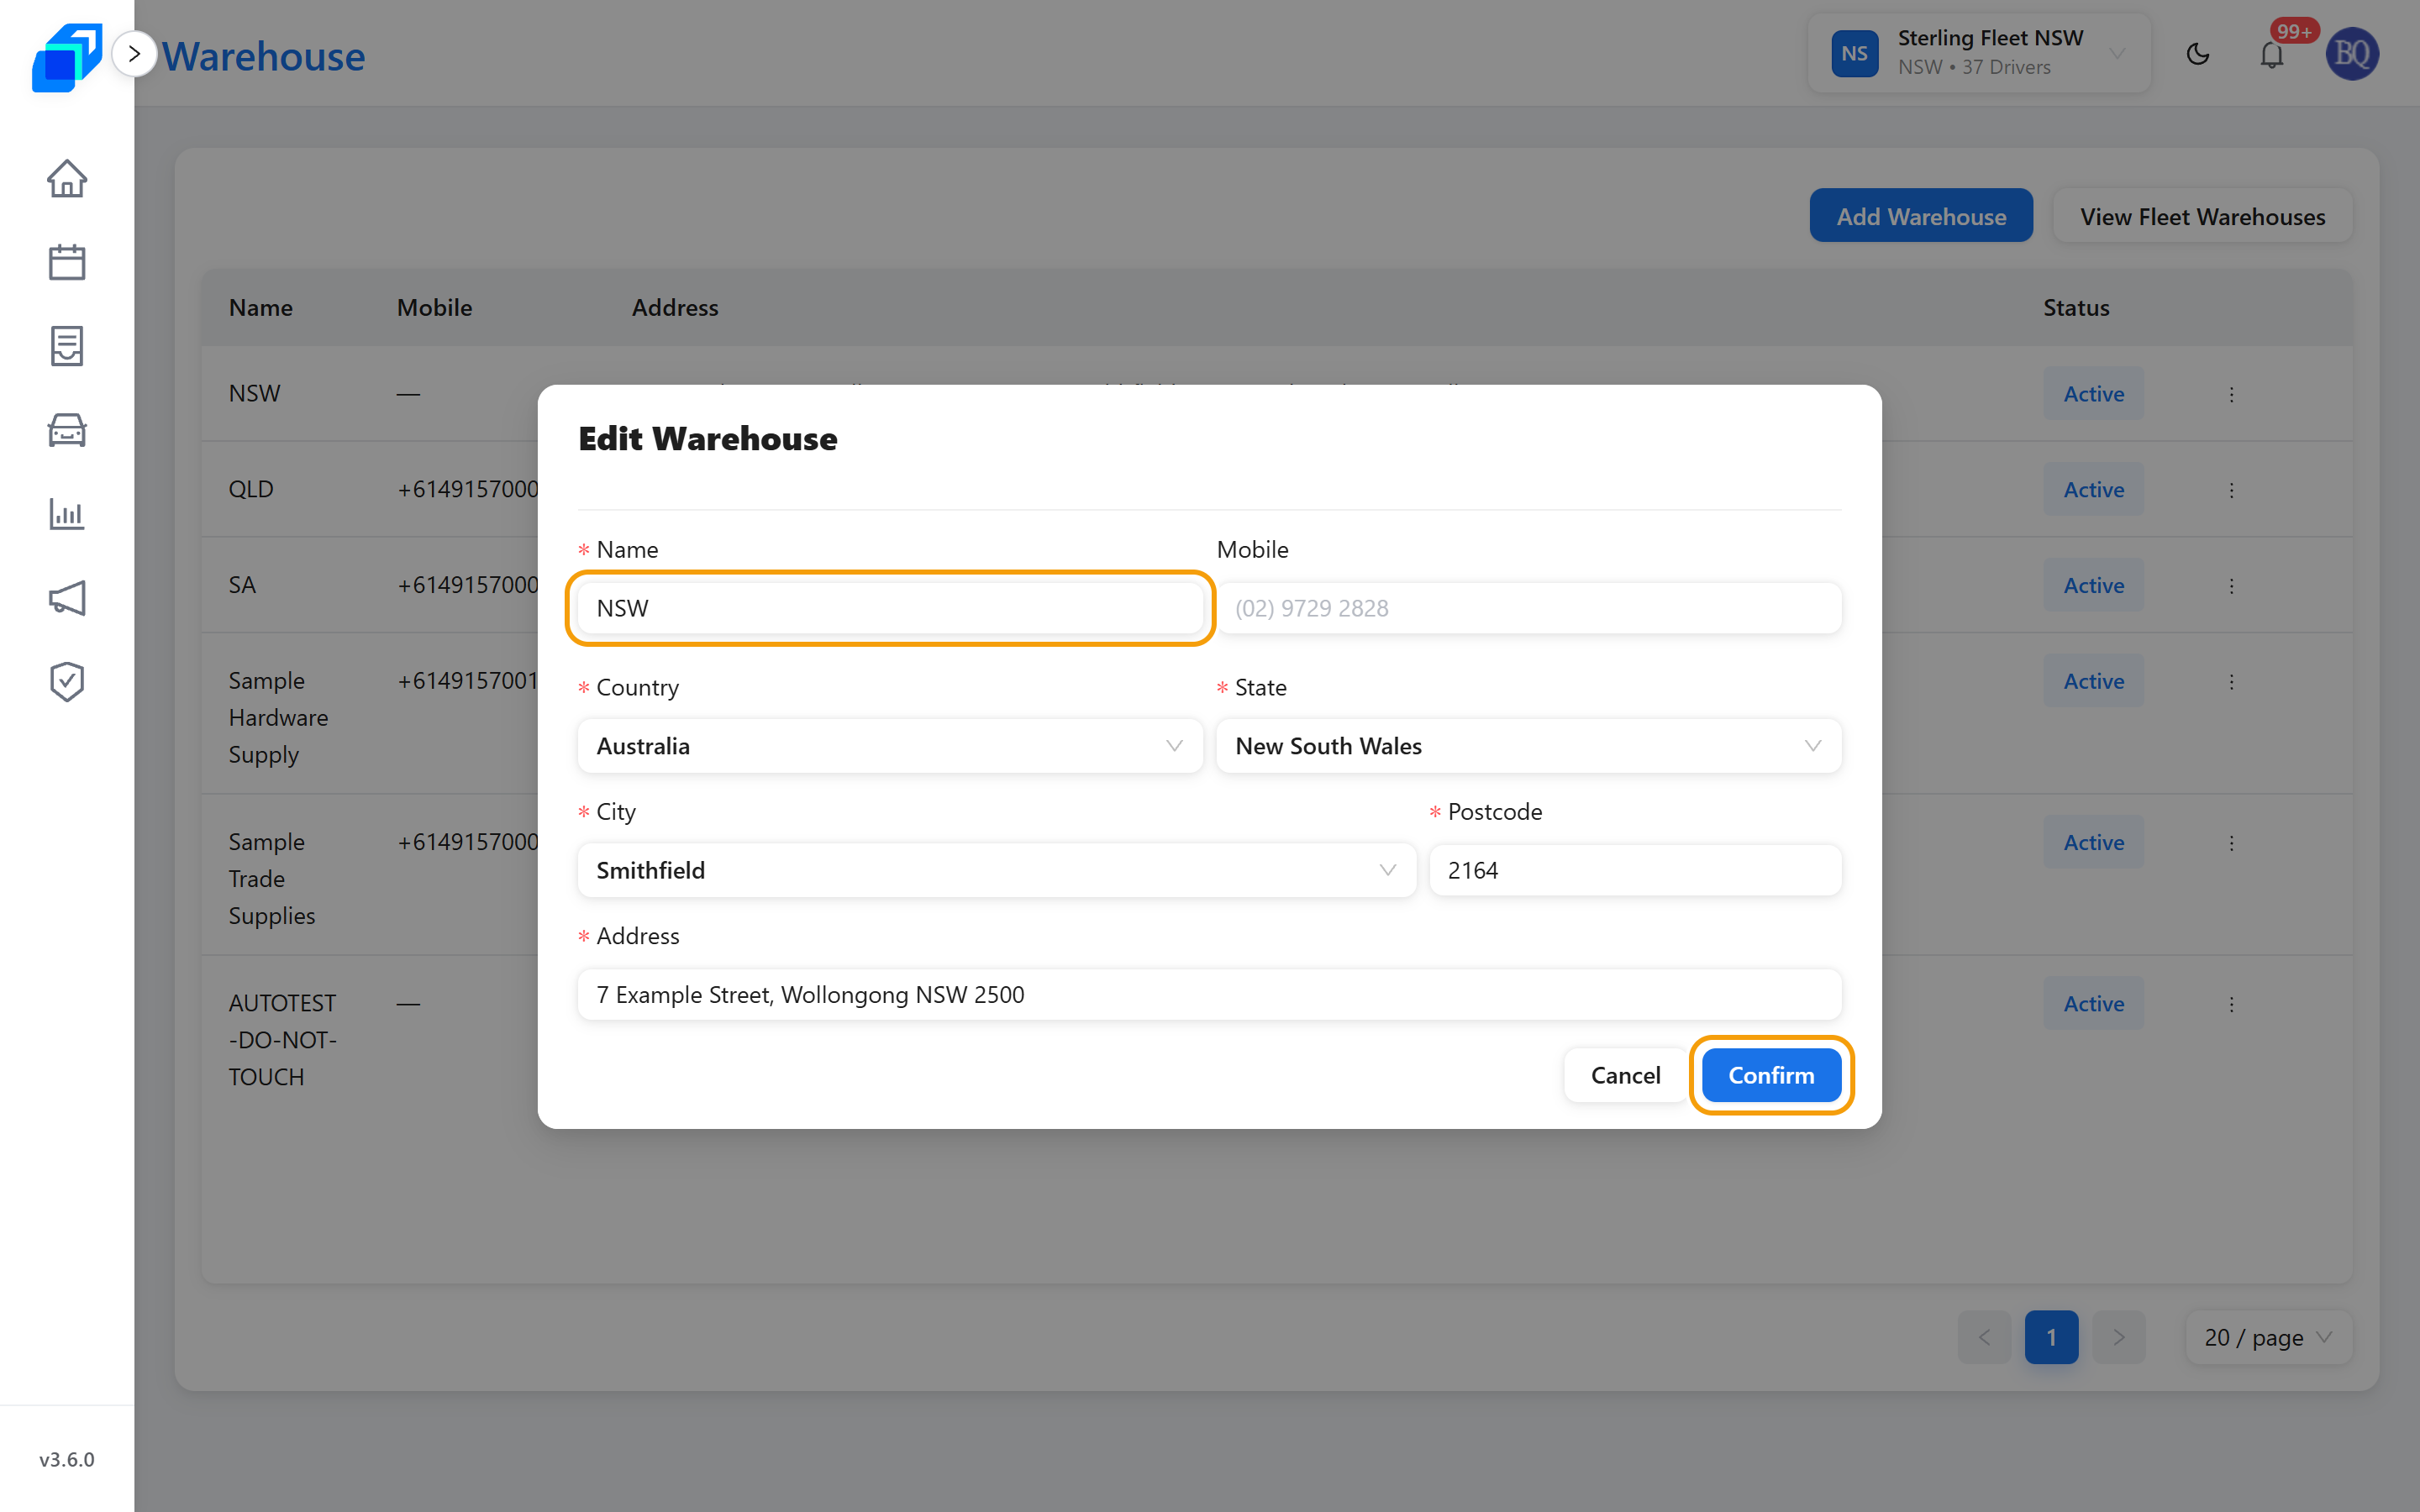
- Choose Edit Warehouse. A dialog opens.
- Change the name, contact number or address.
- Click Confirm.
Deactivate or Activate a Warehouse
Use the same three-dot menu.
- Click the three dots in the warehouse row.
- Choose Deactivate. On a warehouse that is already inactive, the same menu item reads Activate.
A dialog asks you to confirm before anything changes. Its title and its button both read Deactivate Warehouse.
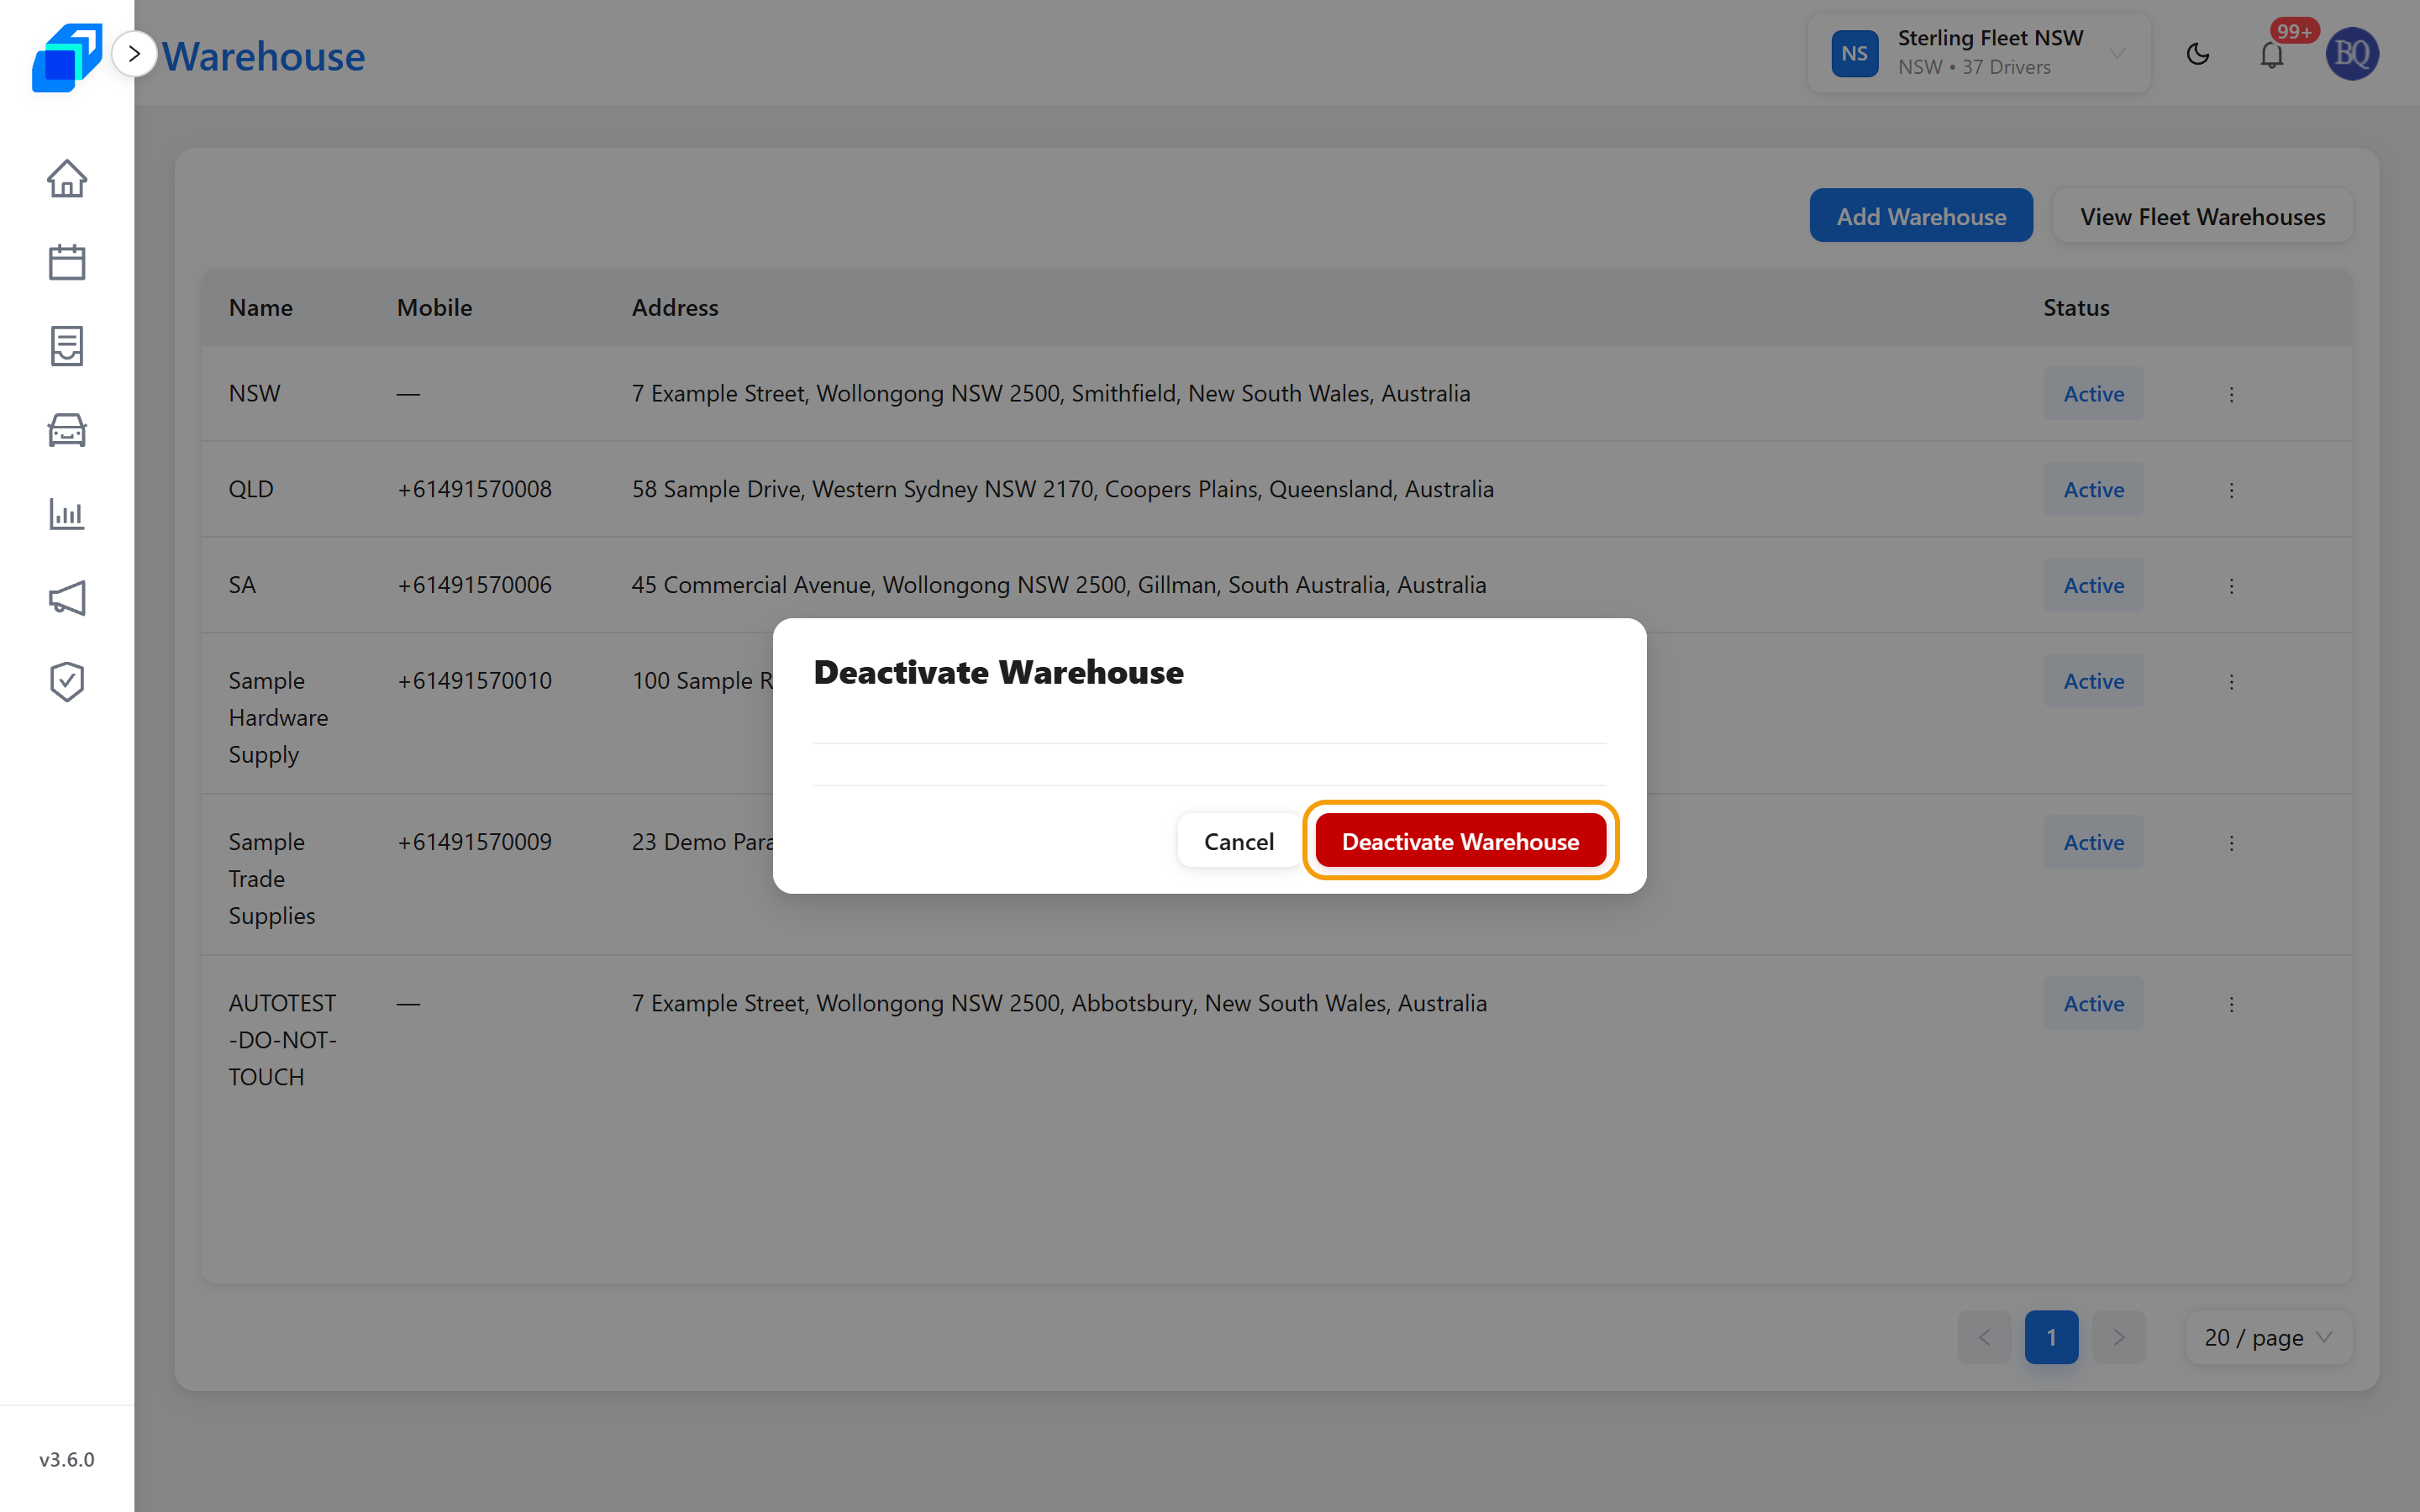
Cancel backs out and changes nothing.
Active in the Status column is the badge telling you where the warehouse stands – it is not a button.
A deactivated warehouse is no longer offered when you create an order. Its routes are not deleted, so Activate puts it back the way it was.
Warehouse Routes
Each warehouse can have many outbound routes. A route points from this warehouse to another warehouse on your account, and the list is ordered – you set that order yourself.
View Routes for a Warehouse
- Click the three dots in a warehouse row.
- Choose Edit Warehouse Route.
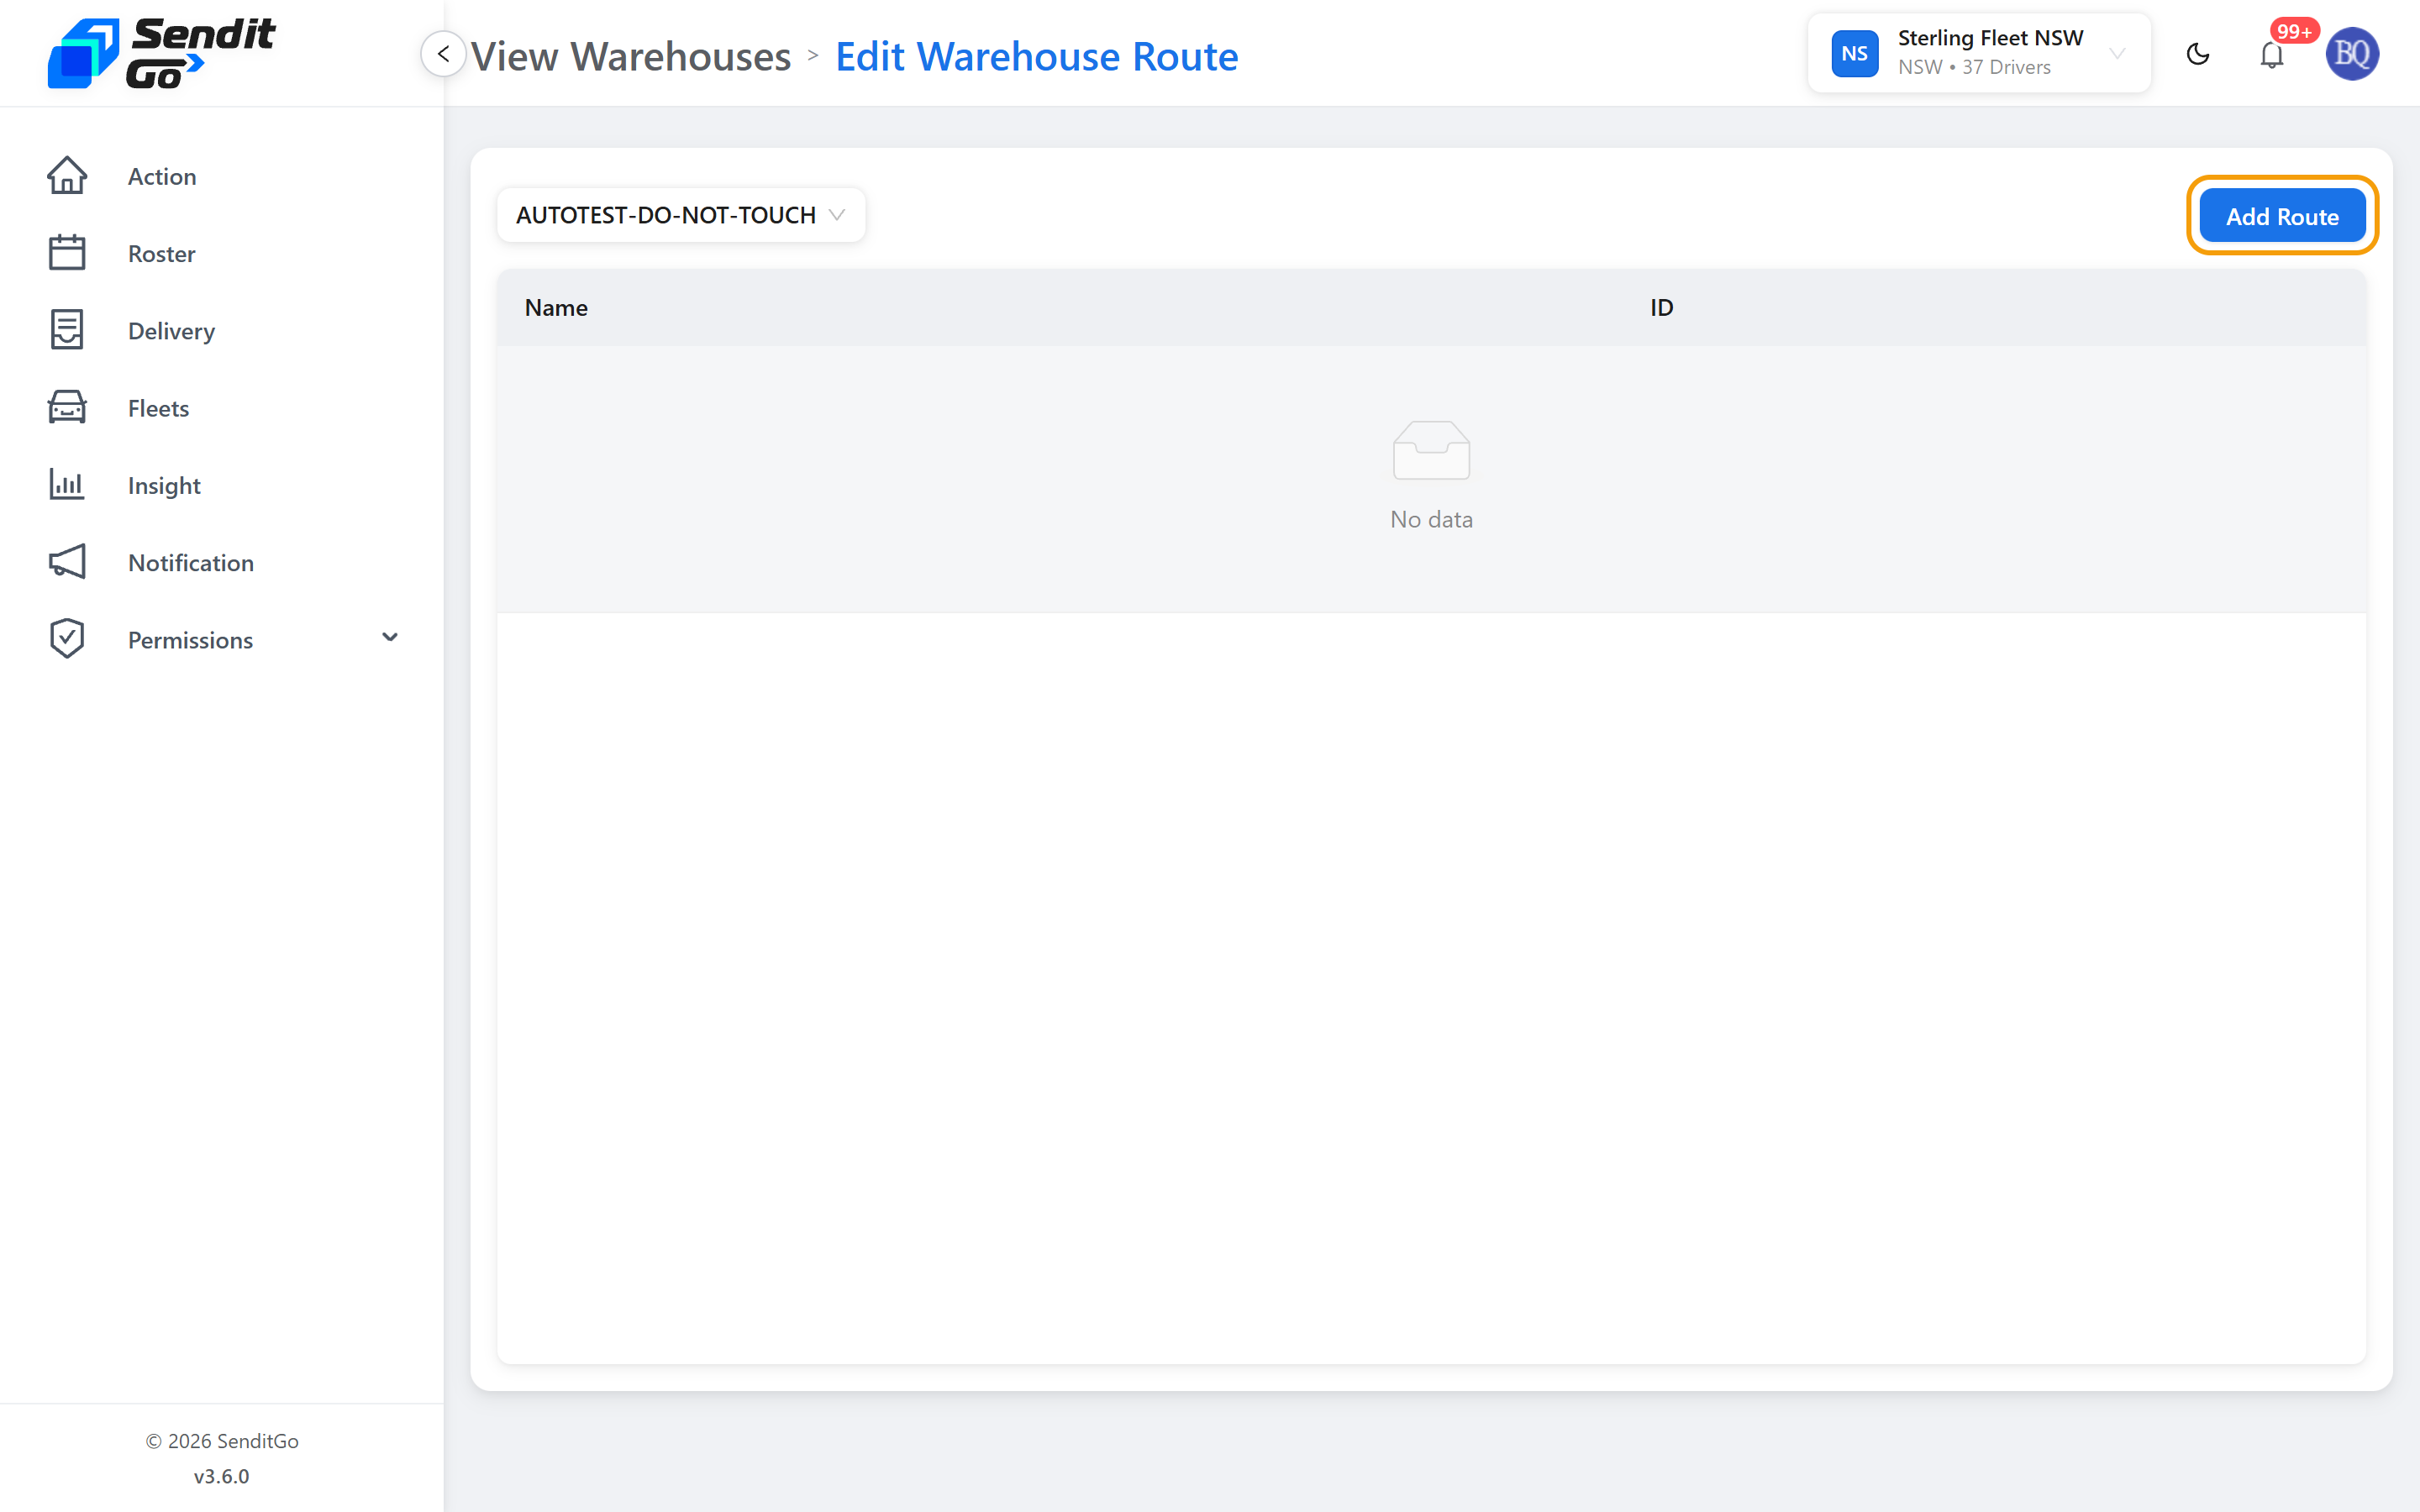
You land on the route list for that warehouse, with the warehouse's own name shown at the top left. Add Route is top right. If this warehouse has no outbound routes yet, the table says No data – that is empty, not a broken page. Click Add Route to add the first one.
Add Routes to a Warehouse
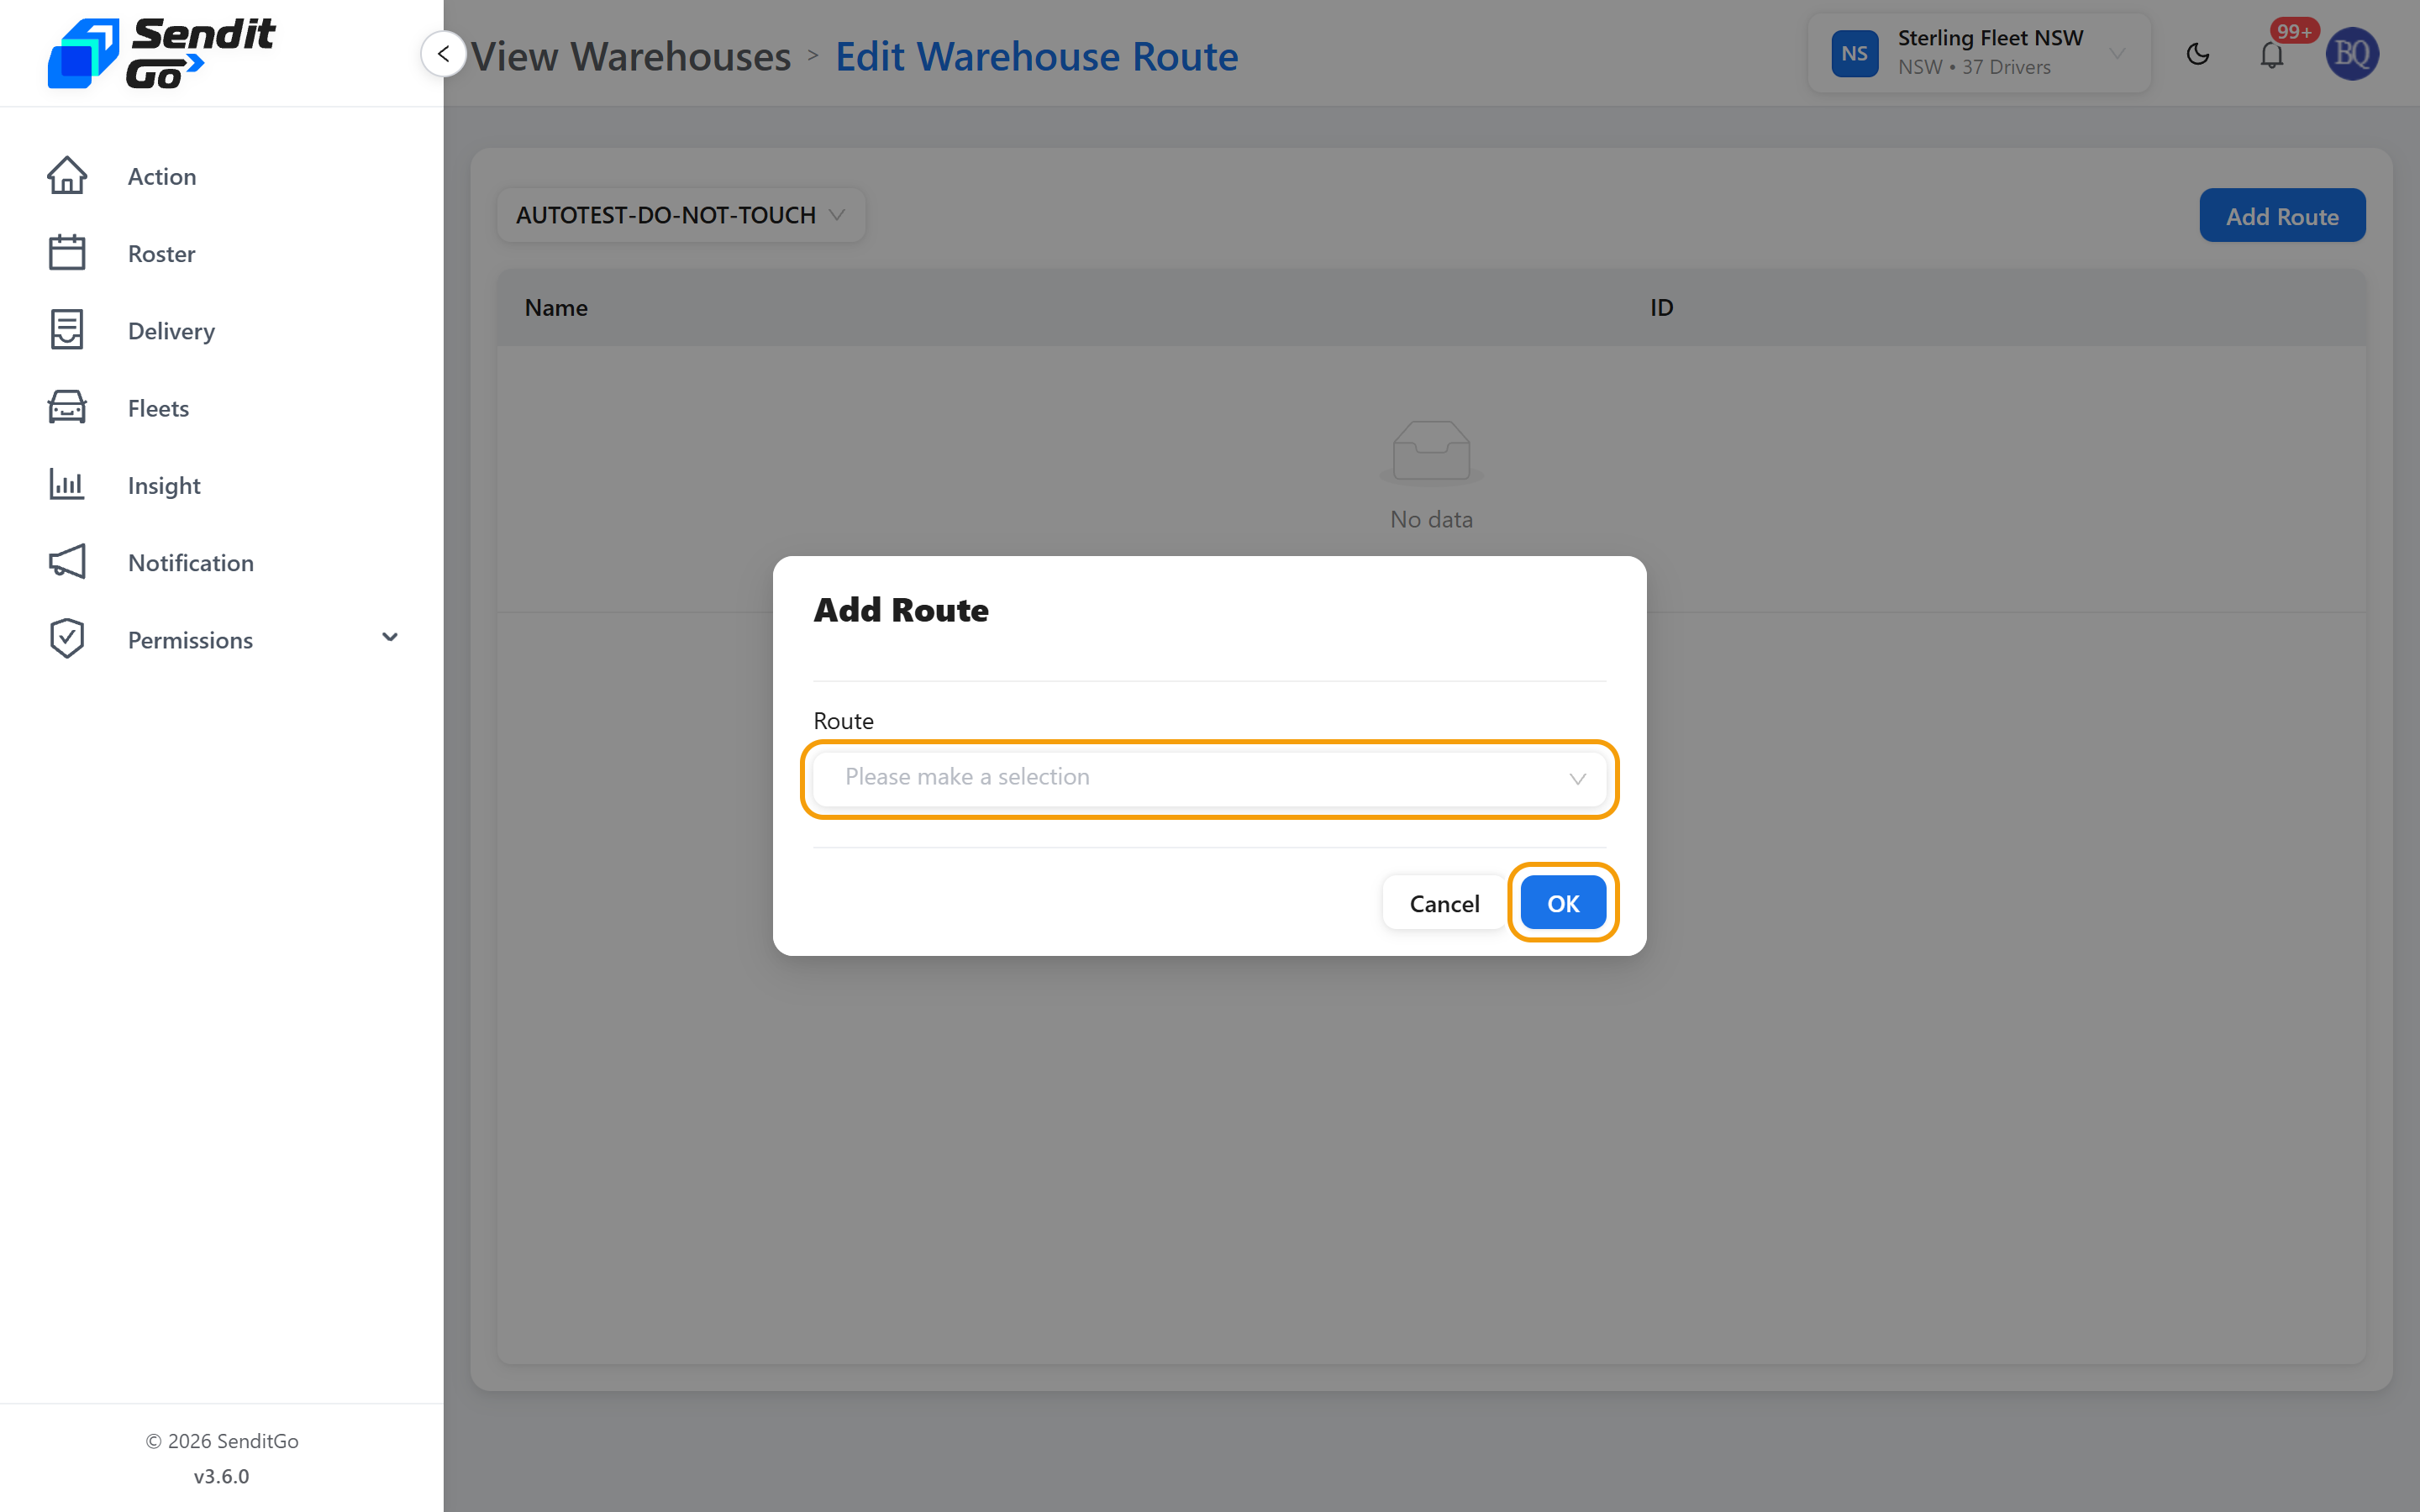
Click Add Route (top right).
- In the Route field, pick one or more destination warehouses.
- Click OK (that is the button on this dialog – not Confirm).
The new routes appear in the list. Each route shows as its own row, ready to reorder.
Reorder Routes
To change the order:
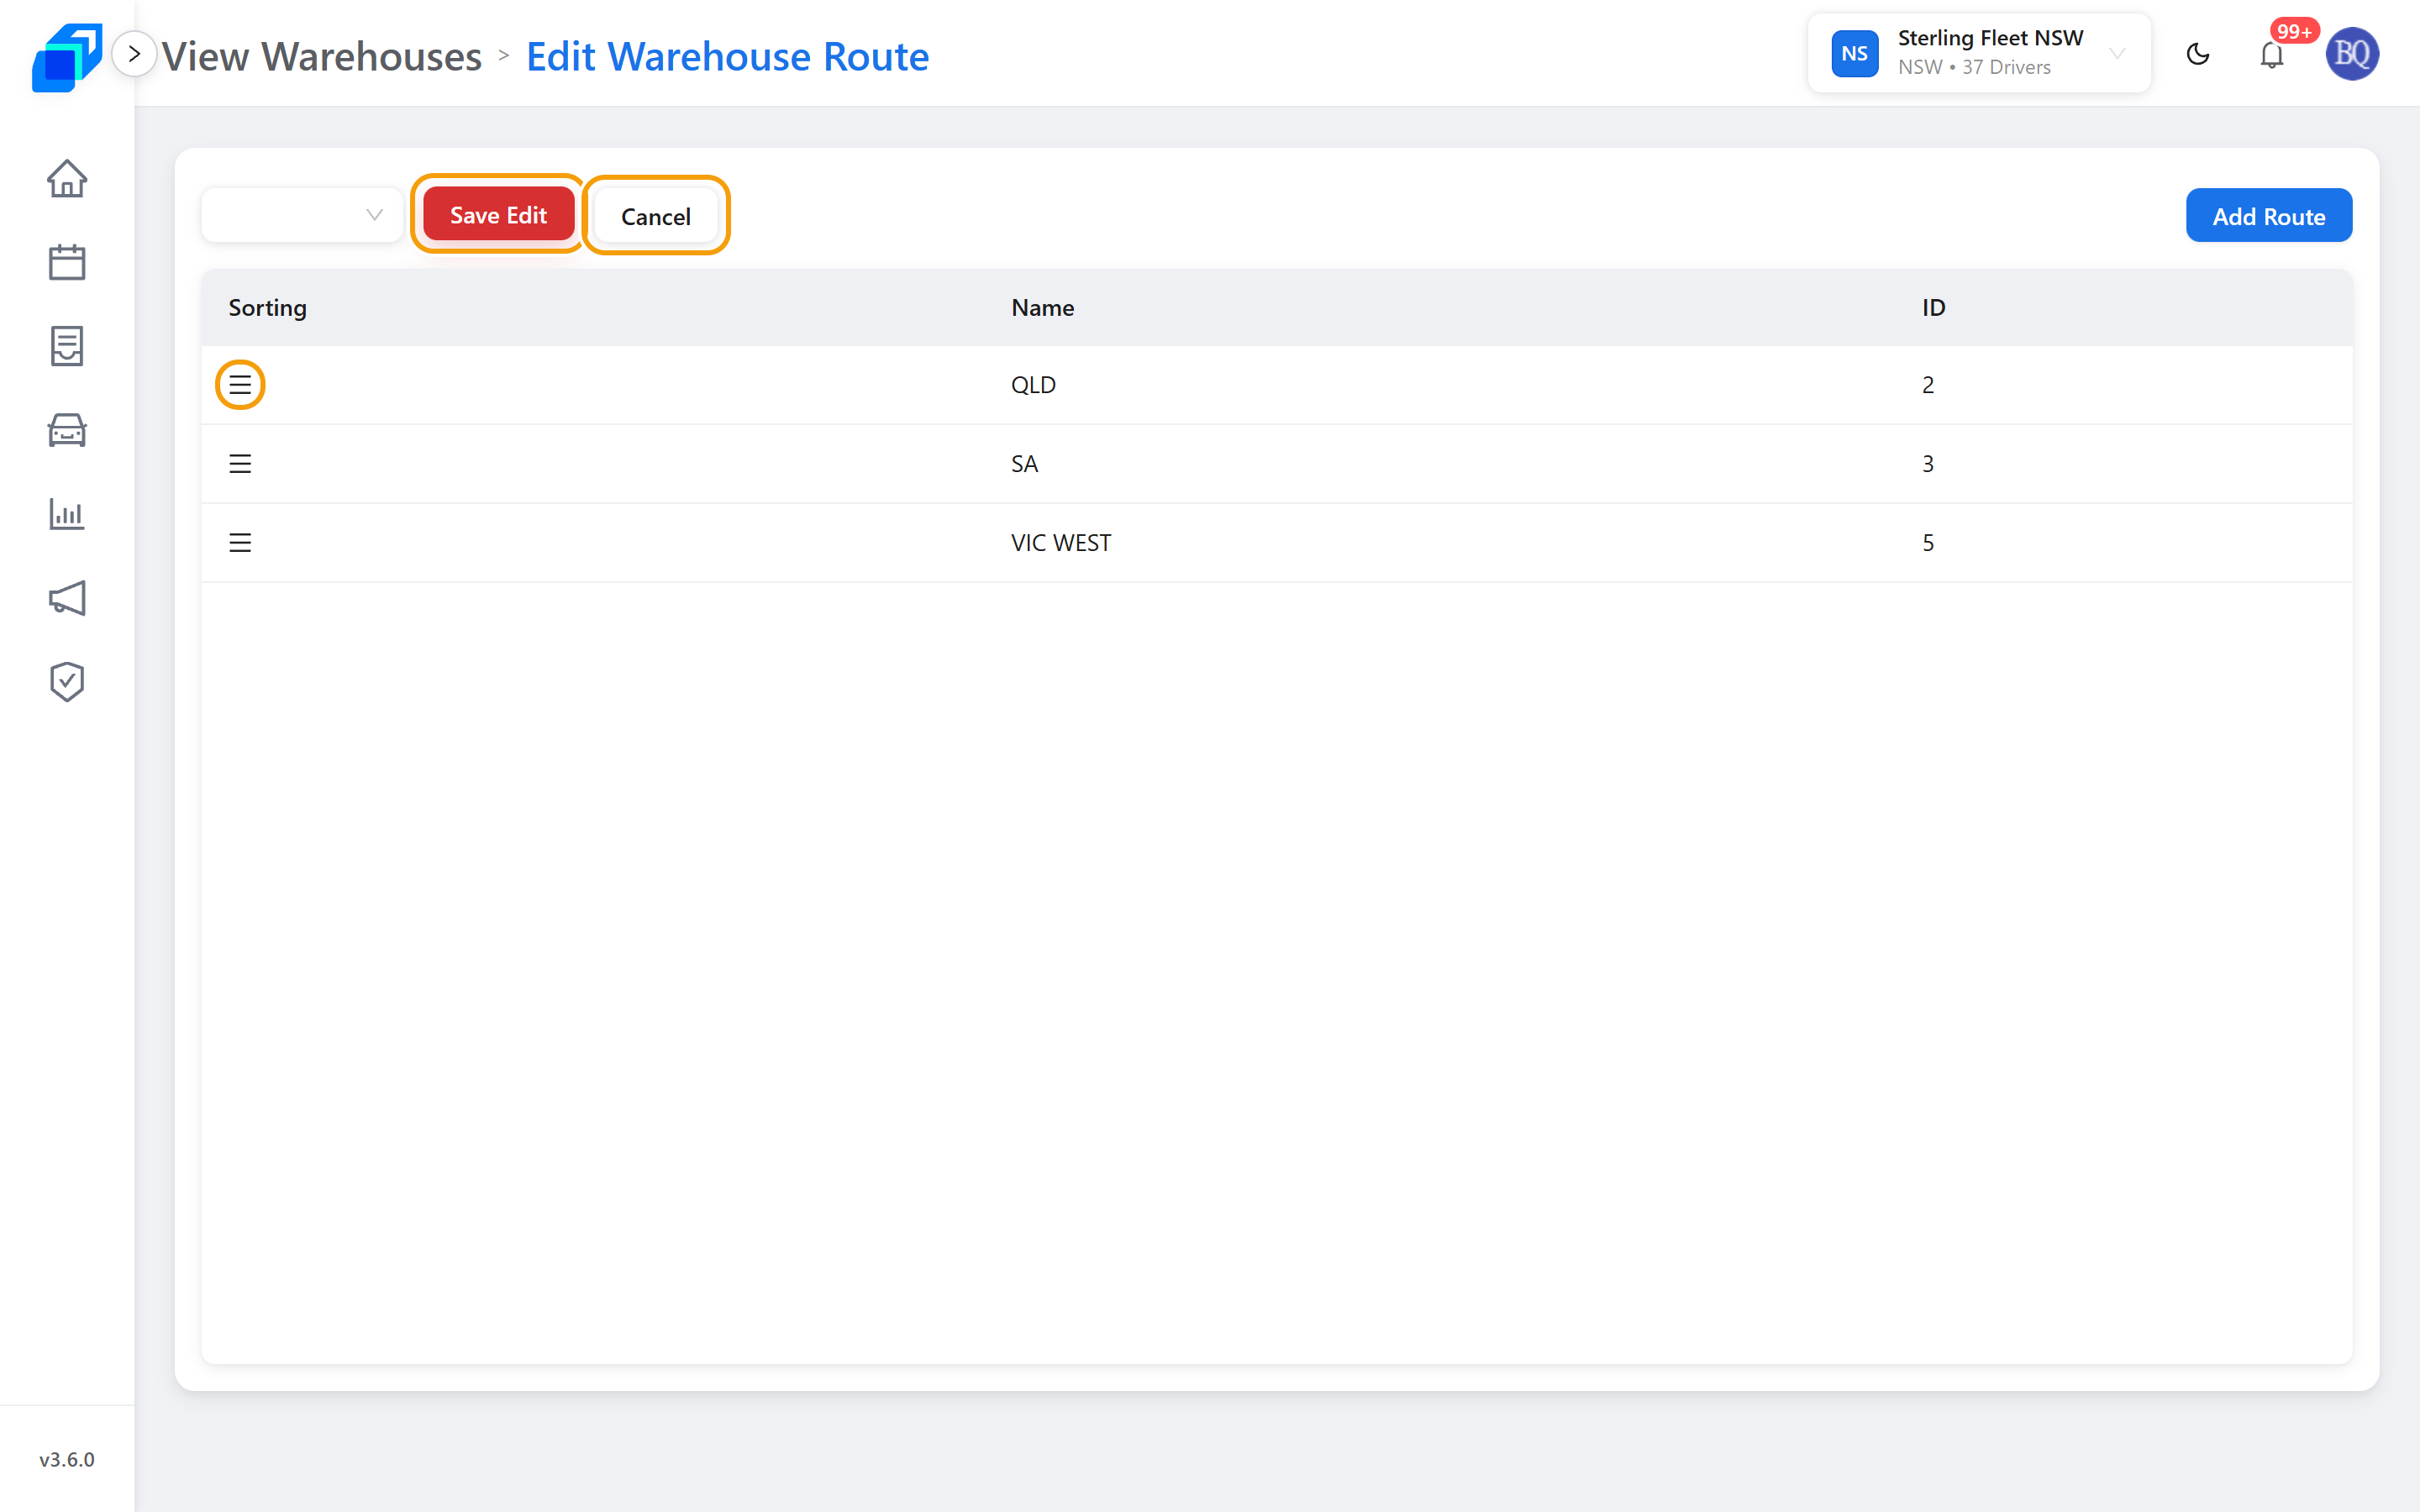
- Click Edit Sorting (top left).
- A drag handle appears in the Sorting column on the left of each route row.
- Drag by the handle – the row itself is not draggable. Move each route up or down into the order you want.
- Click Save Edit to save.
- Or click Cancel to undo without saving.
Edit Sorting only appears once the warehouse has routes. On a warehouse whose table says No data, add a route first.
View All Fleet Warehouses
On the main warehouse list page, click View Fleet Warehouses (top right). A dialog opens with a map of every warehouse in your fleet, each pin labelled with the warehouse name.
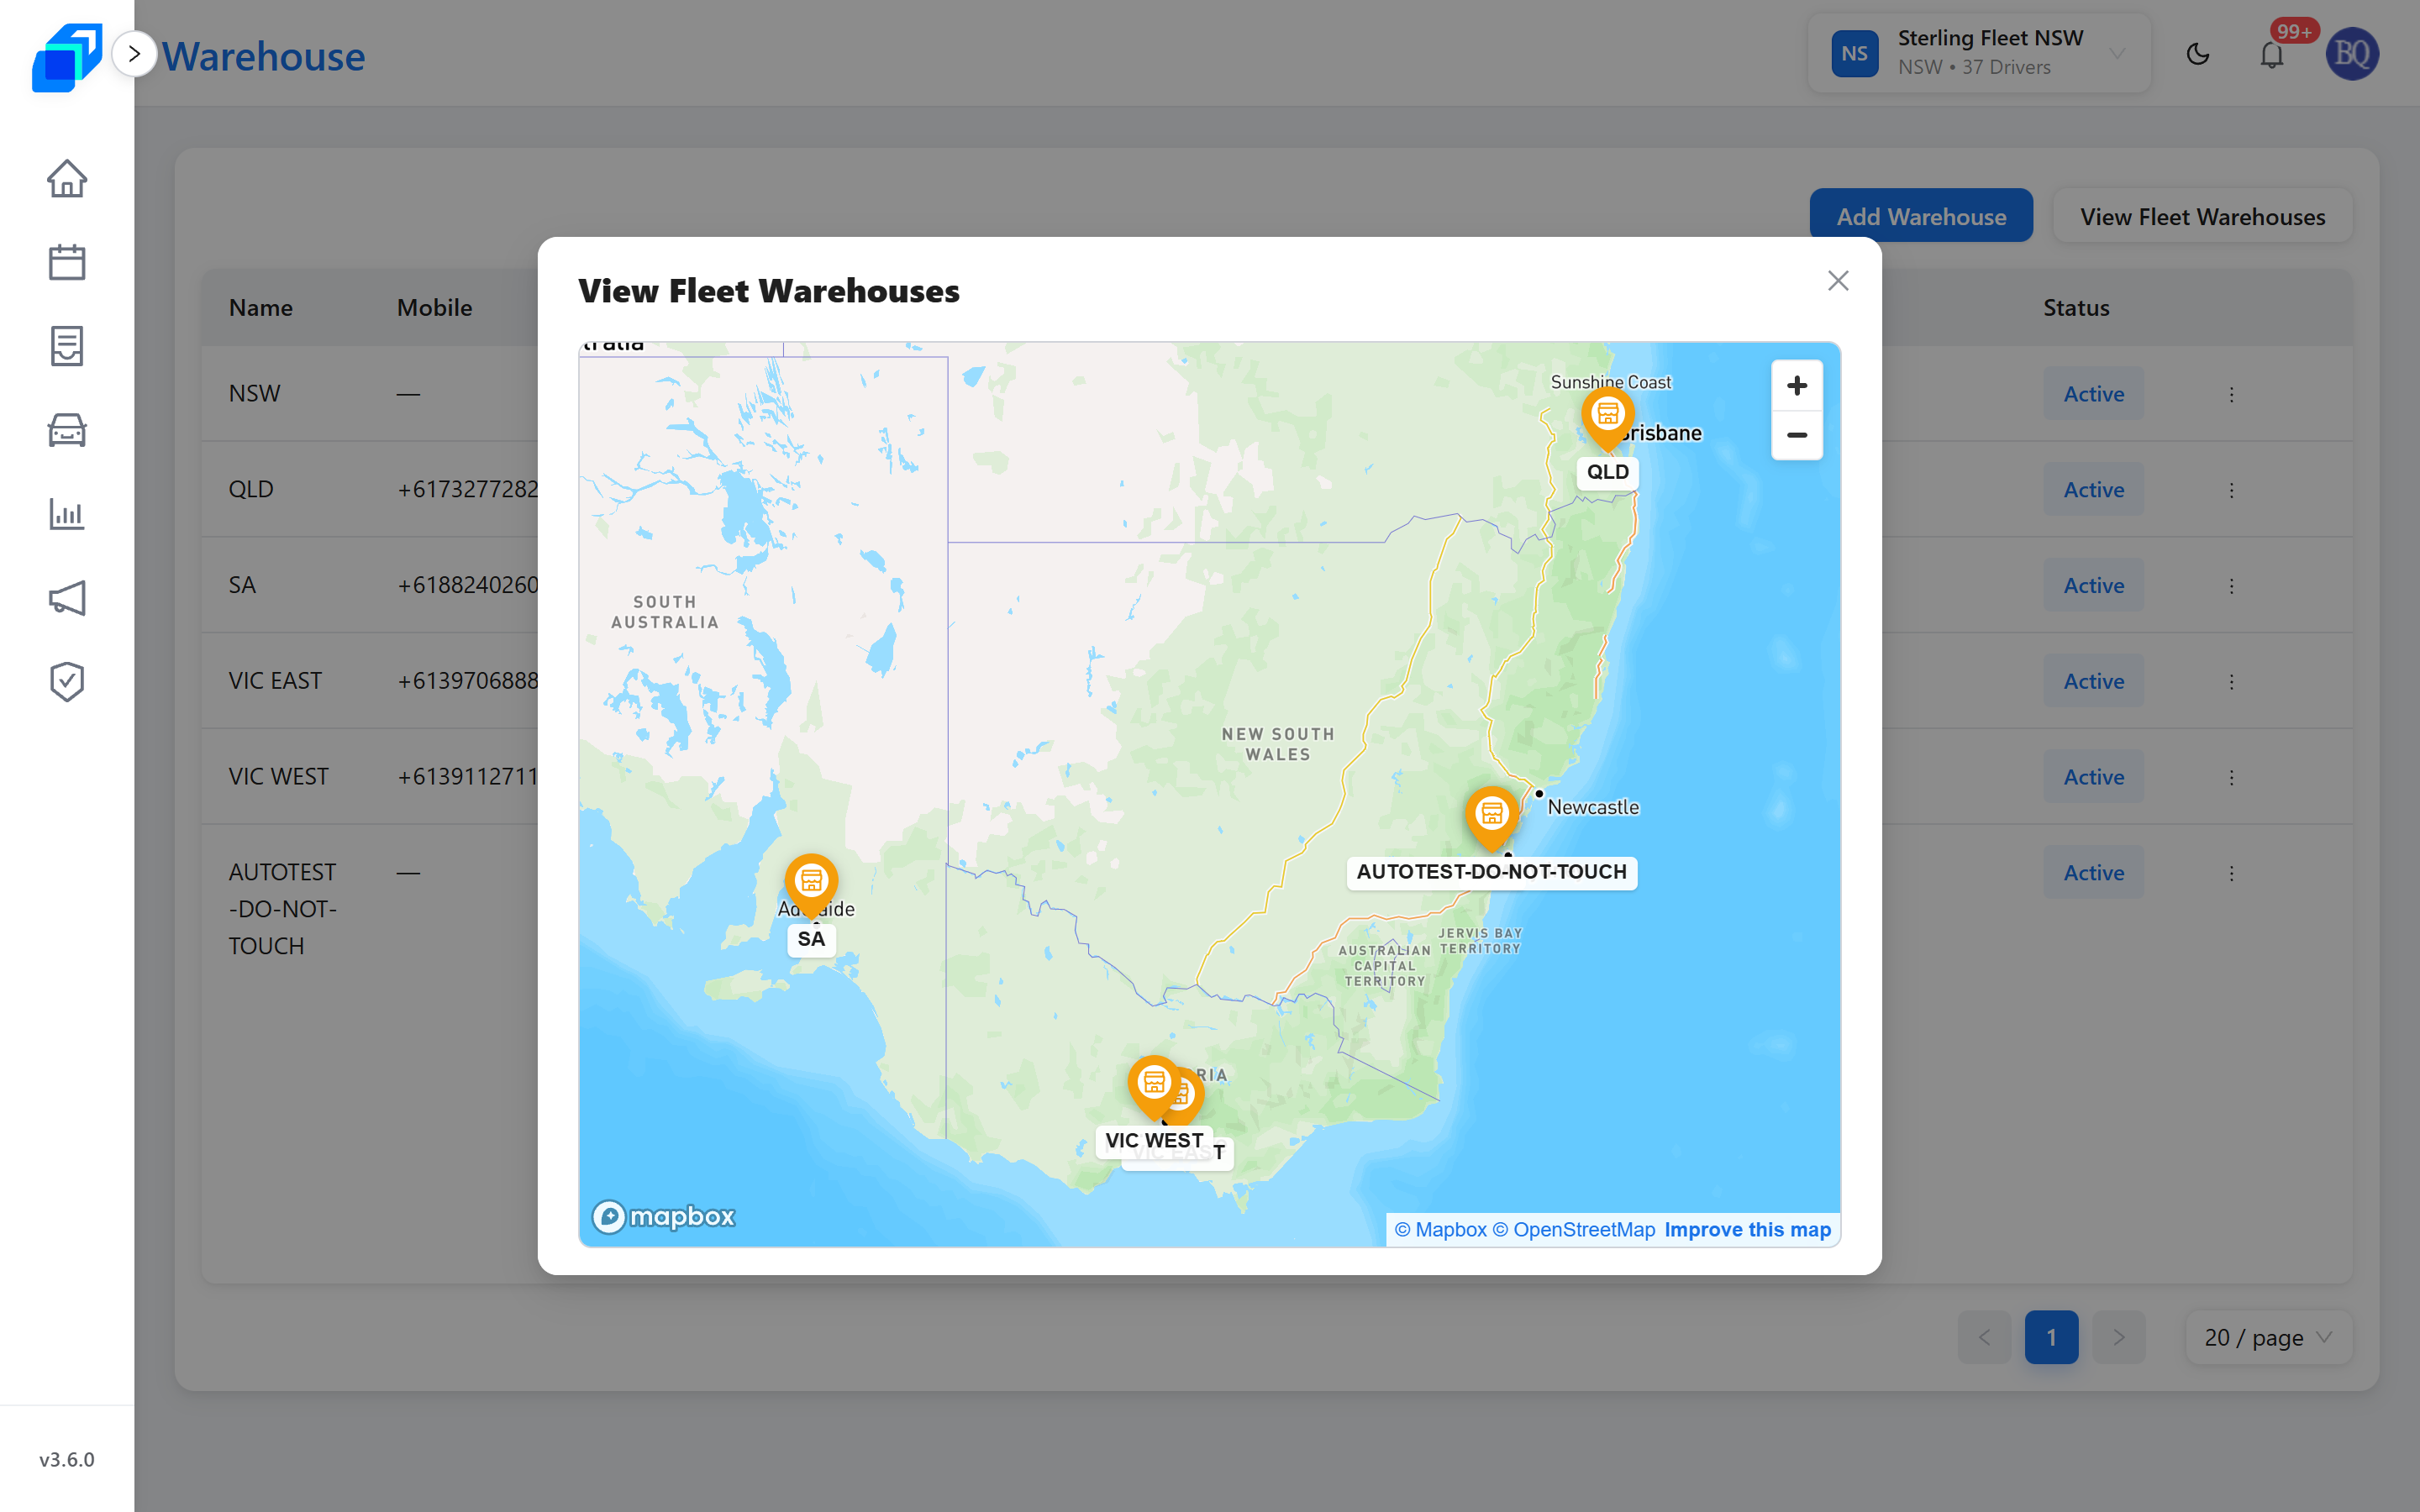
Zoom and pan the map to look at your warehouses across different regions. Close it with the X.
This is a preview of where your warehouses are, not a separate page – it has no address of its own, and it does not draw the routes between them.
Only roles with warehouse access can create, edit, deactivate, or reorder routes. If these actions are hidden, ask your fleet admin.
Next steps
- Create an order – the warehouse you set up here is what you pick as the pickup or delivery point
- Create a shift – set your warehouses up before you draw a shift's delivery zones
- Managing vehicles – the other half of the fleet's standing setup