Arrive and scan packages
Where to find it: active route › current stop › You have arrived!.
iPhone and Android use the same arrival and package-confirmation flow.
Check the current stop and order IDs, then identify delivery, collection or both at the same address. Complete every displayed work section in order; finishing the currently visible package group may not finish the stop. After a scan or manual entry, check that the matching package quantity updates. For an unrelated barcode, an already processed quantity or an error, check the order and package before trying again.
If a package is missing, damaged, or incorrect, do not mark it as successfully scanned. Open the package-row menu, tap Report Exceptions, then follow the Report Exceptions choices for that stop.
Stop arrival and start scanning
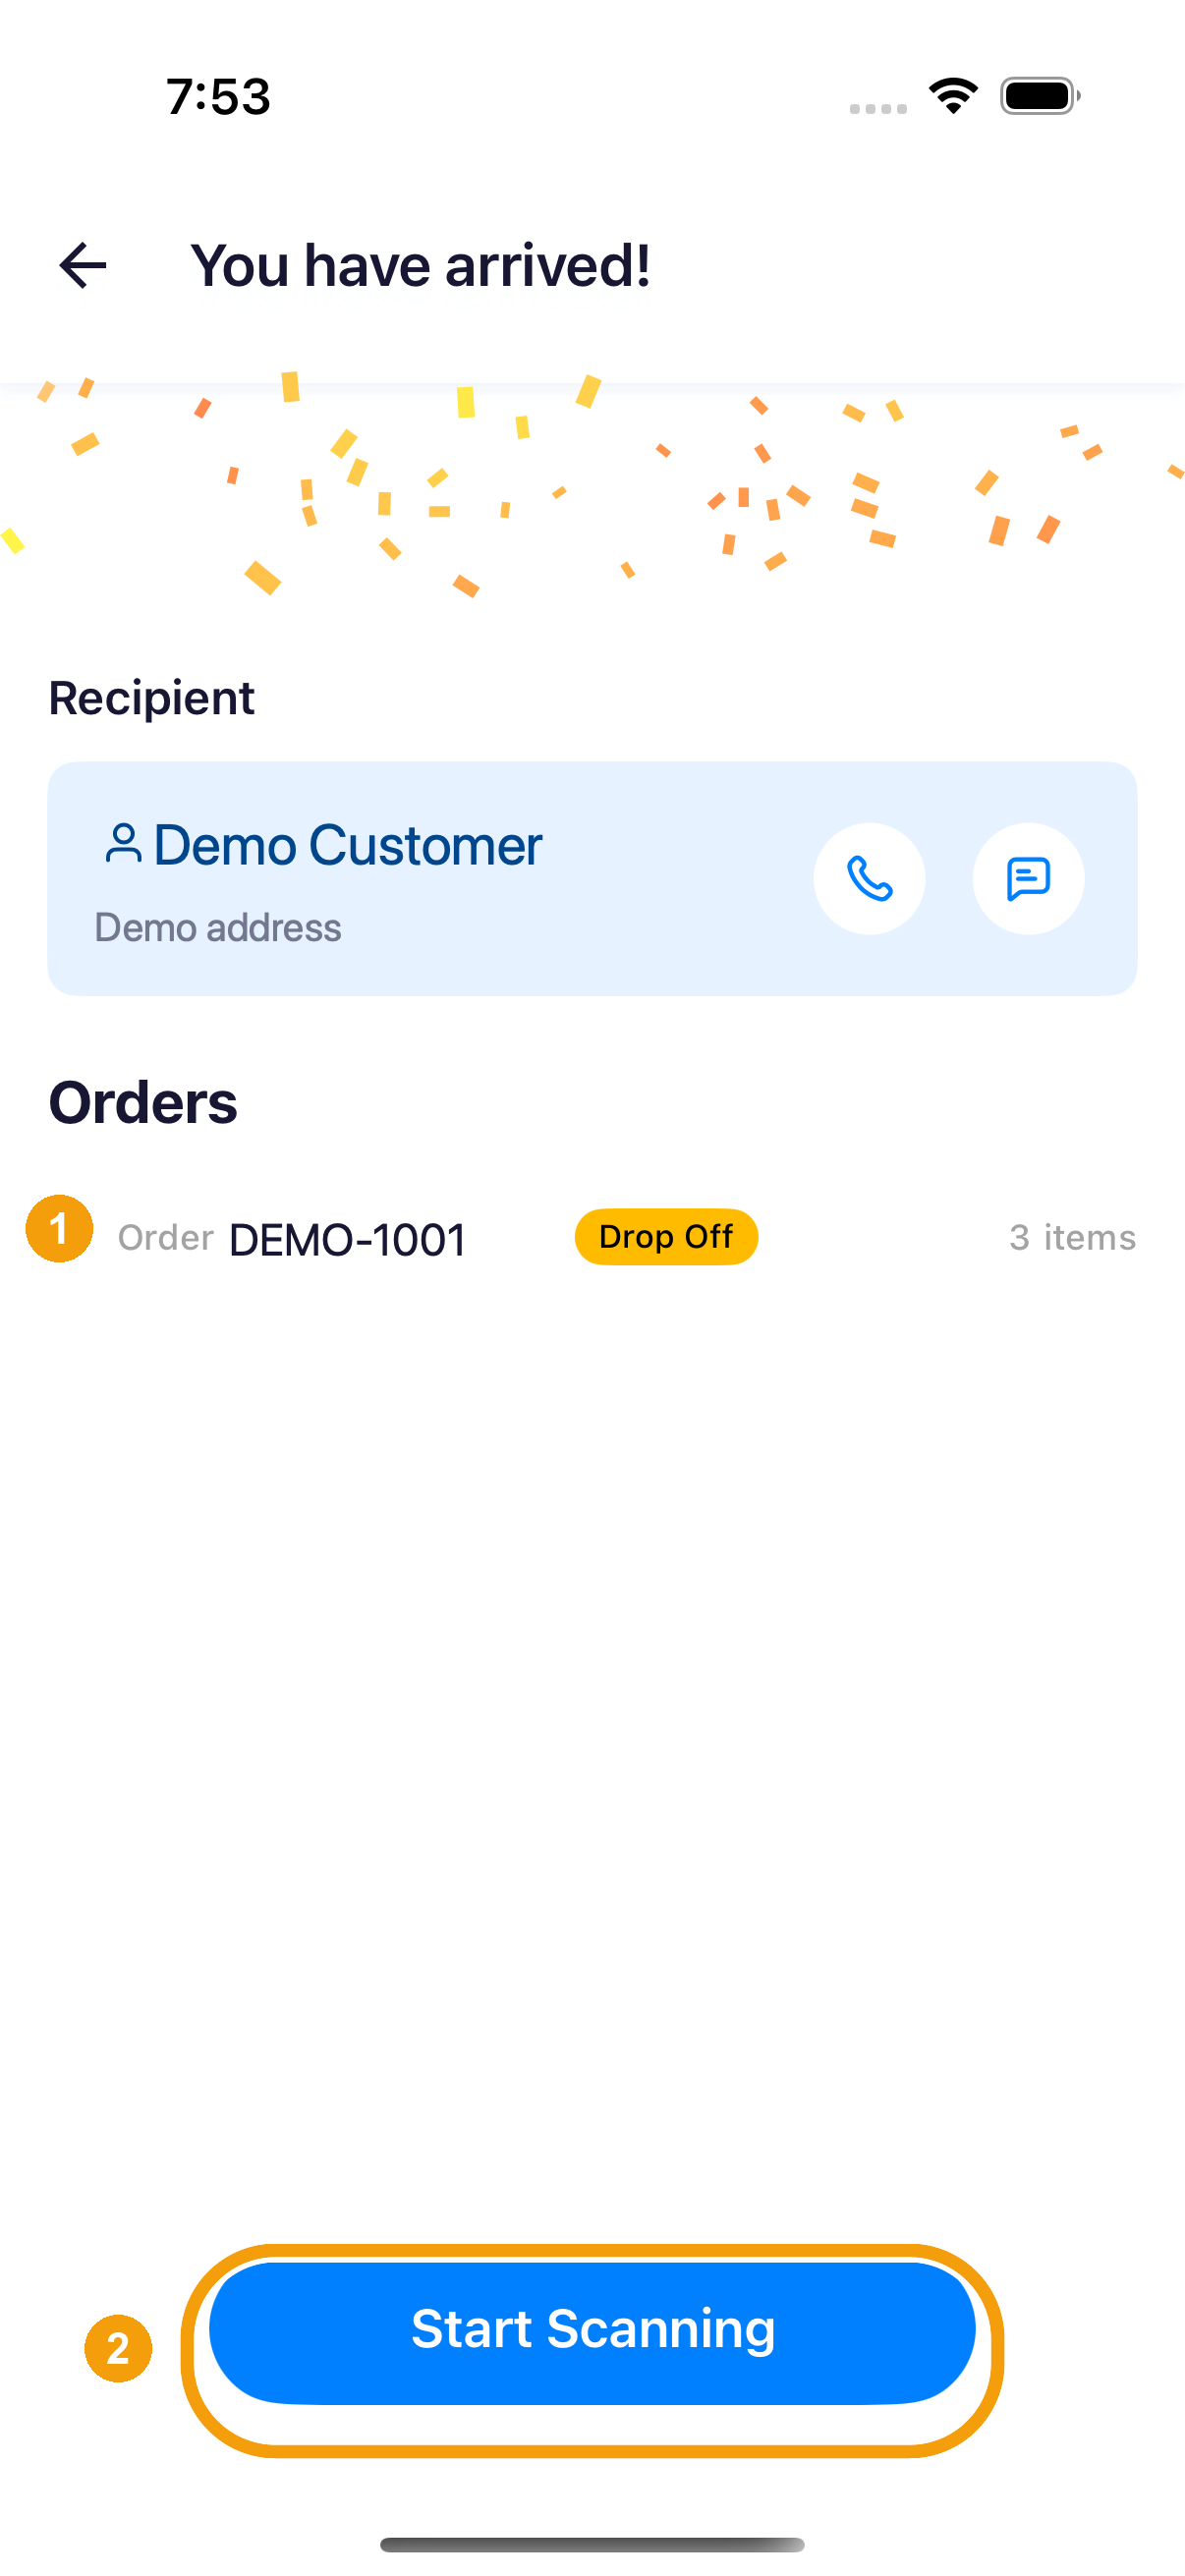
iPhone arrival screen
- Review the order IDs (such as DEMO-1001) and item counts in the Orders list.
- Tap Start Scanning when package confirmation is required; if this stop does not require a scan, tap Continue.
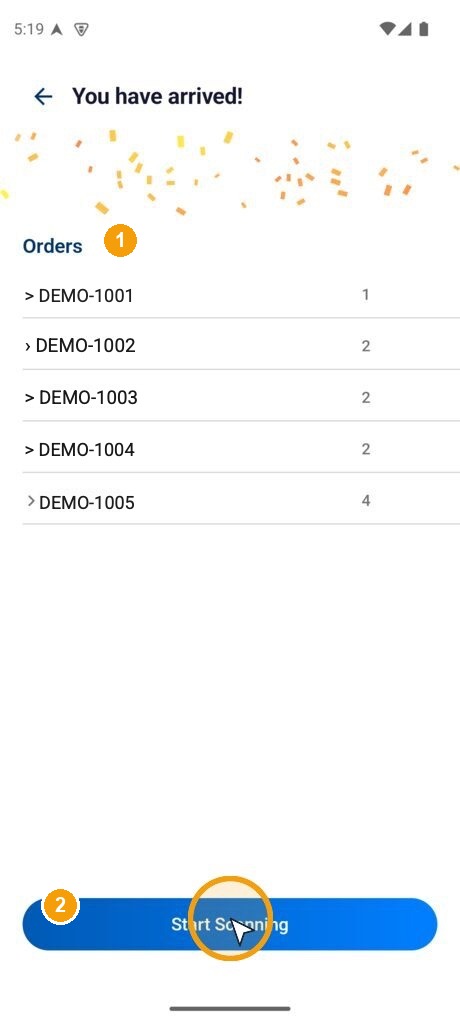
Android arrival screen
- Review the order IDs and expected package quantities under the Orders list.
- Tap Start Scanning at the bottom to open the camera scanner.
Barcode scanning and manual entry
Allow SendItGo to use the camera when prompted. Manual code entry replaces barcode recognition only; it does not replace a required delivery photo. Retain the current work on upload failure and follow the retry action after restoring connection.
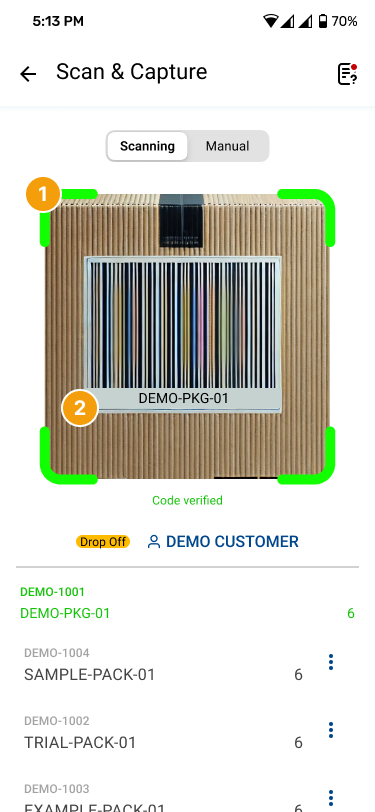
Camera barcode preview
- Aim the camera lens at the barcode on the outer box so the barcode fits within the scan frame.
- Once recognised, verify that the screen displays the correct package code and updates the count.
Switch to manual mode
- When a barcode cannot be scanned or the camera fails to focus, tap Manual at the top to switch to manual input mode.
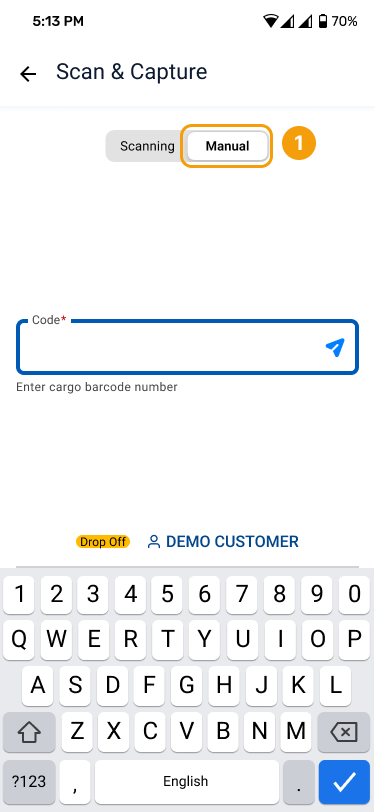
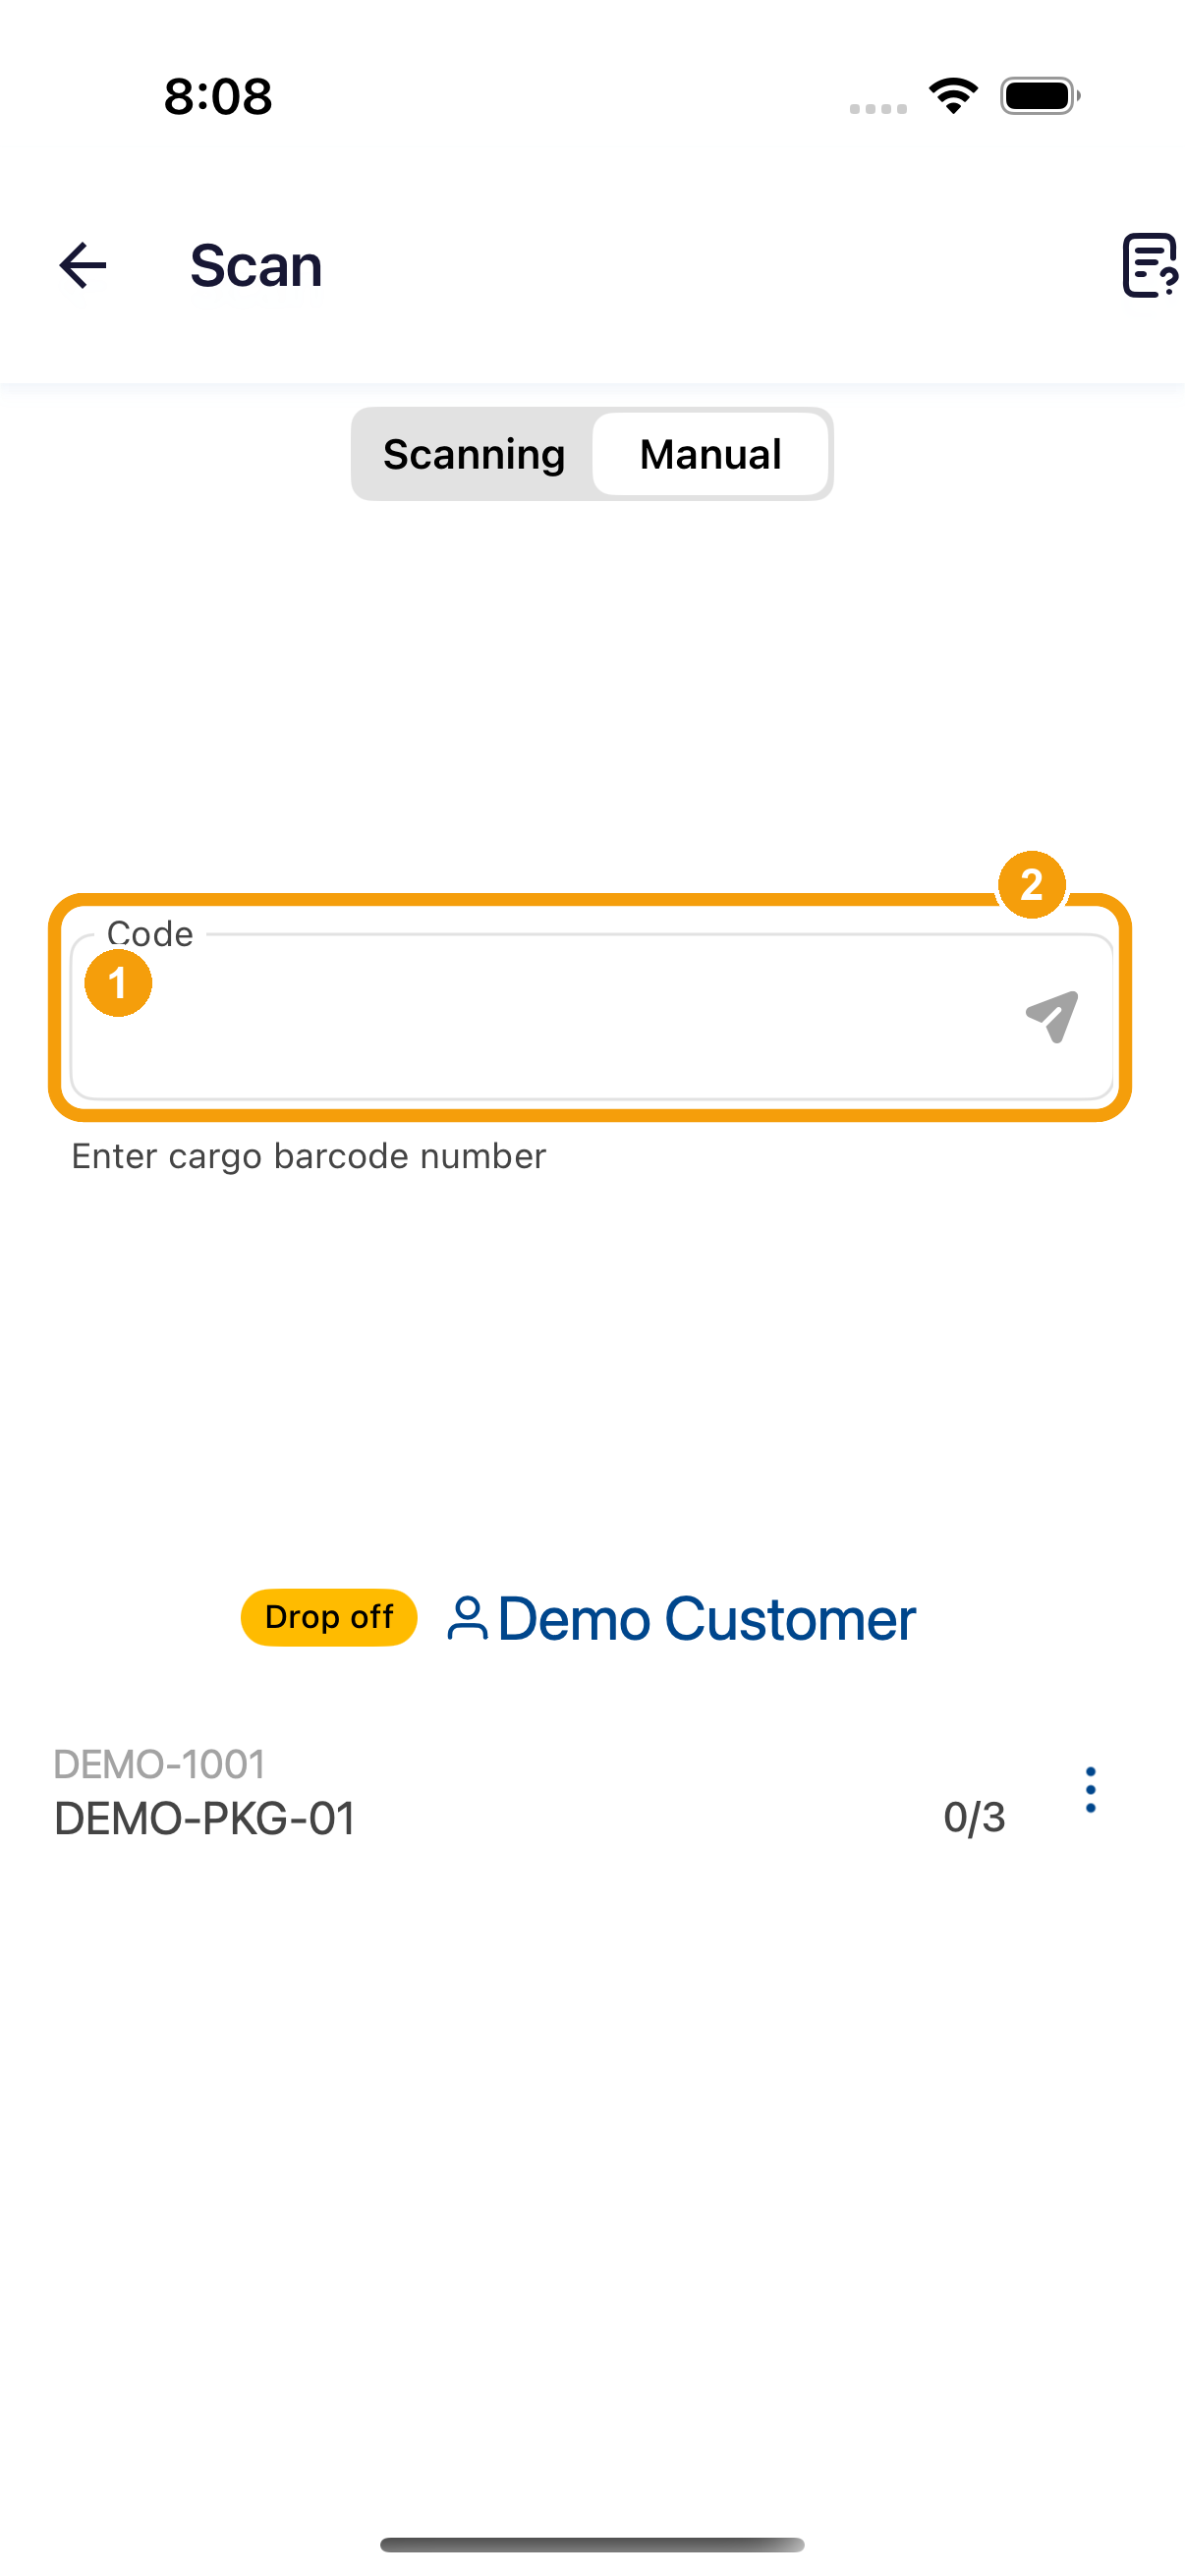
Enter package code
- Enter the package barcode code in the Code field.
- Tap the paper-plane icon beside the field (or the keyboard Done key) to submit.
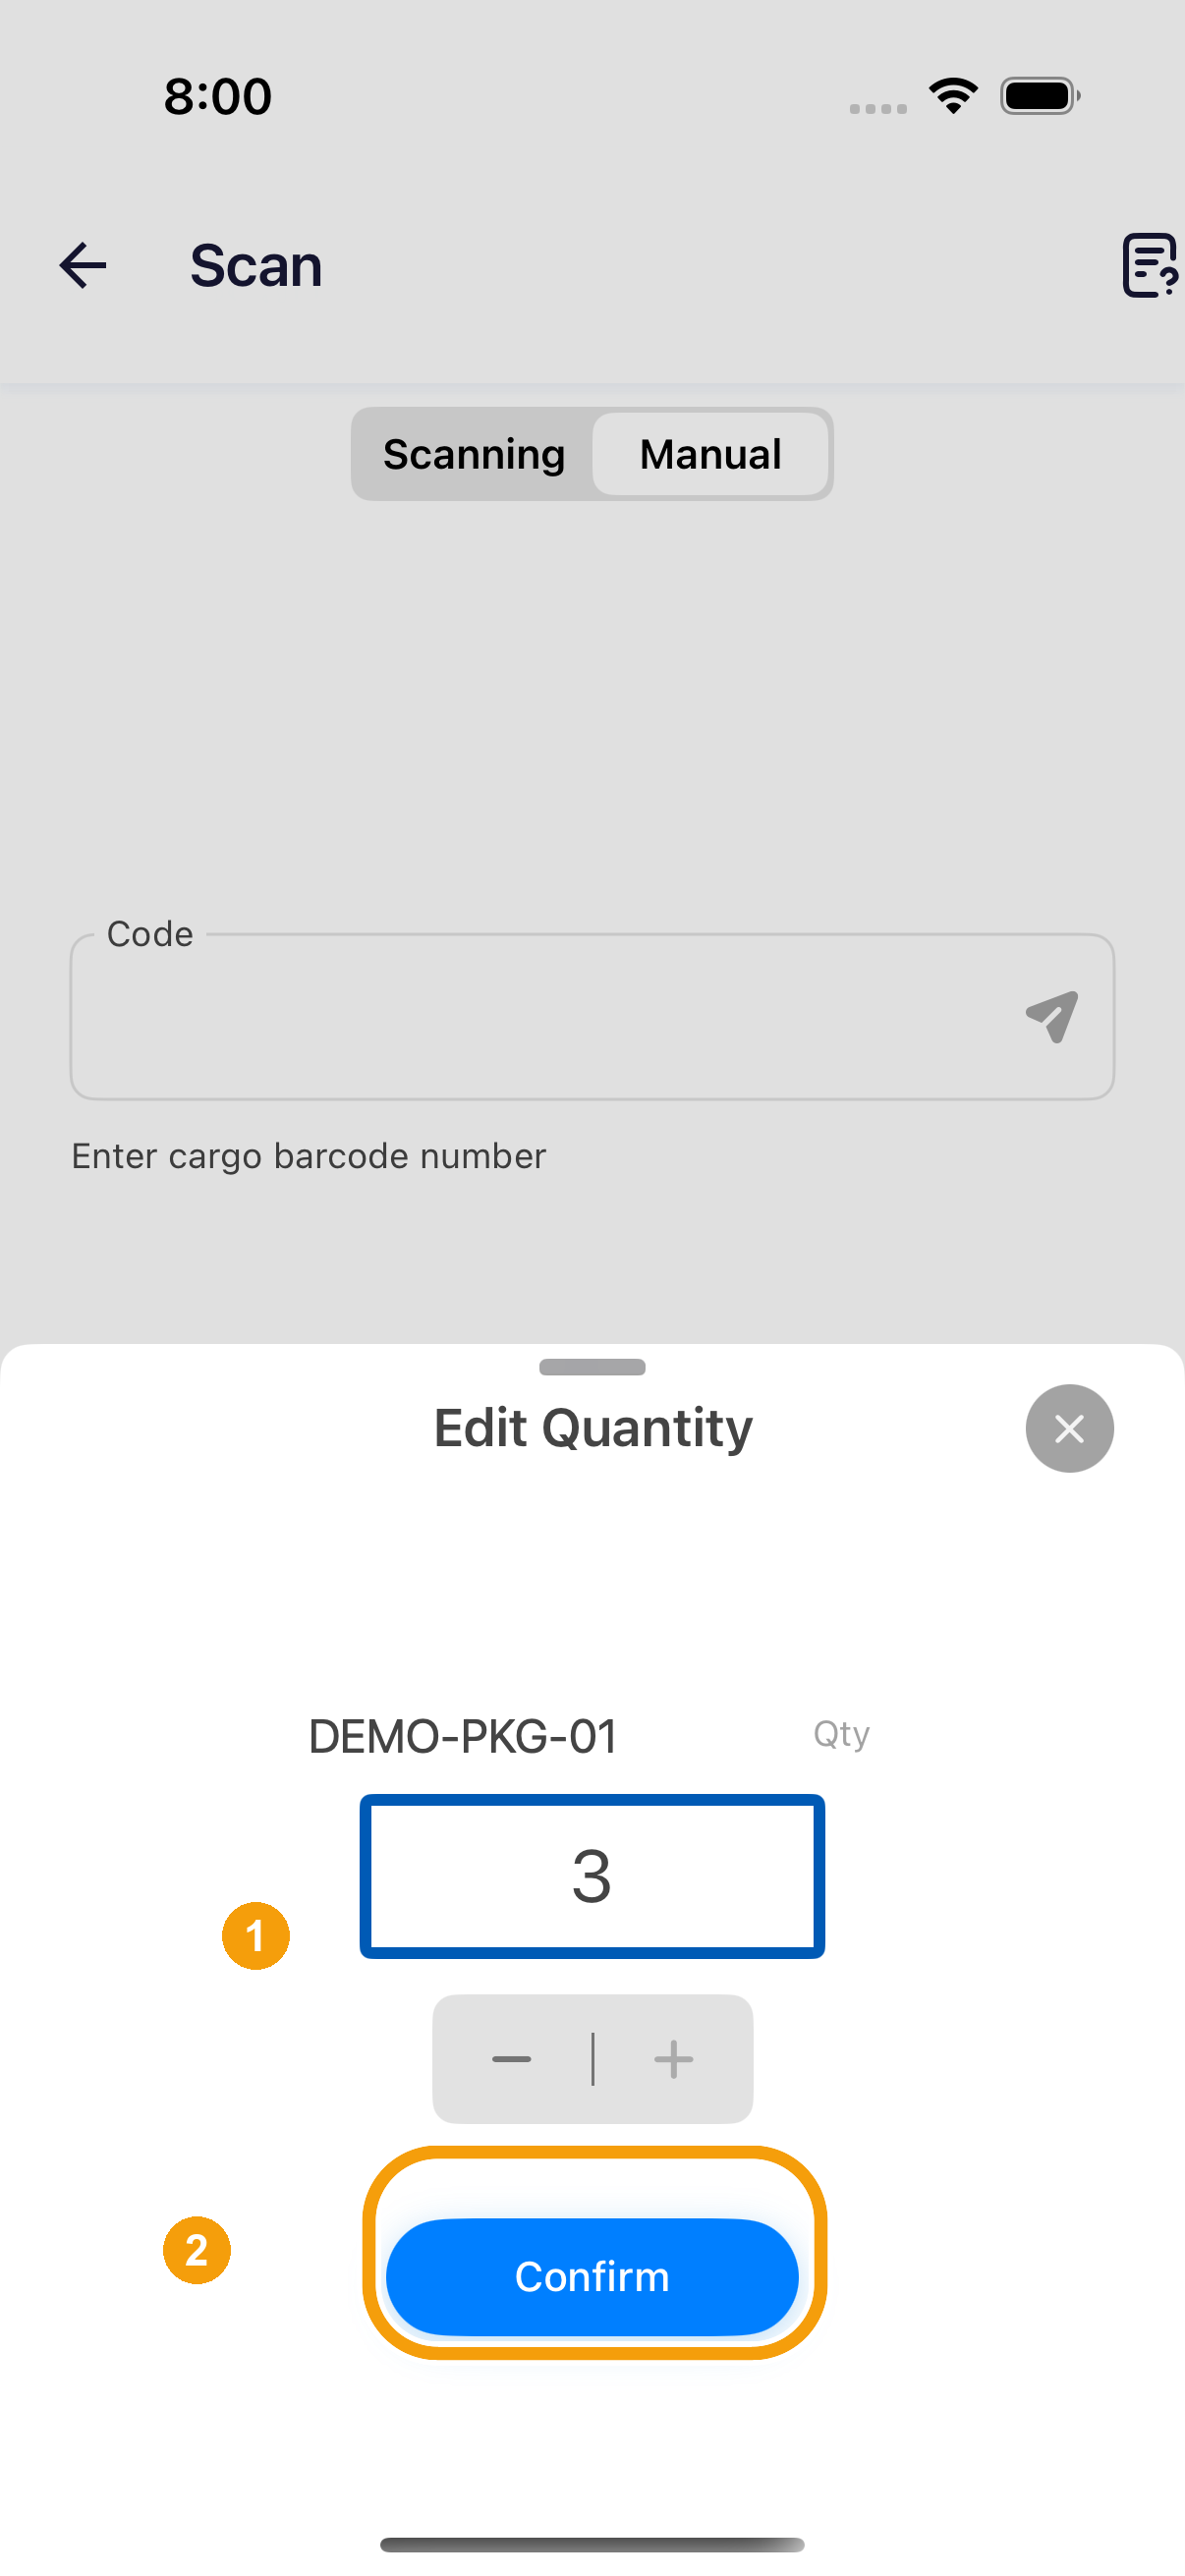
Confirm package quantity
- When the quantity dialog appears, use the plus and minus buttons to set the confirmed quantity.
- Tap Confirm to record the count. Continue scanning or entering until all required packages at this stop are handled.
The animal icon on an iPhone package row opens a size comparison reference (it does not edit quantity). If you need to correct quantities: an eligible row can open quantity adjustment after at least one scan while work remains; once accounted for or reported as an exception, adjustment moves to Edit Quantity in the three-dot menu.
Missing Items list
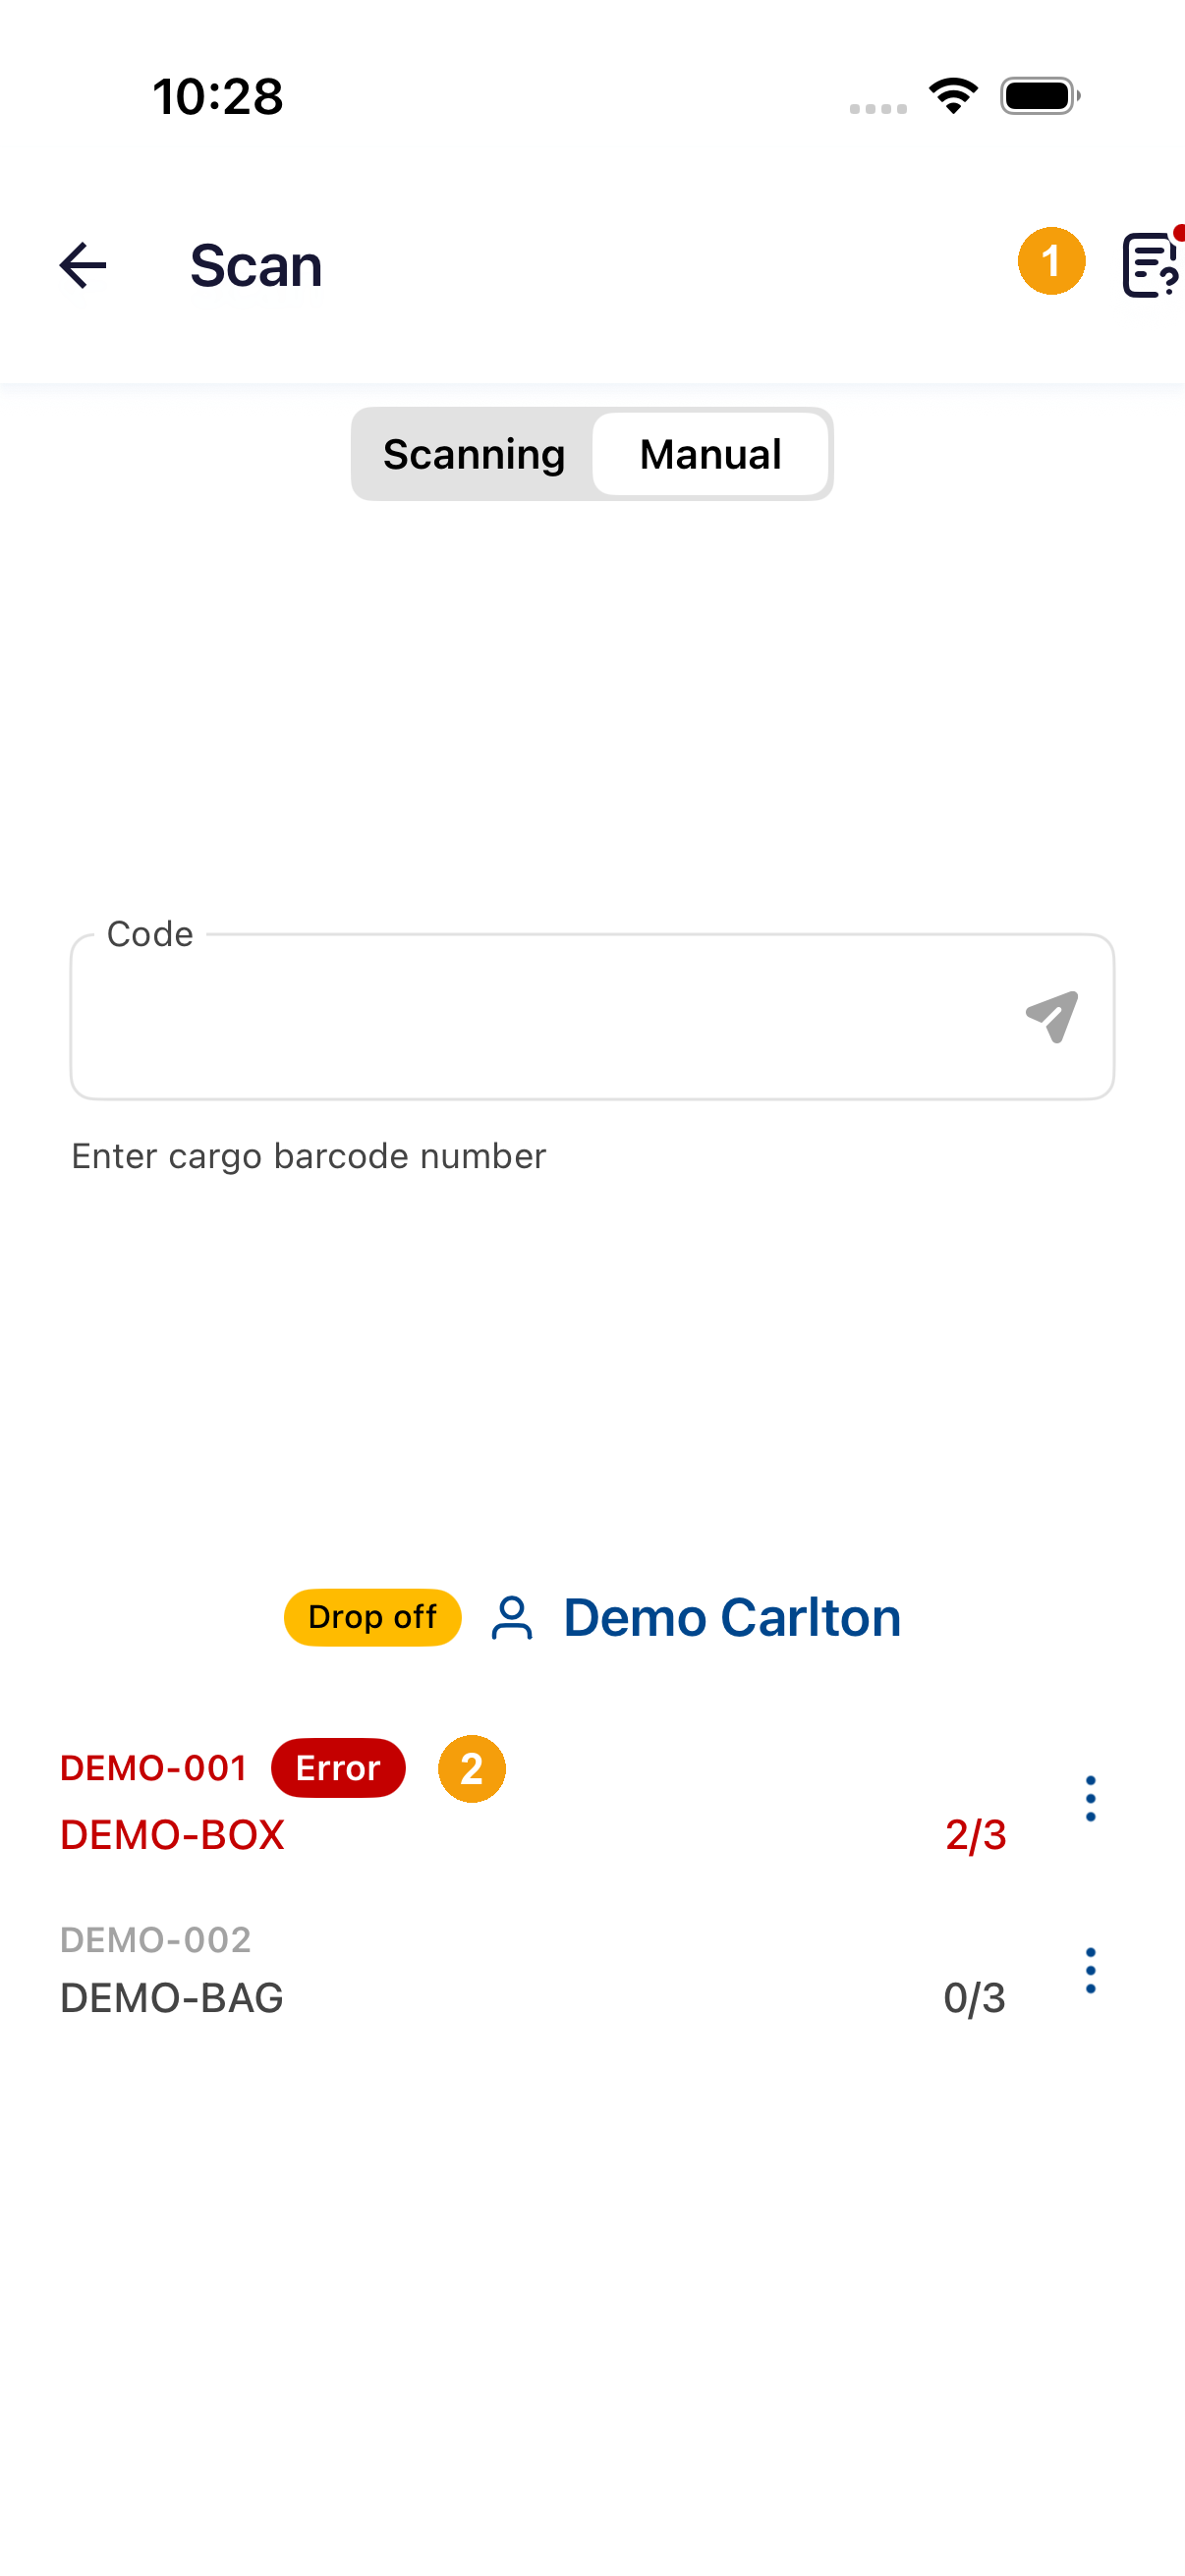
Open the top-right list icon on Scan to view Missing Items.
Open Missing Items entry
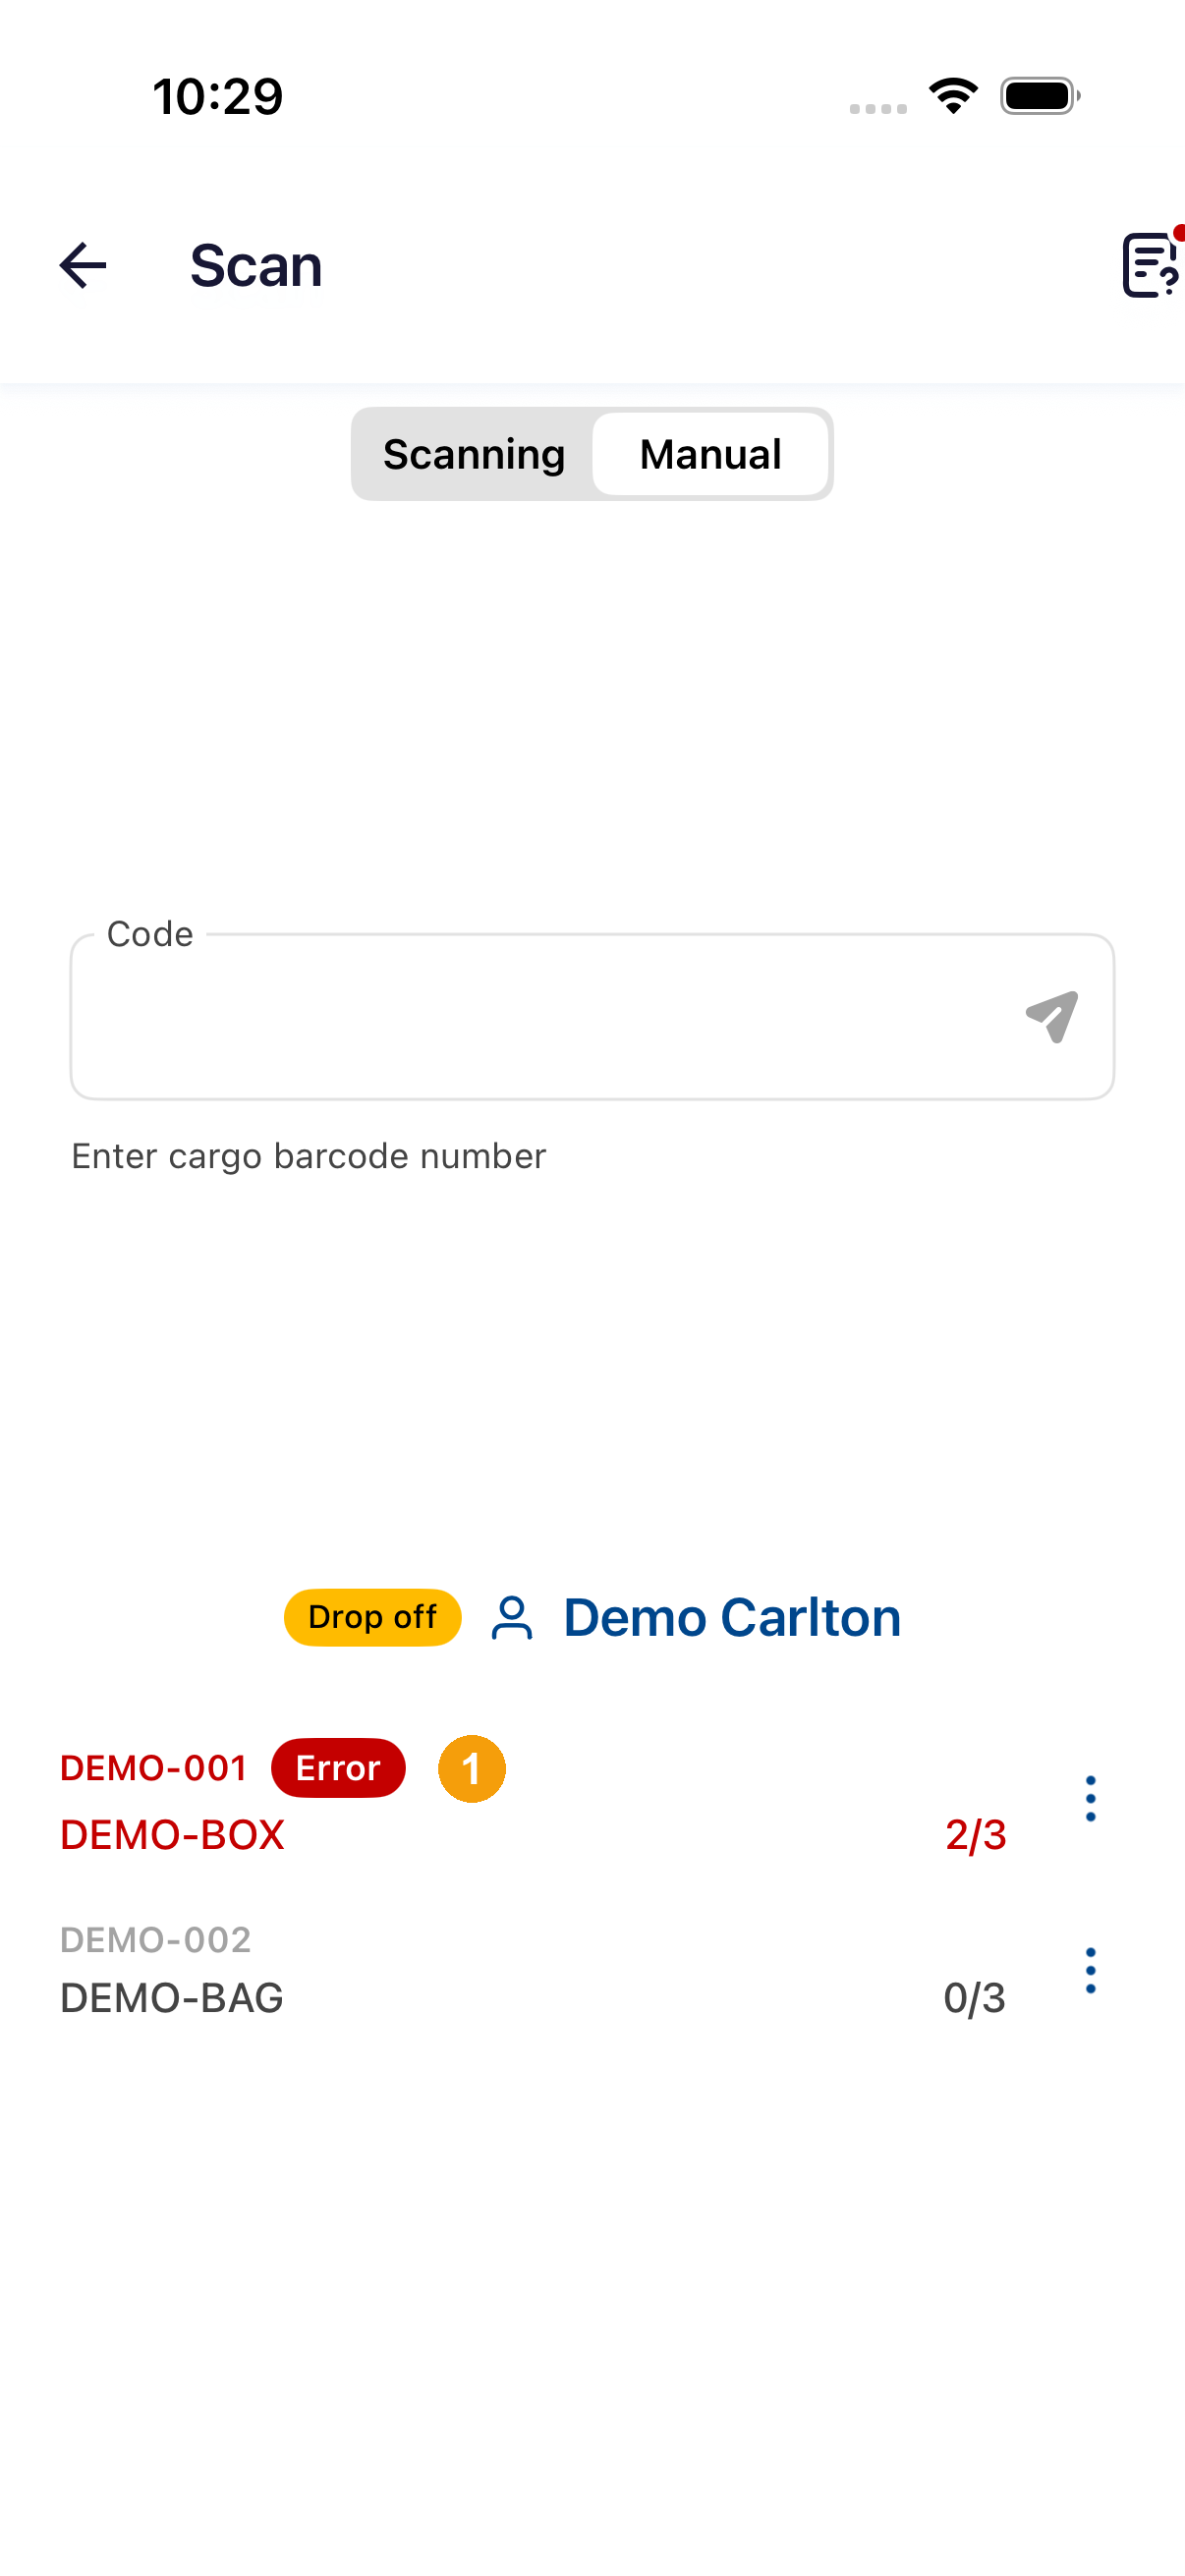
- Tap the list icon at the top right of the scan screen (a red dot appears when items need attention).
- Check orders displaying the Error label (such as DEMO-001) in the package list to verify current progress.
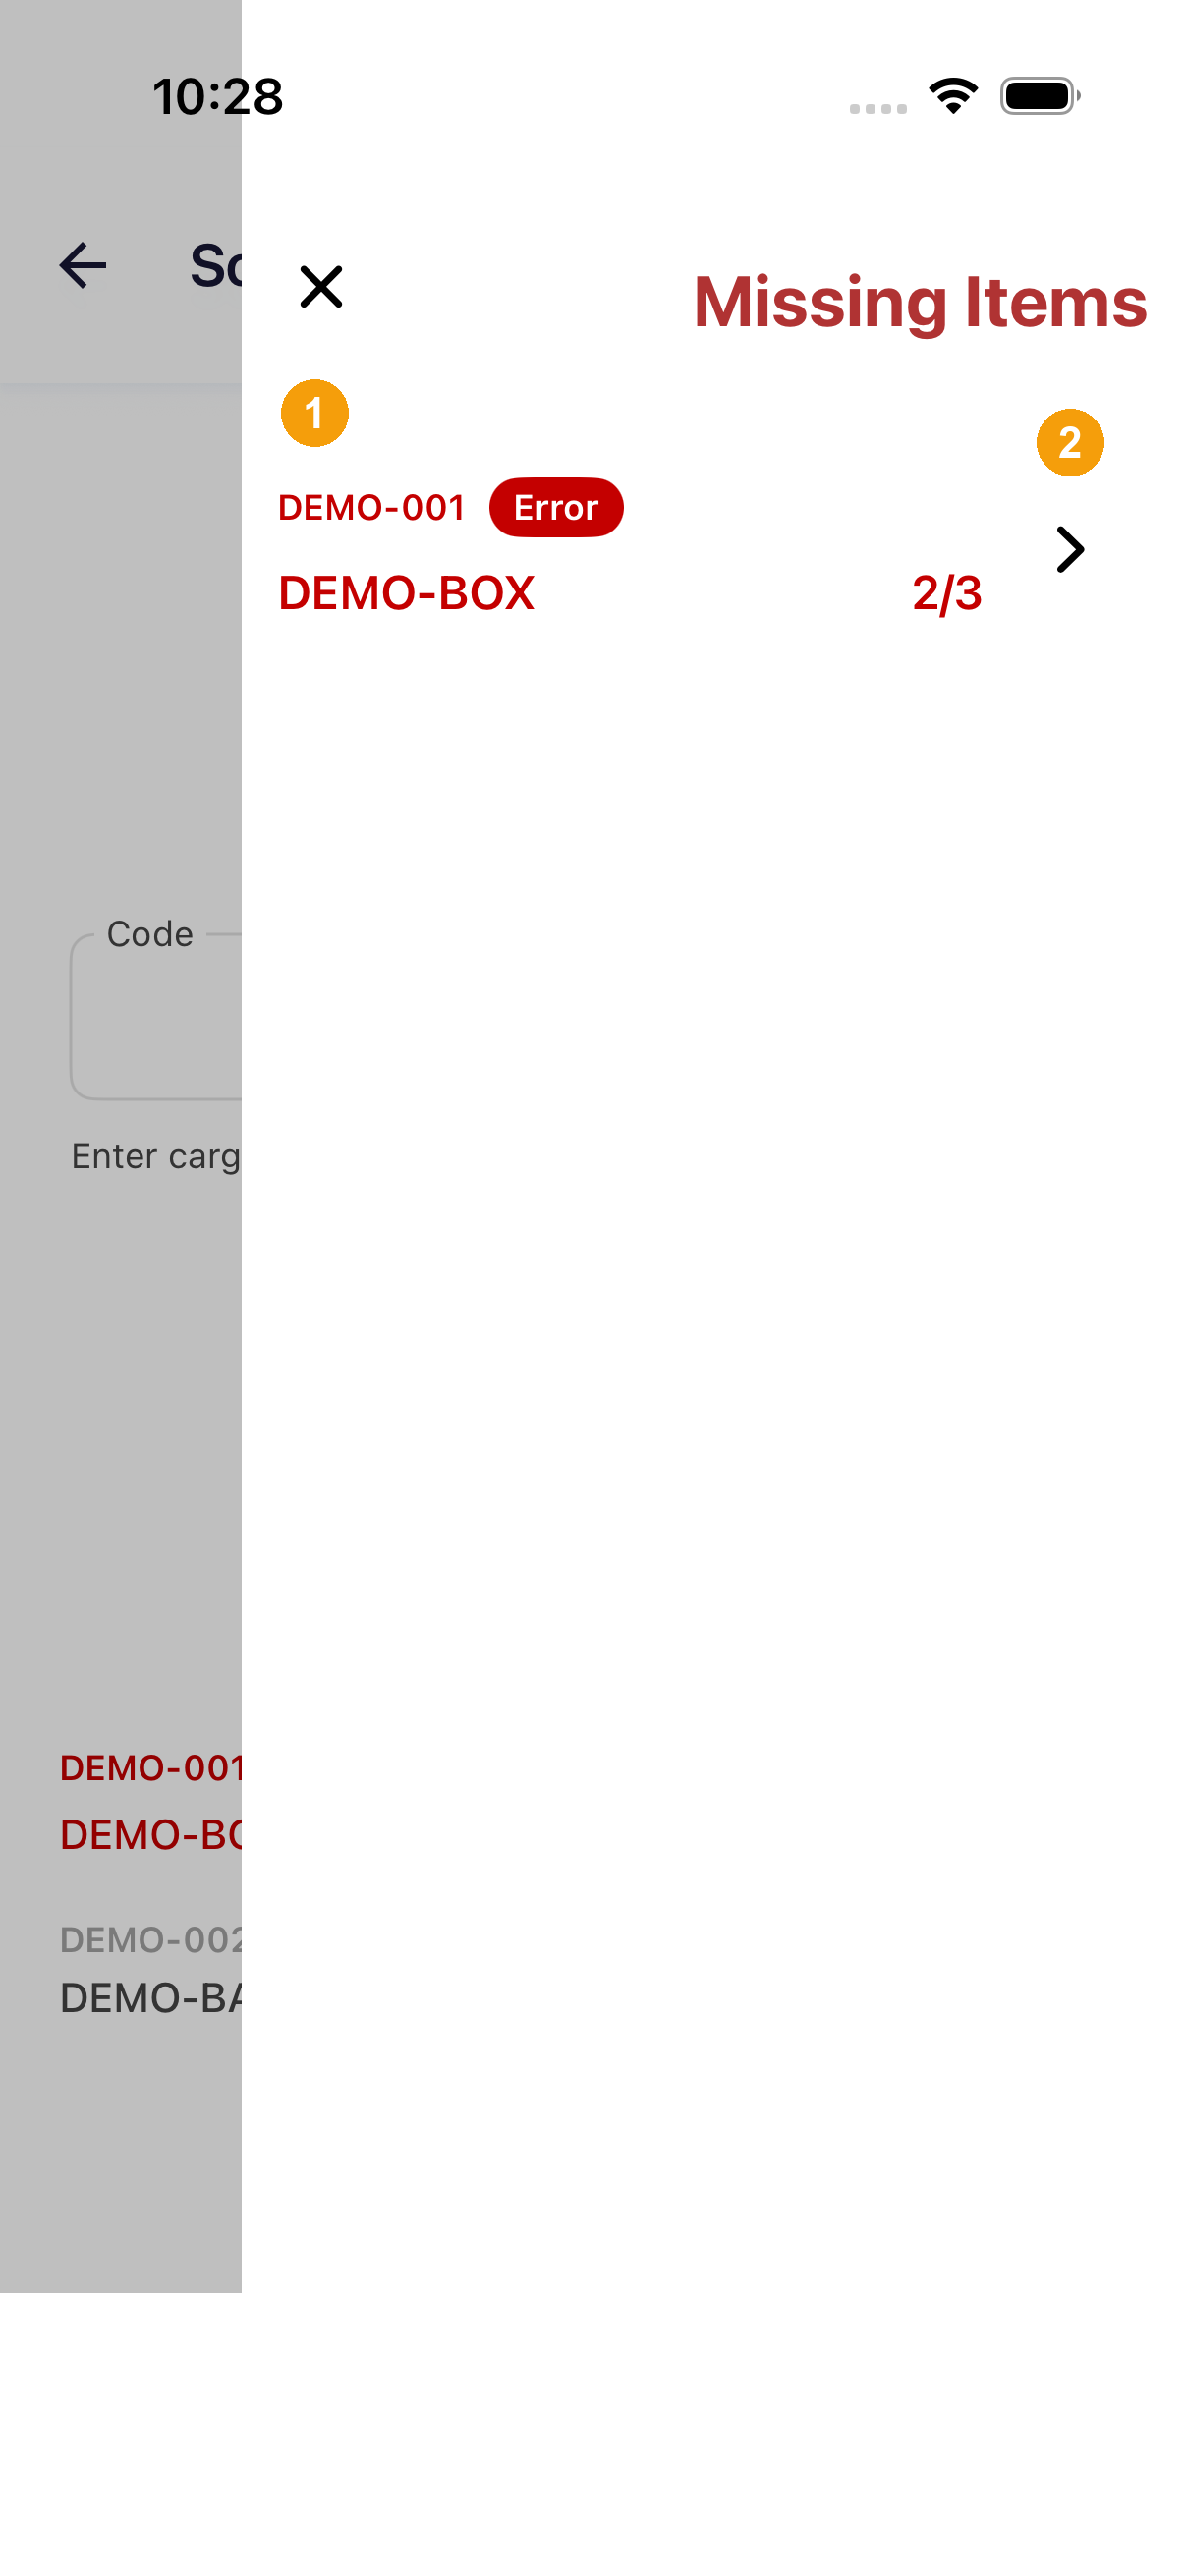
Review error items
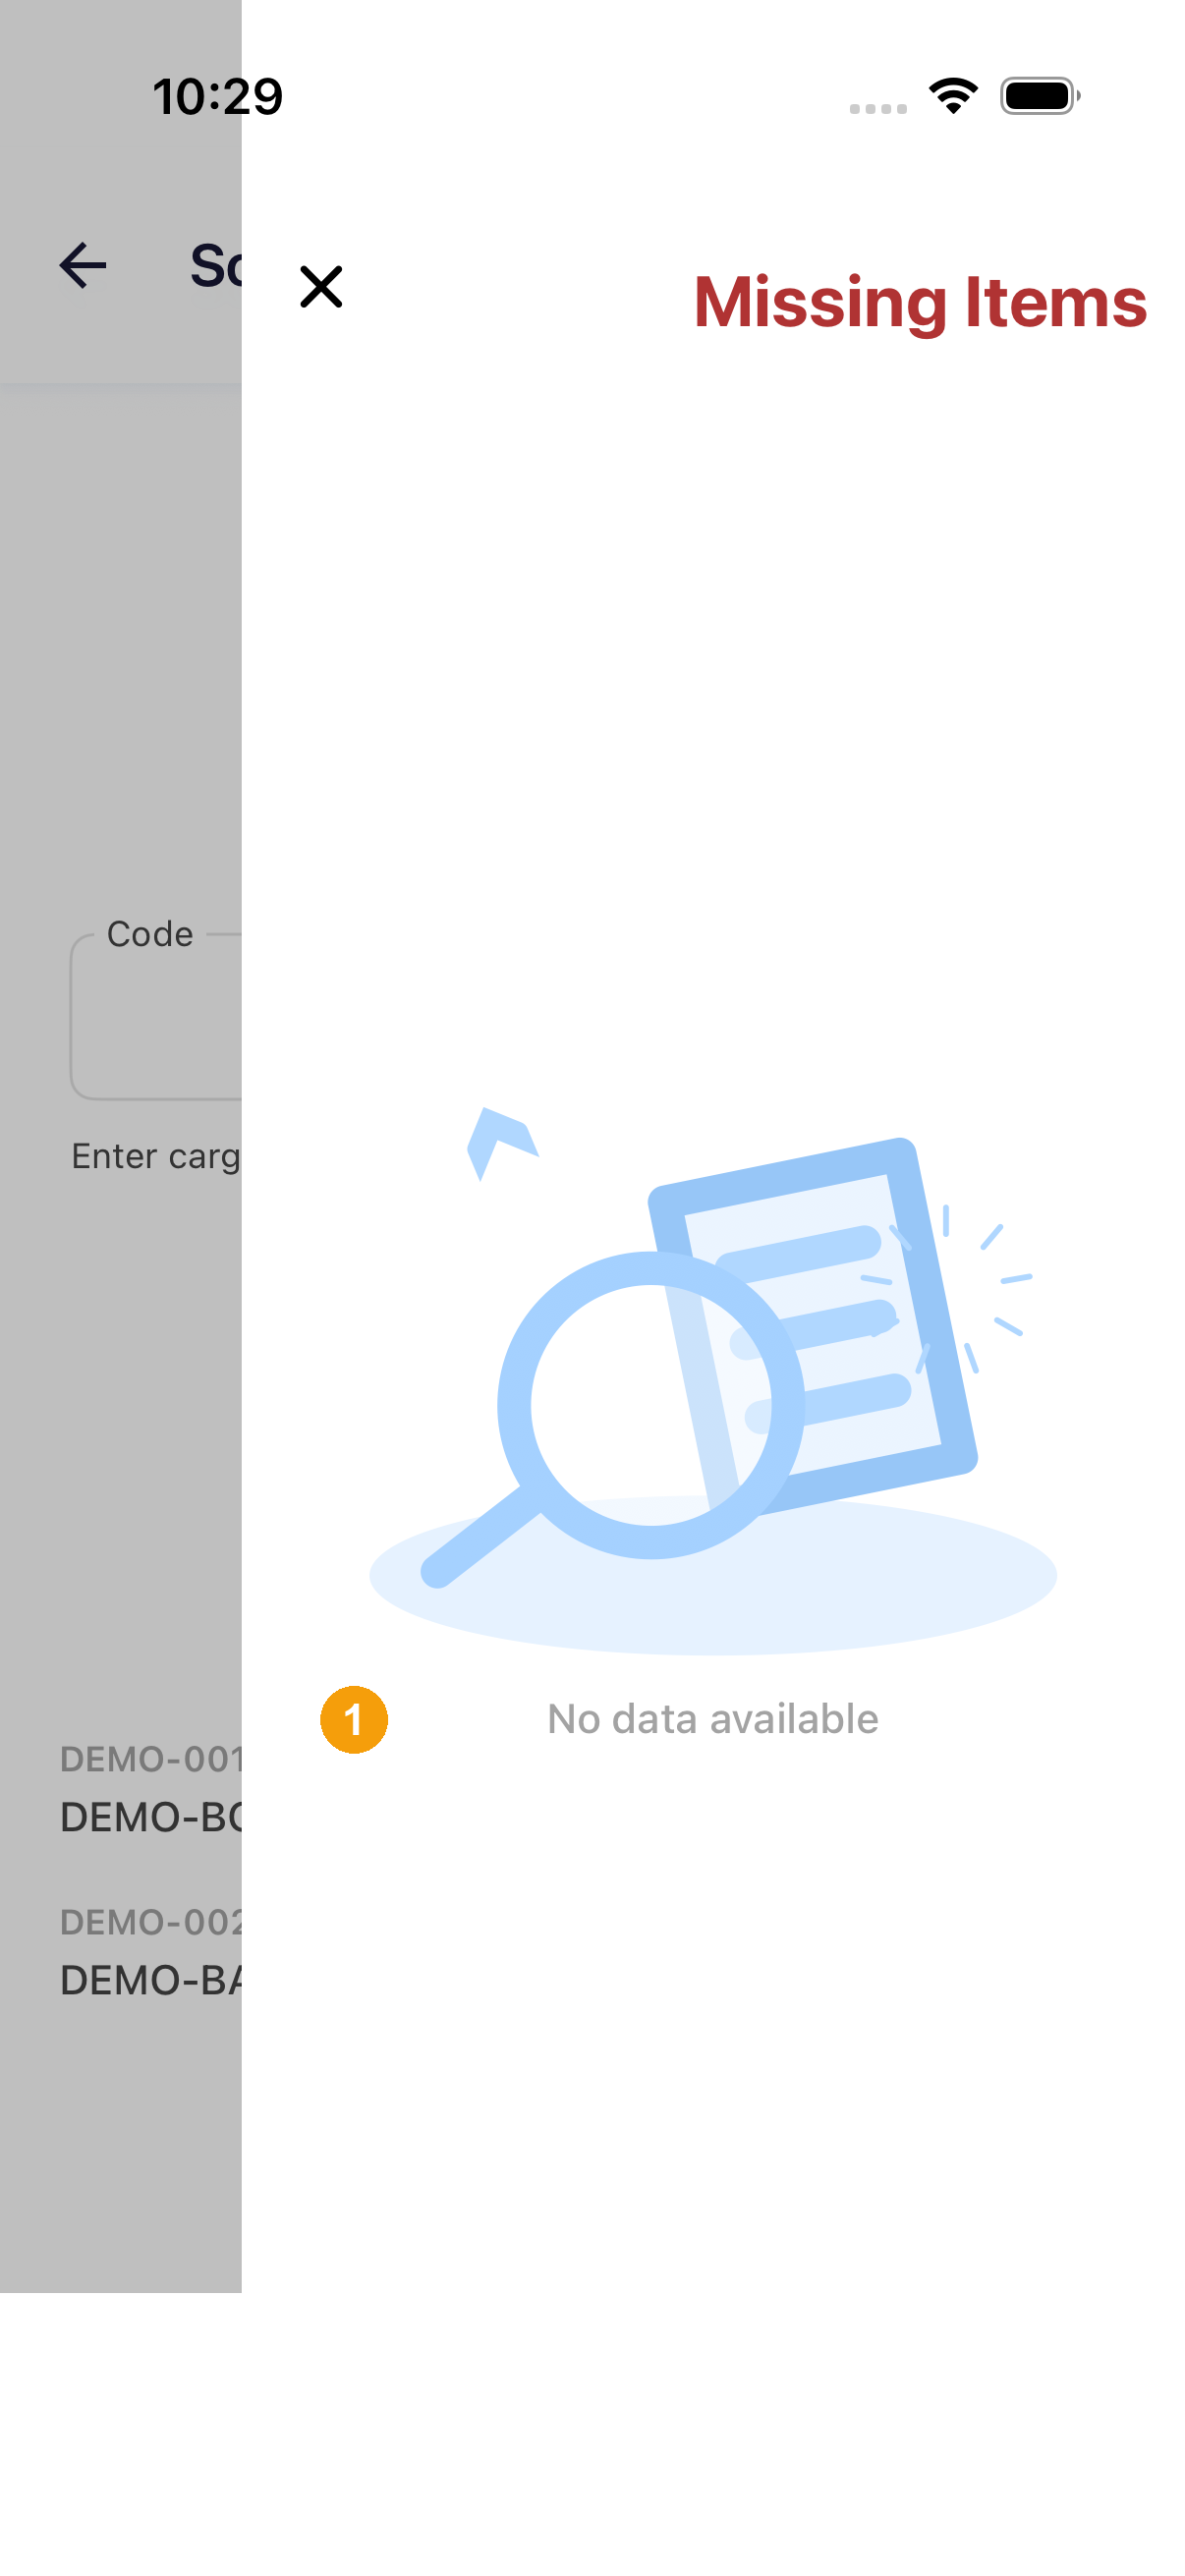
- In the sliding Missing Items drawer, review order IDs, product codes, quantities, and the Error label.
- Tap the right arrow
>to close the drawer and navigate to that order group for rescanning, correcting quantities, or reporting exceptions.
Empty state with no errors
- When the drawer displays No data available, there are no unhandled Error items; close the drawer and continue routine delivery.
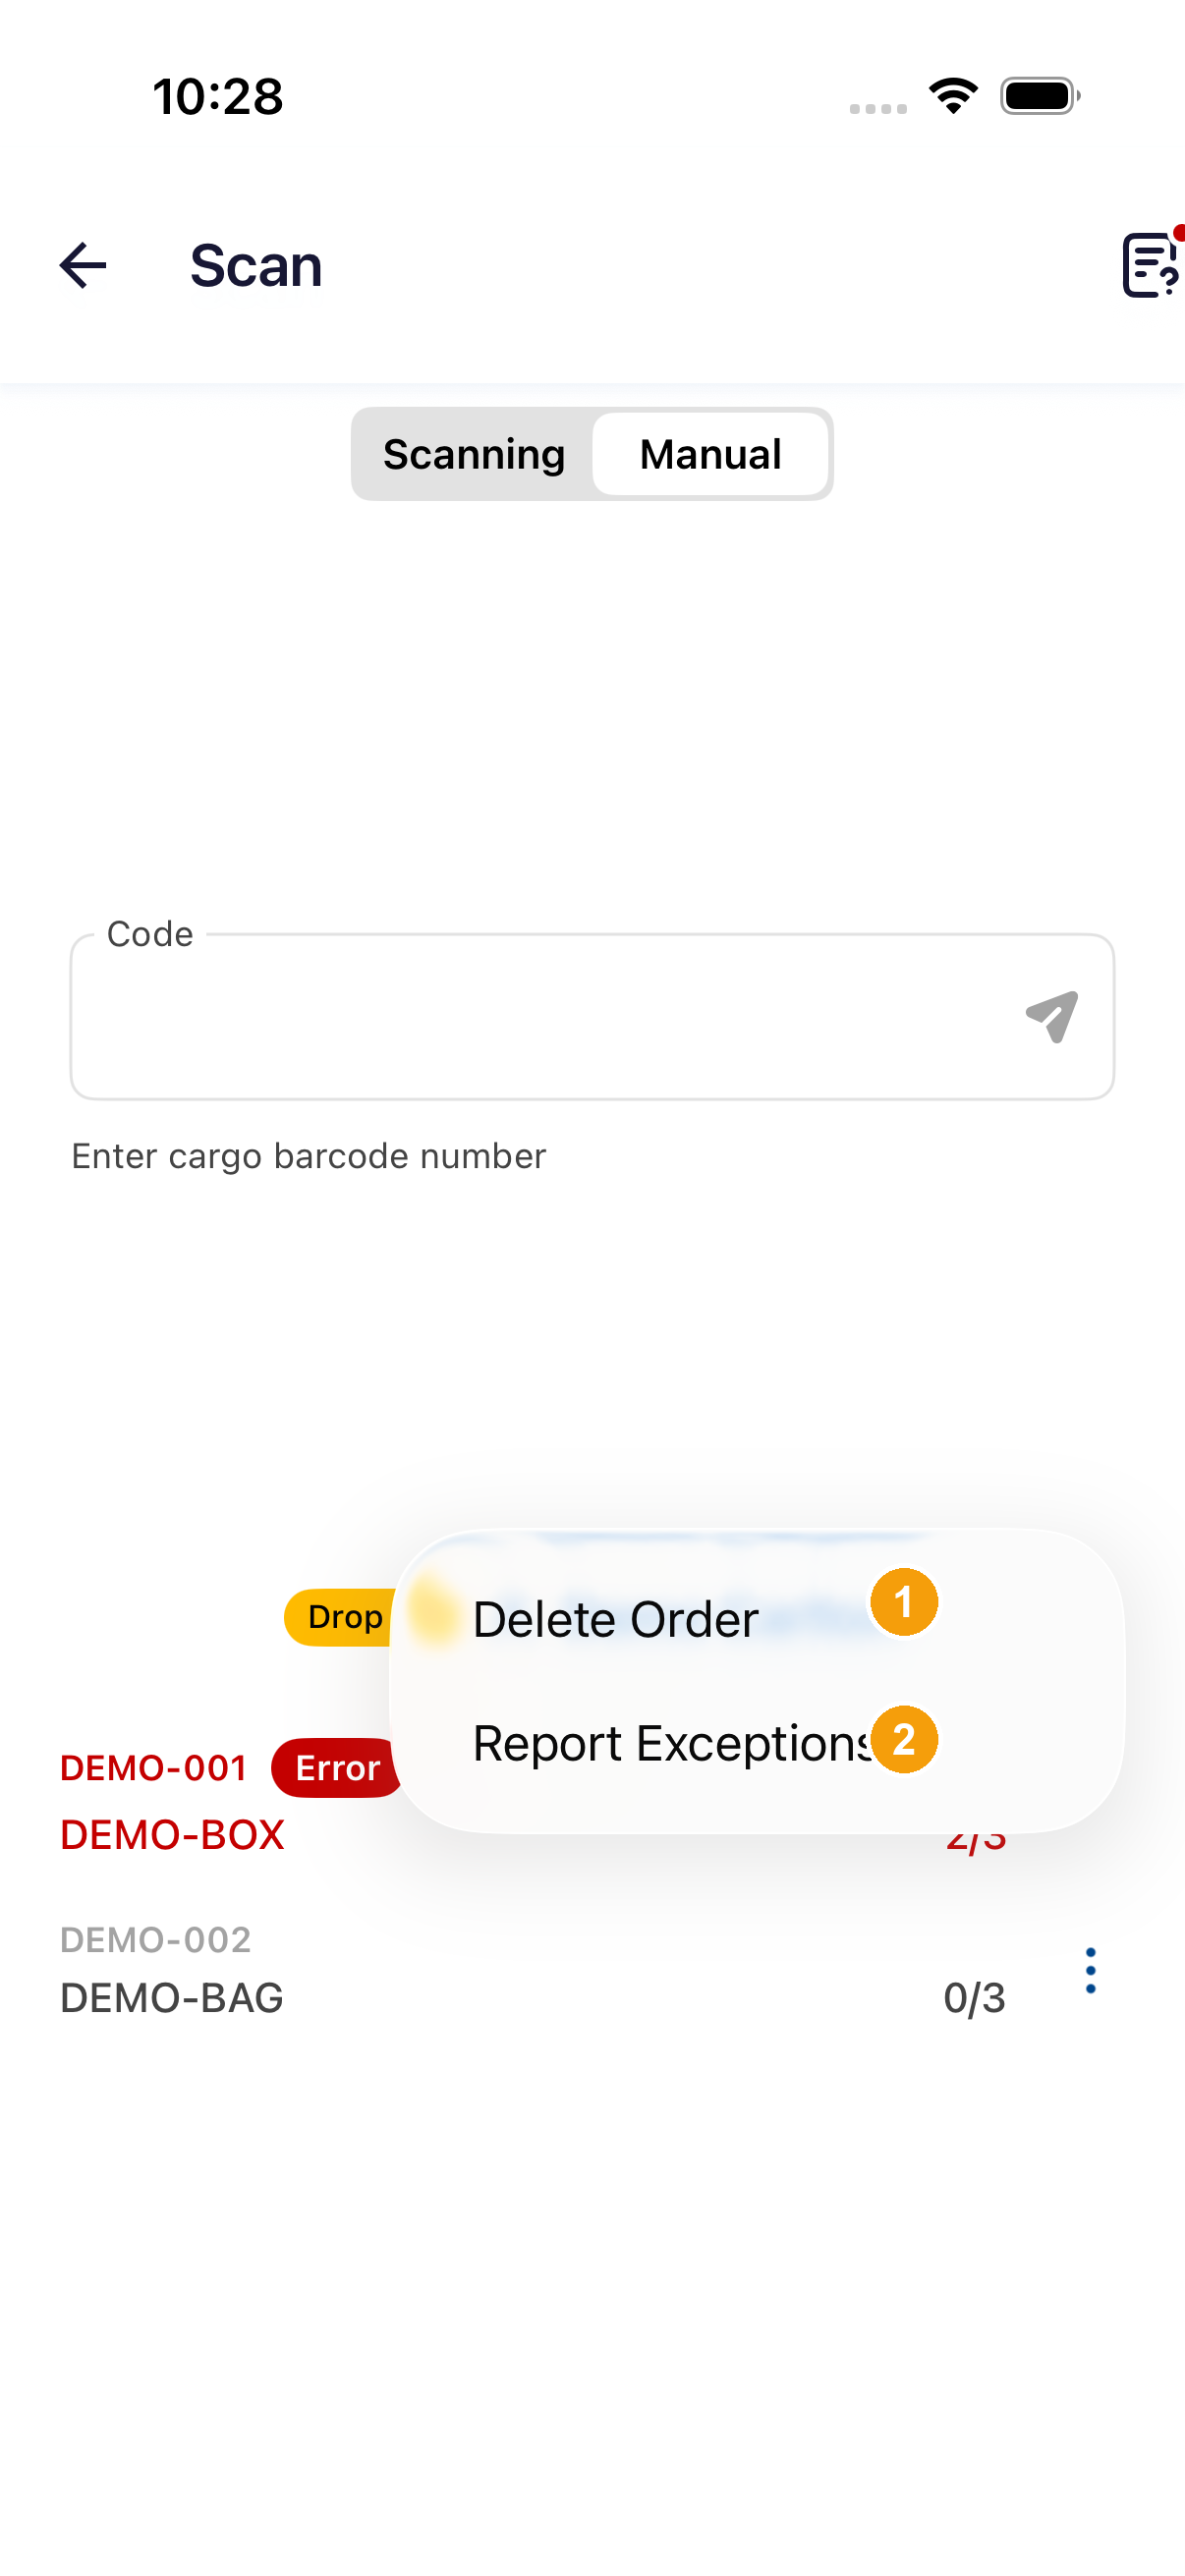
Delete Order
Open the package-row three-dot menu on Scan to find Delete Order. Confirm with dispatch before cancelling an order. For individual missing, damaged or incorrect packages, use Report Exceptions. Delete Order cancels the entire order, not just one package; warehouse unloading orders do not provide this option. To remove an order from route details before departure, see Remove an order from a route.
Open delete menu
- Check the order ID, open the three-dot menu on the package row, and tap Delete Order.
- If only an individual package is damaged or missing, tap Report Exceptions to follow the exception workflow.
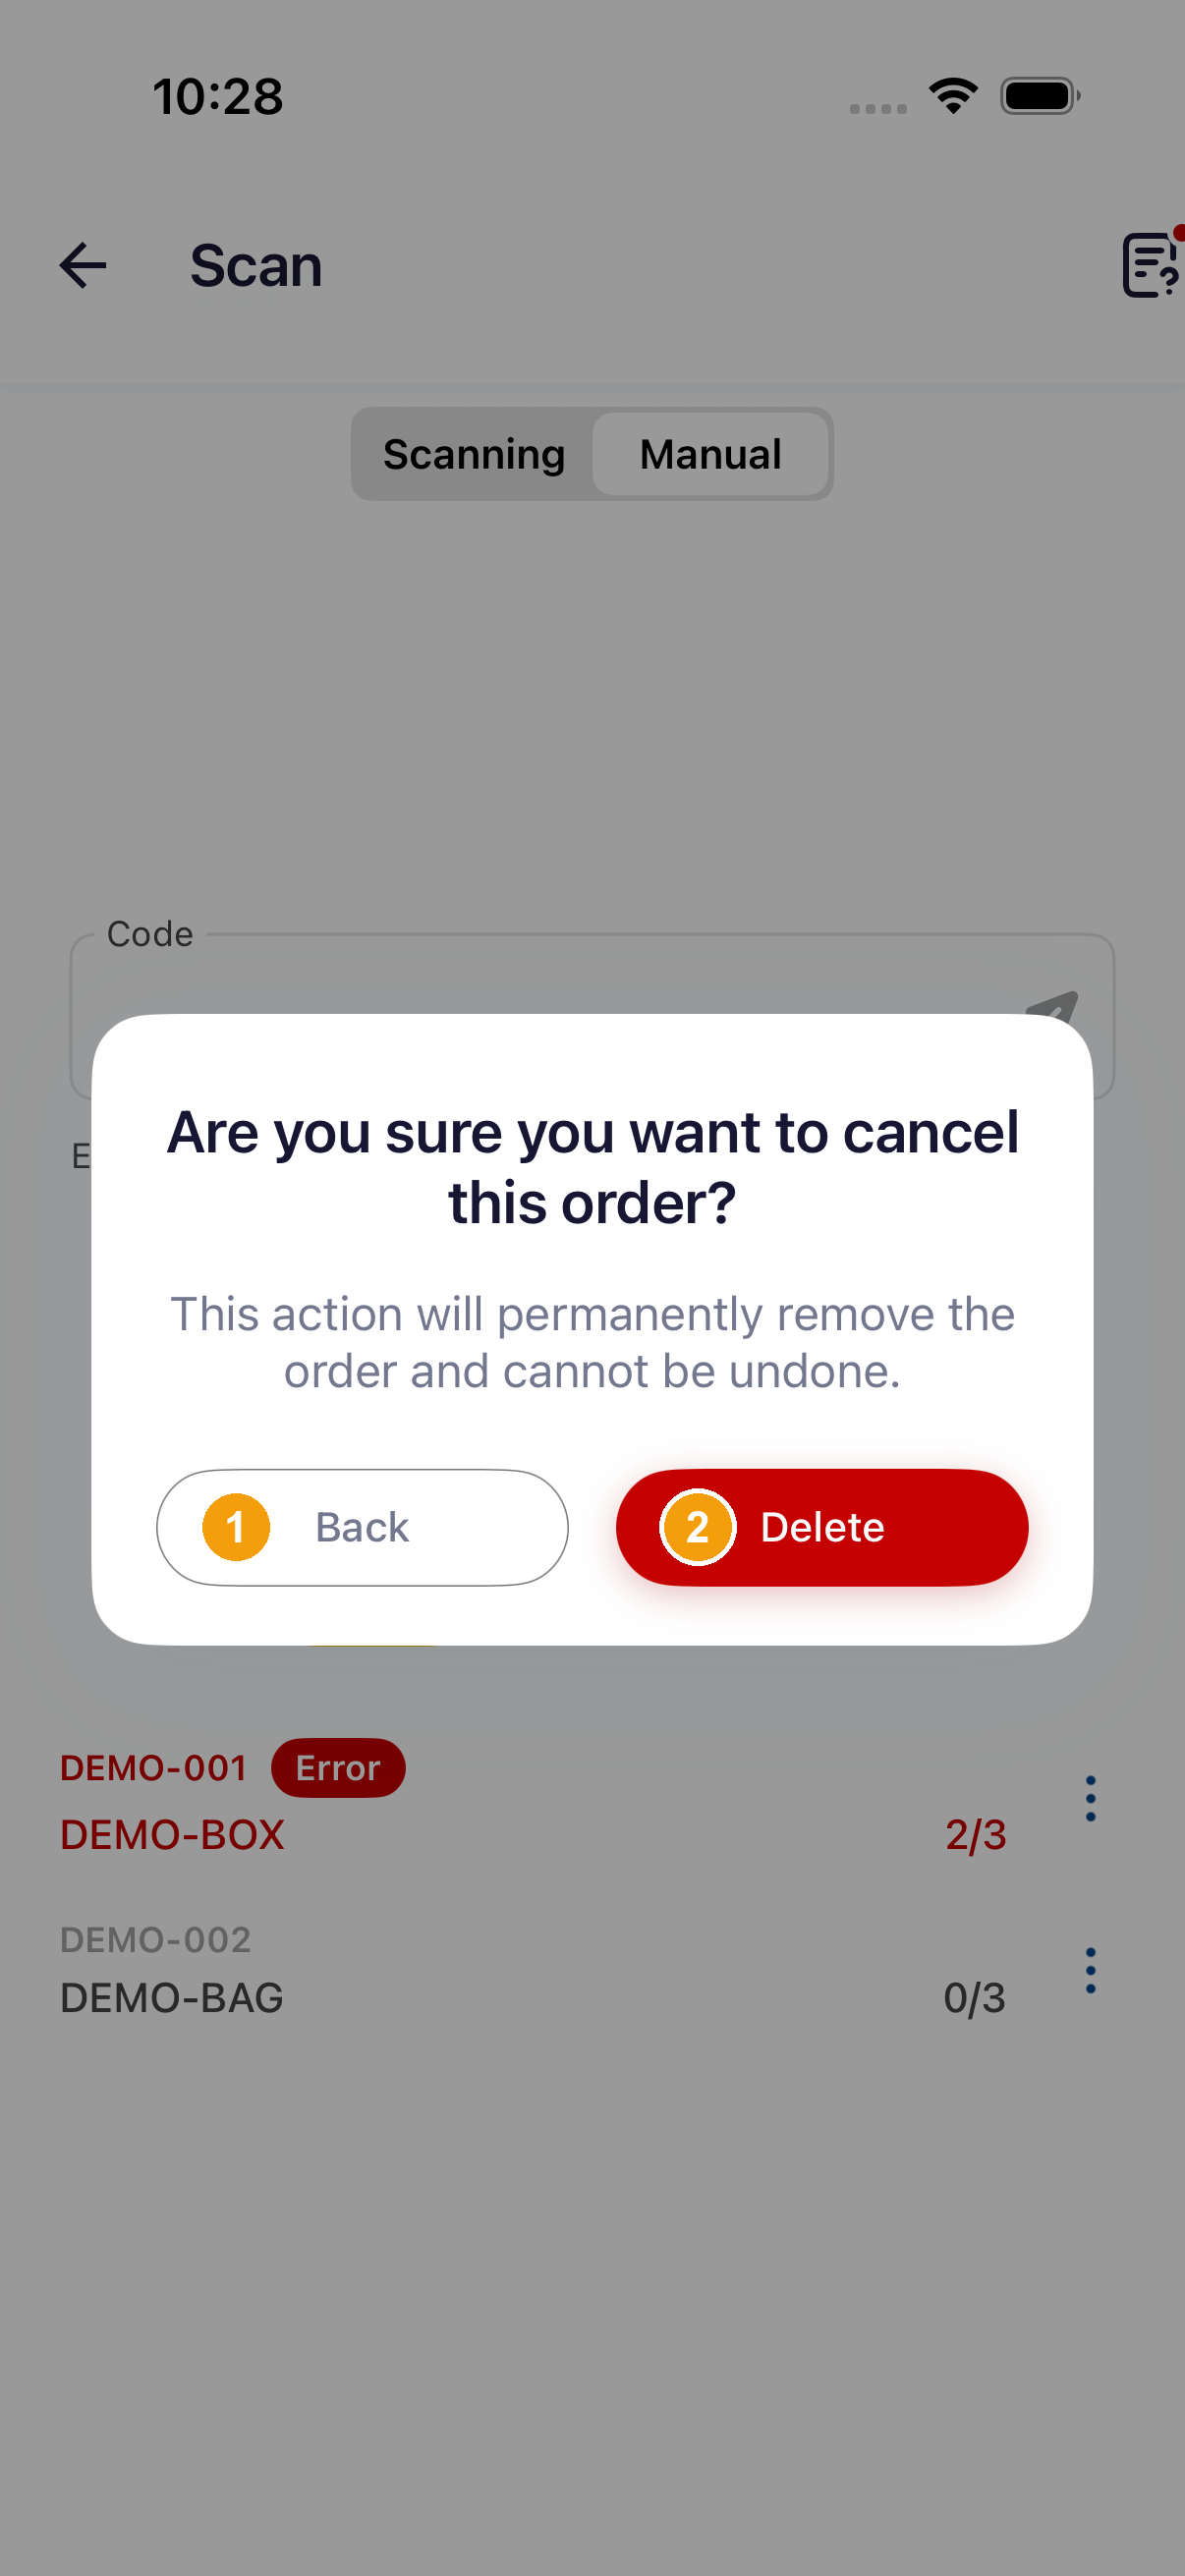
Confirm order deletion
- Tap Back to keep the order and return to the scan screen.
- If the order is definitely cancelled, tap the red Delete button to confirm.
Cancelled order status
- Return to the scan list. On this picture the cancelled row is faded grey. It does not show a strike line.
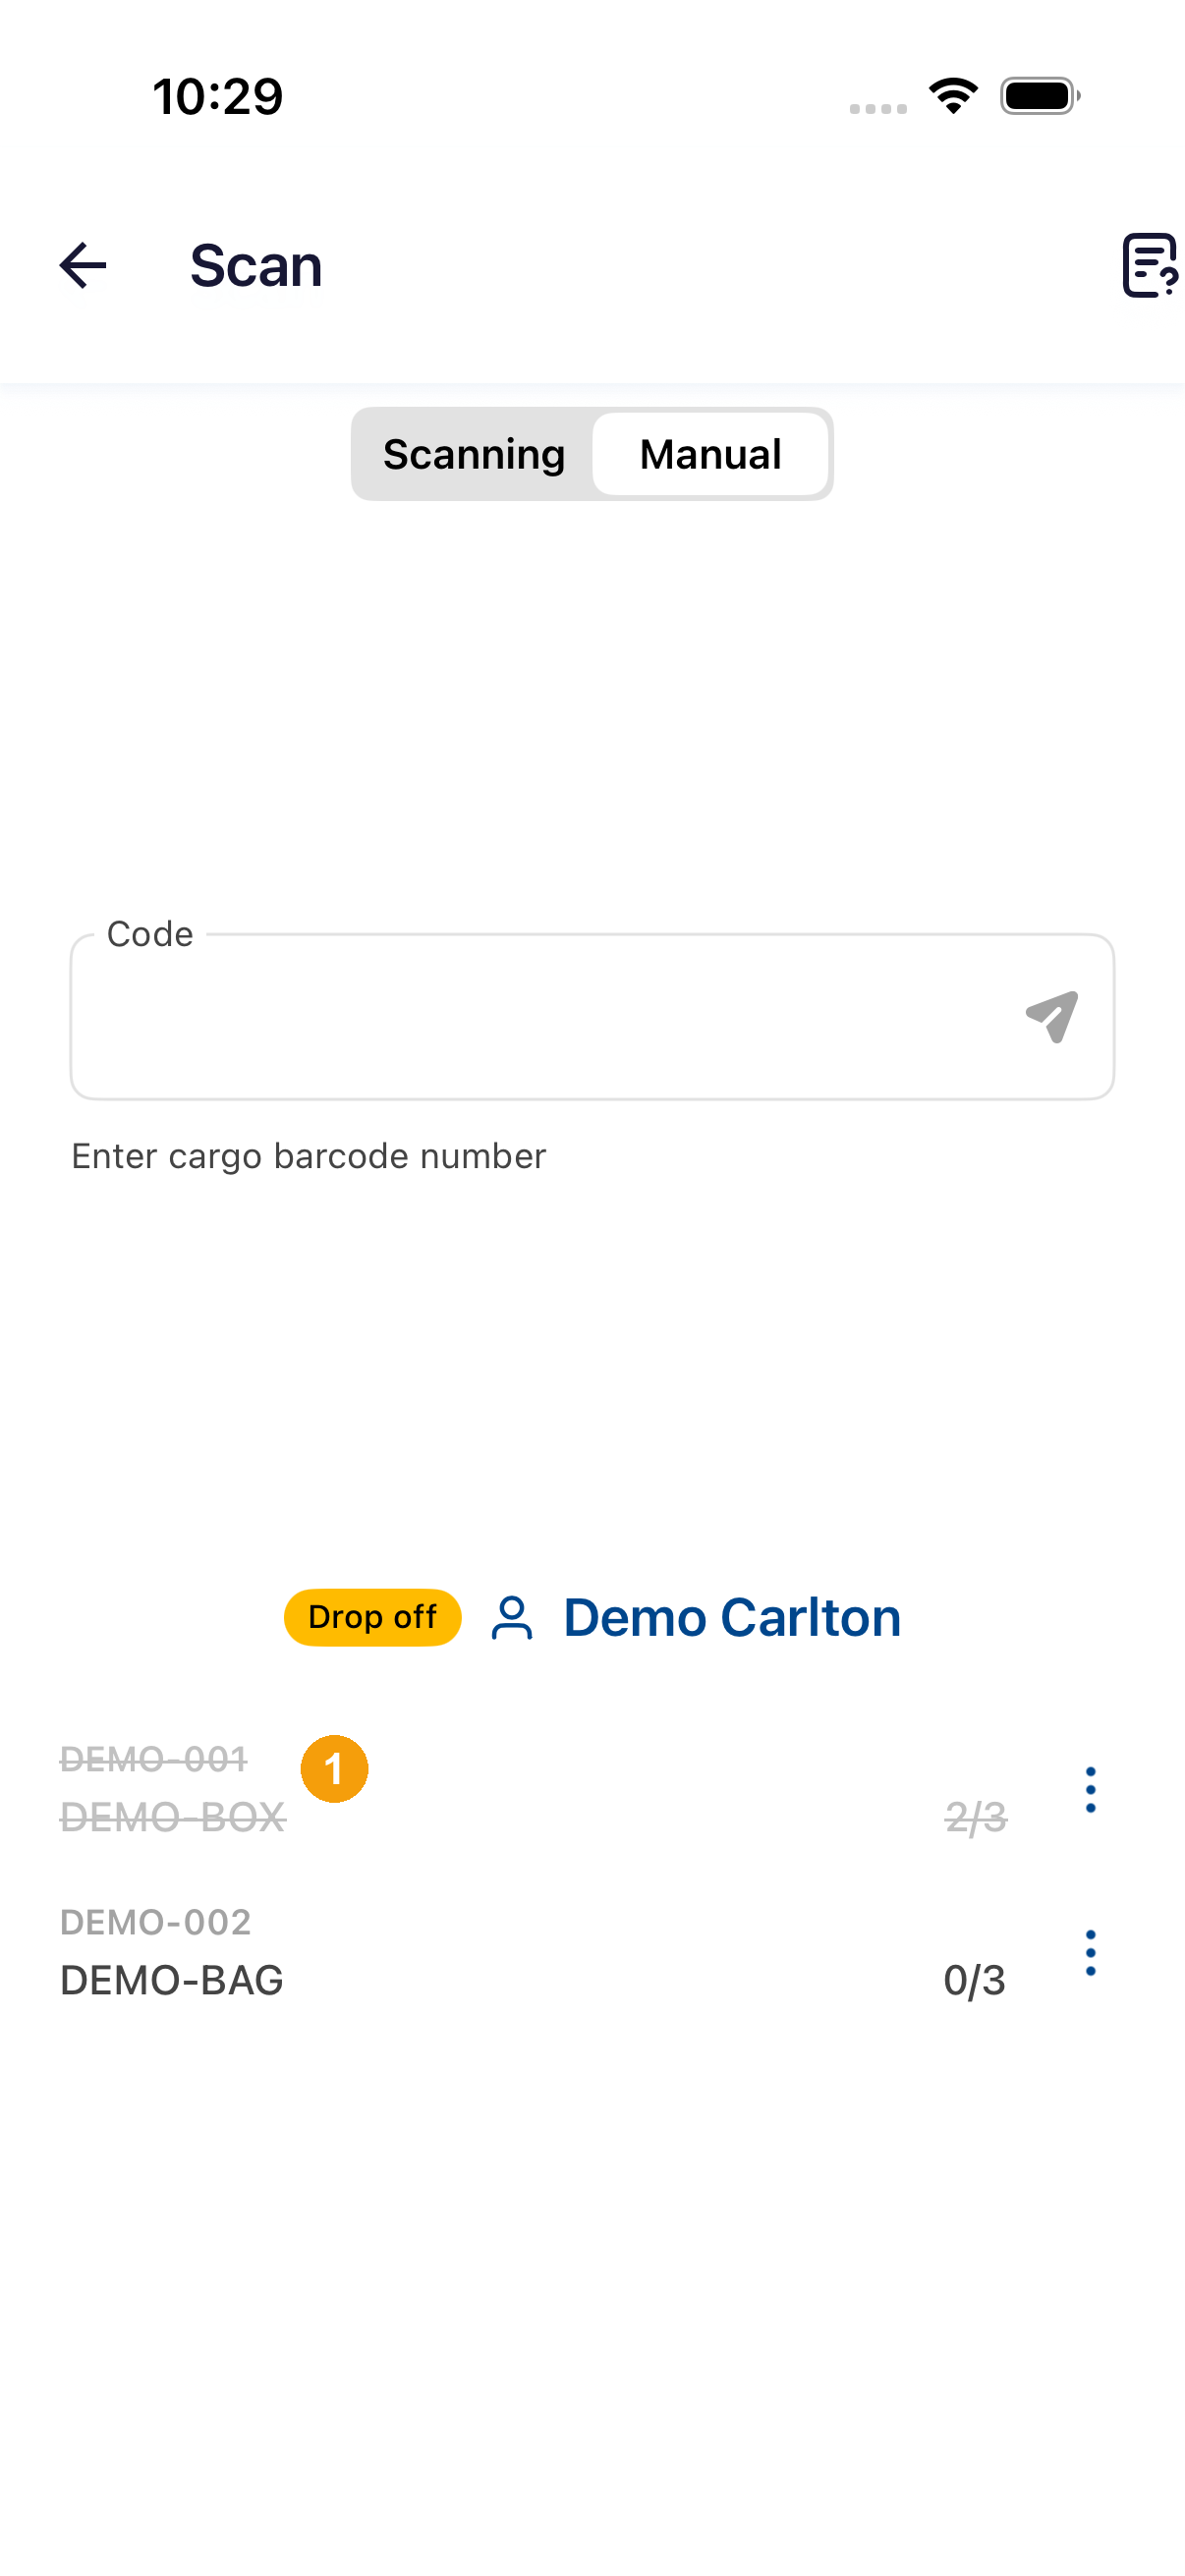
Restore order menu
- To restore a cancelled order, open its three-dot menu again and tap Undo to restore directly.
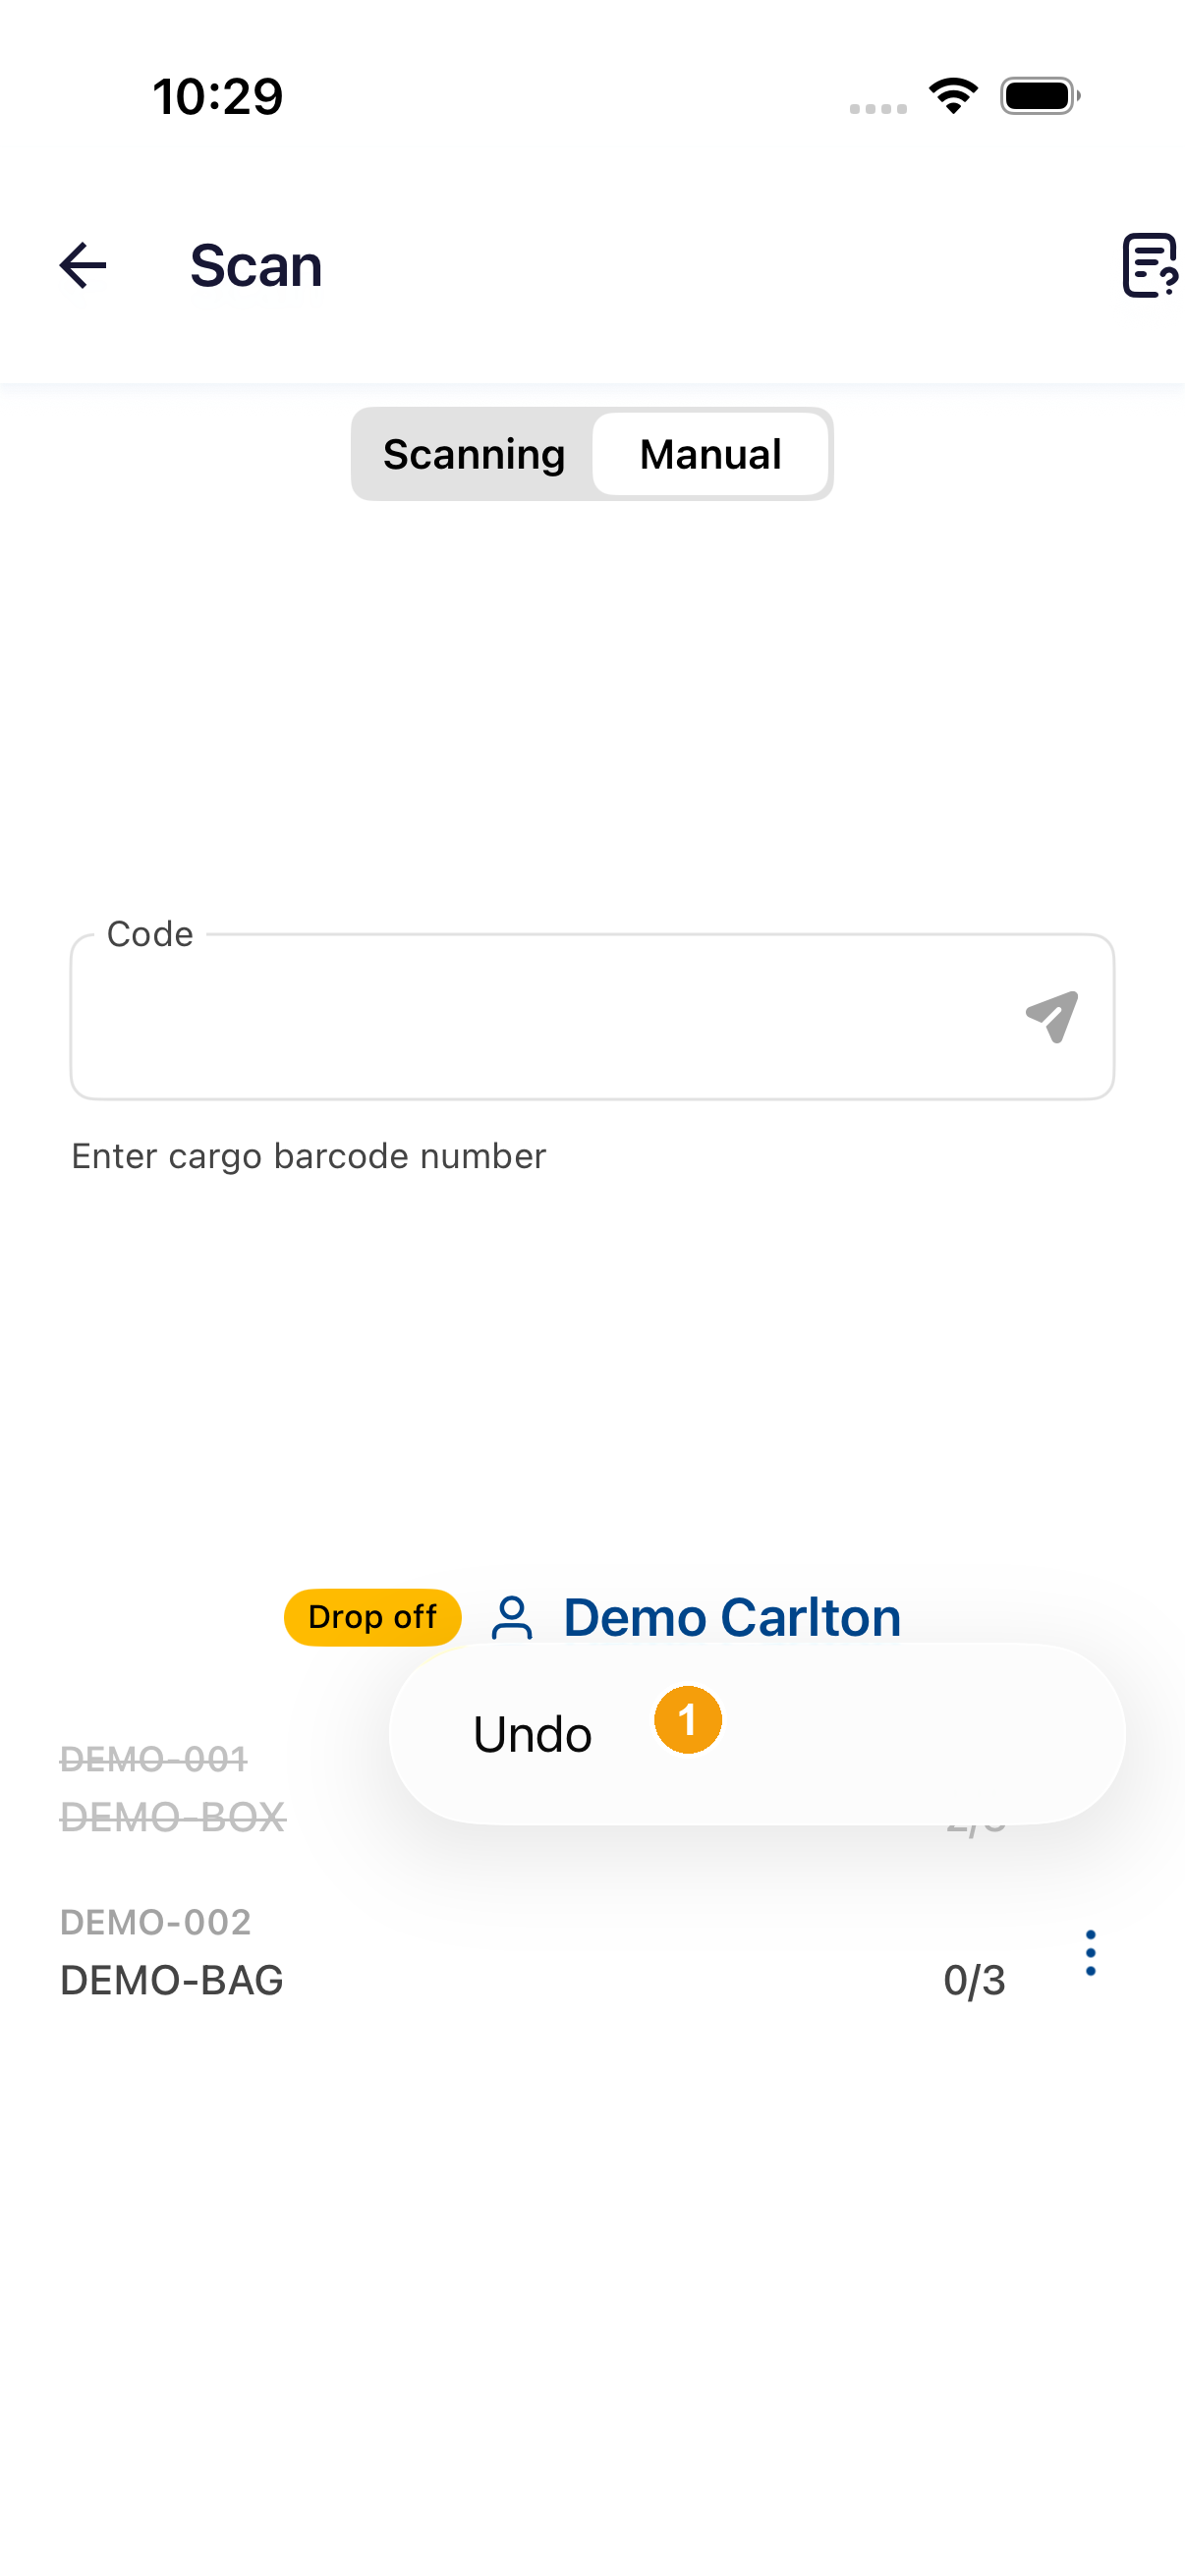
Order restoration check
- Confirm that the strikethrough has disappeared and the order returns to normal active status before completing remaining tasks.
After finishing package scans, follow the bottom button instructions based on stop type:
| Bottom action | Description and workflow guidance |
|---|---|
| Capture Photo | Photograph cargo and surrounding environment for delivery/collection, review preview, and complete upload. |
| Next | Proceed to the next delivery or collection group, or advance to the next stage. Recheck headings and package list. |
| Dispatch Centre | Warehouse packages processed; continue to warehouse handover evidence. |
| No continuation action | Check unresolved quantities, additional work groups, or required photos. |
A customer stop with both delivery and collection requires both package groups and their required photos before proof of delivery. If all relevant packages have been cancelled or reported as exceptions, the app may offer Next directly.
Every required package is confirmed and the app shows the next task, such as taking a delivery photo or providing proof.