Start a route and navigate
Open your assigned route, check its stops and start guidance. The route-details image below shows Android; the navigation map and failure screens show iPhone with safe demonstration data.
Where to find it: Sendit Go › Home › assigned route › Go! or Continue.
Enable mobile location services and grant the app location permissions beforehand; park safely before operating your phone. If a document or route status prompt blocks starting, resolve the displayed prompt first.
Step 1: Check the route before starting
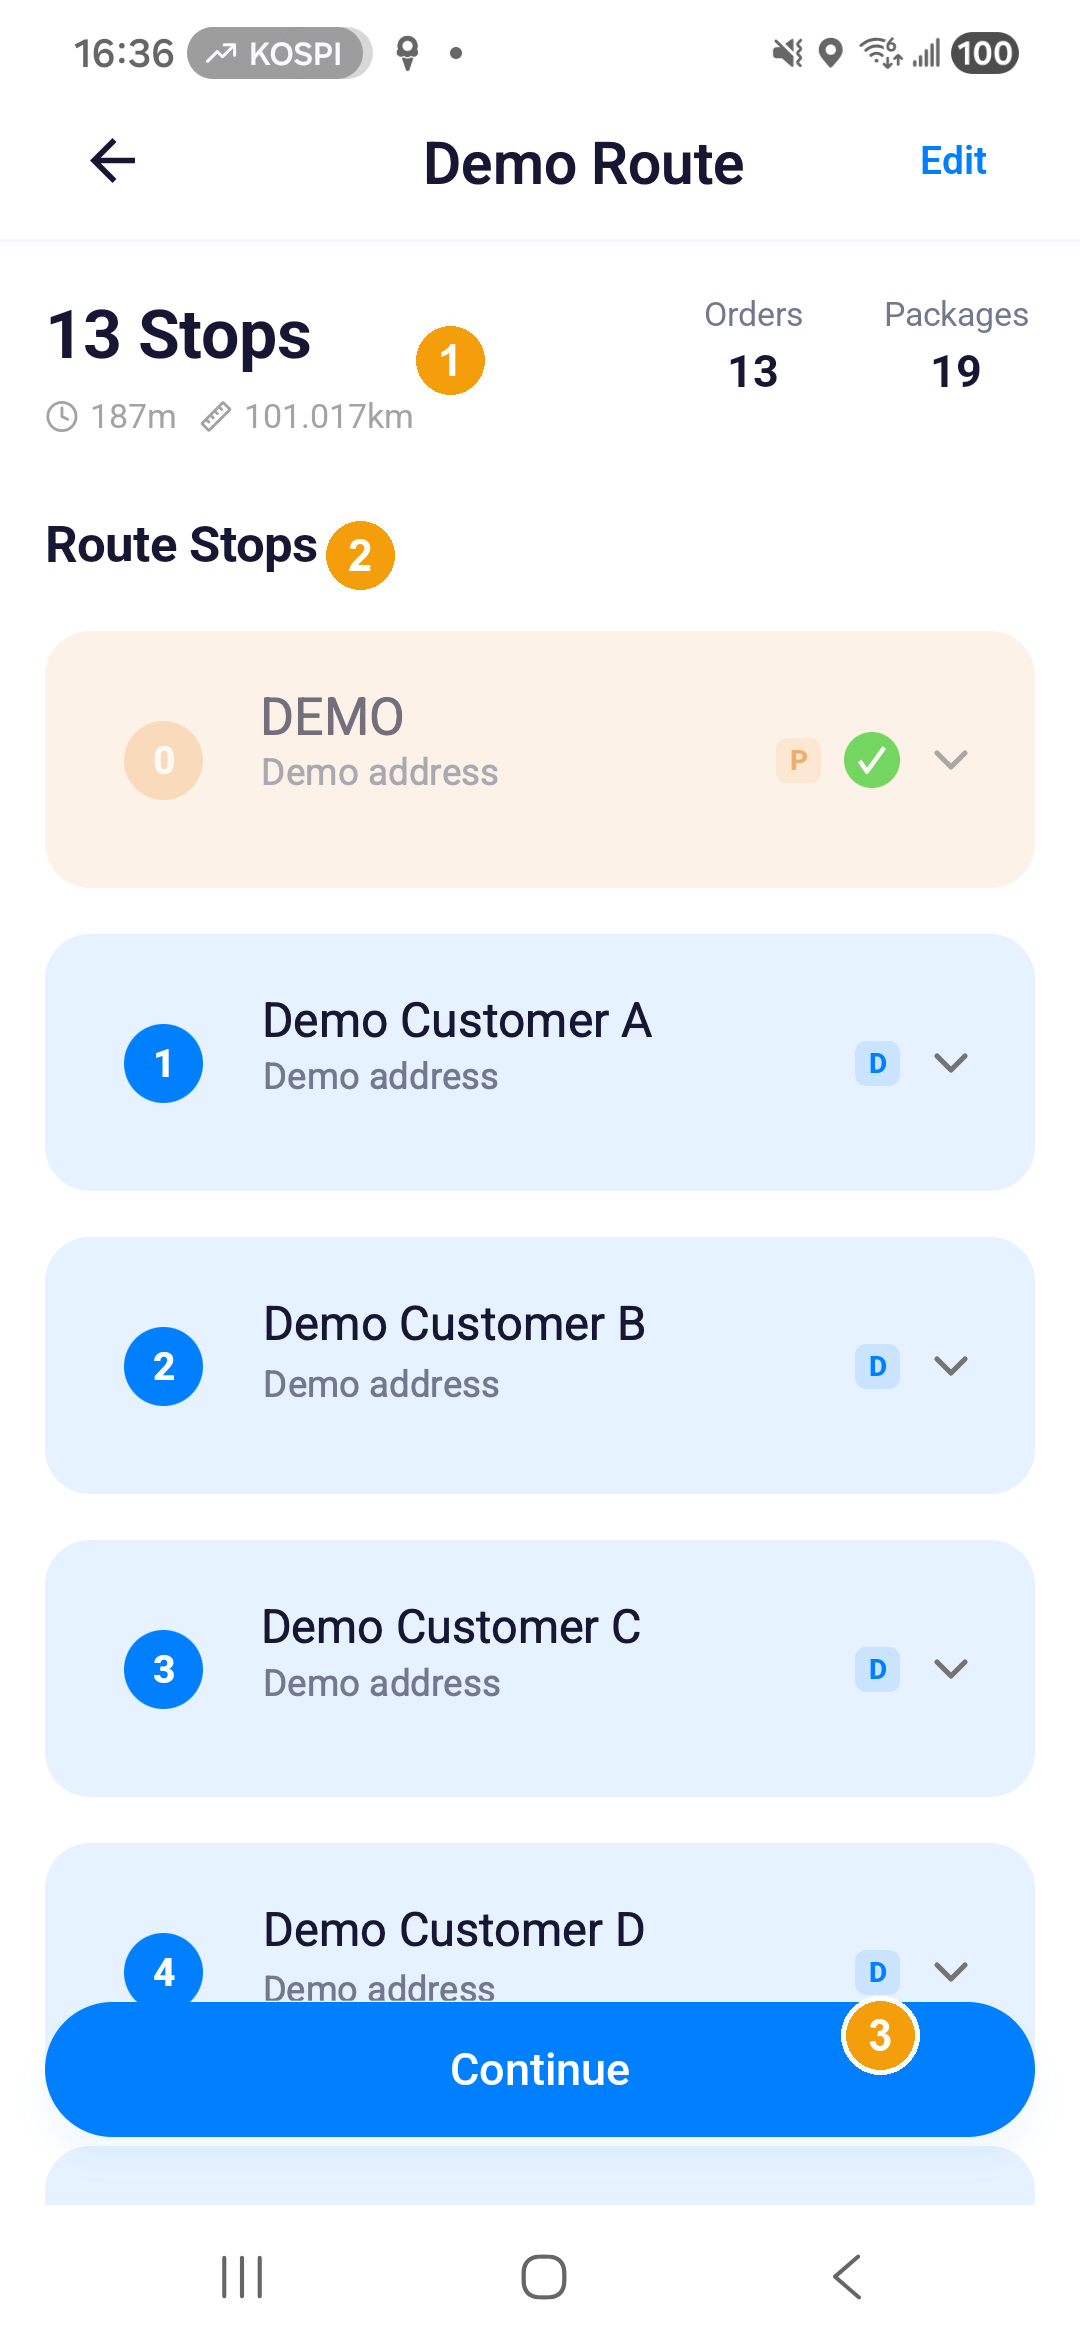
Tap the assigned route card on Home to enter route details and review all values and stop arrangements.
- Check route overview information (1 on image): Confirm the route name, stop count, estimated driving time, total distance, and total counts for Orders and Packages.
- Check stop list (2 on image): Review stop sequence and addresses under Route Stops. Completed stops display a green checkmark; if the assignment has errors, contact dispatch before starting – do not depart immediately.
- Start or continue (3 on image): After confirming the route is correct, tap Continue (or Go!) at the bottom to launch satellite navigation.
Step 2: Read the navigation map
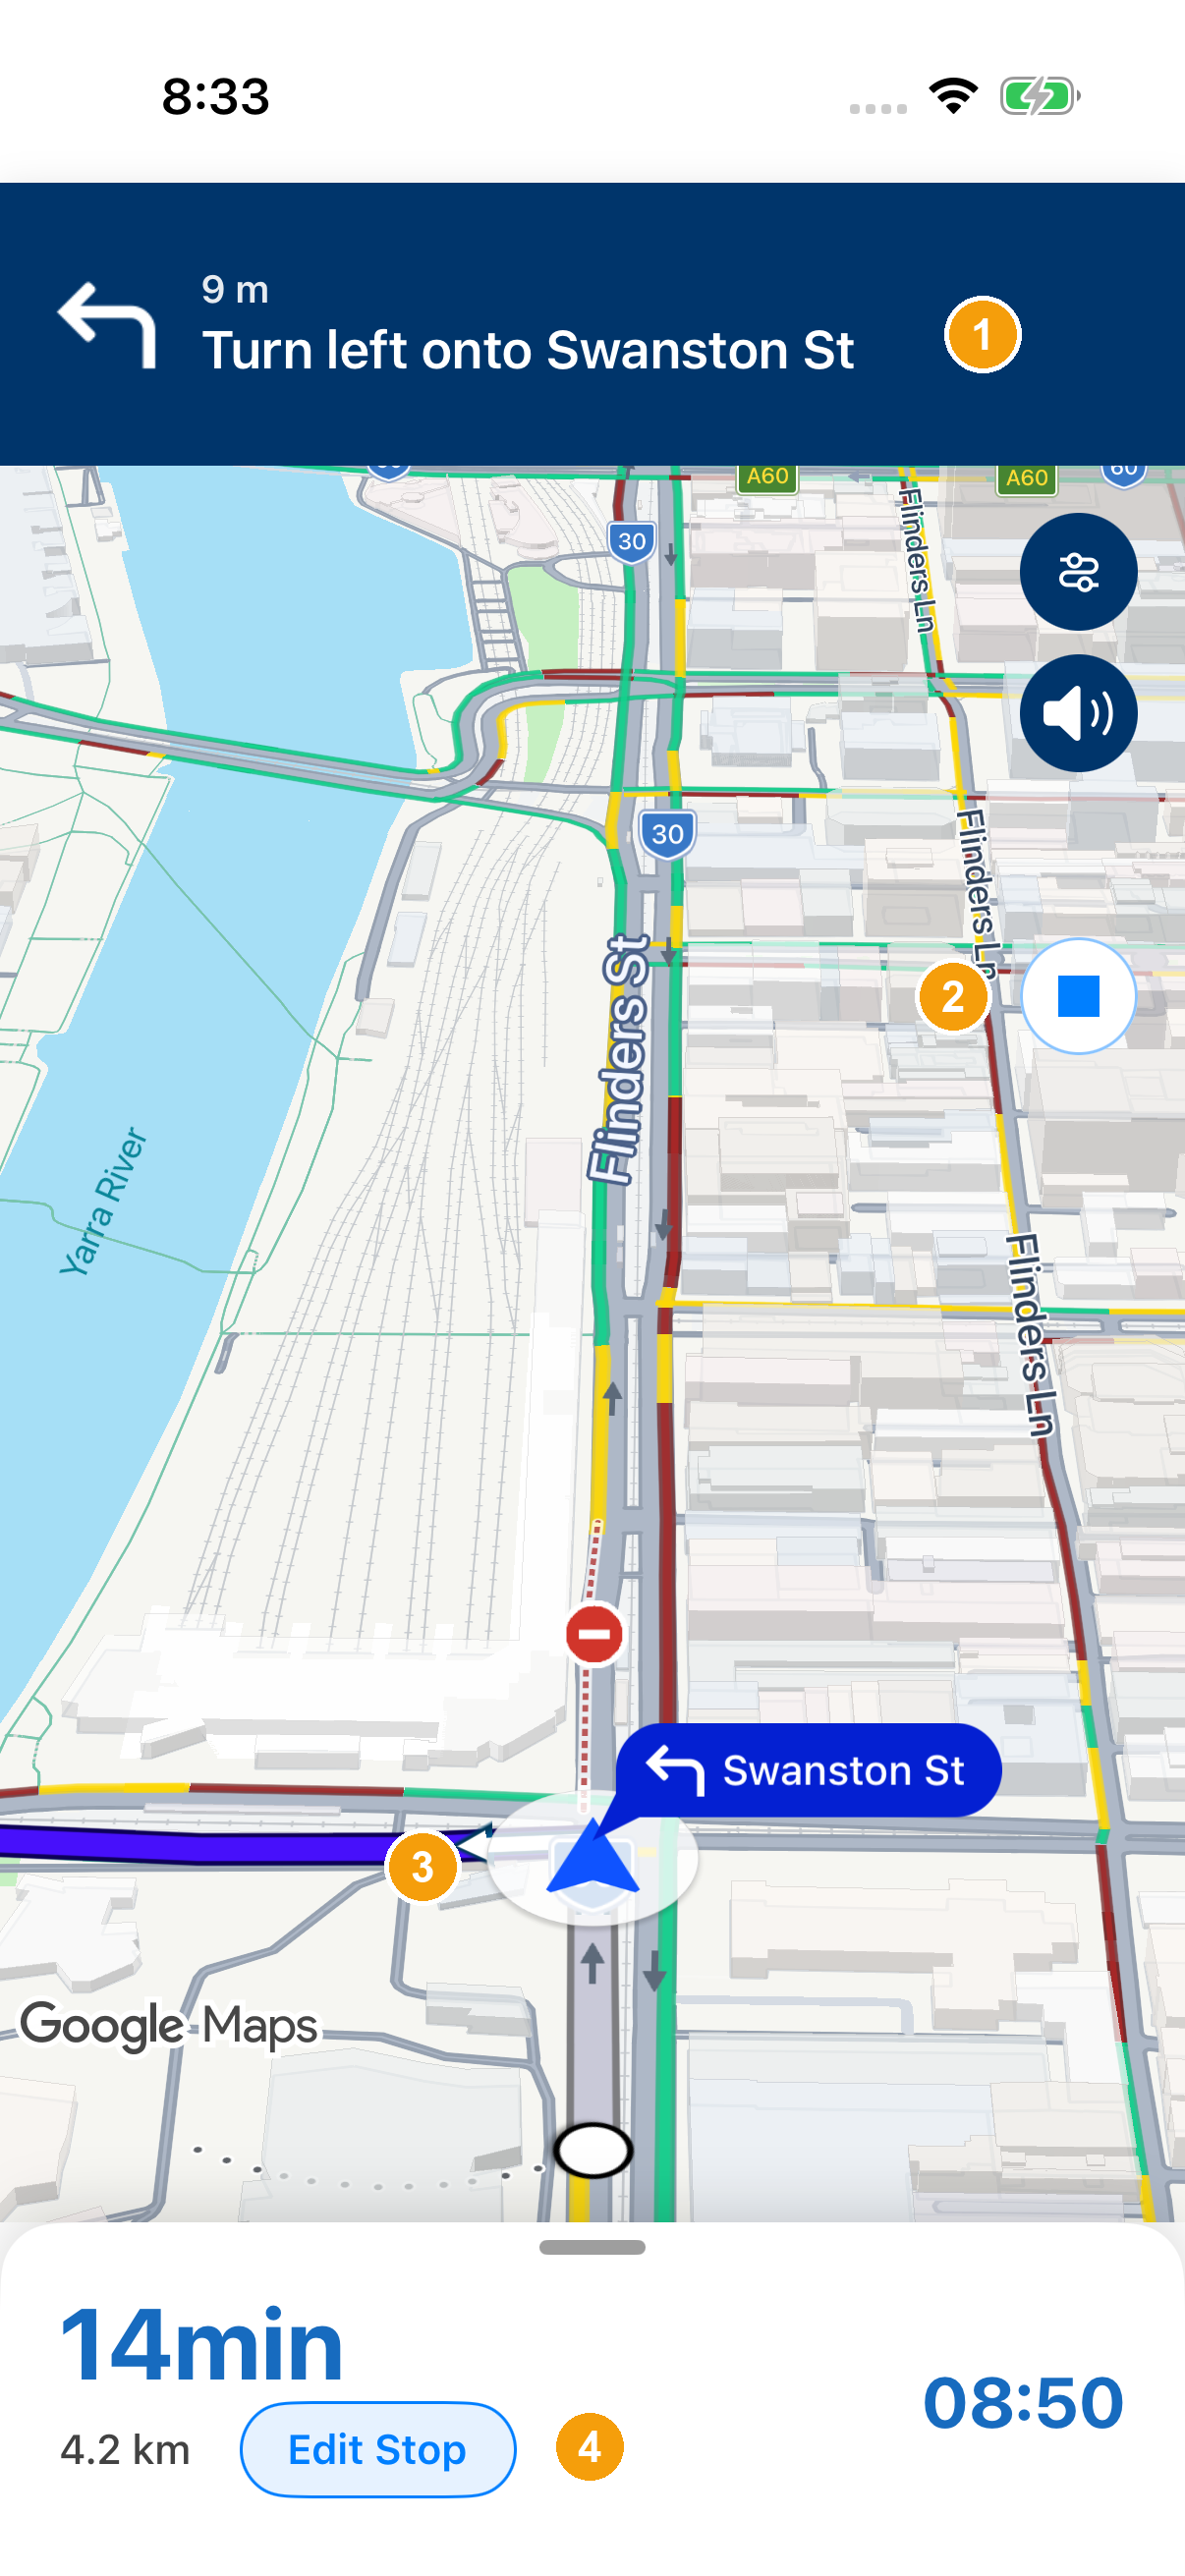
Once navigation launches, the app presents real-time mapping and turn-by-turn guidance, comprising 4 key areas from top to bottom:
- Direction banner (1 on image): Displays the next turn instruction, target street name, and distance to that manoeuvre. Always prioritise on-site road signs and real traffic conditions while driving.
- Map controls and manual arrival (2 on image): Offers route overview toggles and voice guidance controls; the bottom round button with a blue square in the right-hand control stack is the manual arrival button. If you have arrived at the correct address but Sendit Go does not automatically advance to the arrival screen, park safely and tap this button to manually trigger arrival.
- Current position and route (3 on image): The centre of the map displays your vehicle position arrow, the blue route line leading to the destination, and street name labels.
- Journey panel and edit stops (4 on image): Shows remaining driving time, remaining distance, and estimated time of arrival (ETA); tap Edit Stop while safely parked to adjust subsequent stop order (see Reorder Stops).
Upon reaching the destination, the app typically opens You have arrived! automatically. Review stop details and proceed to Package confirmation. If dispatch updates your route while driving, reload the route per Route updated while driving; to pause delivery, park safely and open Take a break or work without internet.
Step 3: If navigation cannot start
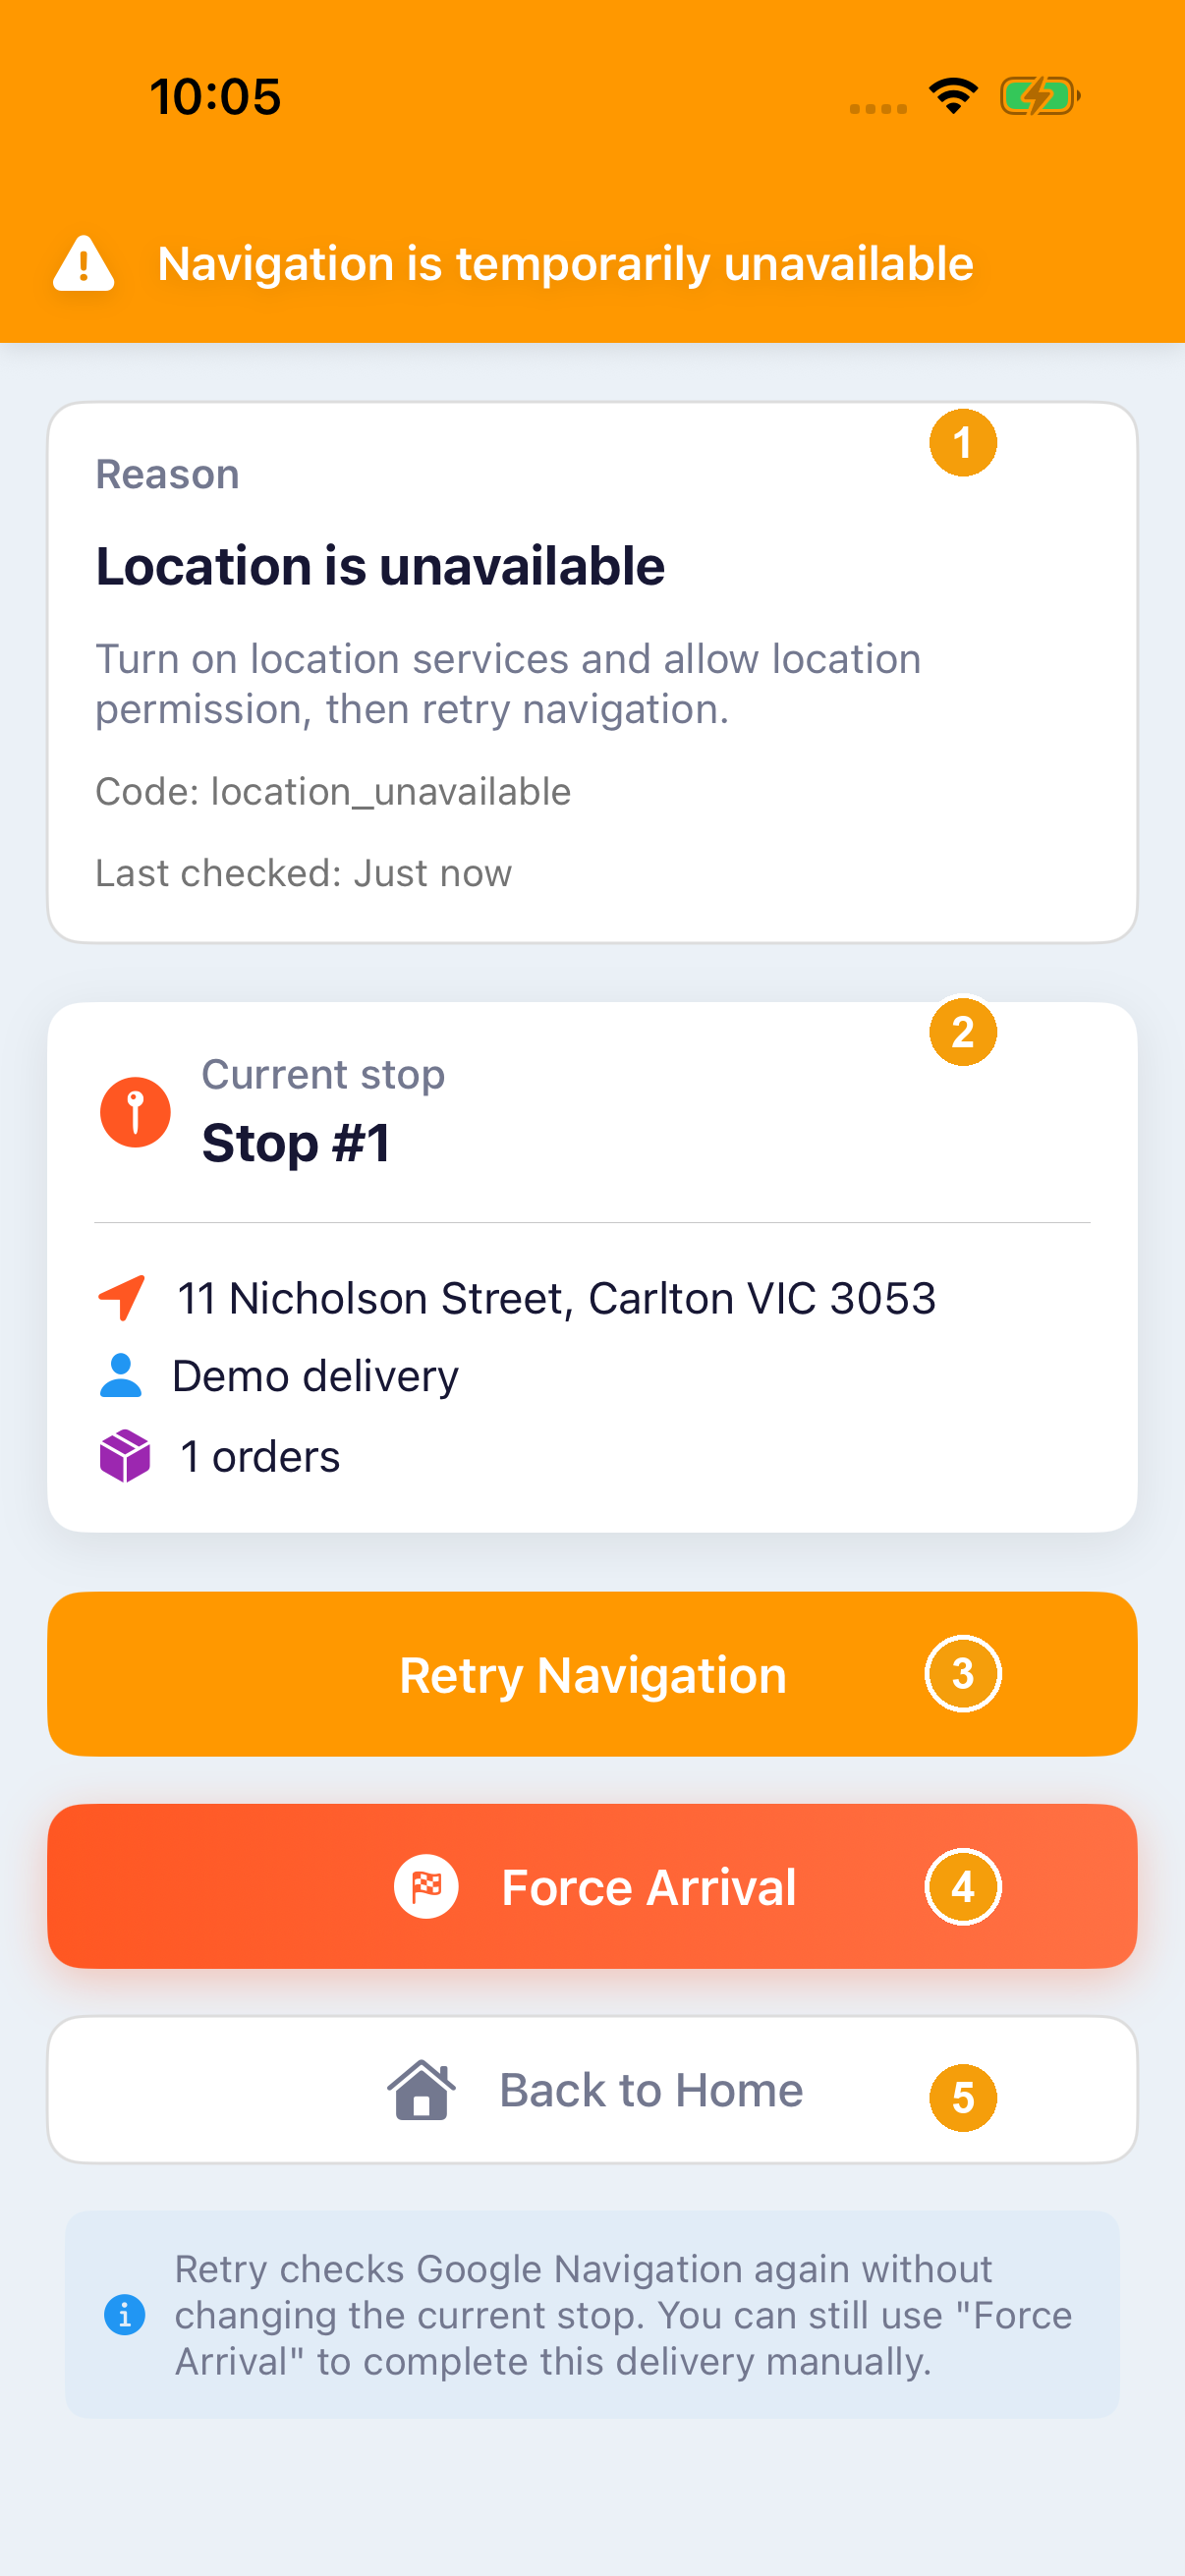
If the iPhone displays Navigation is temporarily unavailable, navigation services are temporarily blocked. The screen lists the cause and provides recovery options:
- Failure reason and explanation (1 on image): Read the error type shown under Reason (e.g. Location is unavailable) and diagnostic Code.
- Current stop information (2 on image): Verify the target stop name, address, and order count under Current stop to identify the affected stop.
- Retry Navigation (3 on image): Tap after eliminating the root cause to re-attempt connection and launch satellite navigation for the same stop.
- Force Arrival (4 on image): Use only when you have physically reached the correct stop. Tapping bypasses navigation and opens the arrival workflow directly; package scanning and proof of delivery are still required. Never force arrival while travelling or solely to dismiss an error.
- Back to Home (5 on image): Temporarily exit navigation and return to Home; returning home does not mark the stop as completed, and you can re-enter the route from Home later.
Common navigation failure reasons and solutions:
| Screen reason | How to resolve |
|---|---|
| Device is offline | Restore Wi-Fi or mobile data connection, then tap Retry Navigation. |
| Location is unavailable | Go to iPhone Settings, enable Location Services, grant app location access, then tap Retry Navigation. |
| Google Navigation service is not ready / Navigation setup timed out | Check internet connectivity and retry; if it persists, tap Back to Home to return to Home and reopen the route. |
| Google could not find a route / Stop location is invalid | Check the stop address; if retrying still fails, contact dispatch to verify coordinates and address. |
| Current stop is missing / Navigation map could not be opened | Tap Back to Home to return to Home, then tap the route card to enter again. |
The navigation map displays a planned route to the current stop, direction banner, and journey panel. Seeing only route details does not mean navigation has started.
Next steps
- Delete an order from route – Learn the full workflow for removing orders before delivery or during editing.
- Arrive and scan packages – Barcode scanning and package tallying after arriving at a stop.
- Reorder Stops – Adjust stop sequence via route details or navigation shortcut.
- Route updated while driving – Understand real-time route update notifications from dispatch.
- Take a break or work without internet