Report a package exception
Use this only for a package problem at the current stop. The Android menu item is Report Exception. The iPhone form title is Report Exceptions.
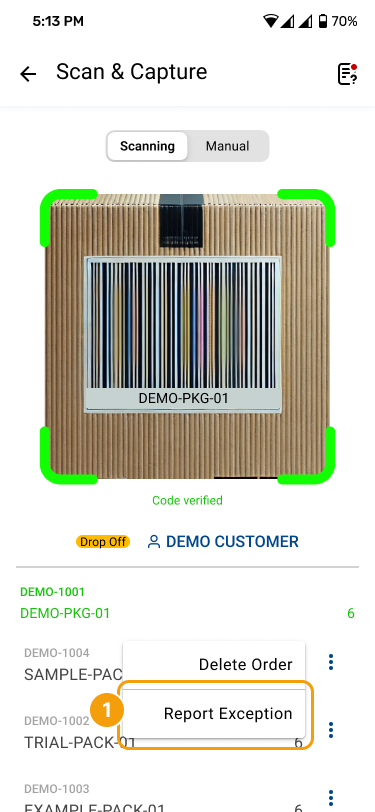
Where to find it: active route › current stop › package row more menu › Report Exception.
Open the exception report menu
In the package list, tap the more options menu (⋮) next to the package, then select Report Exception.
- Report Exception: Tap Report Exception in the popup menu to open the exception reporting form.
The action and available types depend on what you are doing at the current stop:
| Current stop | Entry | Types shown |
|---|---|---|
| Delivering to a customer | Shown | Missing, Damaged, Wrong Delivery |
| Collecting from a customer | Hidden | – |
| Collecting from the first warehouse | Shown | Missing, Damaged |
| Returning a customer return order | Shown | Missing, Damaged, Wrong Delivery |
| Other final warehouse returns | Hidden | – |
Even in a permitted row, the action is hidden when the order status is not reportable, the package was cancelled, the package has already been reported, or no unreported quantity remains. There is no disabled version of the action.
Enter exception details and submit
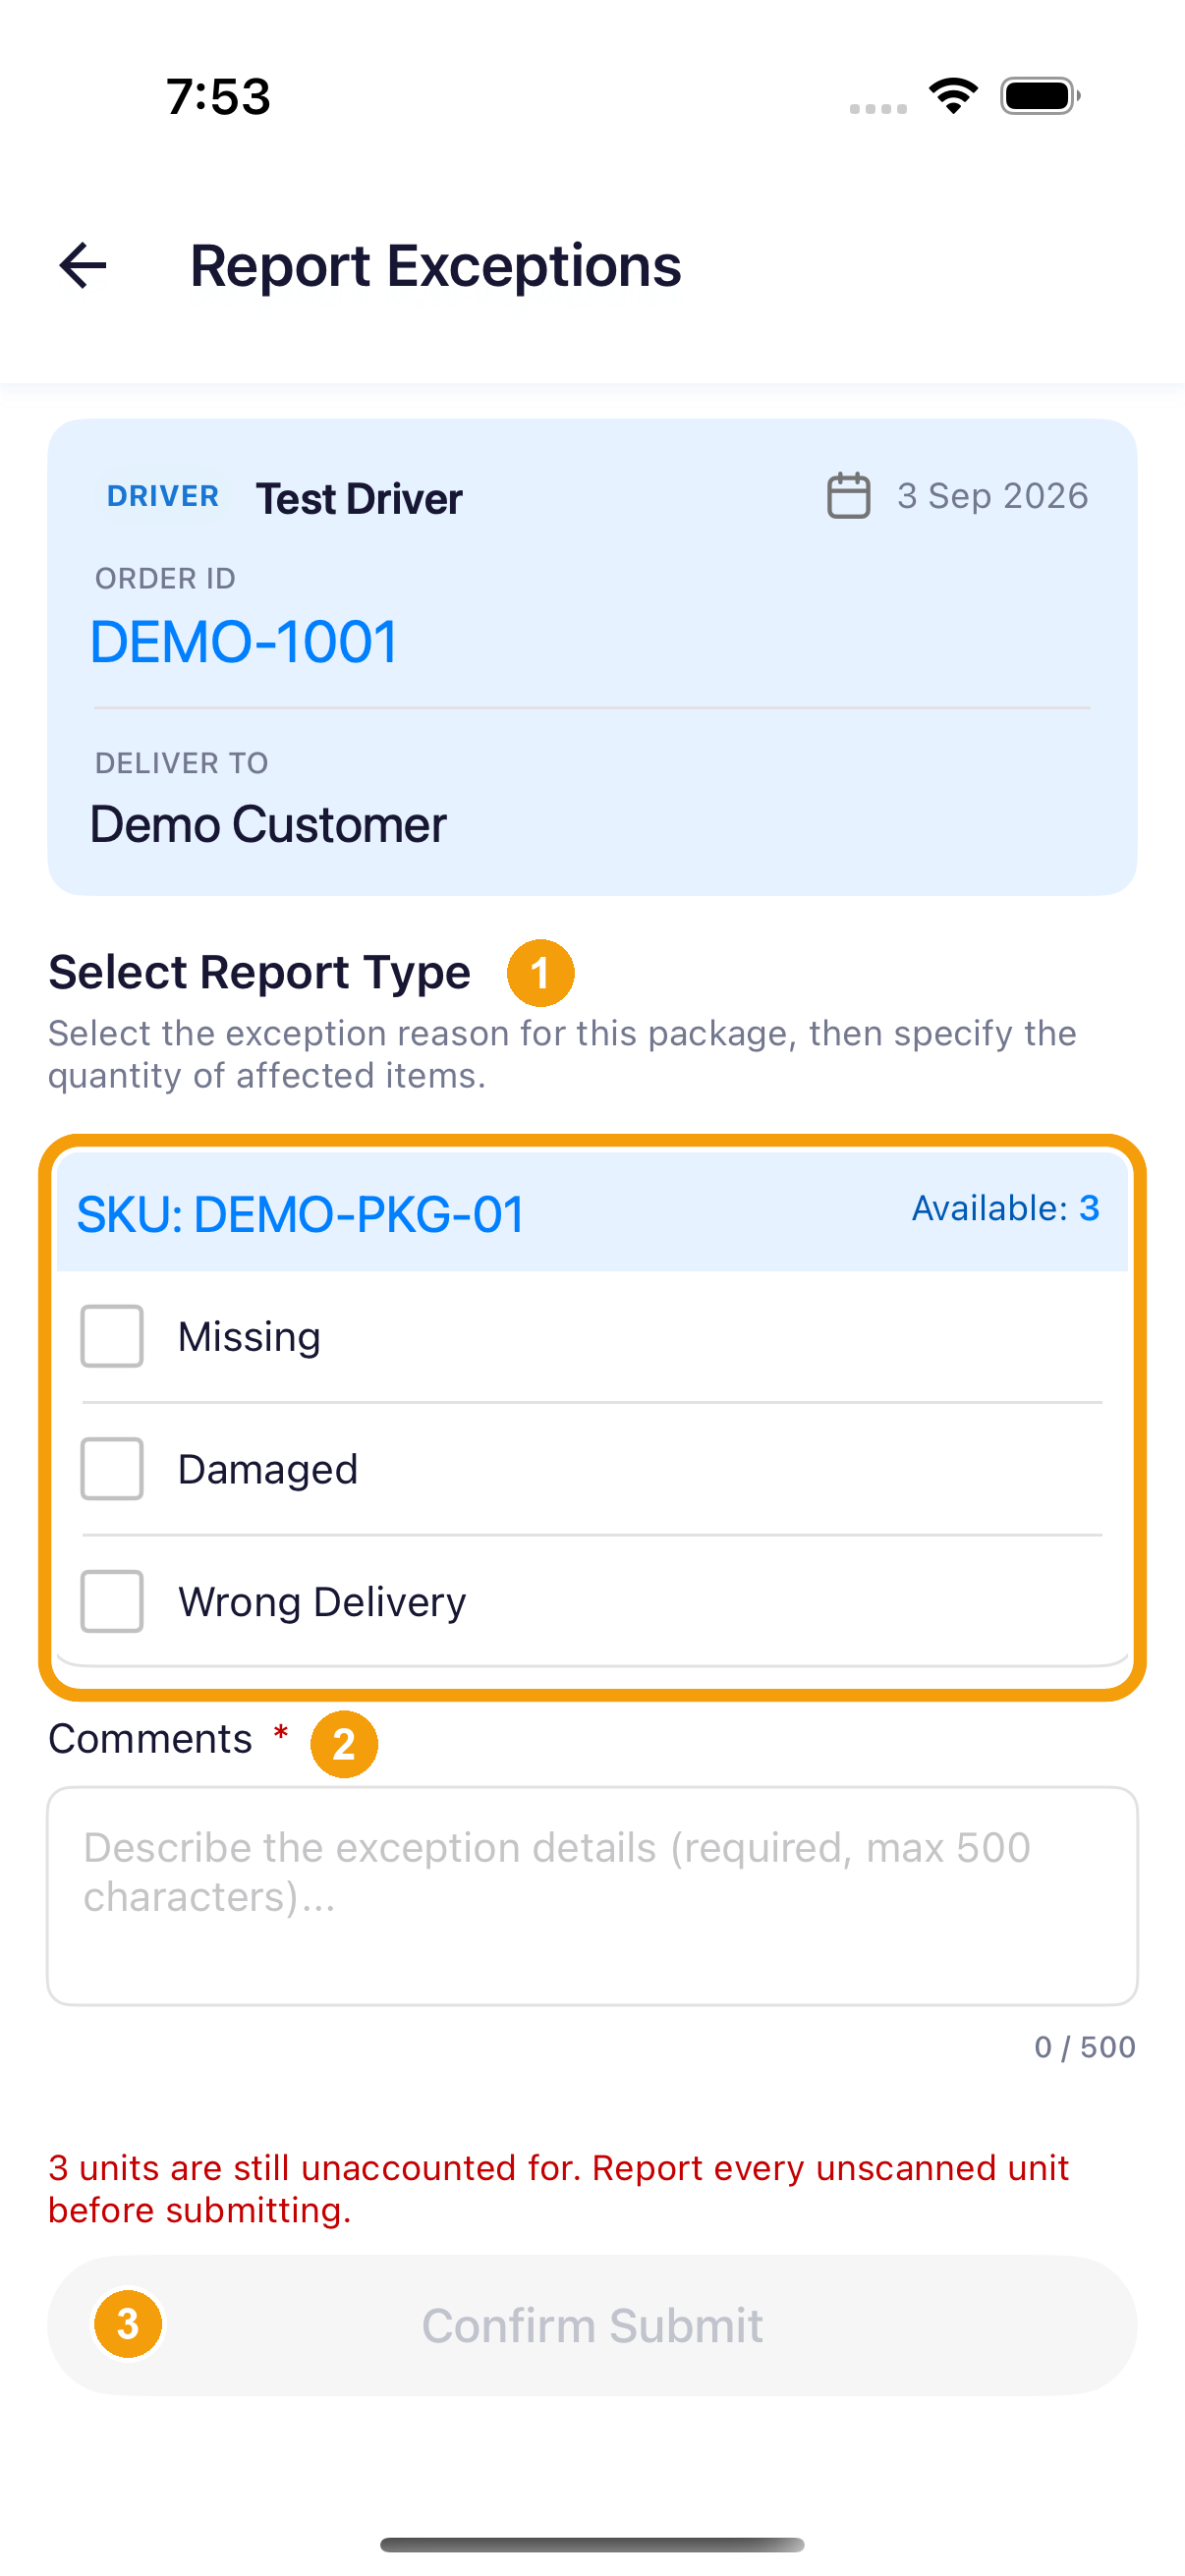
On the exception reporting screen, verify the driver name and order ID at the top (e.g., DEMO-1001), then complete the following 3 steps:
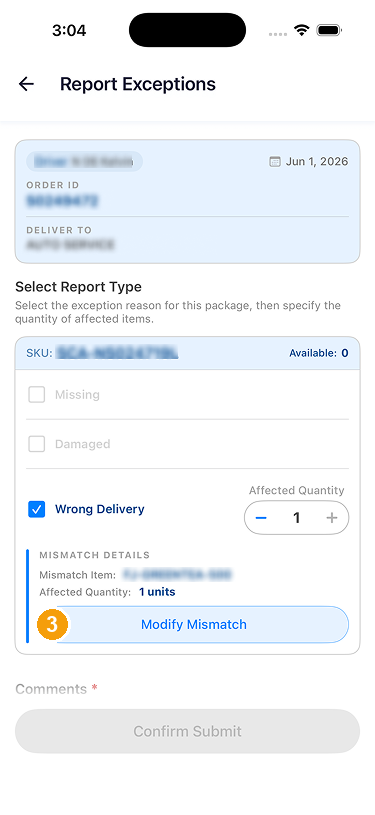
- Select exception type and quantity: Select the applicable types (Missing, Damaged, or Wrong Delivery) and use the plus and minus buttons to set the Affected Quantity for each. The total quantity across all selected types must equal the package quantity that has not been scanned or reported. Scan unaffected packages normally first; do not include them in the exception count.
- Add notes and photos: Enter a clear description of the issue in the mandatory Comments field (up to 500 characters). If you selected Damaged, upload 1–5 photos showing the damage; if you selected Wrong Delivery, pick the actual incorrect package or SKU from the list.
- Confirm and submit: Confirm Submit is at the bottom of the form. On the frames in this sample it is grey. This sample did not tap it, so a confirmation dialog and a return to the scan list are not shown.
Quantity example
For 5 expected items with 3 already scanned correctly, 1 missing and 1 damaged, select Missing = 1 and Damaged = 1. Allocate the 2 remaining items, not the original 5. Each selected type needs at least 1 item; do not count the same item under two types.
What each exception type expands into
Once you tick Missing, Damaged or Wrong Delivery, the fields below change to match the type you ticked. Each type asks for different information – tick the one that matches the real situation.
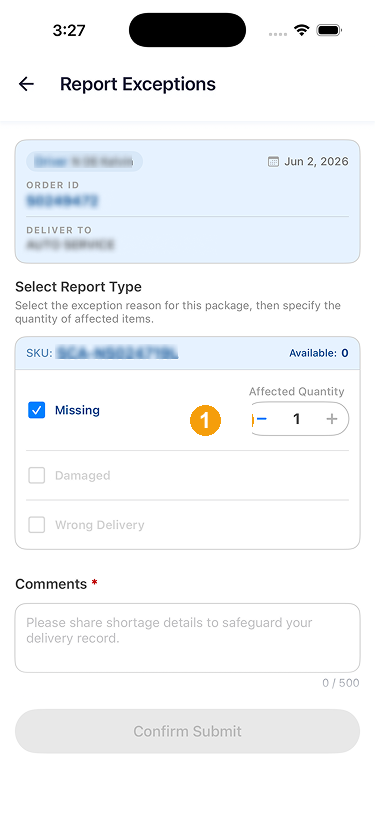
Missing: quantity and a comment only
- Use the plus/minus buttons on the Missing row to set how many pieces are missing. Missing does not need photos – just describe the situation in the Comments field (for example, "customer noticed the box was short by 1 piece at signing").
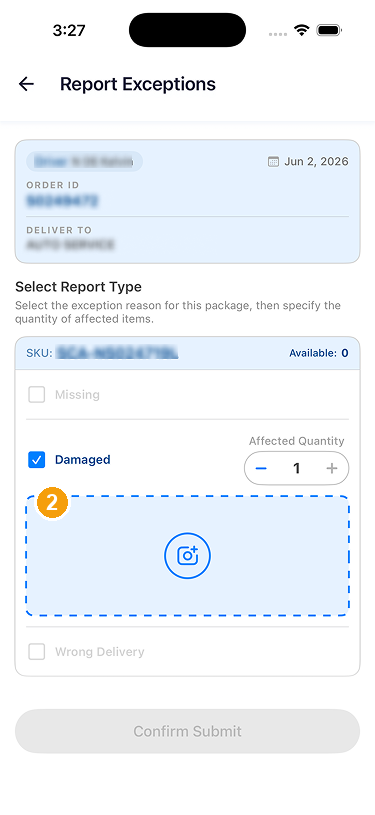
Damaged: 1–5 photos required
- After setting the damaged quantity, this picture shows a camera box. The words Add Photos are not on it. Confirm Submit stays grey until a photo is attached, and it was not tapped.
Wrong Delivery: pick the actual package from the list
Ticking Wrong Delivery opens the picker straight away (see the next section). Once you pick the mis-delivered package there and save, the form shows a Mismatch Details block listing the Mismatch Item and Affected Quantity you chose.
- Wrong Delivery does not require photos, but you must pick the actual mis-delivered package or SKU before you can submit. Once chosen, the form shows Mismatch Details; to swap it for a different one, tap Modify Mismatch to reopen the picker.
Pick the actual package from the bottom sheet
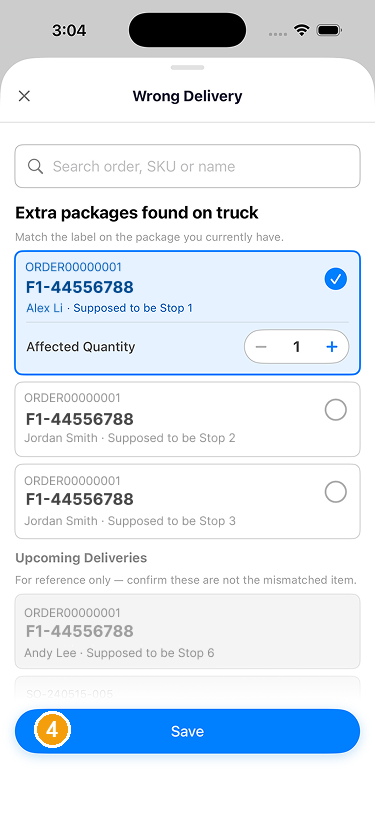
Ticking Wrong Delivery (or tapping Modify Mismatch on the form) slides up a bottom sheet titled Wrong Delivery, headed Extra packages found on truck, listing the packages or SKUs for this stop. The Upcoming Deliveries list below is reference-only – not the mismatched item.
- Tick the package that was delivered by mistake and set its count with that row's Affected Quantity stepper (the count must match the wrong-delivery quantity on the form), then tap the blue Save to dismiss the sheet and return to the form. Use the search bar at the top to find a package by order, SKU or name; tap the X at the top-left to close without changes.
Exception reporting requires an active internet connection, and each package can only be submitted once. Do not choose an incorrect type if the needed option is missing; contact dispatch instead.
Confirm Submit was not tapped in this sample. A recorded exception and a return to the scan list are not shown.
Confirm Submit is visible on the form and was not tapped. A recorded exception and a return to the scan list are not shown.