Request, view and cancel leave
Follow your leave request from choosing dates to checking the saved details or cancelling it when your plans change.
Where to find it: dashboard › Roster › more menu › Request Leave.
Your saved request opens in Leave Details, with its dates, reason and Request ID. After cancellation, the same request shows Leave Cancelled.
Have your leave dates, times and reason ready. Only scheduled shift hours count towards the leave duration. The workflow below applies to iPhone and Android. The new step-by-step screenshots show Android; the roster guide also shows iPhone.
Open the roster and leave menu
- Tap Roster at the bottom left of the dashboard.
- Select a date to check your shifts. Use the month arrows or Today to find the day you need.
- Tap the three-dot menu at the top right. Choose Request Leave to start a request, or Attendance Records to find an existing one.
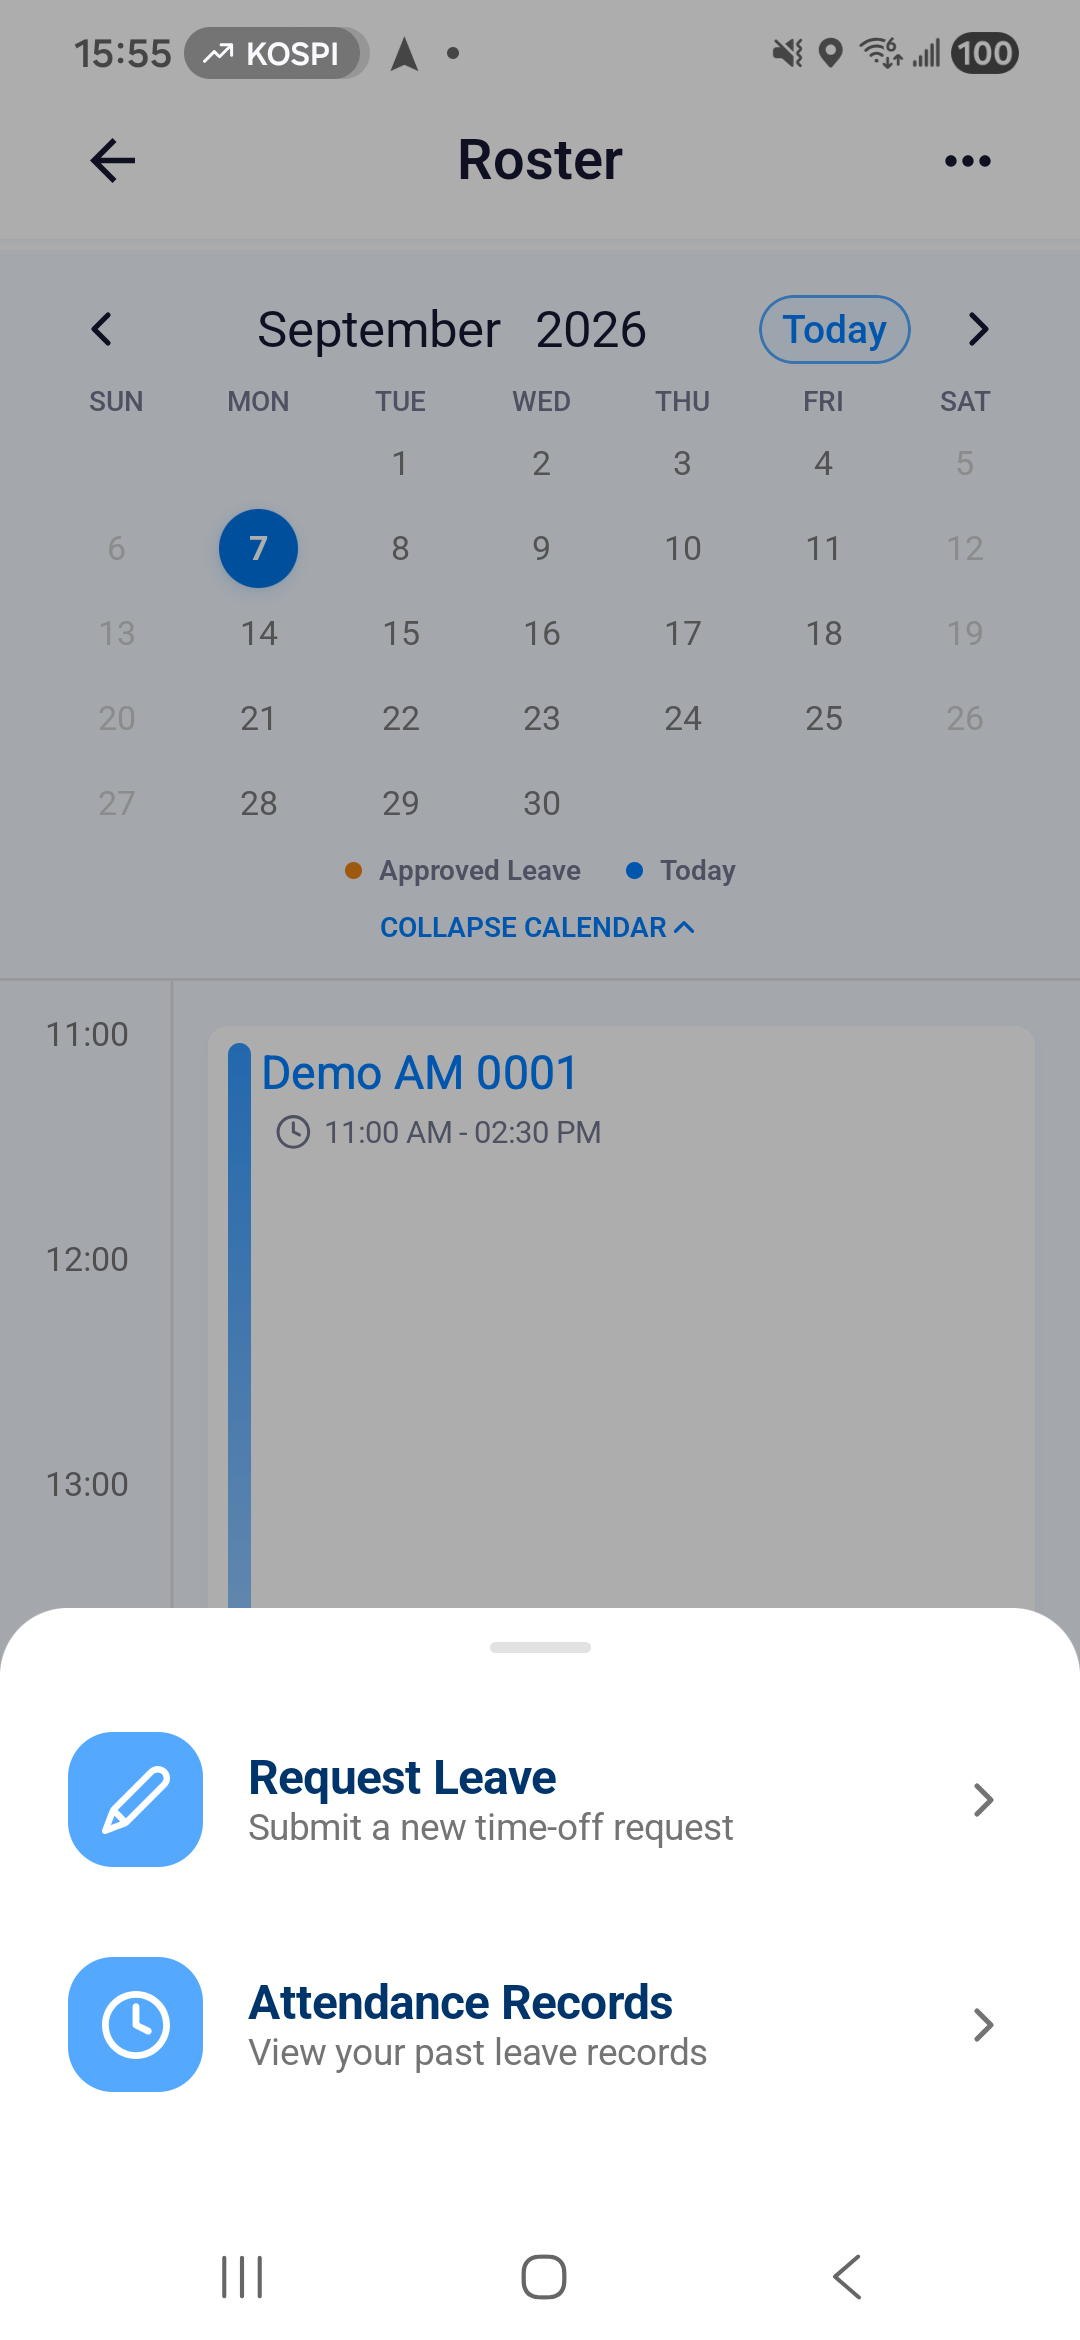
For the calendar and shift cards, see Check your roster.
Find your leave requests
- Open Attendance Records from the roster menu. It is the app's list of leave requests.
- Use the year arrows to find the year you need.
- Choose All, Short Notice or Cancelled to filter the cards.
- Tap a card to open its Leave Details. Check the dates and reason to make sure you have the right request.
Each card shows the leave dates, the last update and who made it. The figures at the top count requests, not hours. Tap the plus button at the top right to start a new request from this list.
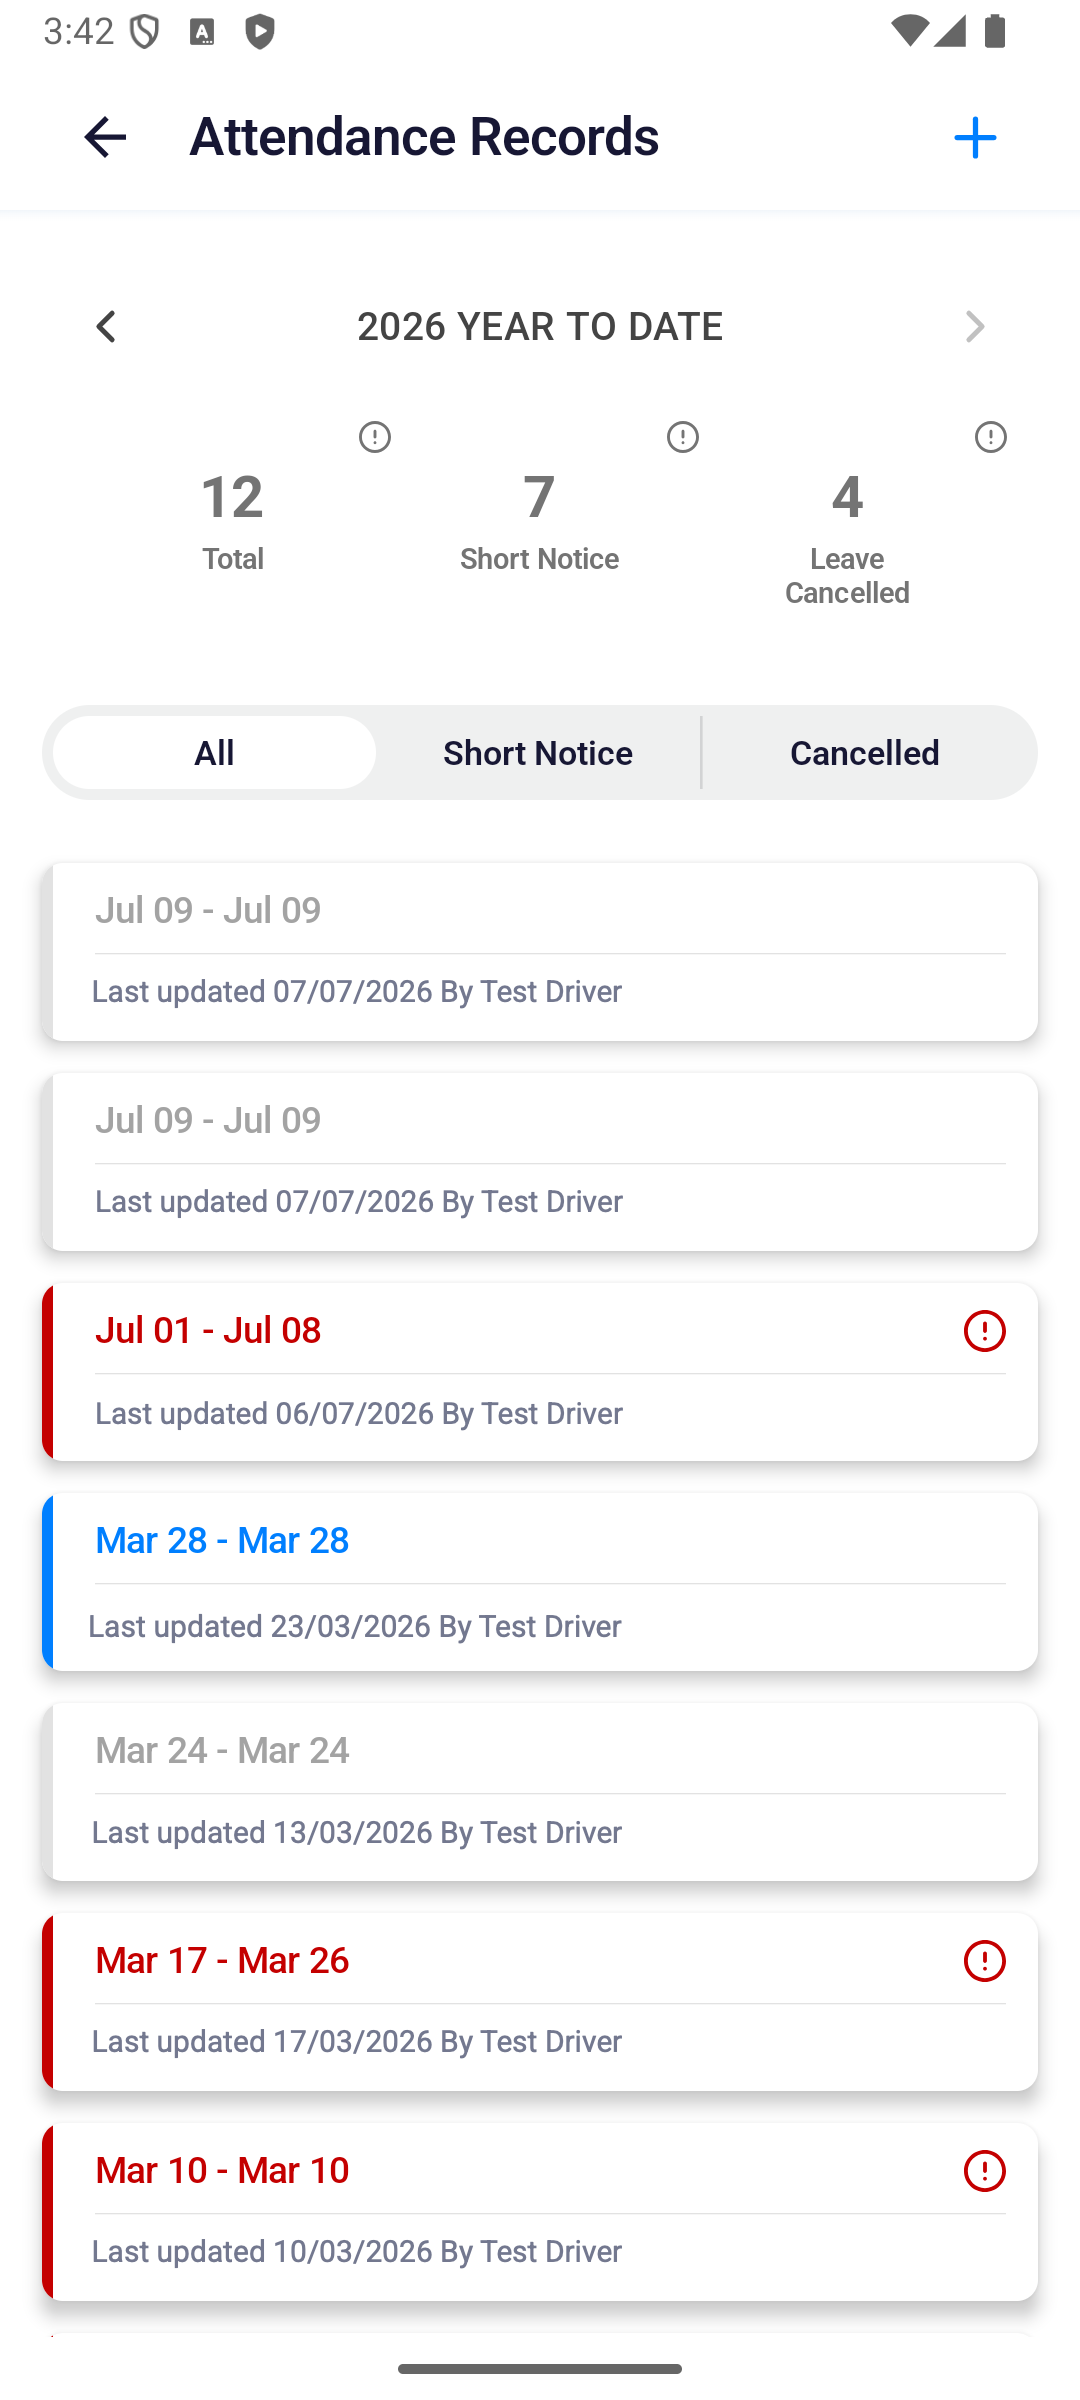
The attendance records guide explains the filters and totals.
Fill in the leave form
Choose the start date and time
- Open Request Leave and tap Start Date.
- Use the calendar arrows to change month, then tap the date. The selected date appears in the form.
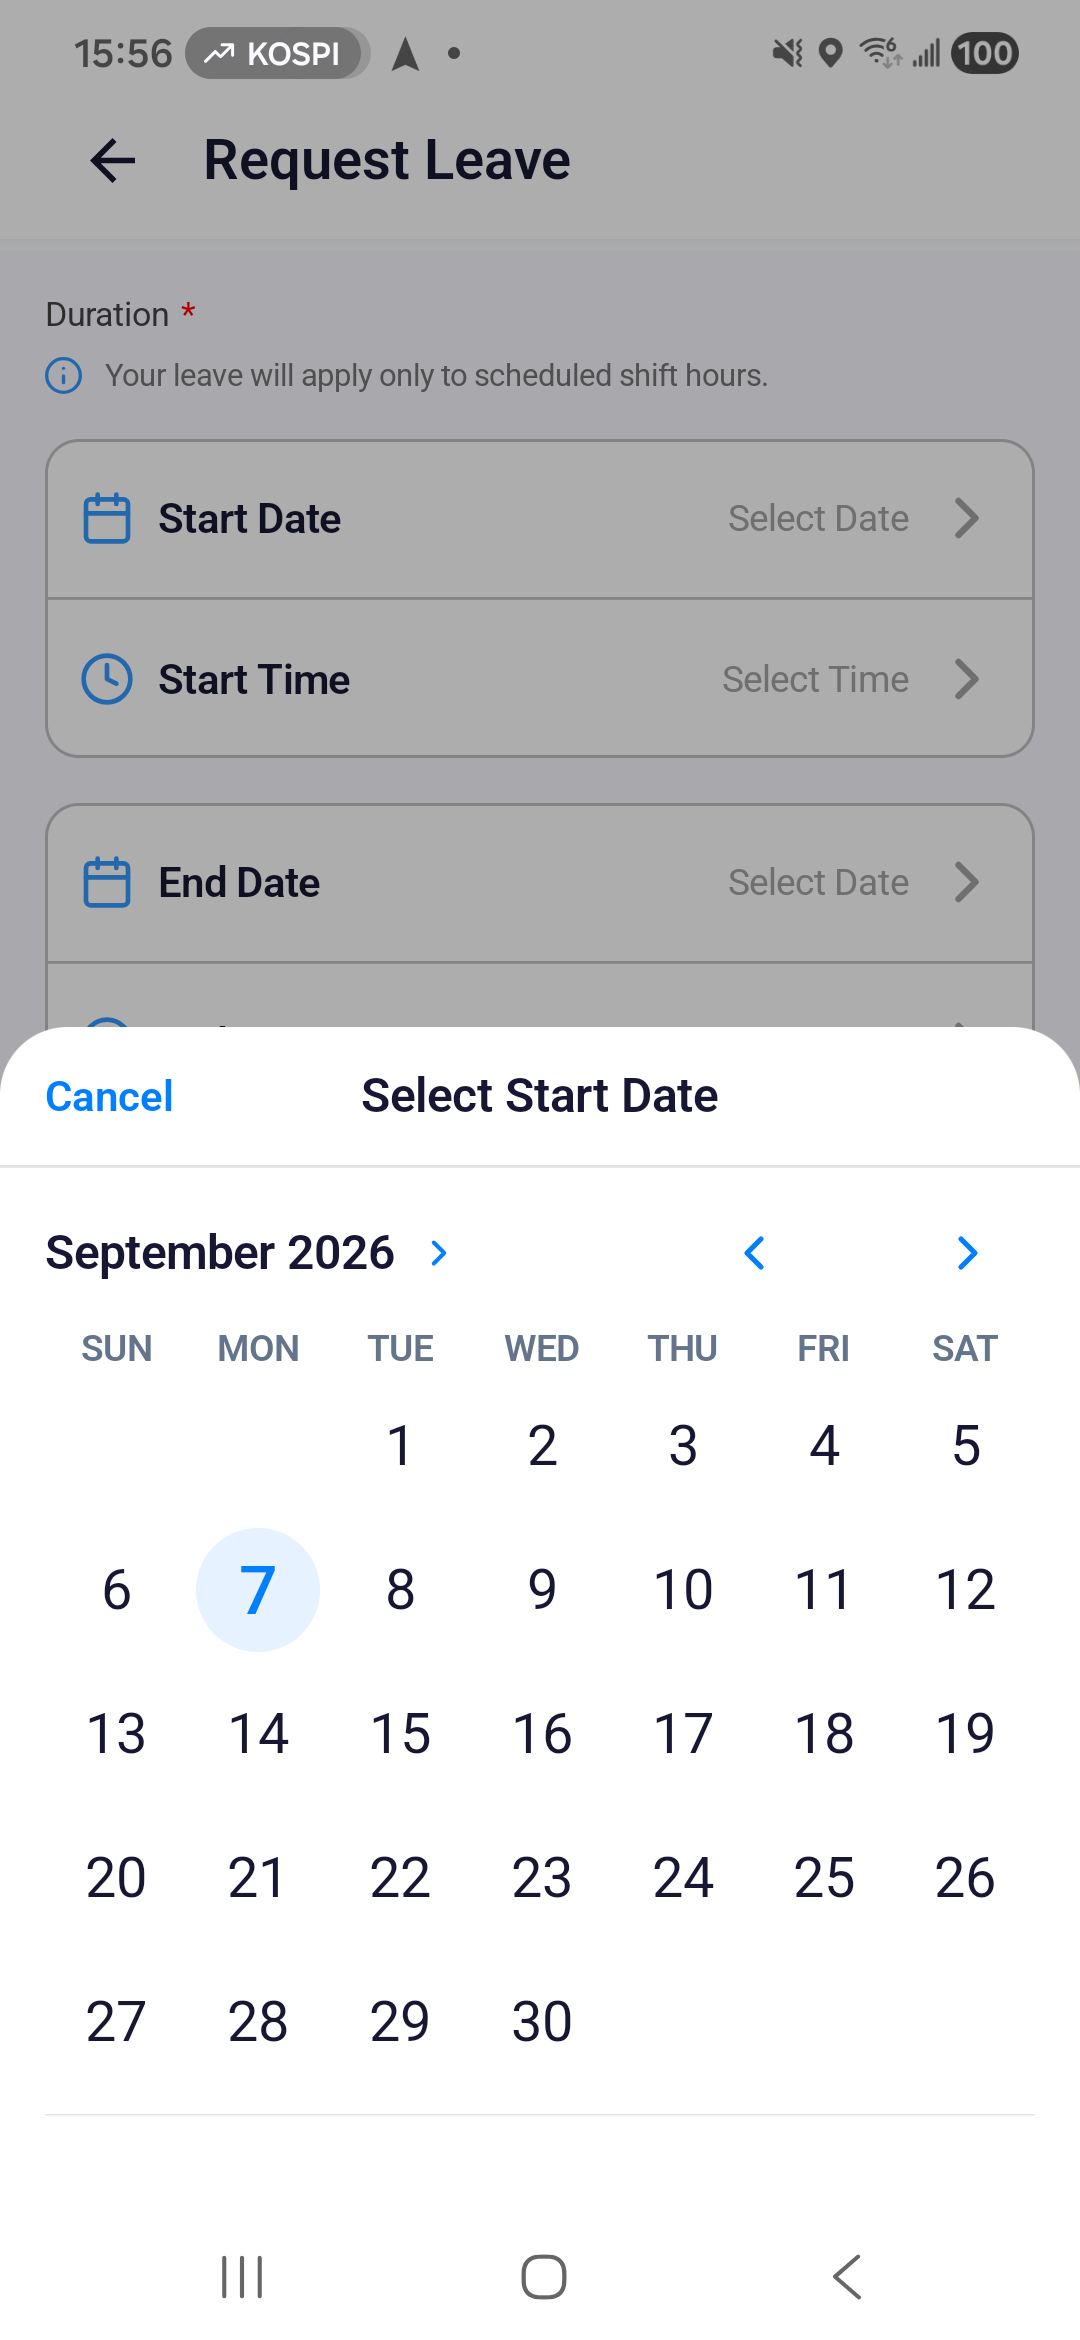
- Tap Start Time after choosing the date.
- Select a time from the list. Scroll if the time you need is further down.
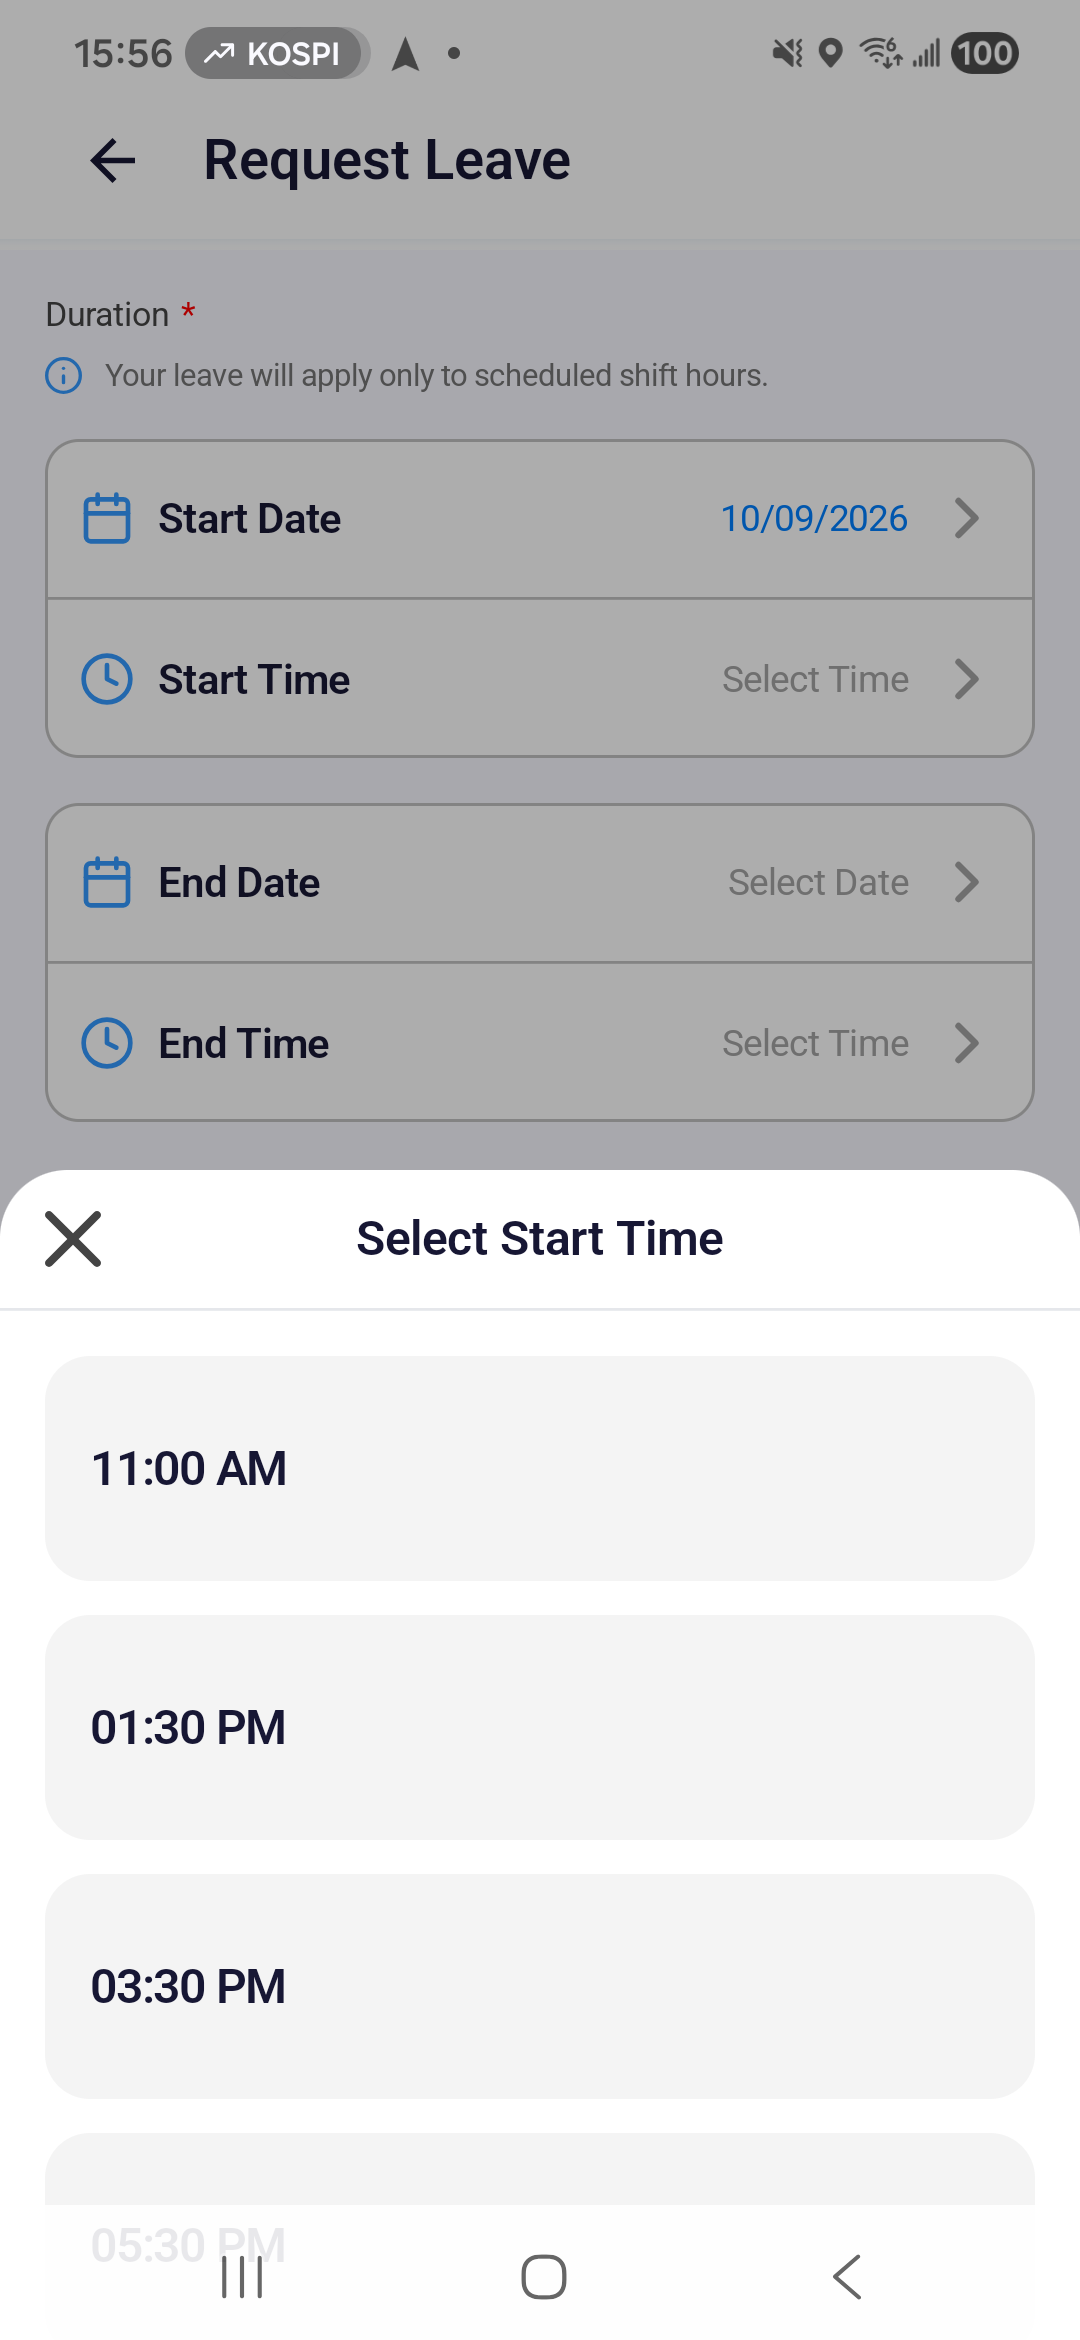
Choose the end and enter your reason
- Tap End Date and choose the last date of your leave.
- Tap End Time and choose a time later than the start.
- Fill in Reason / Notes. It is required and allows up to 500 characters.
- Check all four date and time fields before tapping Submit.
If you change a date, select its time again. For leave on one day, use the same date in both date fields. The example below requests 10 September, from 11:00 AM to 12:30 PM.
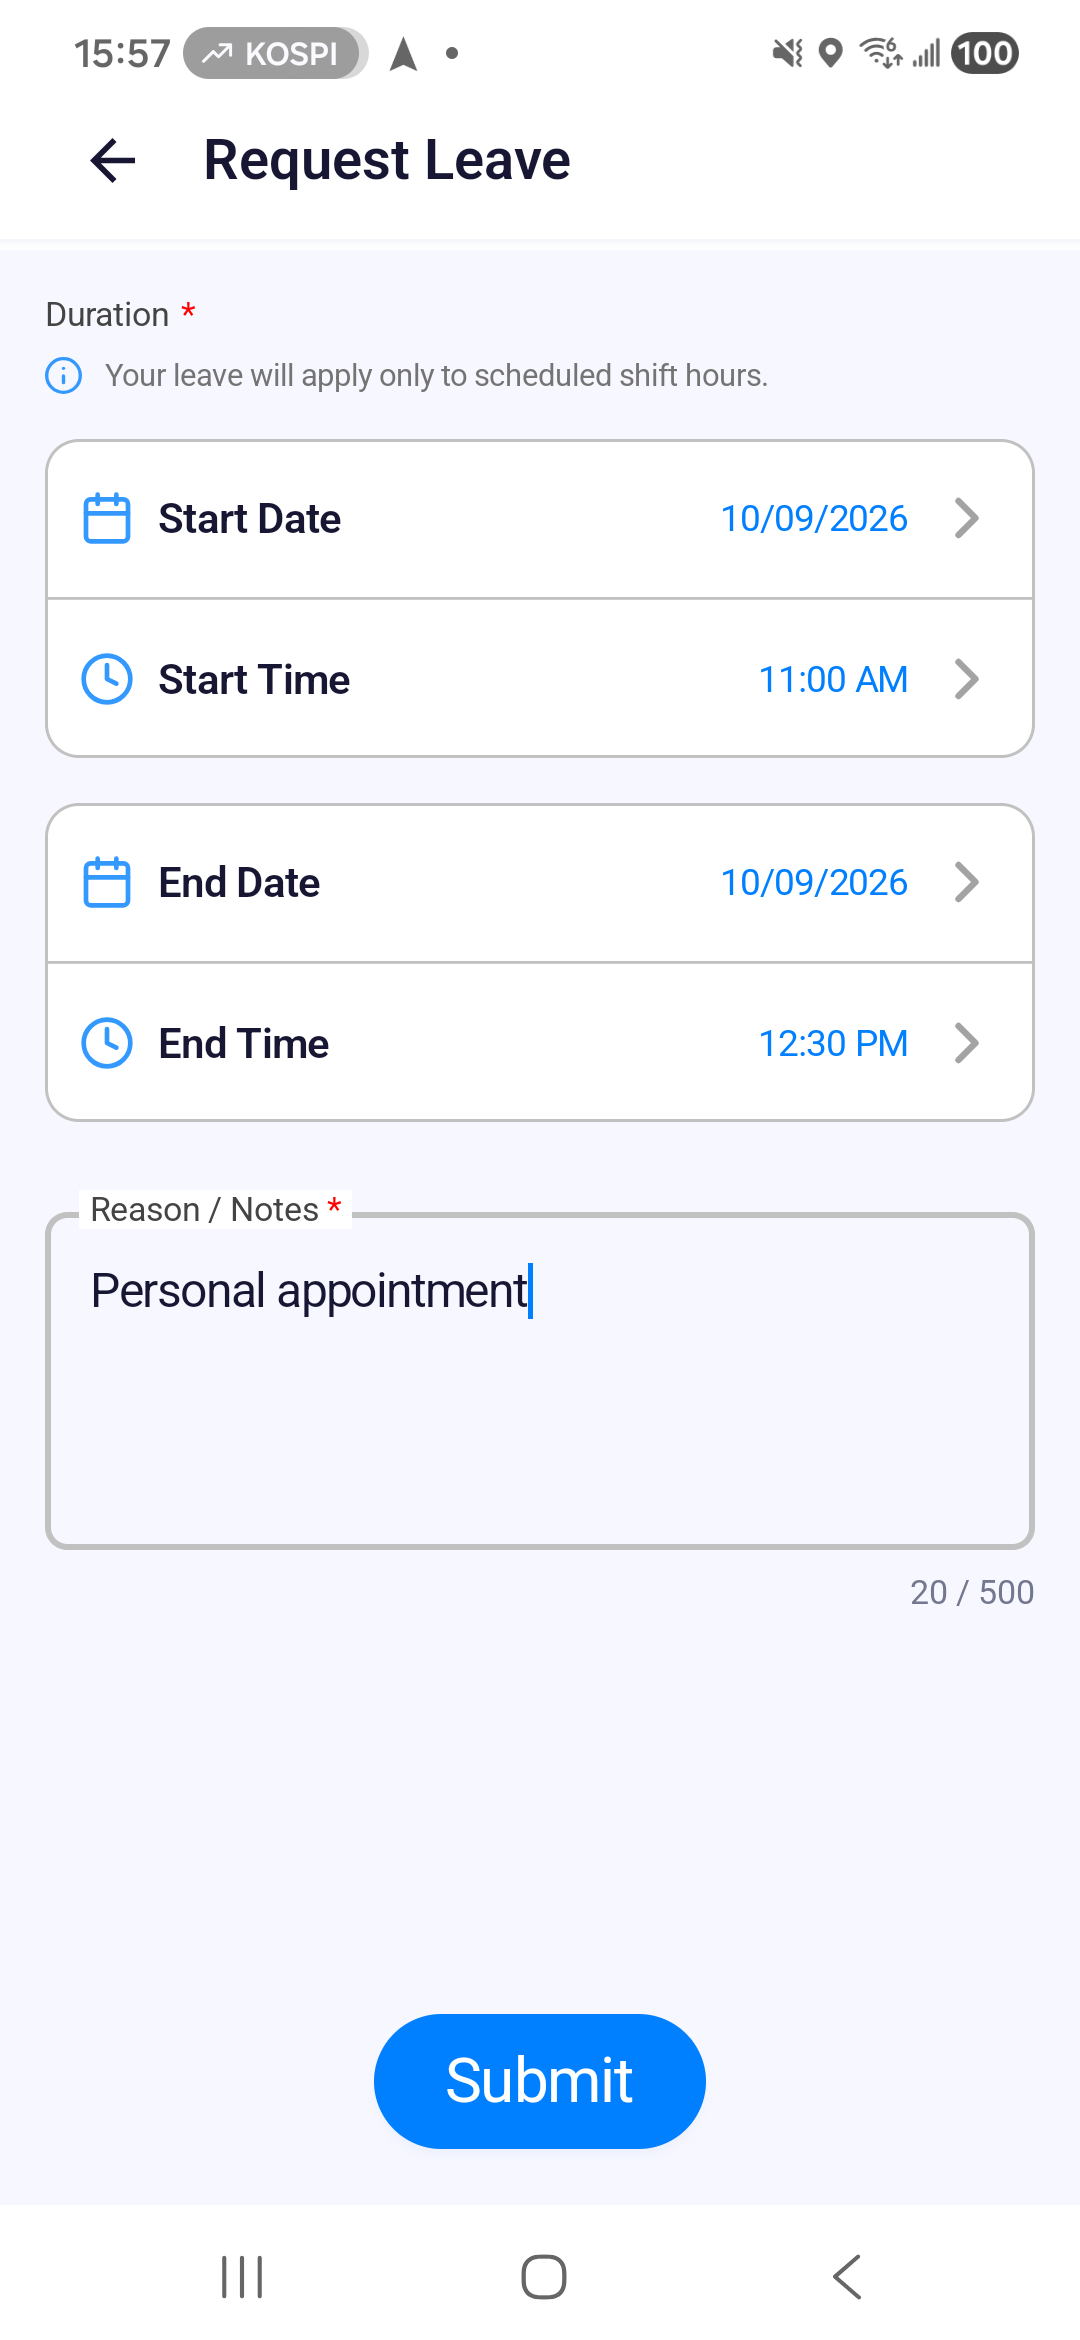
Submit stays unavailable until all dates and times are selected, the end is later than the start, and the reason is filled in.
Confirm a short-notice request
If the leave starts within 24 hours, tapping Submit opens Short Notice.
- Read the warning. Continuing records the request as short notice.
- Tap Submit Request to send it, or Cancel to return to the form without submitting.
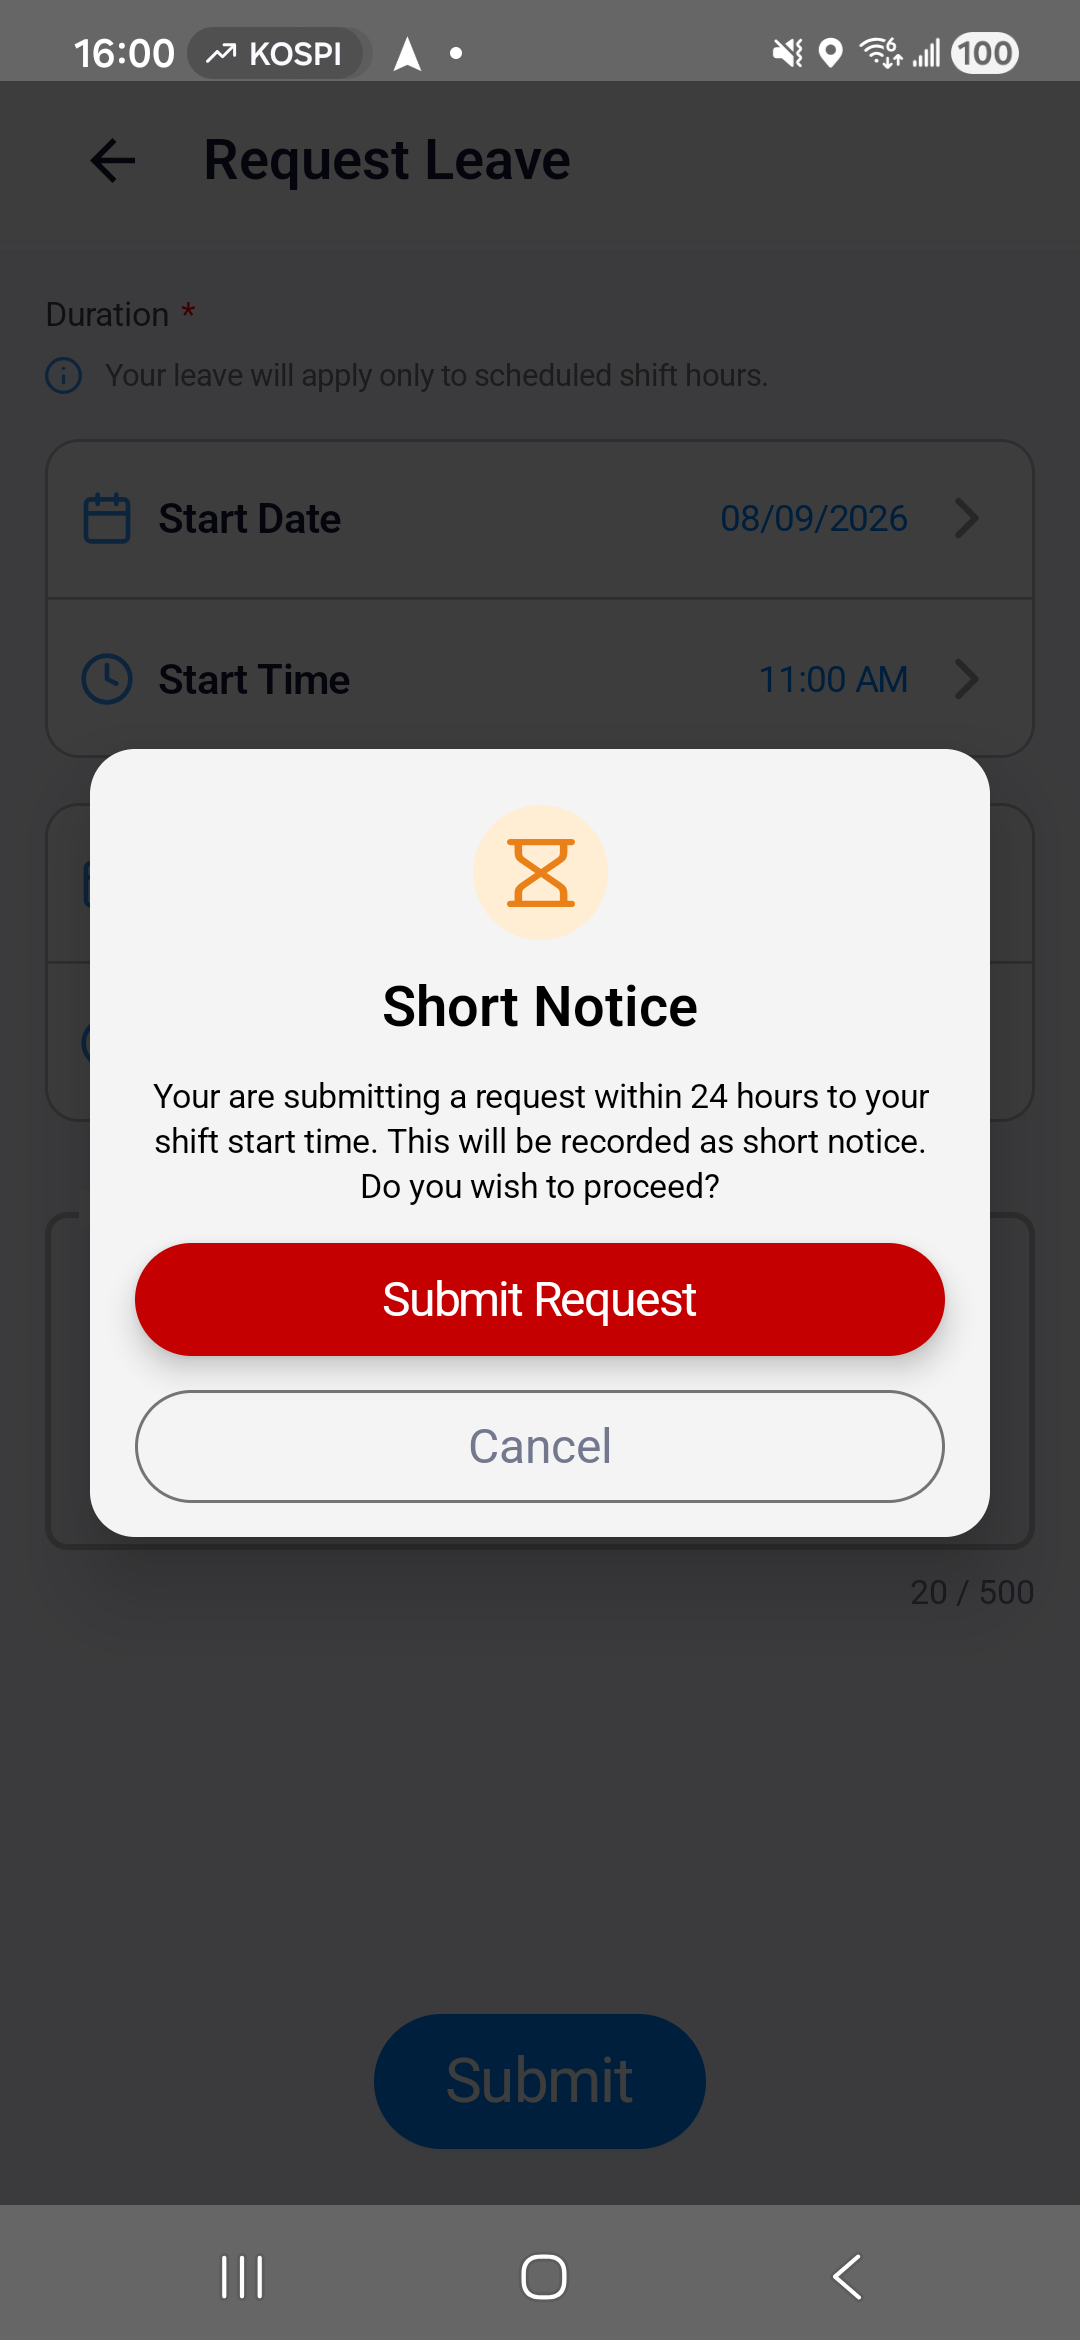
For other requests, Submit sends the form directly. Wait for Leave Details before treating the request as saved.
Check the saved leave details
- Review Total Duration and the FROM and TO dates and times under Leave Period.
- Check Request ID and Reason. Keep the request ID if you need help from dispatch.
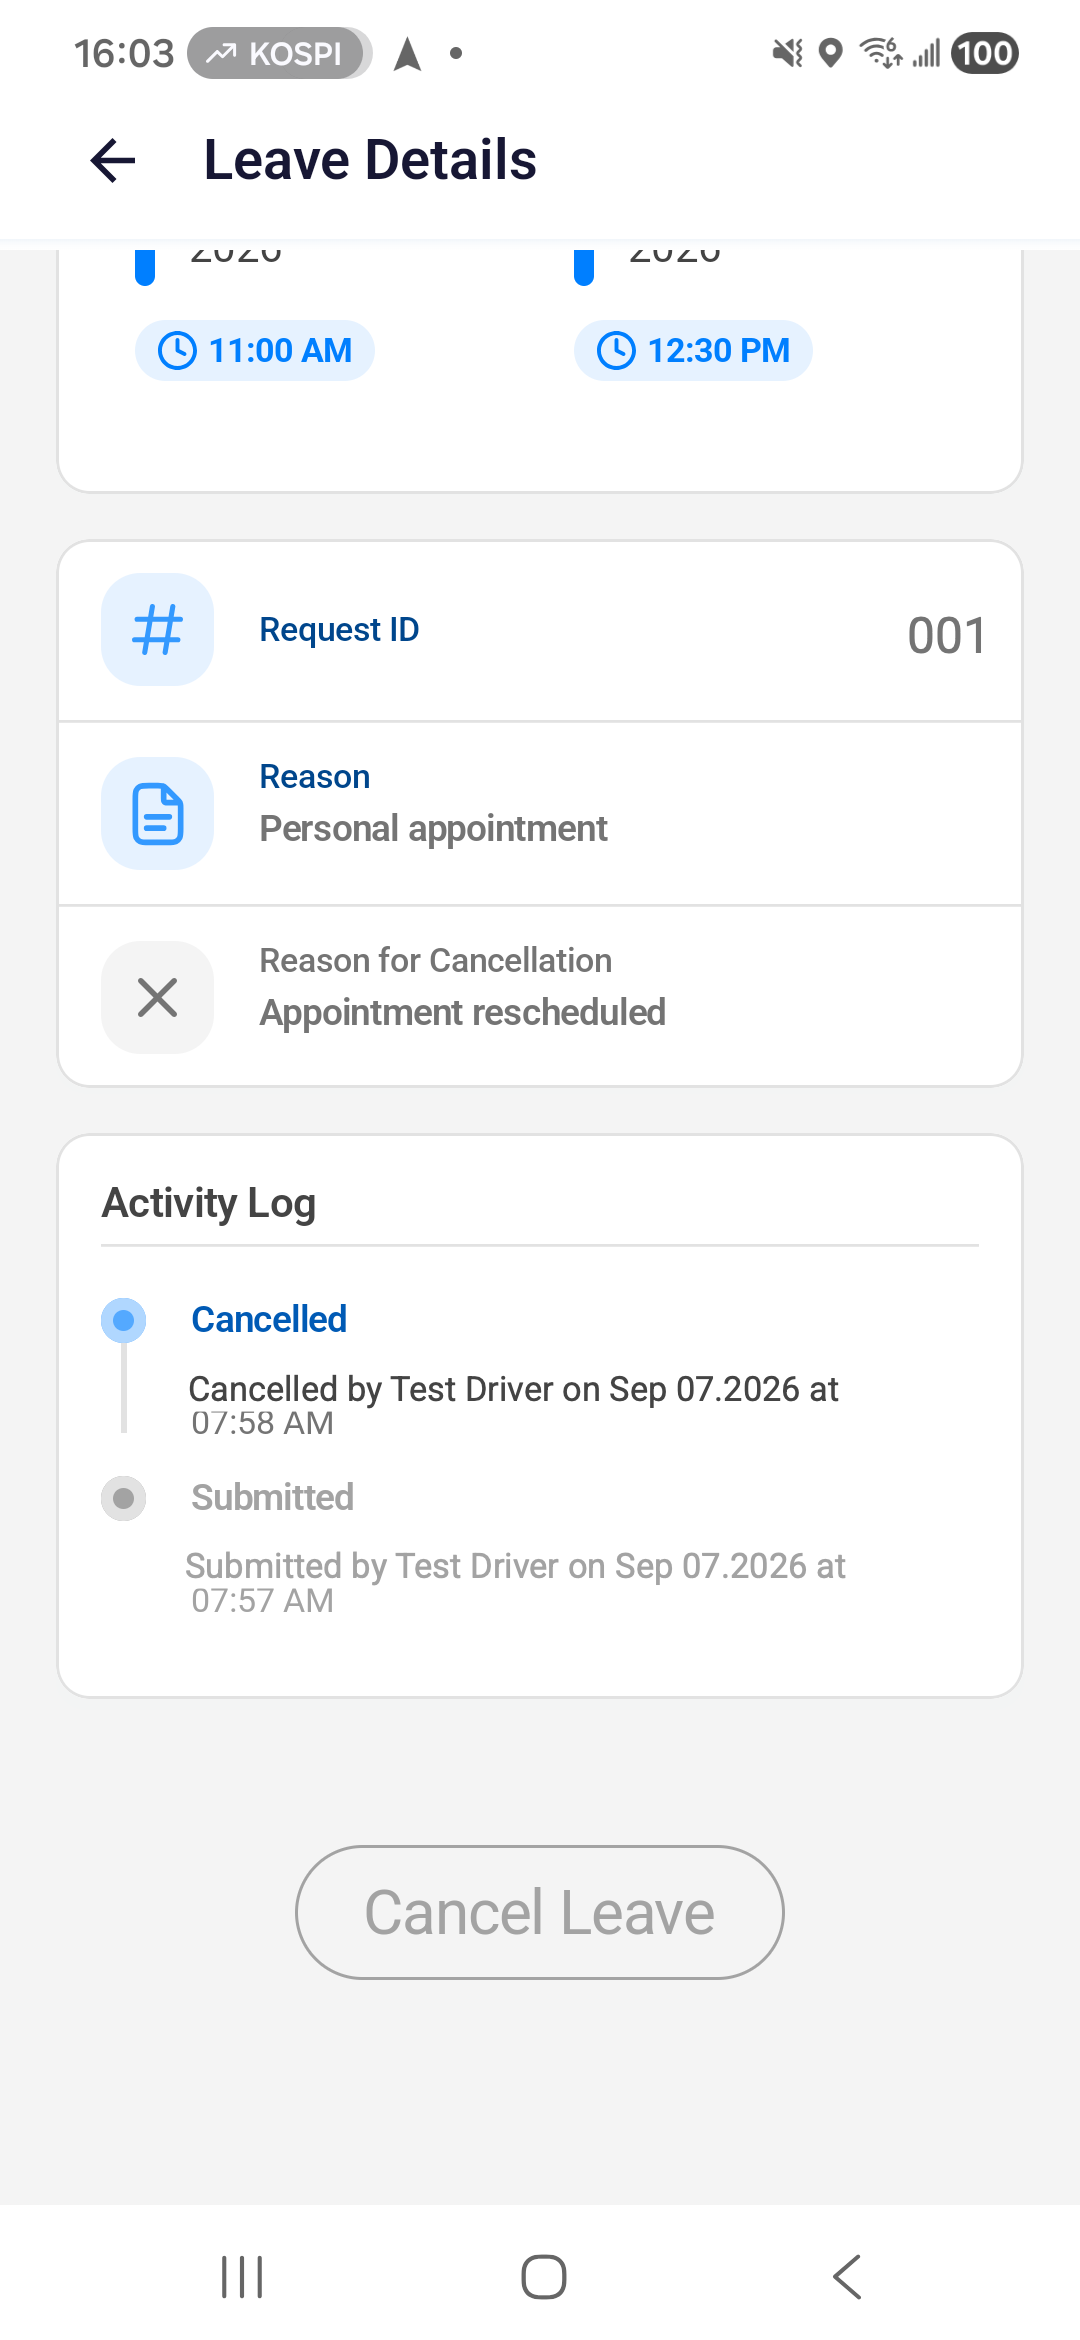
- Scroll down to Activity Log to see the recorded actions, who made them and when.
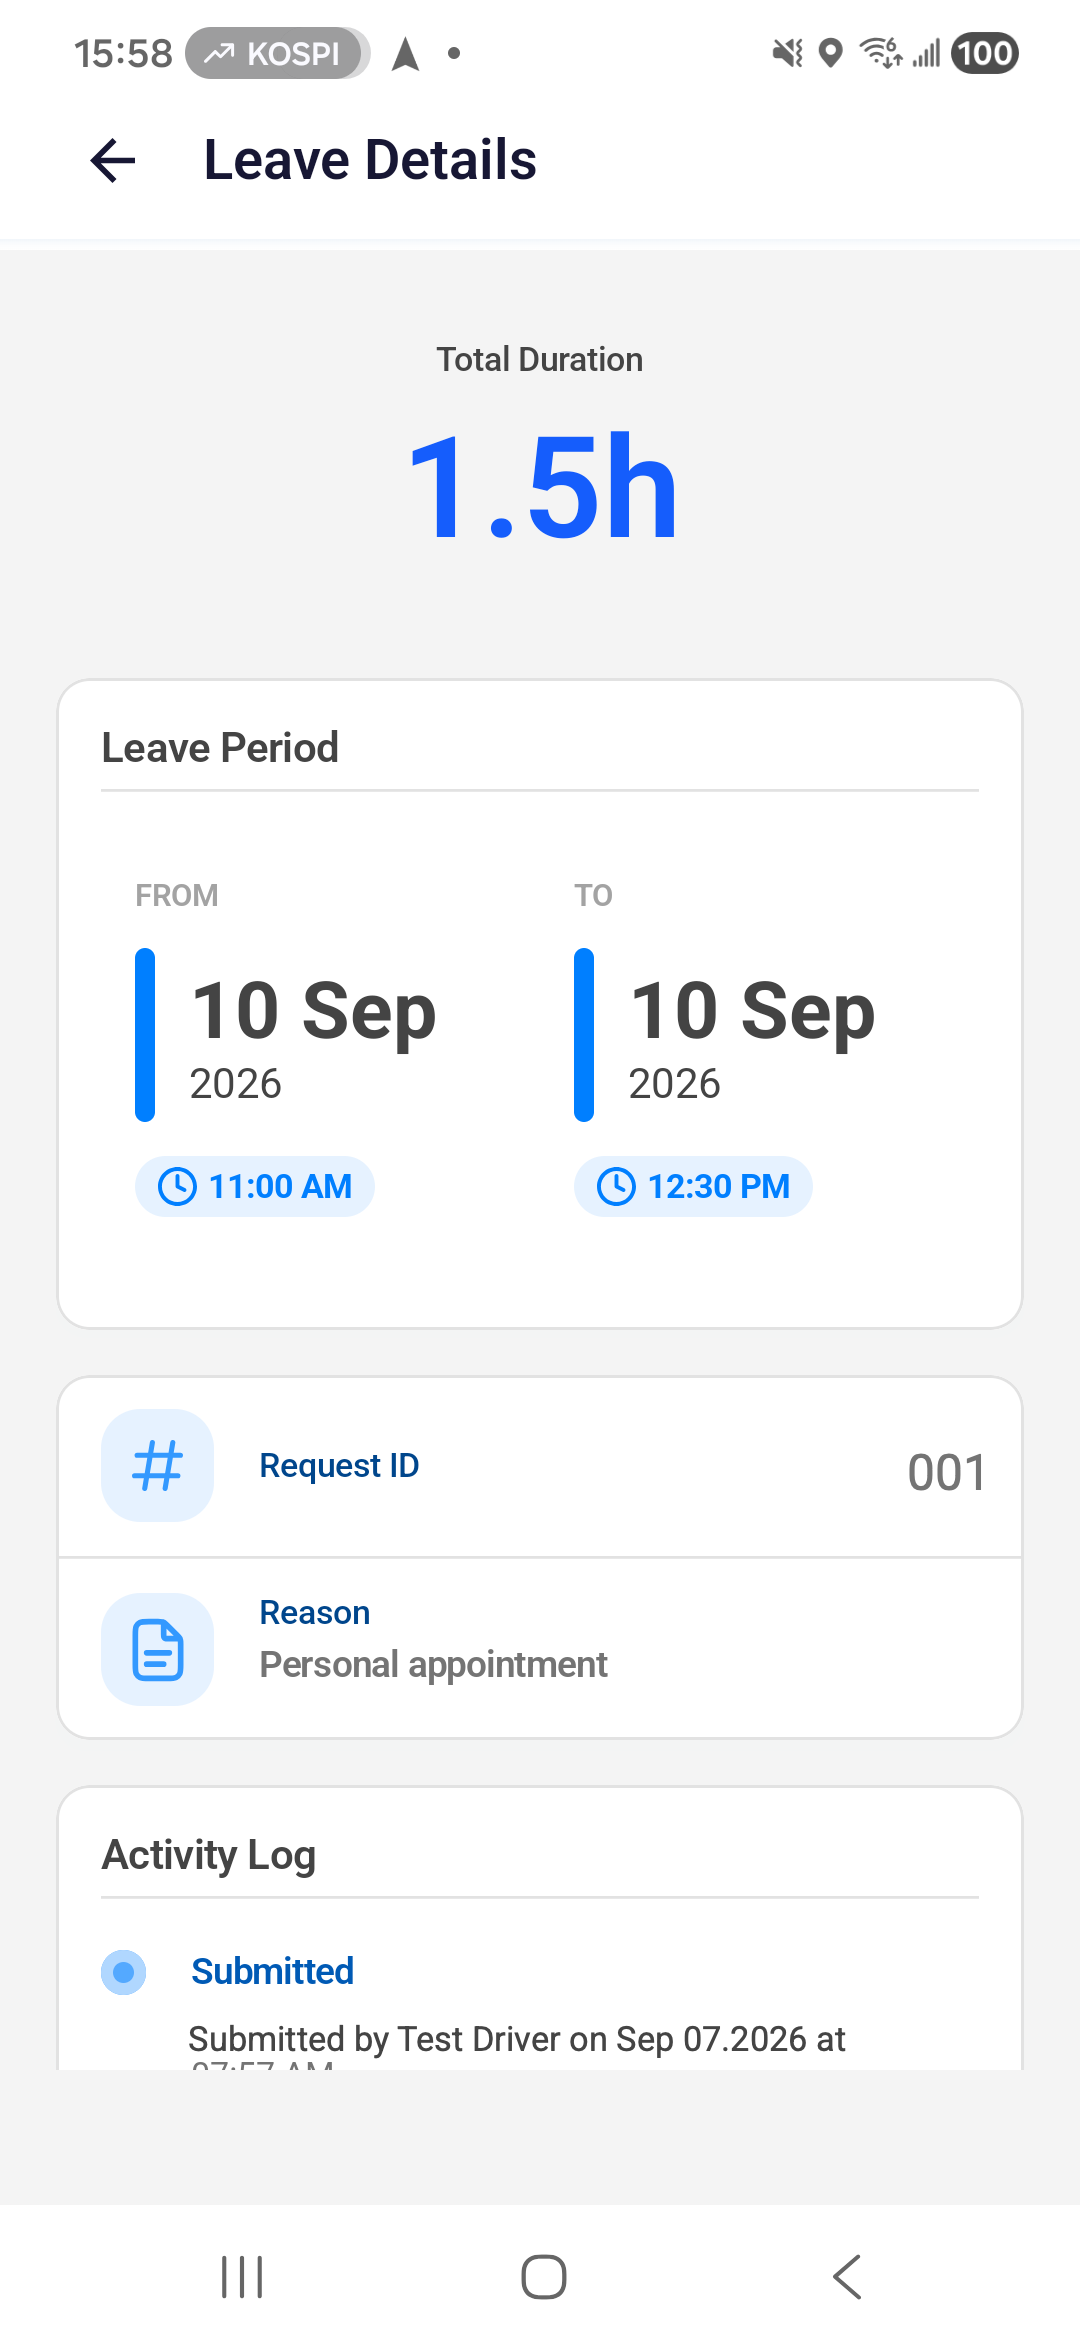
To reopen the full request later, tap its card in Attendance Records. On iPhone, the roster’s Leave Confirmation card opens only a period summary. If the details are wrong, use Cancel Leave when available and submit a replacement. There is no edit form on this screen.
Cancel leave when your plans change
Open the cancellation action
- Open the correct request in Leave Details.
- Scroll down past Activity Log to Cancel Leave.
- Tap Cancel Leave if it is available.
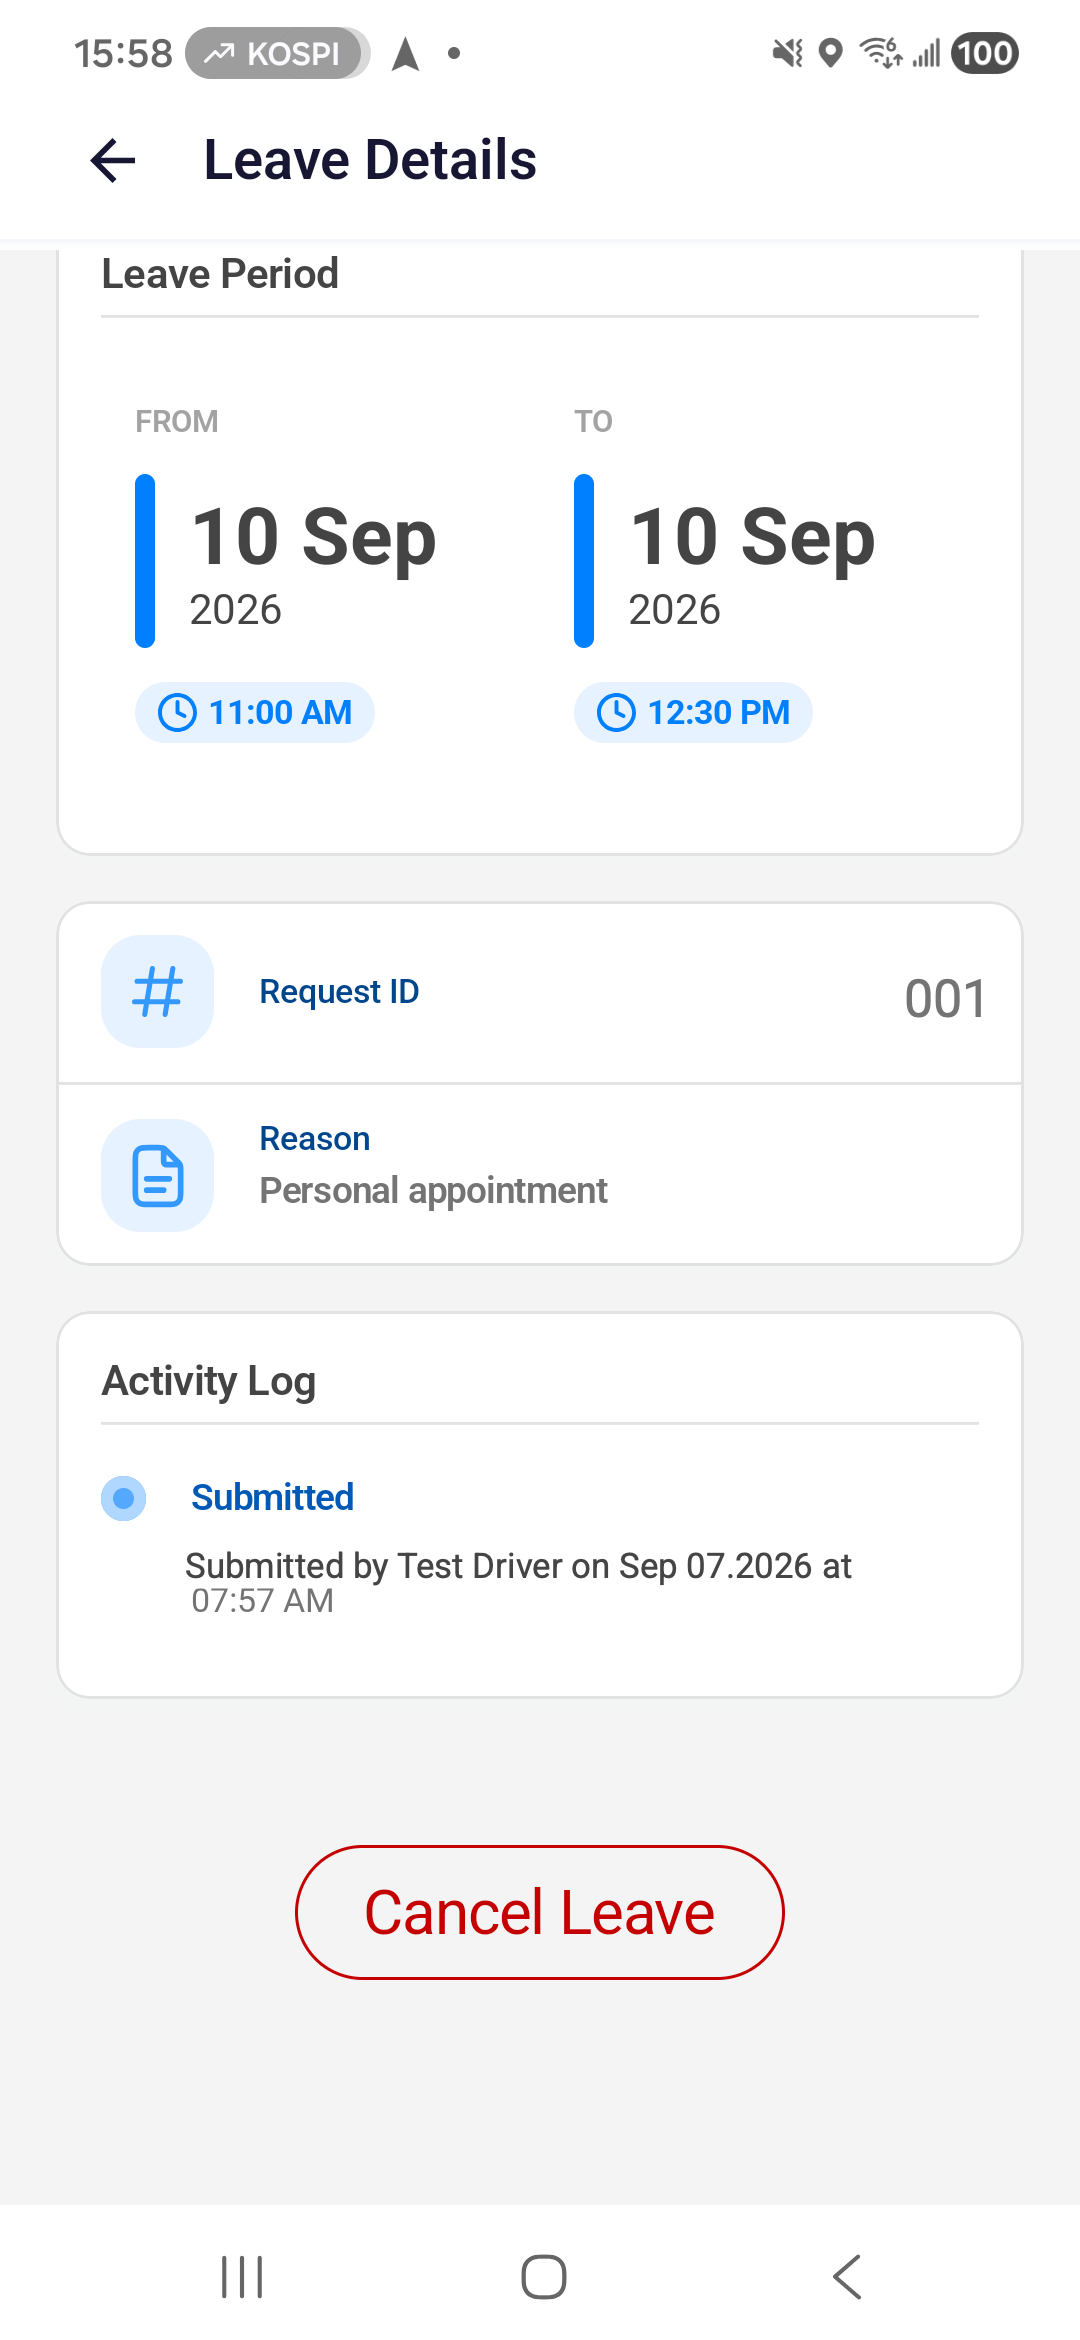
If the button is unavailable, the request cannot be cancelled from this screen. Contact dispatch if you still need it changed.
Enter a cancellation reason
- Fill in Cancel Reason, using up to 500 characters.
- Tap the red Cancel Leave button to confirm. Tap Close instead if you want to keep the leave.
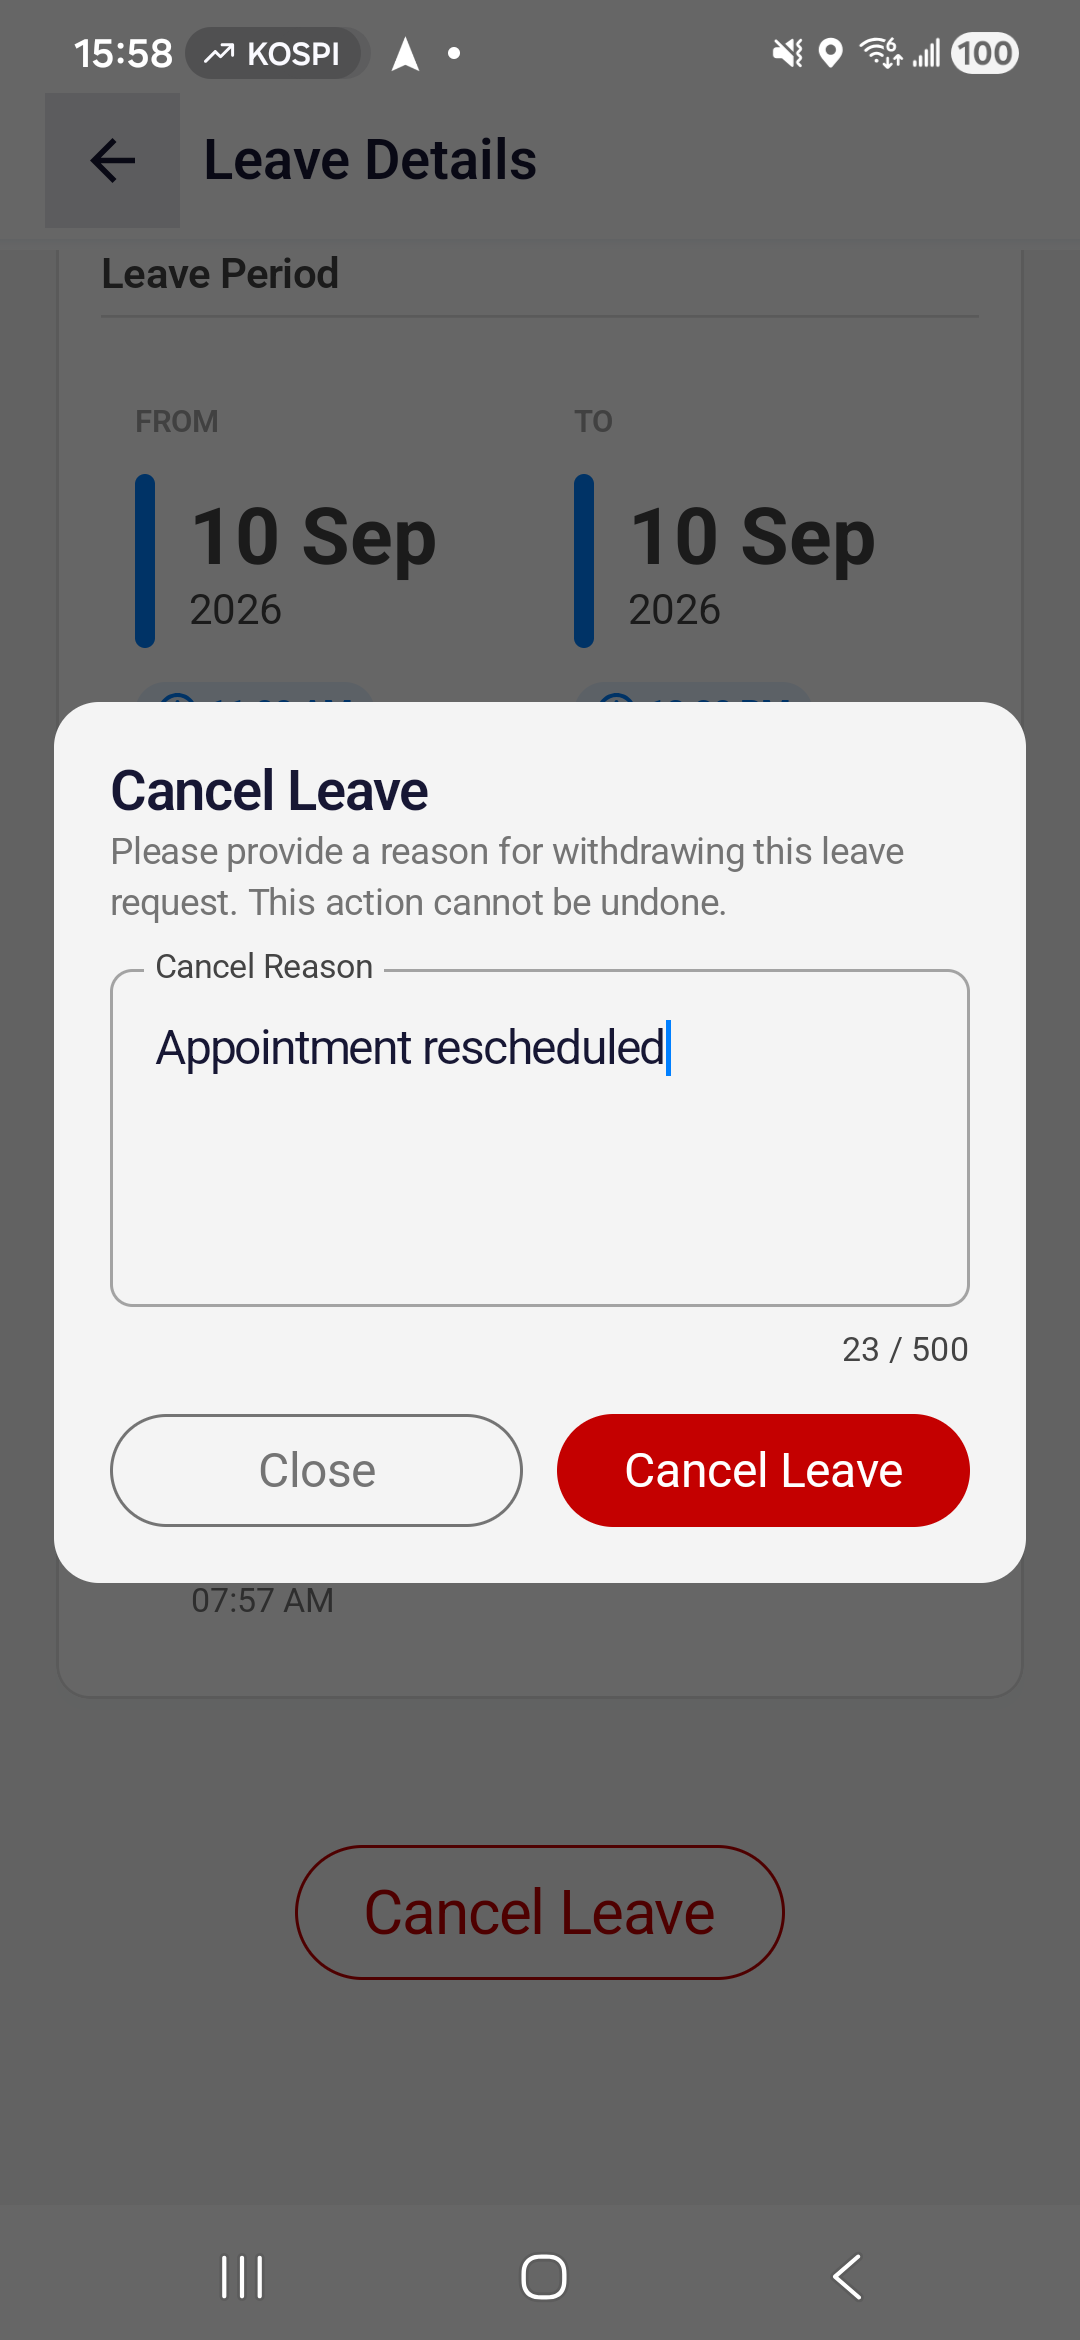
Cancellation cannot be undone. Closing the dialog without confirming keeps the request unchanged.
Check the cancellation result
- Wait for Leave Cancelled in the details page.
- Scroll down to check Reason for Cancellation and the new entry in Activity Log.
- Return to Attendance Records and choose Cancelled to find the request again.
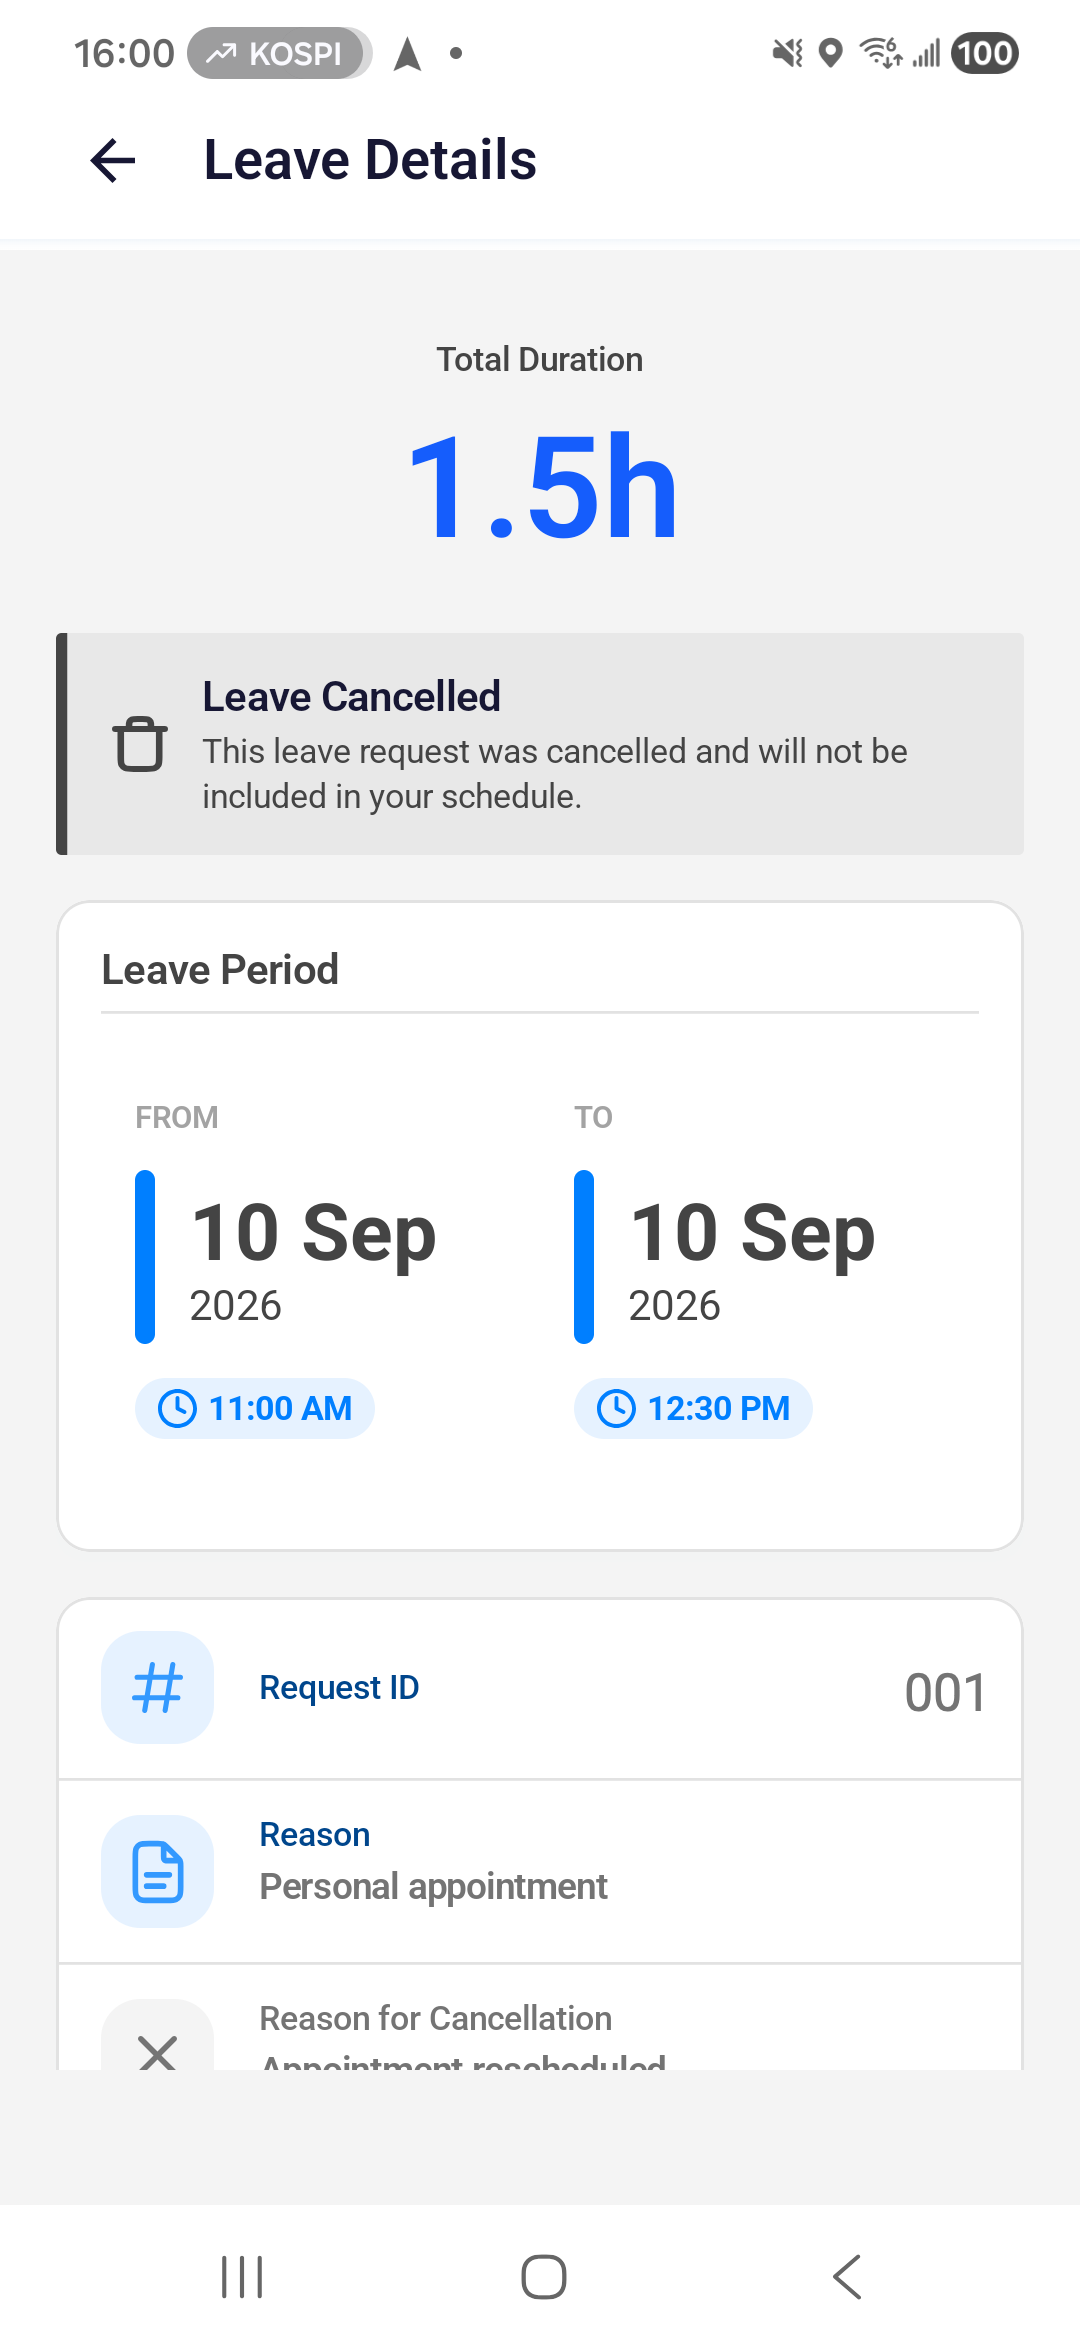
The cancelled leave is no longer included in your schedule. Its record remains available; cancellation does not erase its history.
If you cannot finish
| What you see | What to do |
|---|---|
| Submit is unavailable | Select all four date and time fields, check that the end is later, and enter a reason. |
| A time field becomes empty after changing its date | Select a time again for the new date. |
| The app reports overlapping leave or another submission error | Read the message and check your existing requests before changing the dates or retrying. |
| A request is missing from the list | Check the year and choose All. For a cancelled request, also check Cancelled. |
| The connection fails while saving or cancelling | Reconnect and check the request's details before retrying. Do not assume the action succeeded from the button tap alone. |