Check on a fleet
VIEW · UPDATE
Find a fleet in the list, open it, and read how it is set up and how it is running.
Where to find it: Fleets › your fleet.
The fleet opens on Overview, its fleet code and status badge sit in the header, and the Drivers, Vehicles and Assistants tabs each carry a count.
1. Read the fleet list – VIEW
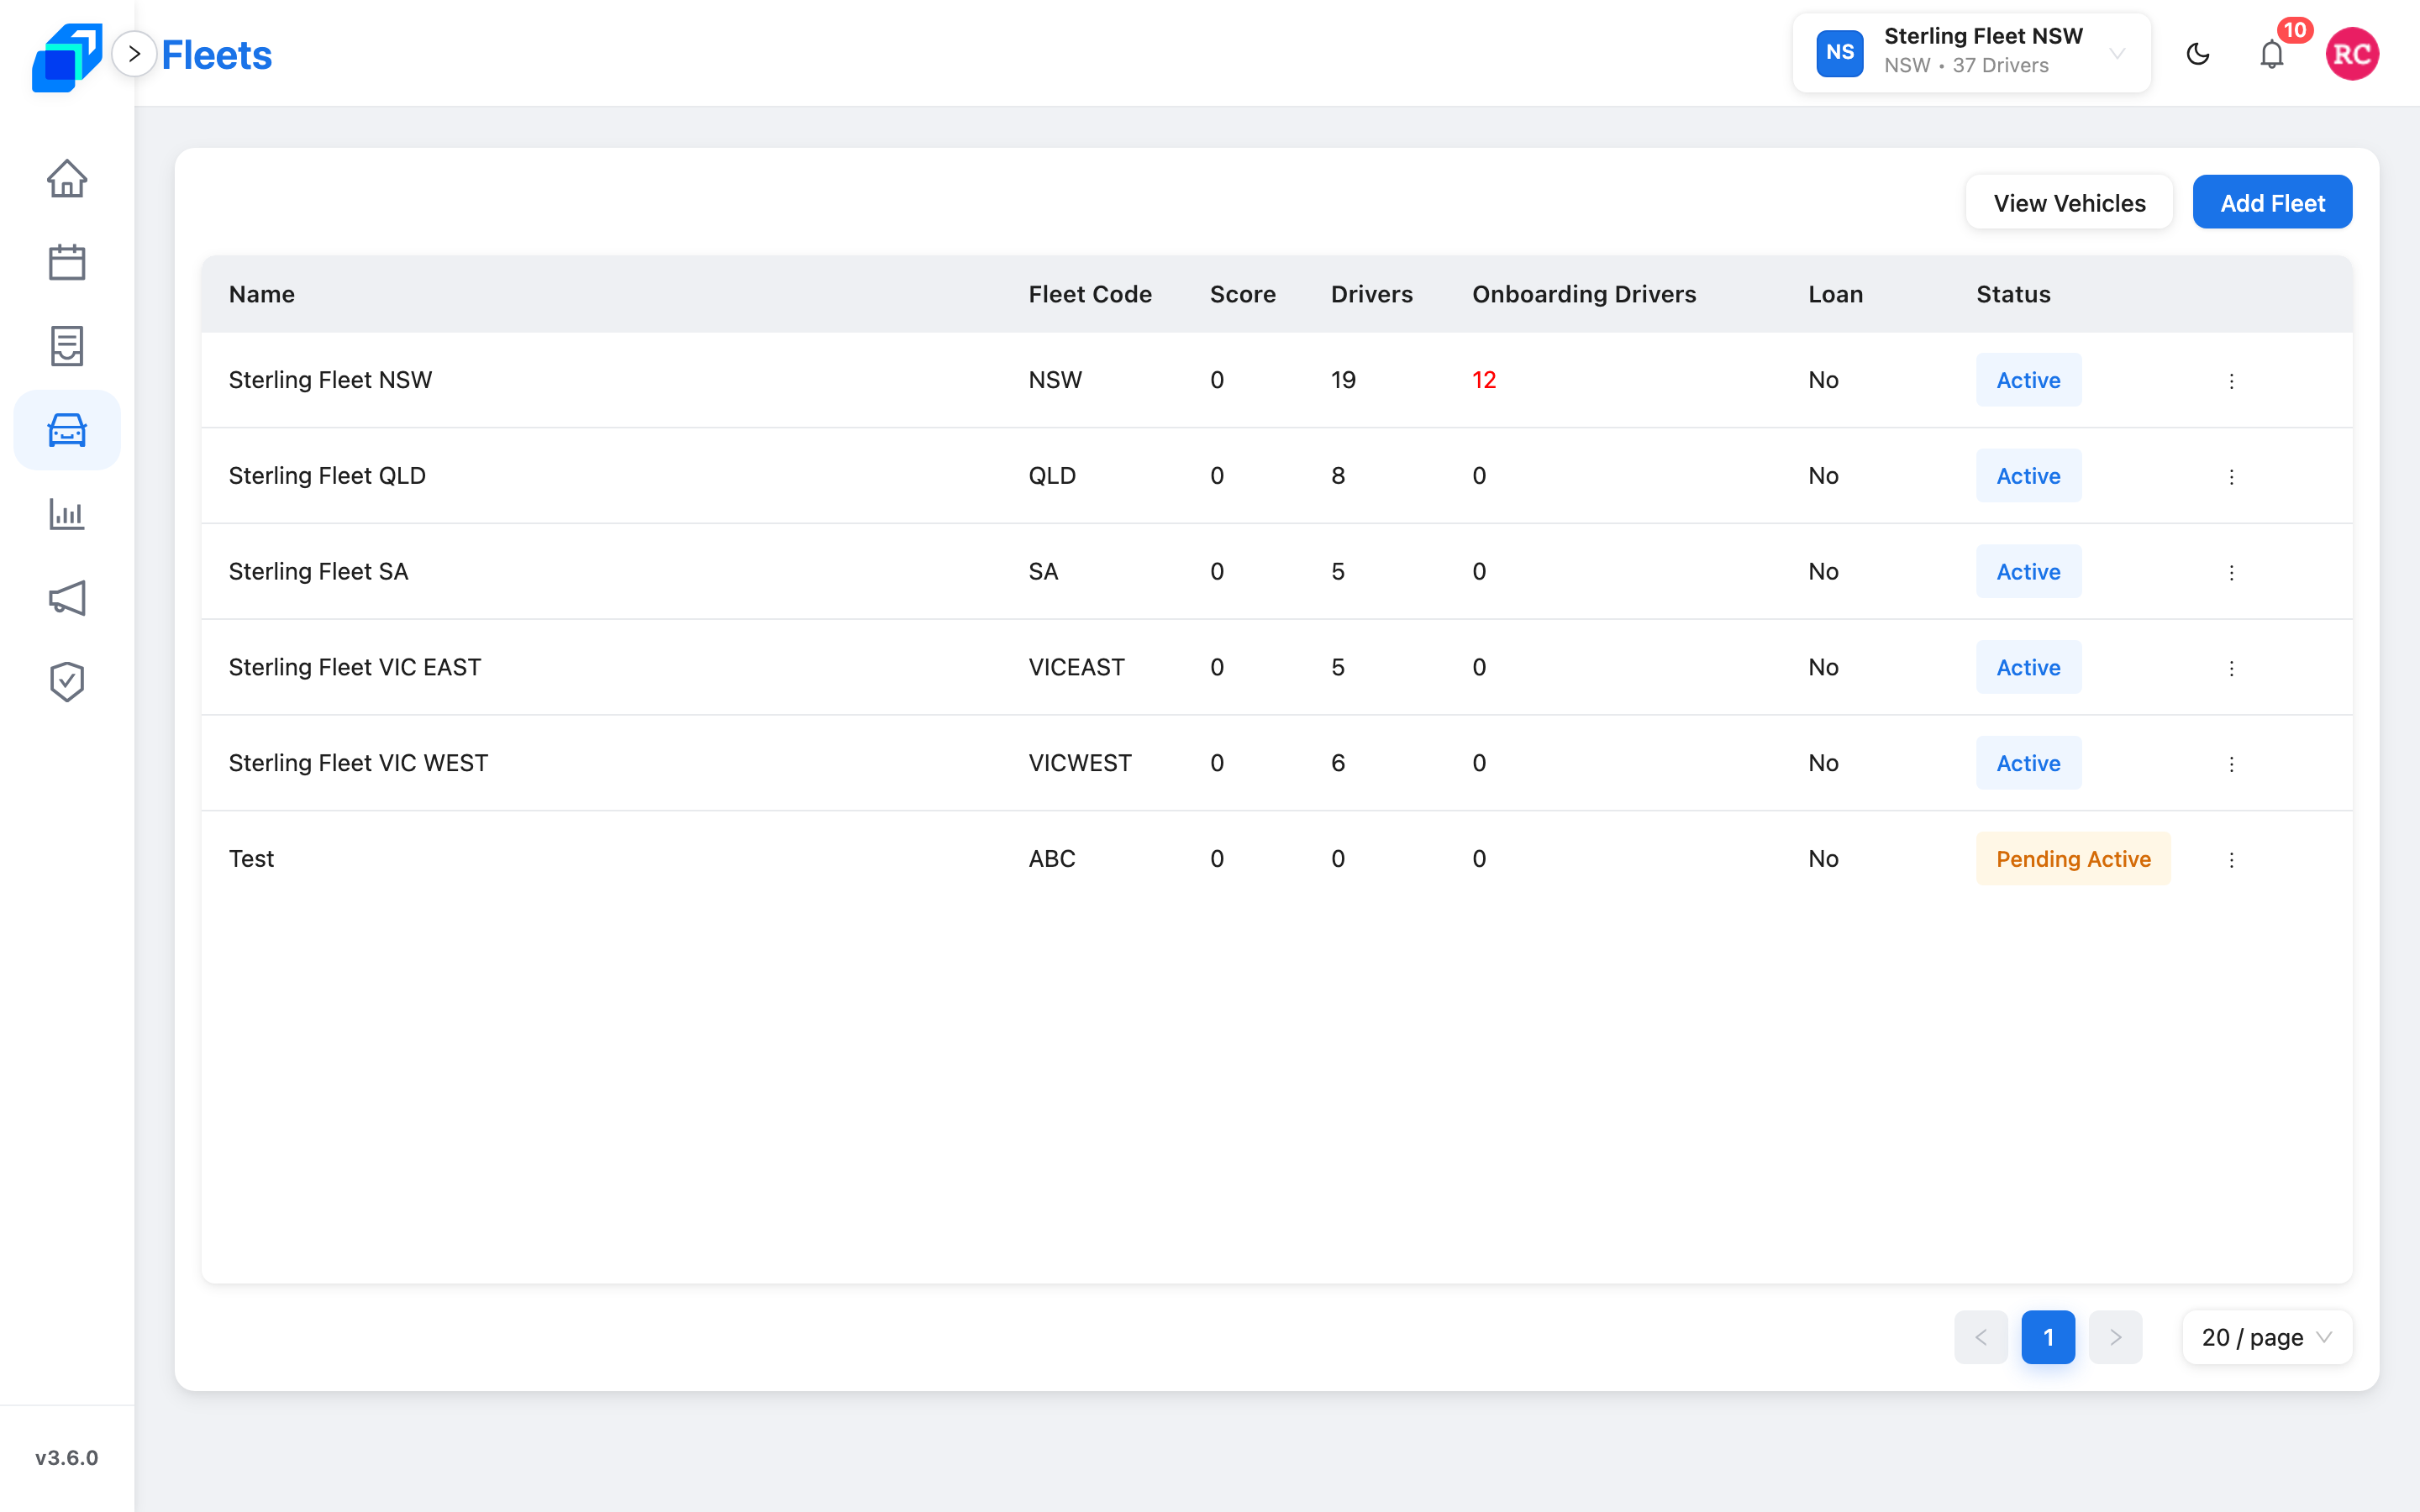
Fleets in the left rail lists every fleet your role covers, one to a row.
What each column shows:
- Name – the fleet's name
- Fleet Code – its short code, the one a driver types to join it
- Score – its performance rating
- Drivers – how many drivers are on this fleet
- Onboarding Drivers – how many applications are waiting. The number turns red as soon as there is one. Rest the pointer on the heading. It reads Drivers awaiting review.
- Loan – Yes or No, whether the fleet is out on loan
- Status – the coloured badge, covered in step 4
Two buttons sit above the list. View Vehicles opens every vehicle you are allowed to see, and Add Fleet starts a new one.
Some accounts cover a single fleet and cannot add another. Those land straight on that fleet and never see this list.
2. Open a fleet – VIEW
Click anywhere on a row except the ⋮ at its end. The fleet opens on Overview.
The ⋮ is a shortcut menu instead. It is grouped under Drivers and Fleet, and jumps straight to one part of the fleet – Register Driver or Fleet Assistants, for example.
The tabs across the top are Overview, Drivers, Vehicles and Assistants. The last three carry a count, Overview does not, and a tab your role cannot read is not shown at all.
3. Check how the fleet is set up – UPDATE
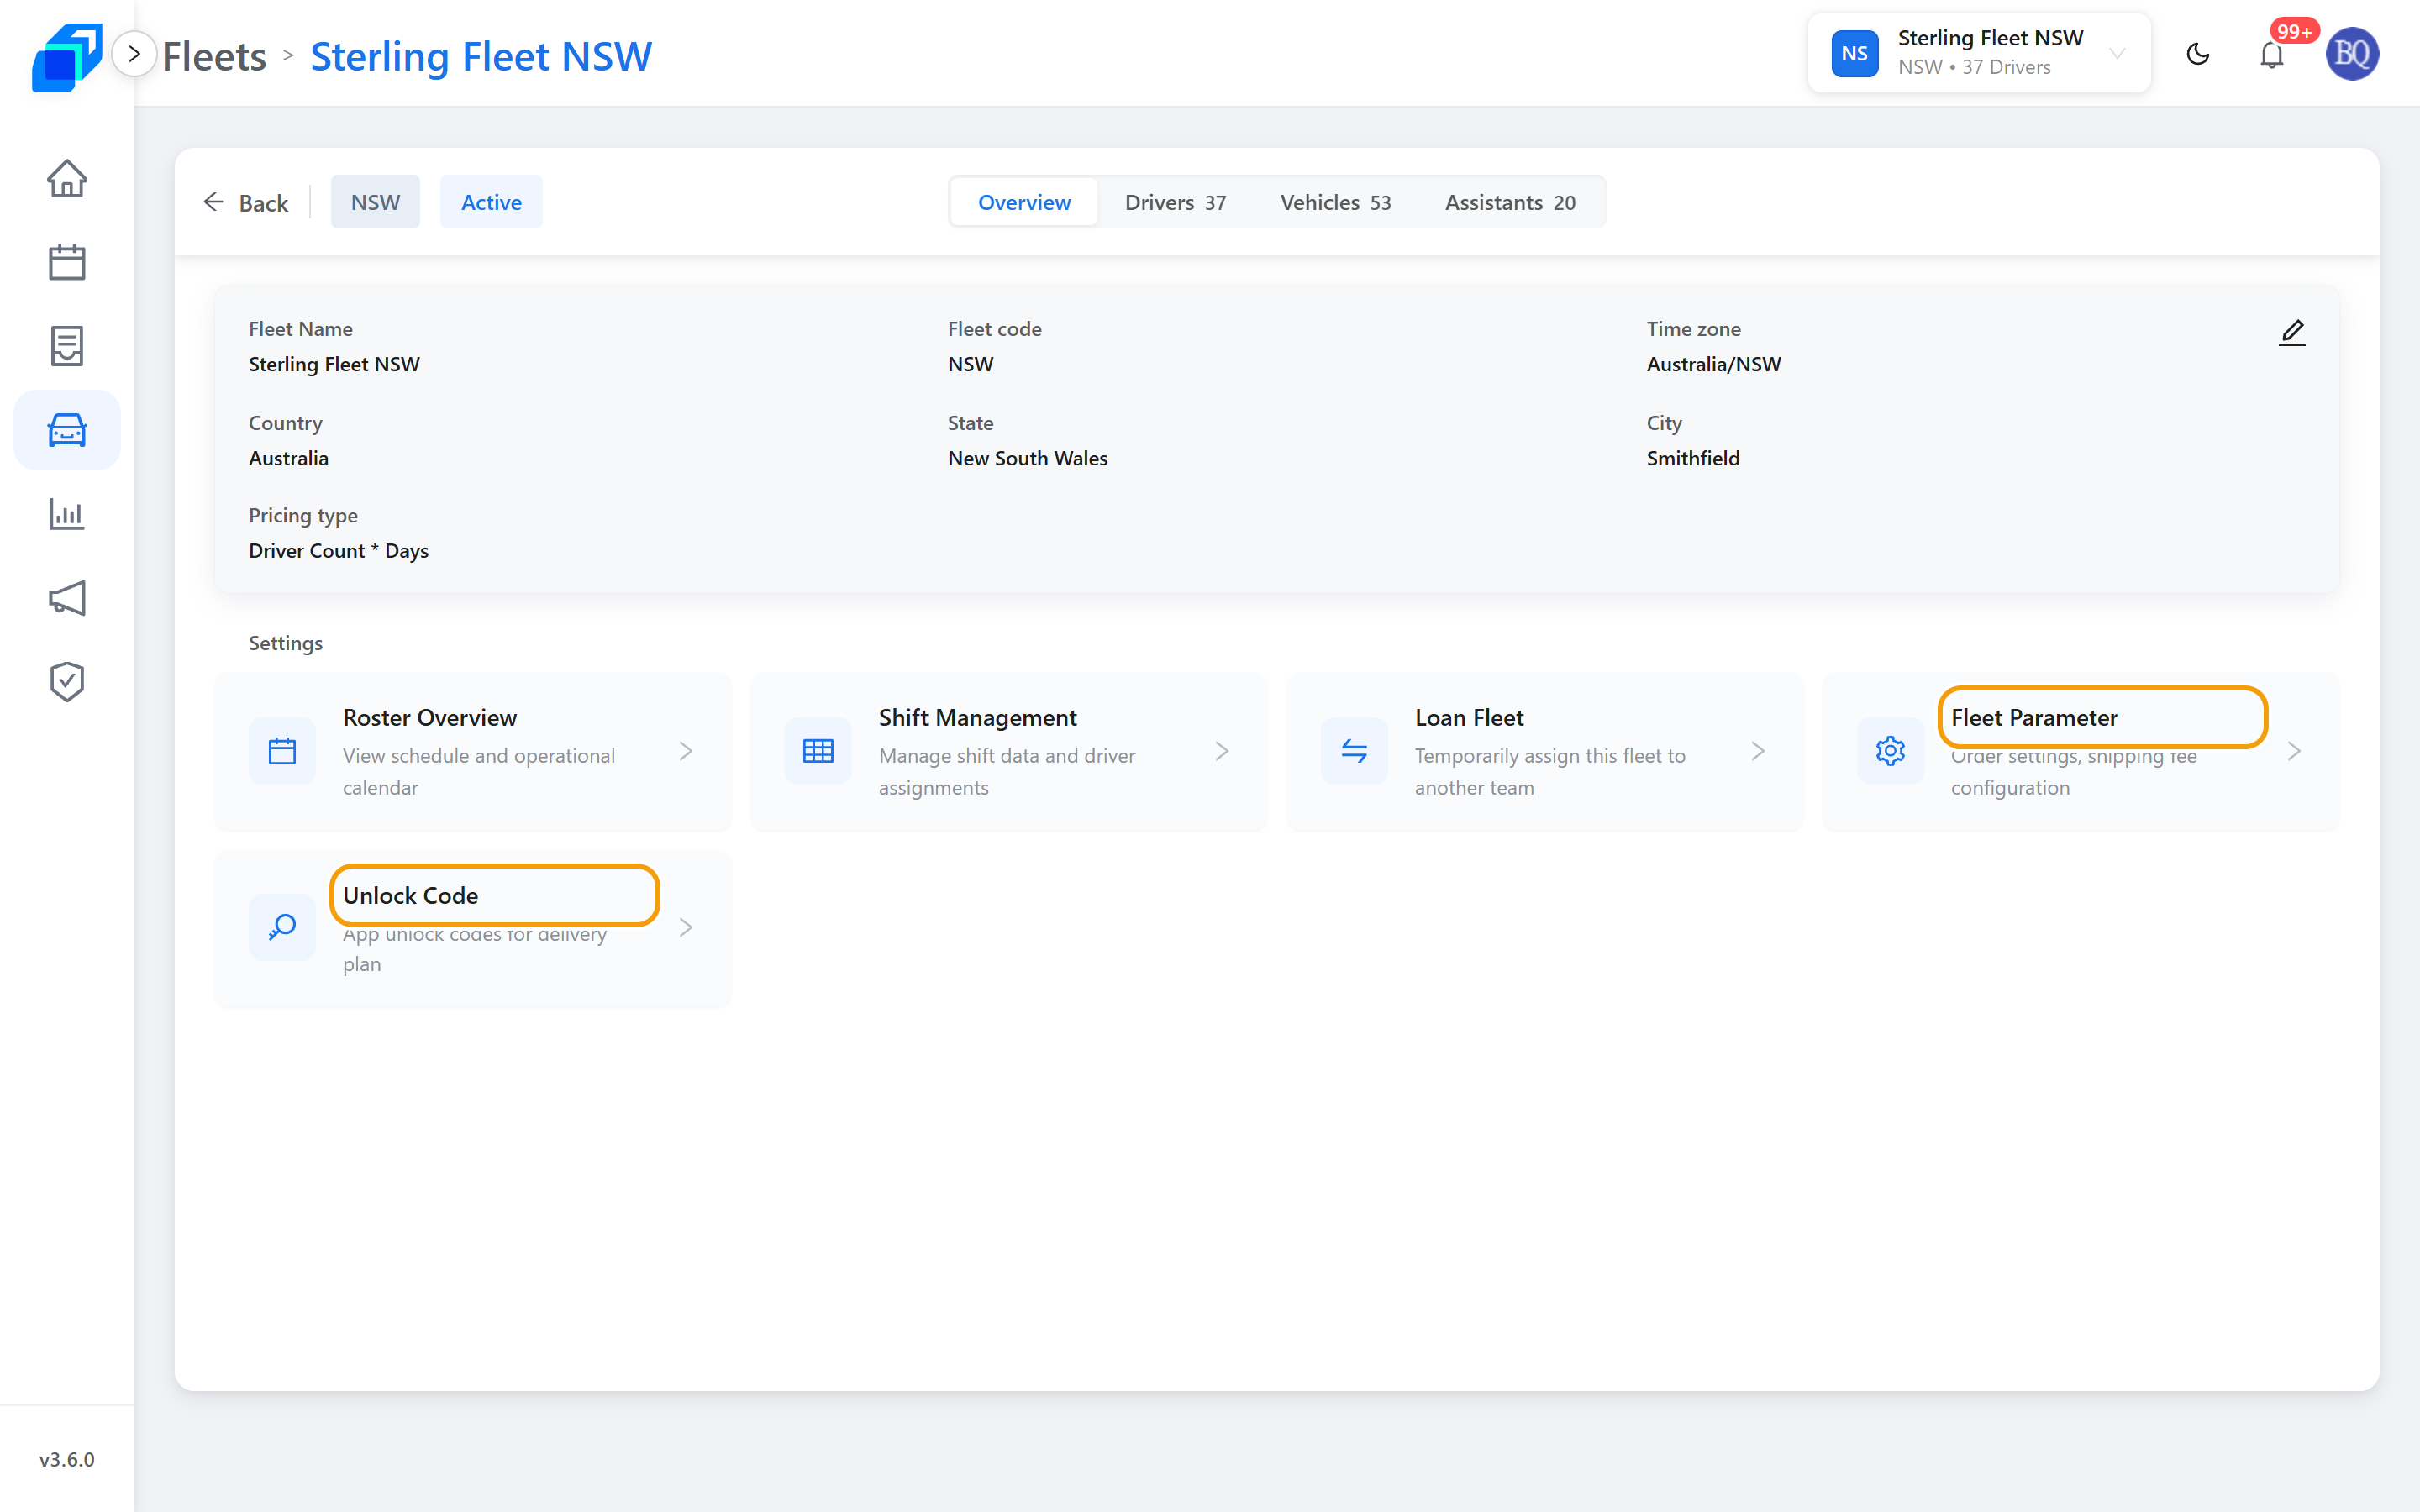
Overview holds the fleet's own details: Fleet Name, Fleet code, Time zone, Country, State, City and Pricing type.
Below them, the delivery cities are grouped by state, and the heading carries the total, like Delivery City · 12.
To change any of it, click the pencil at the top right, edit the fields, then click Save. Cancel leaves everything as it was.
Further down, Settings is a set of shortcut cards – Roster Overview, Shift Management, Loan Fleet, Fleet Parameter and Unlock Code.
4. Read the status badge – VIEW
The badge in the header and the Status column in the list show the same four values:
- Active (blue) – the fleet is working normally
- Pending Active (amber) – the fleet is not active yet, because a loan on it is still pending
- Loan Active (blue) – the fleet is on loan to another team
- Blocked (red) – the fleet is stopped
5. Find the fleet's vehicles – VIEW
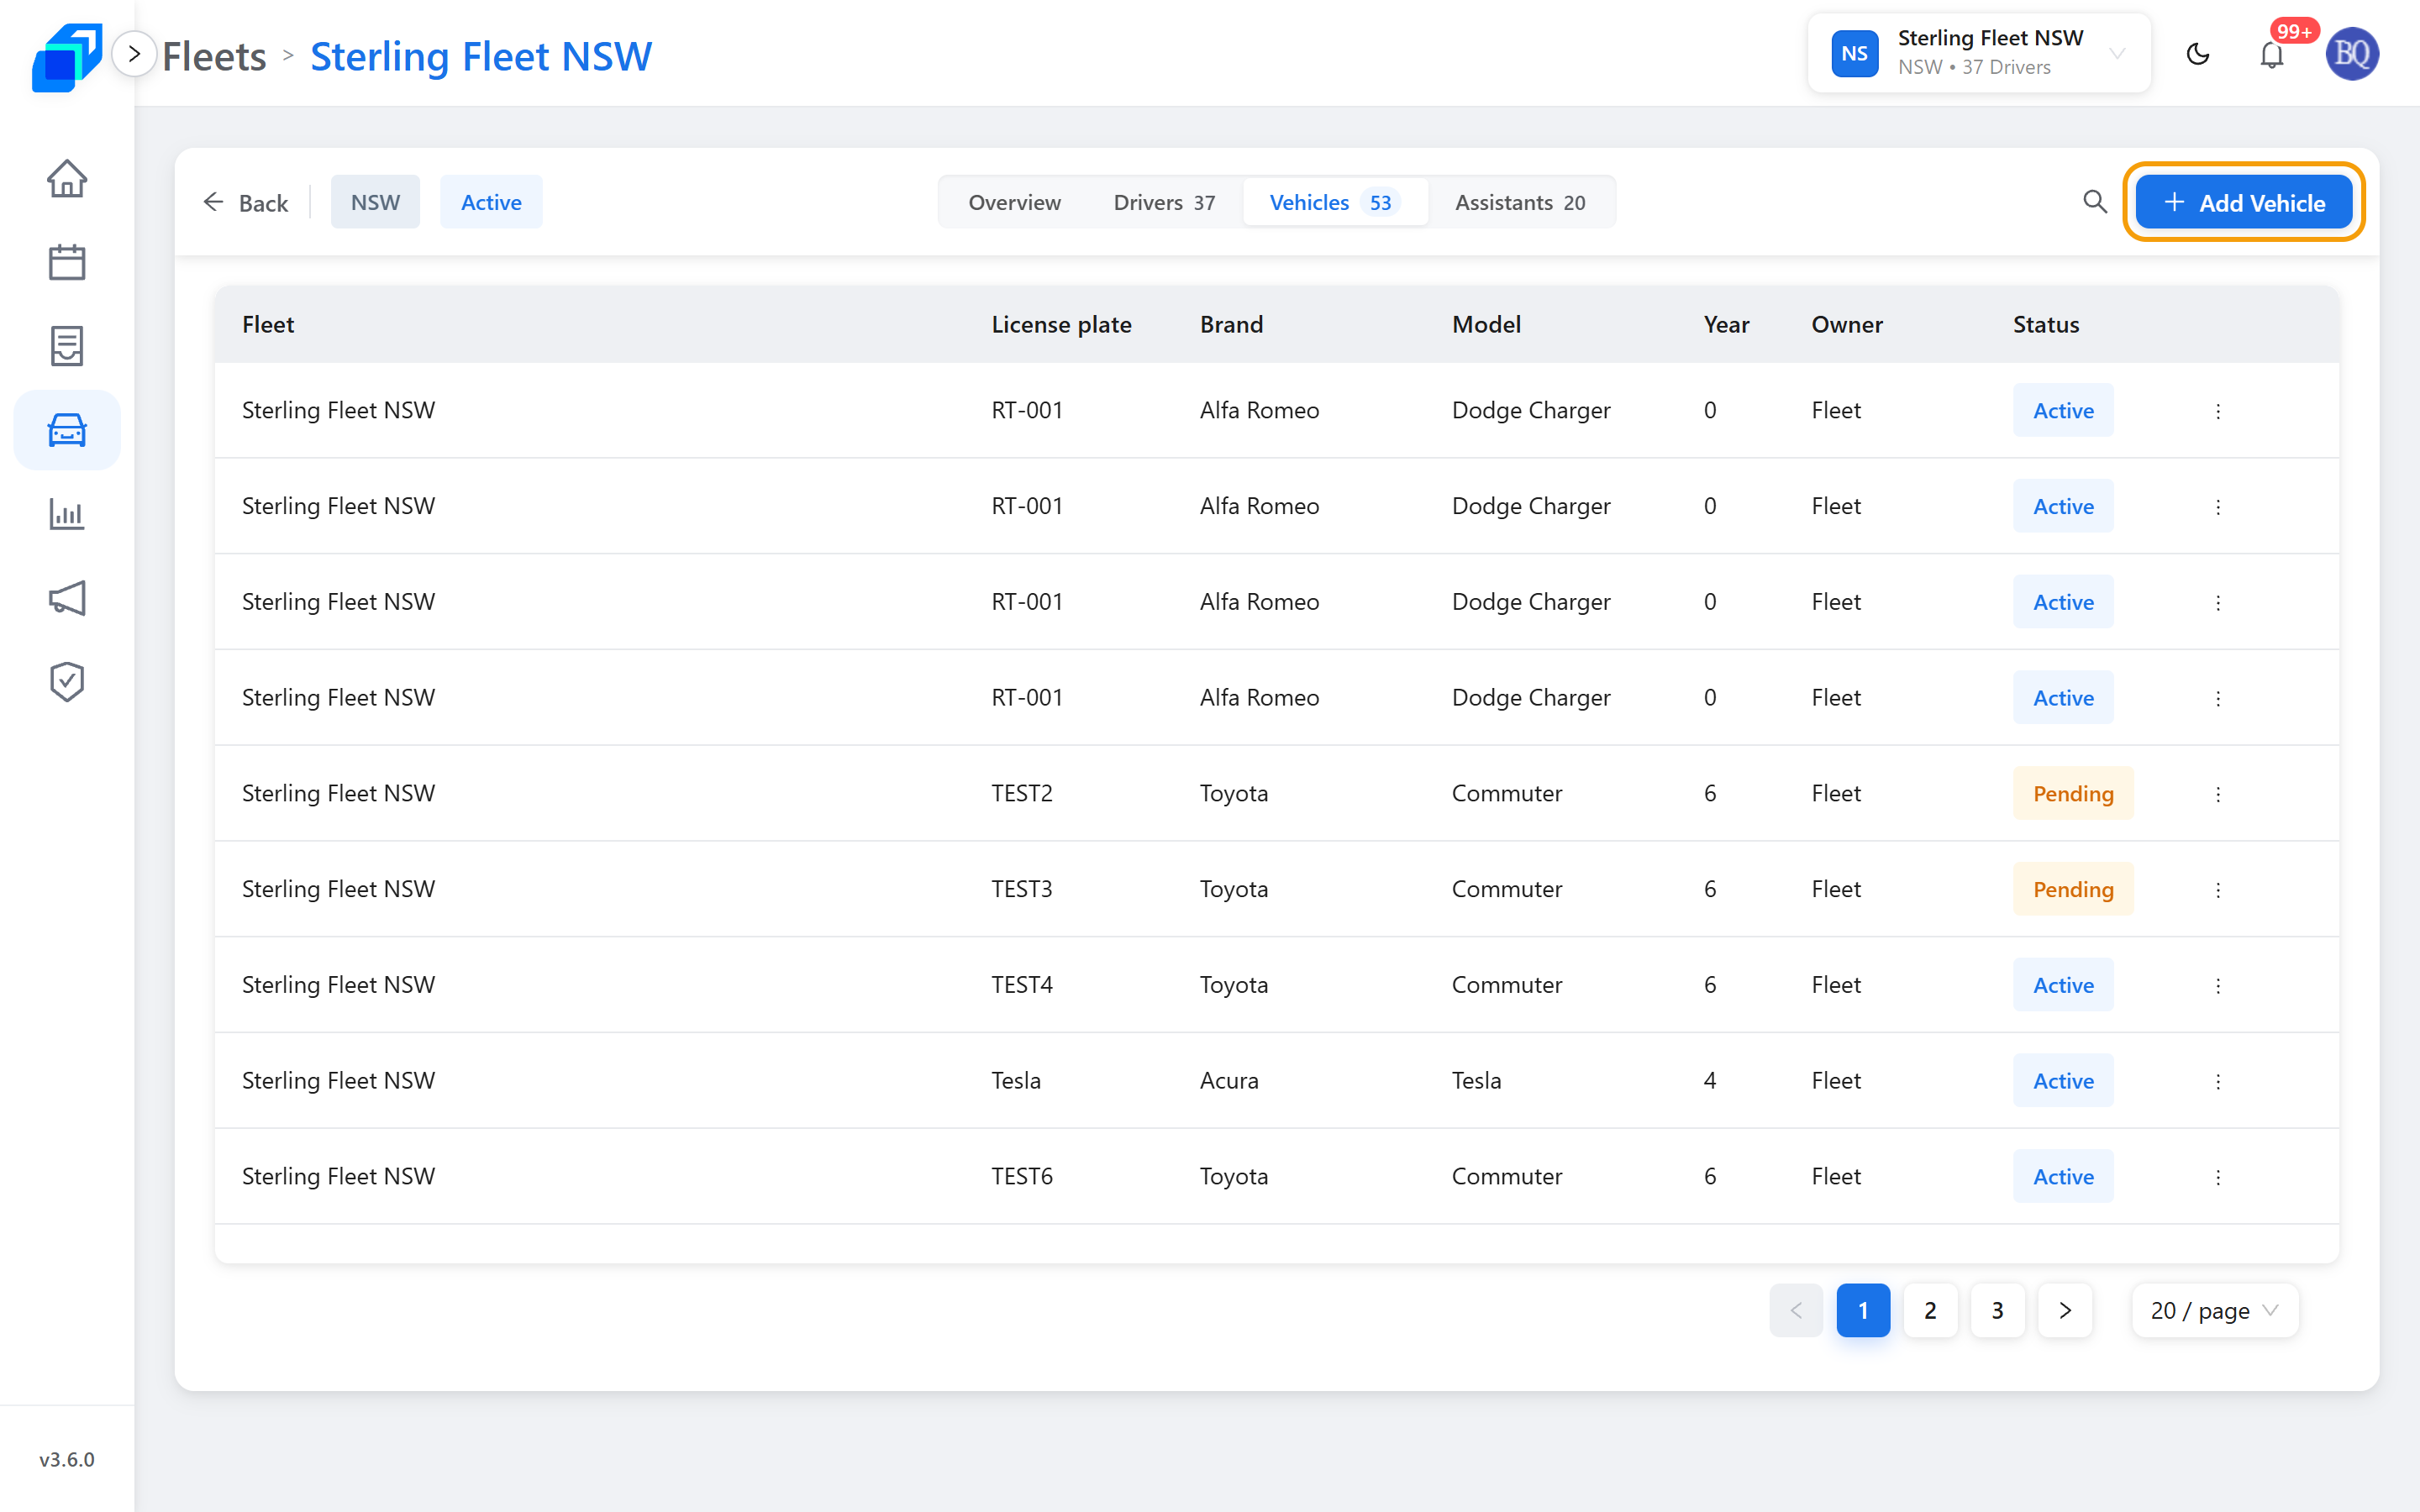
Vehicles lists the vehicles on this fleet, carries their count, and puts Add Vehicle at the top right. Managing vehicles covers the rest.
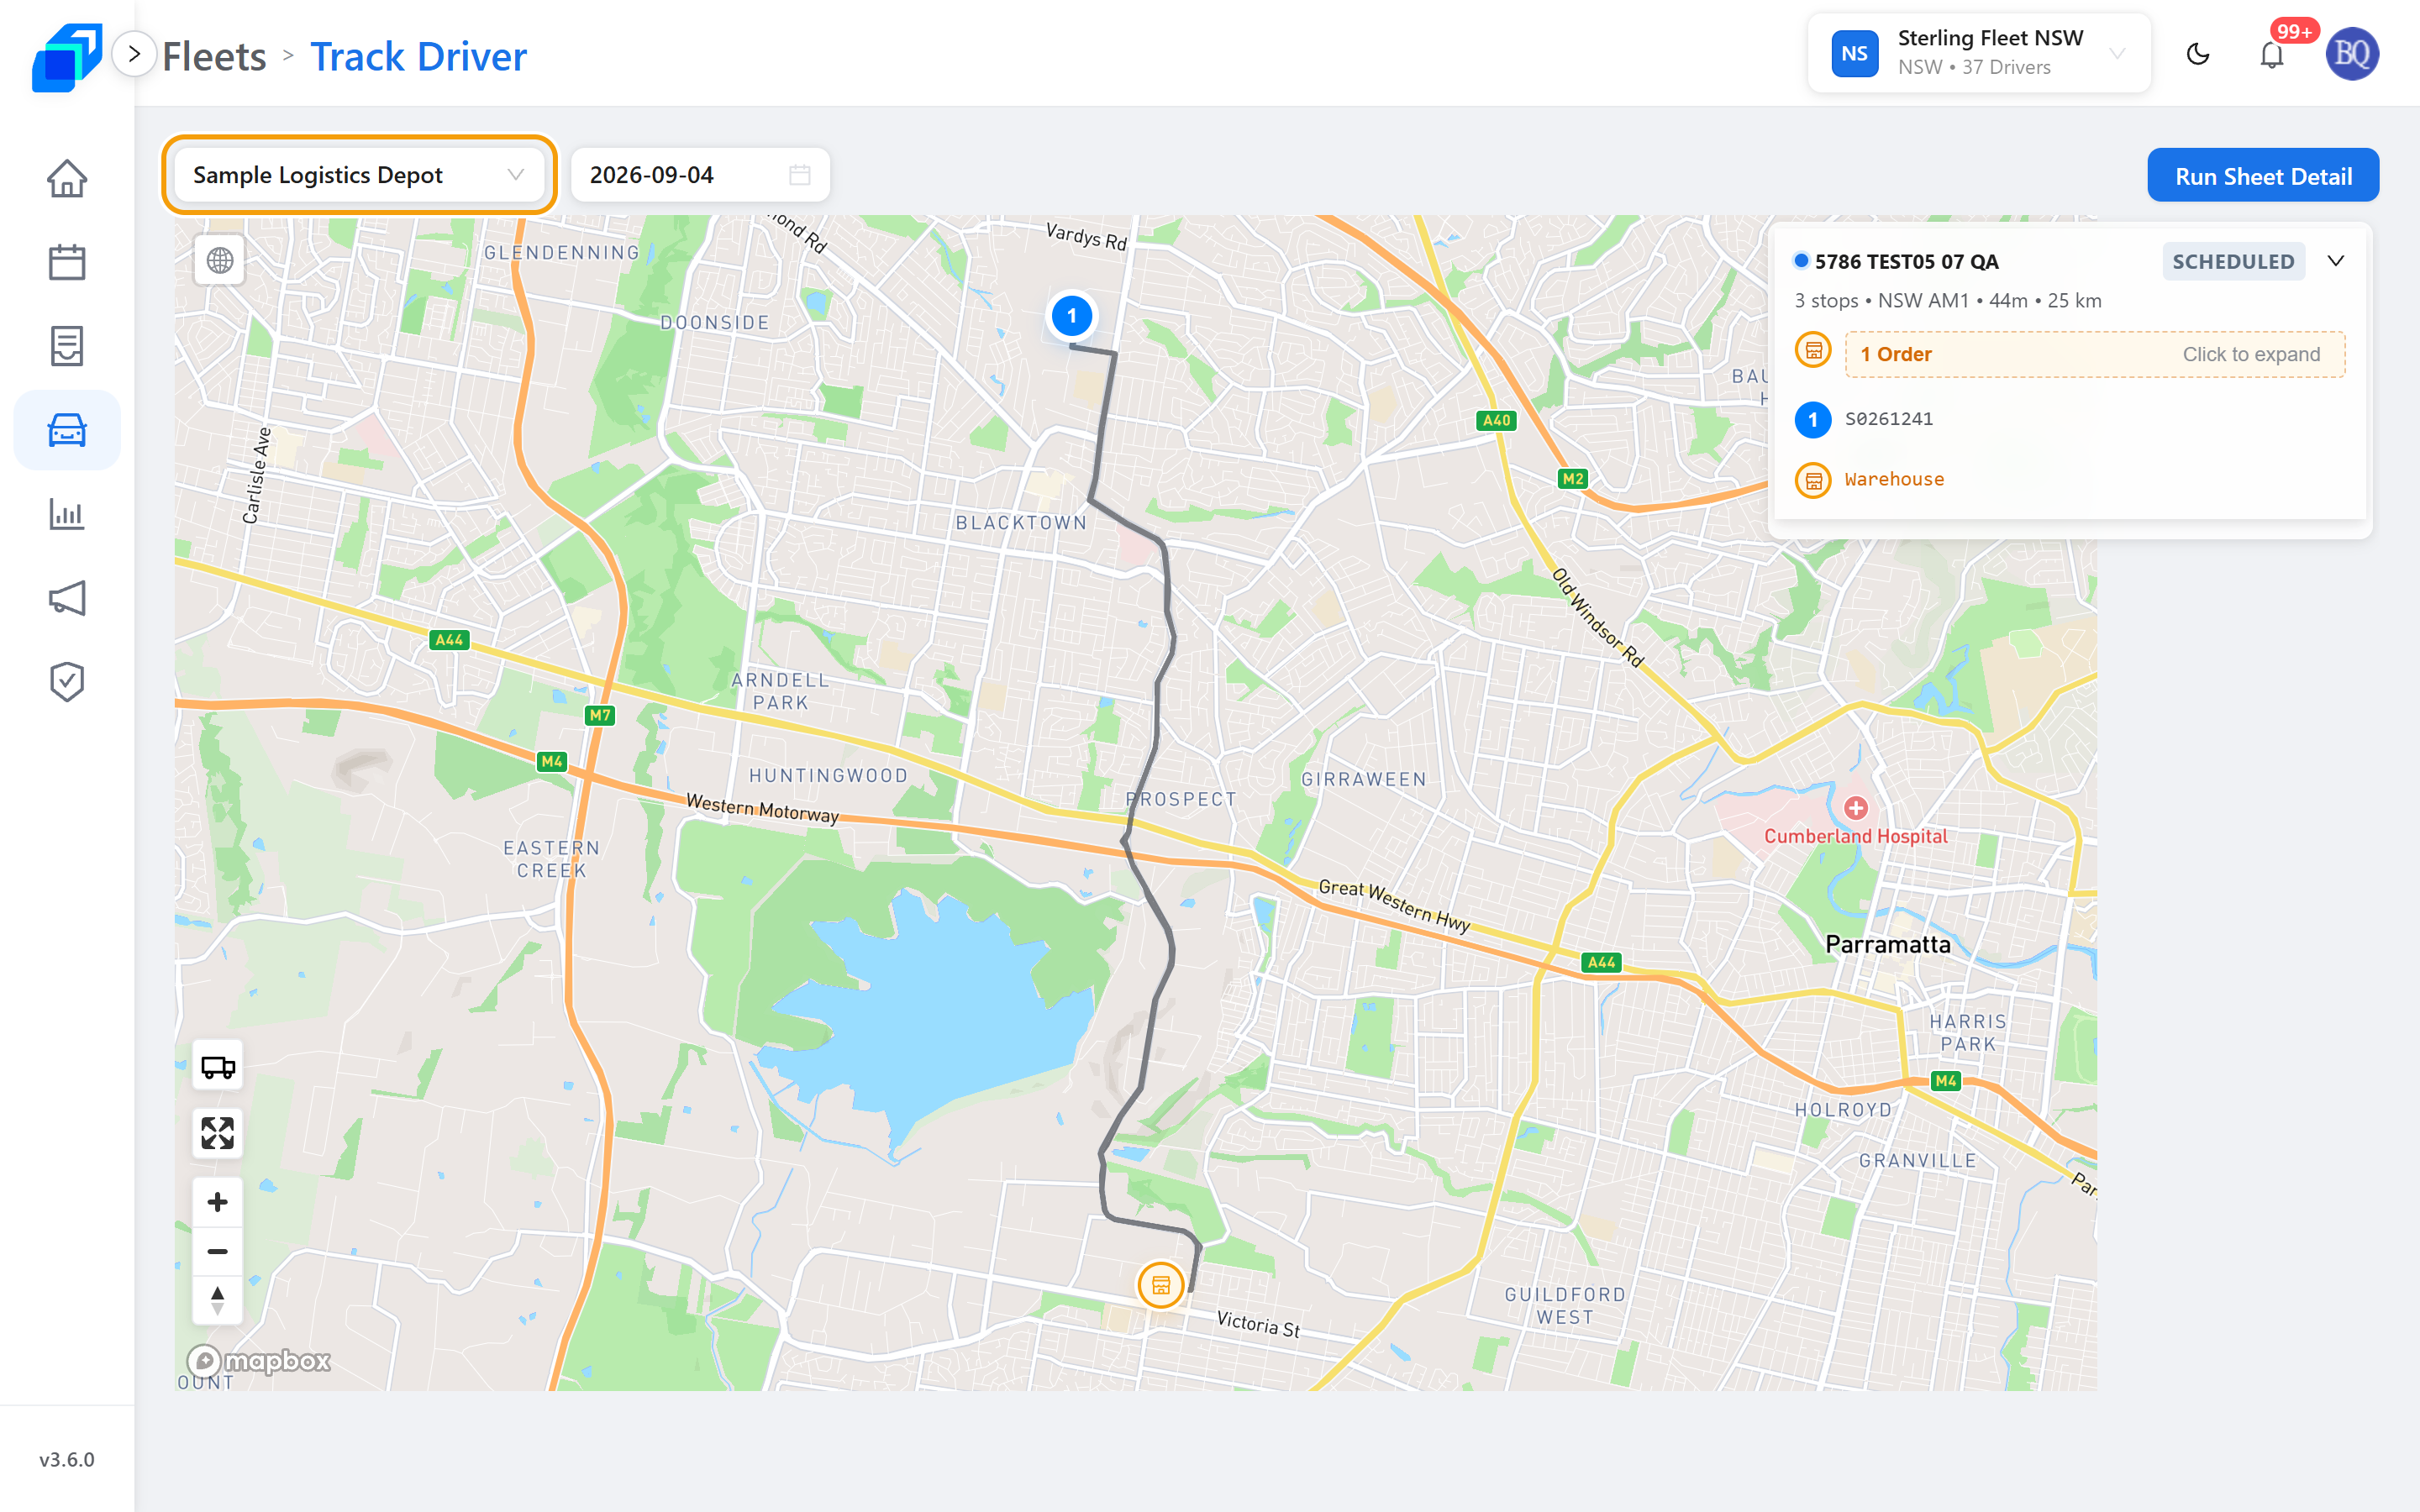
6. Follow a driver on the map – VIEW
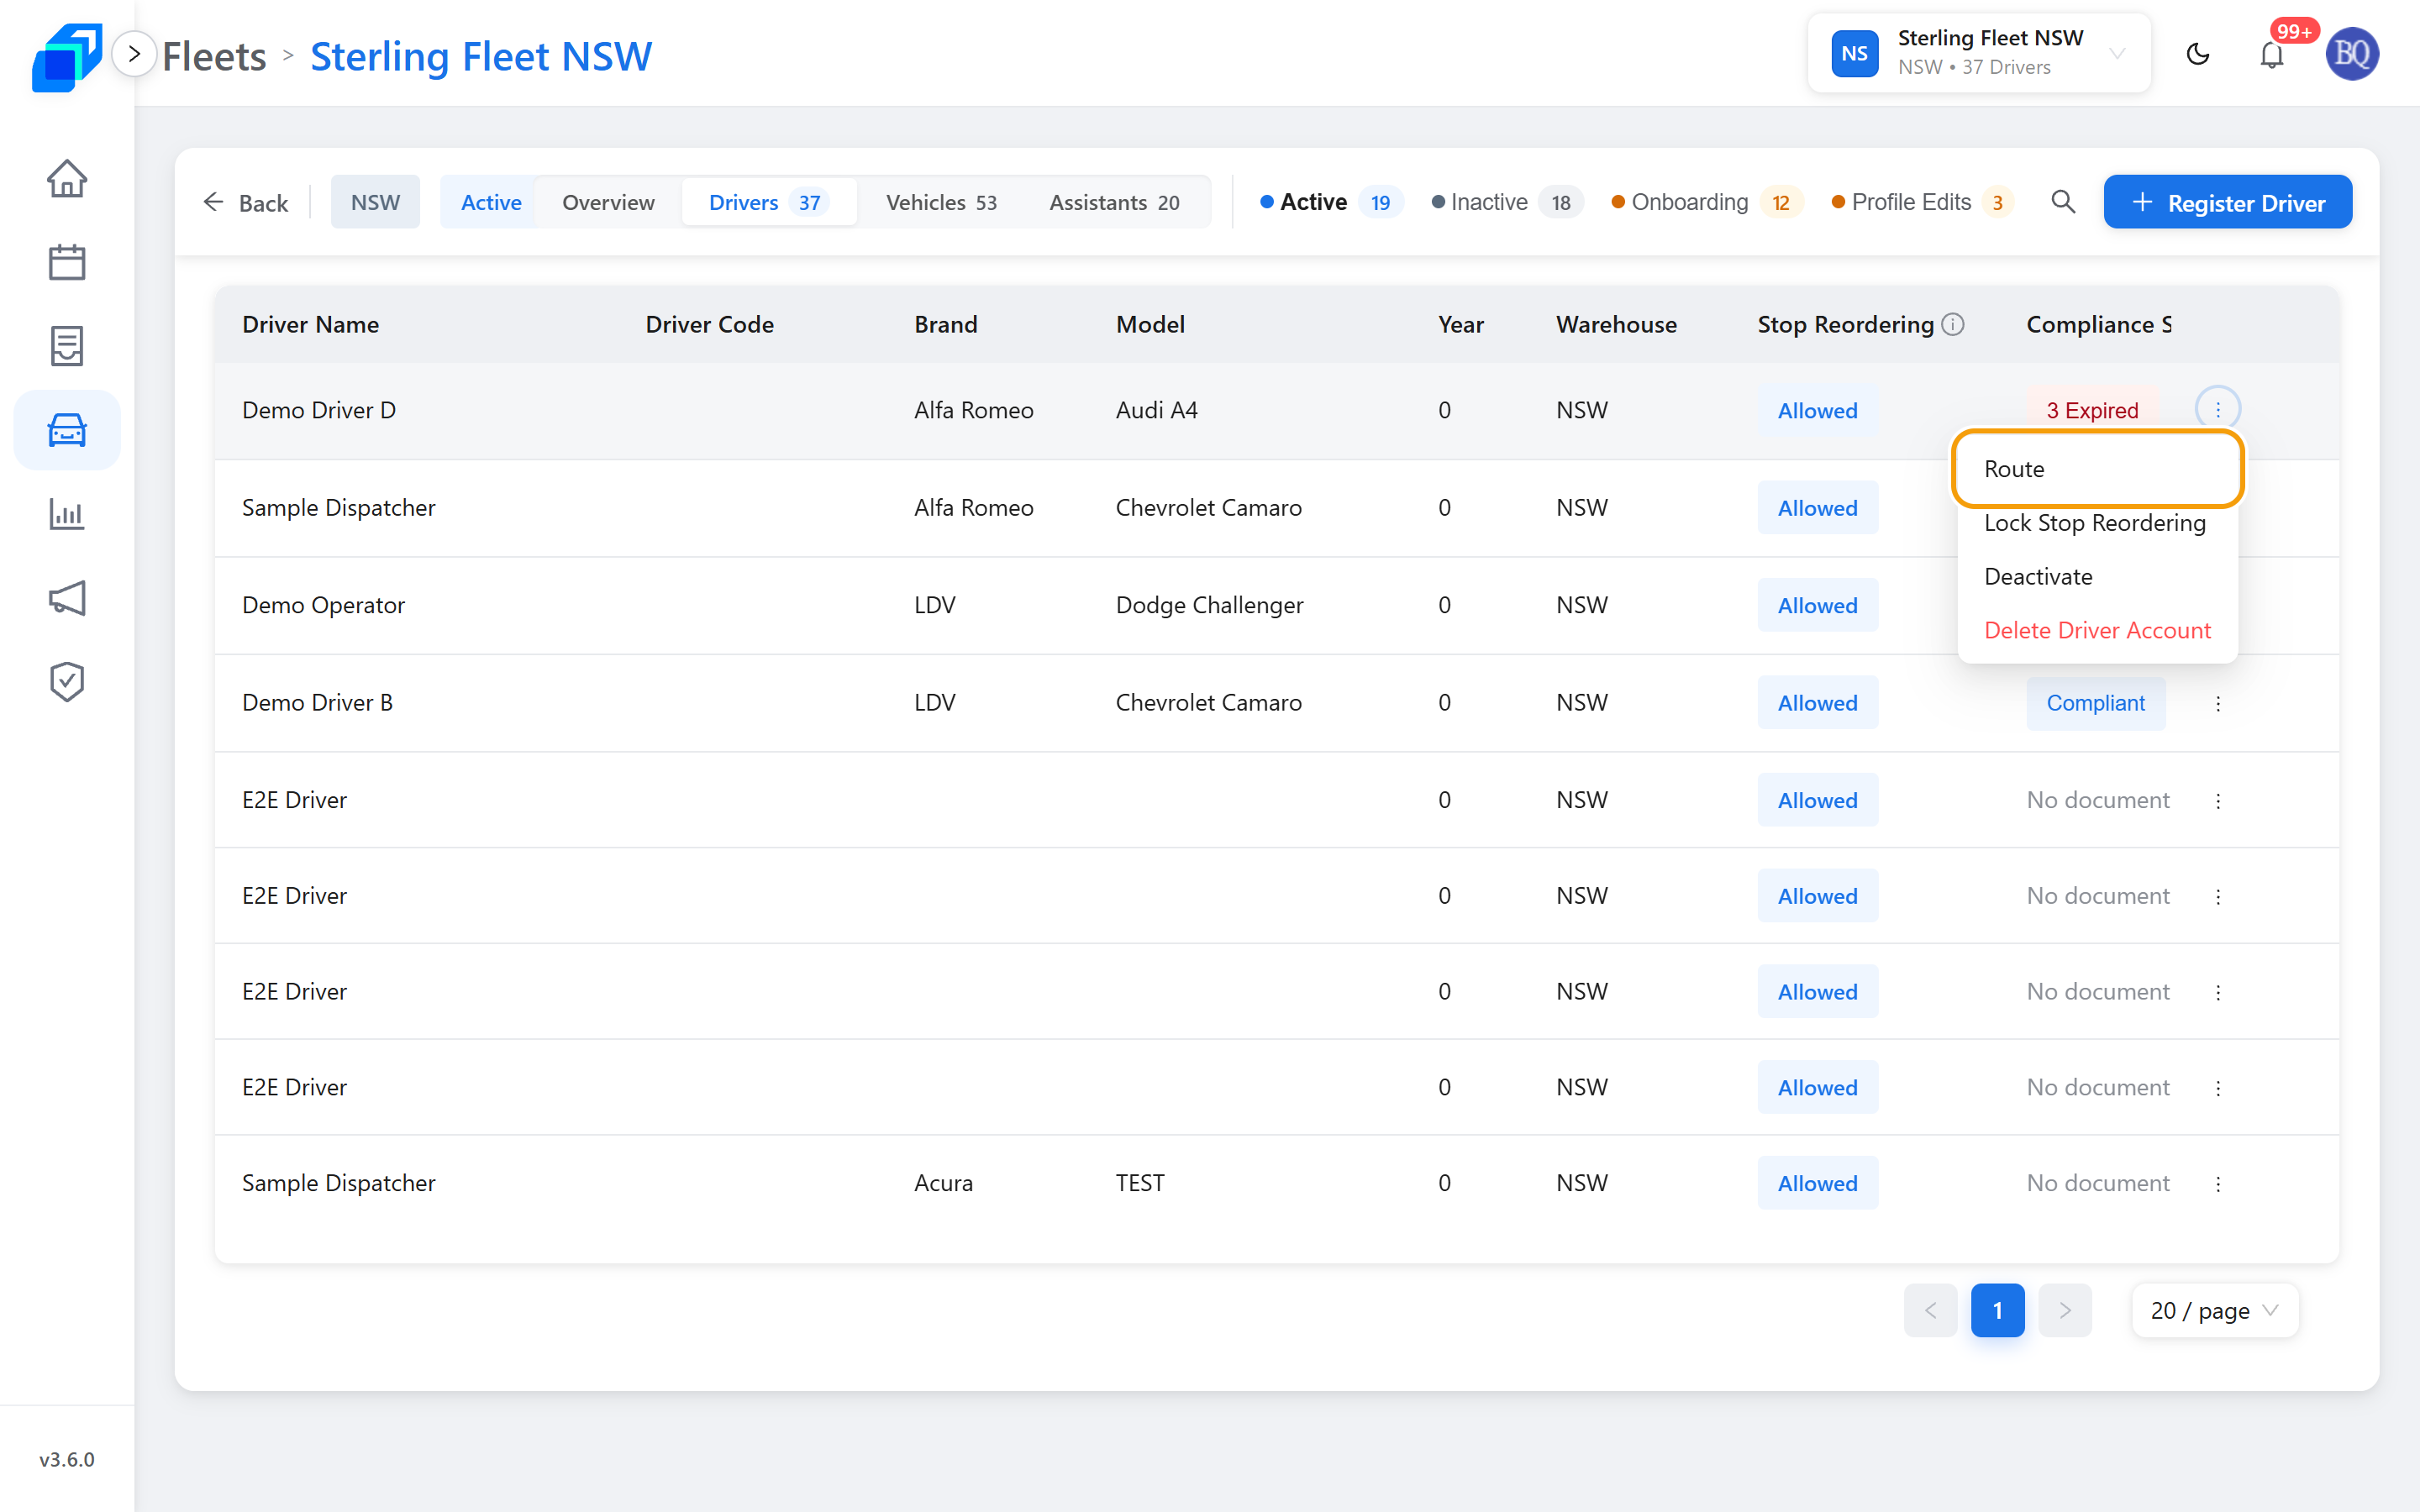
Open Drivers, click the ⋮ at the end of a driver's row, then click Route.
- Pick the run sheet and the date at the top left. If that day has no run sheet, a short notice appears and the map stays empty.
- Read the map. It draws the planned route, the driver's recorded path, and the stops they are delivering to.
- Find the driver's own marker. It sits at their latest position, with a cone showing the way they are heading.
- Click a stop for its Planned Arrival, Actual and Live Google ETA. Zoom and pan the map with your mouse or trackpad.
On a run sheet that has already finished, the marker is muted and reads Last recorded GPS. That is the last position on record, not a live one.
Run Sheet Detail, at the top right, opens the whole sheet.
A control your role does not hold is hidden, not greyed out. If the pencil on Overview, a tab, or an item on the ⋮ menu never appears, ask your fleet admin.