Create an order
VIEW · CREATE · UPDATE · REMOVE
Create a single order by hand, then open, cancel, finish, or trace it from the order list.
Where to find it: Delivery › Order.
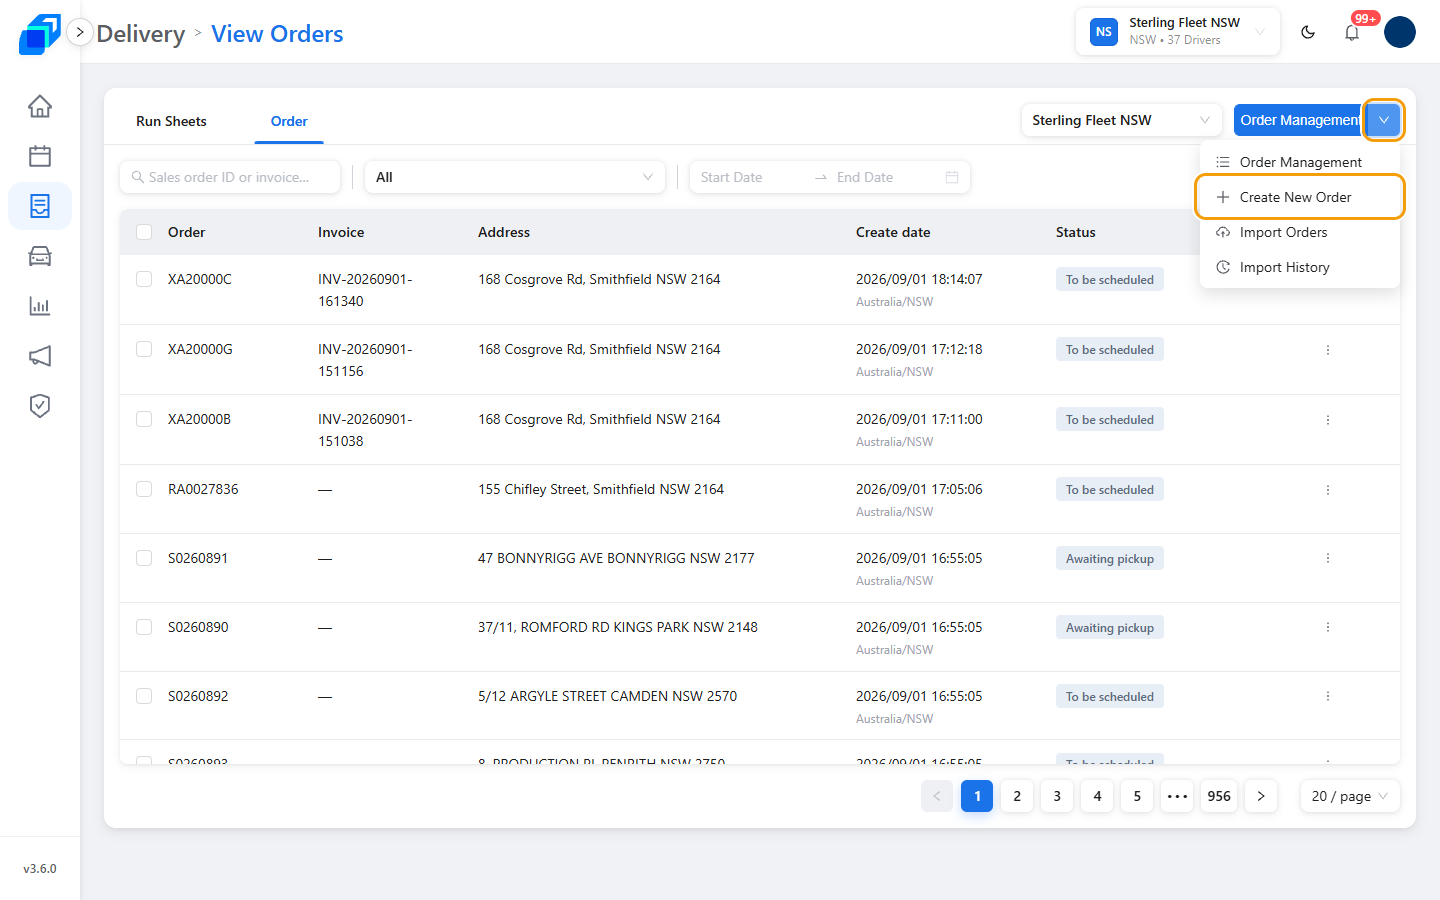
1. Open today's orders – VIEW
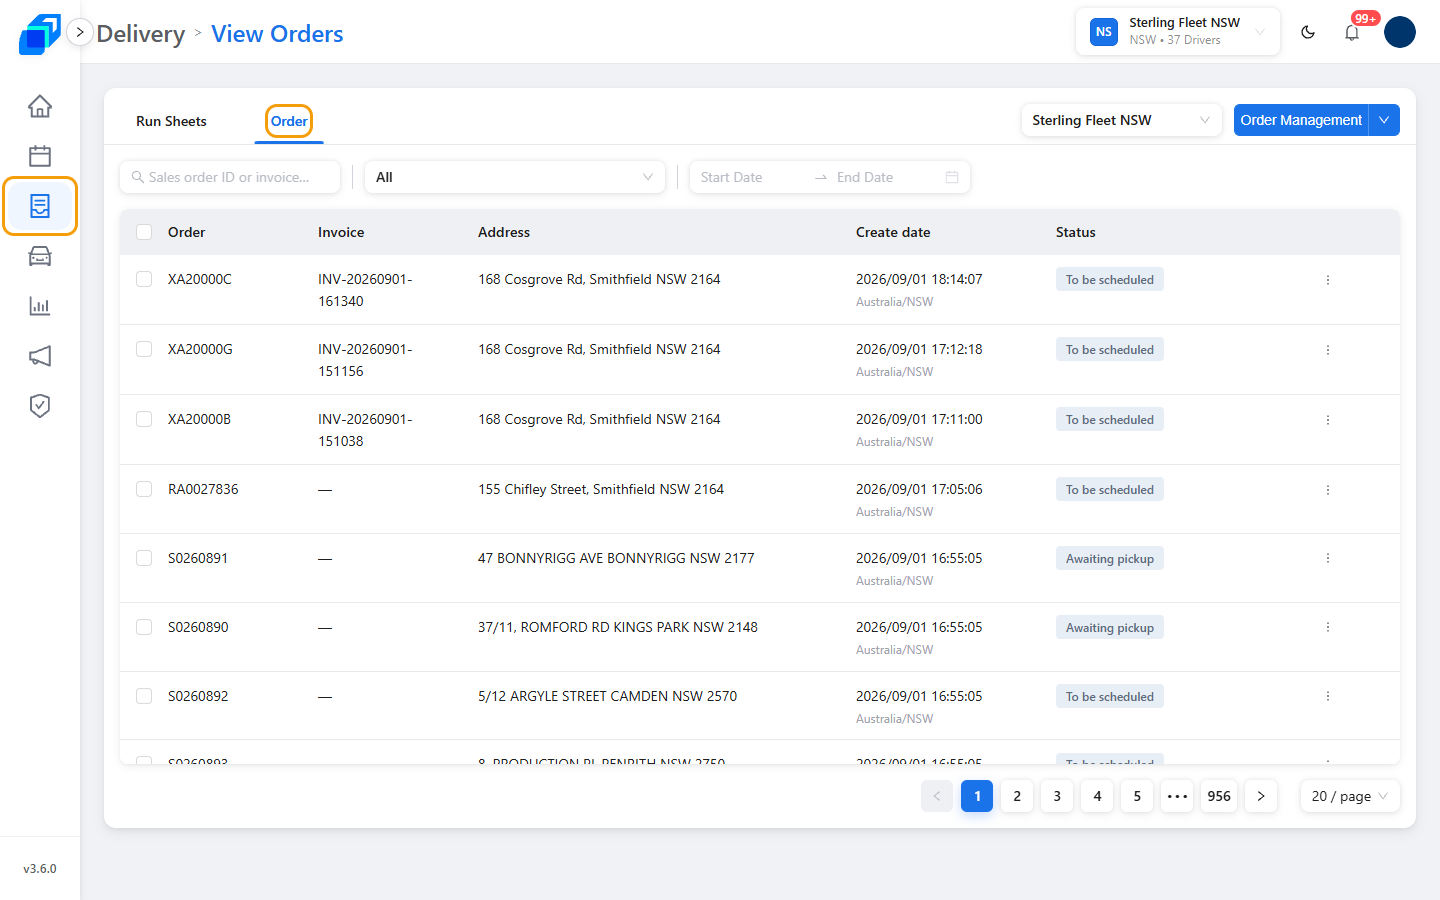
Click Delivery, then the Order tab.
Each row has a menu (⋮). What it holds depends on the order's status. Print All QR Codes is always there – it opens a print dialog with one QR-code label per package.
2. Fill Create New Order – CREATE
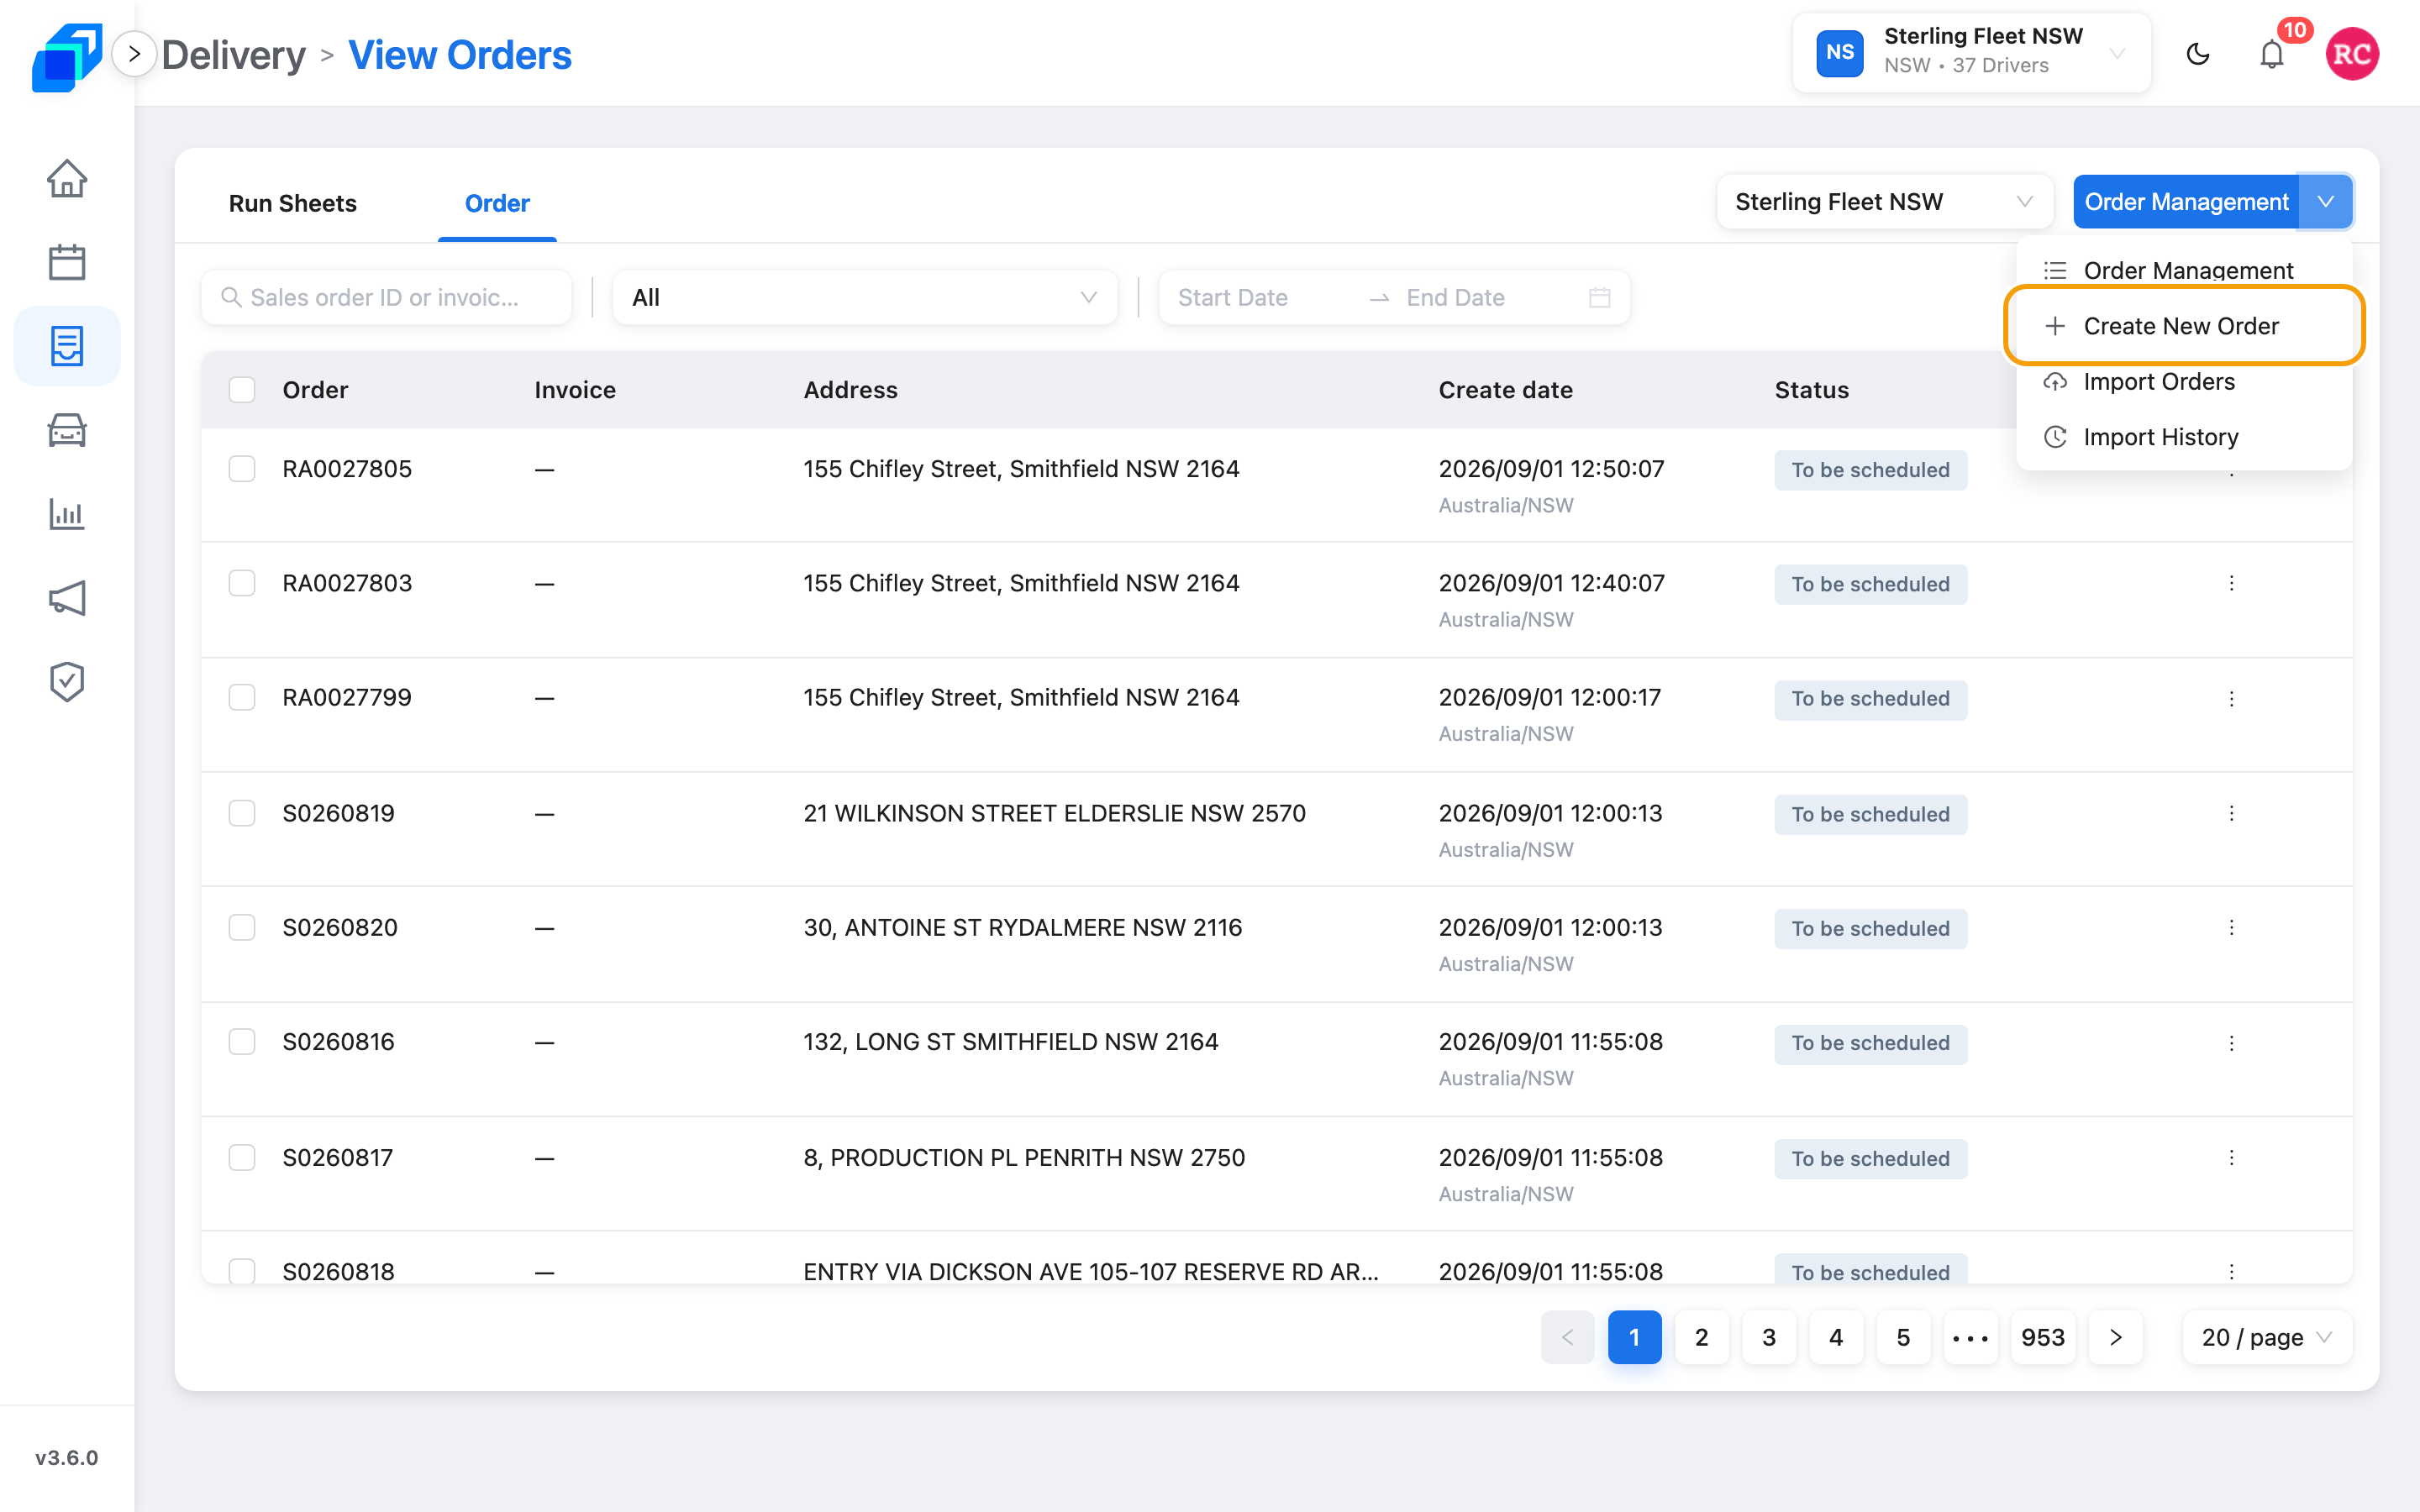
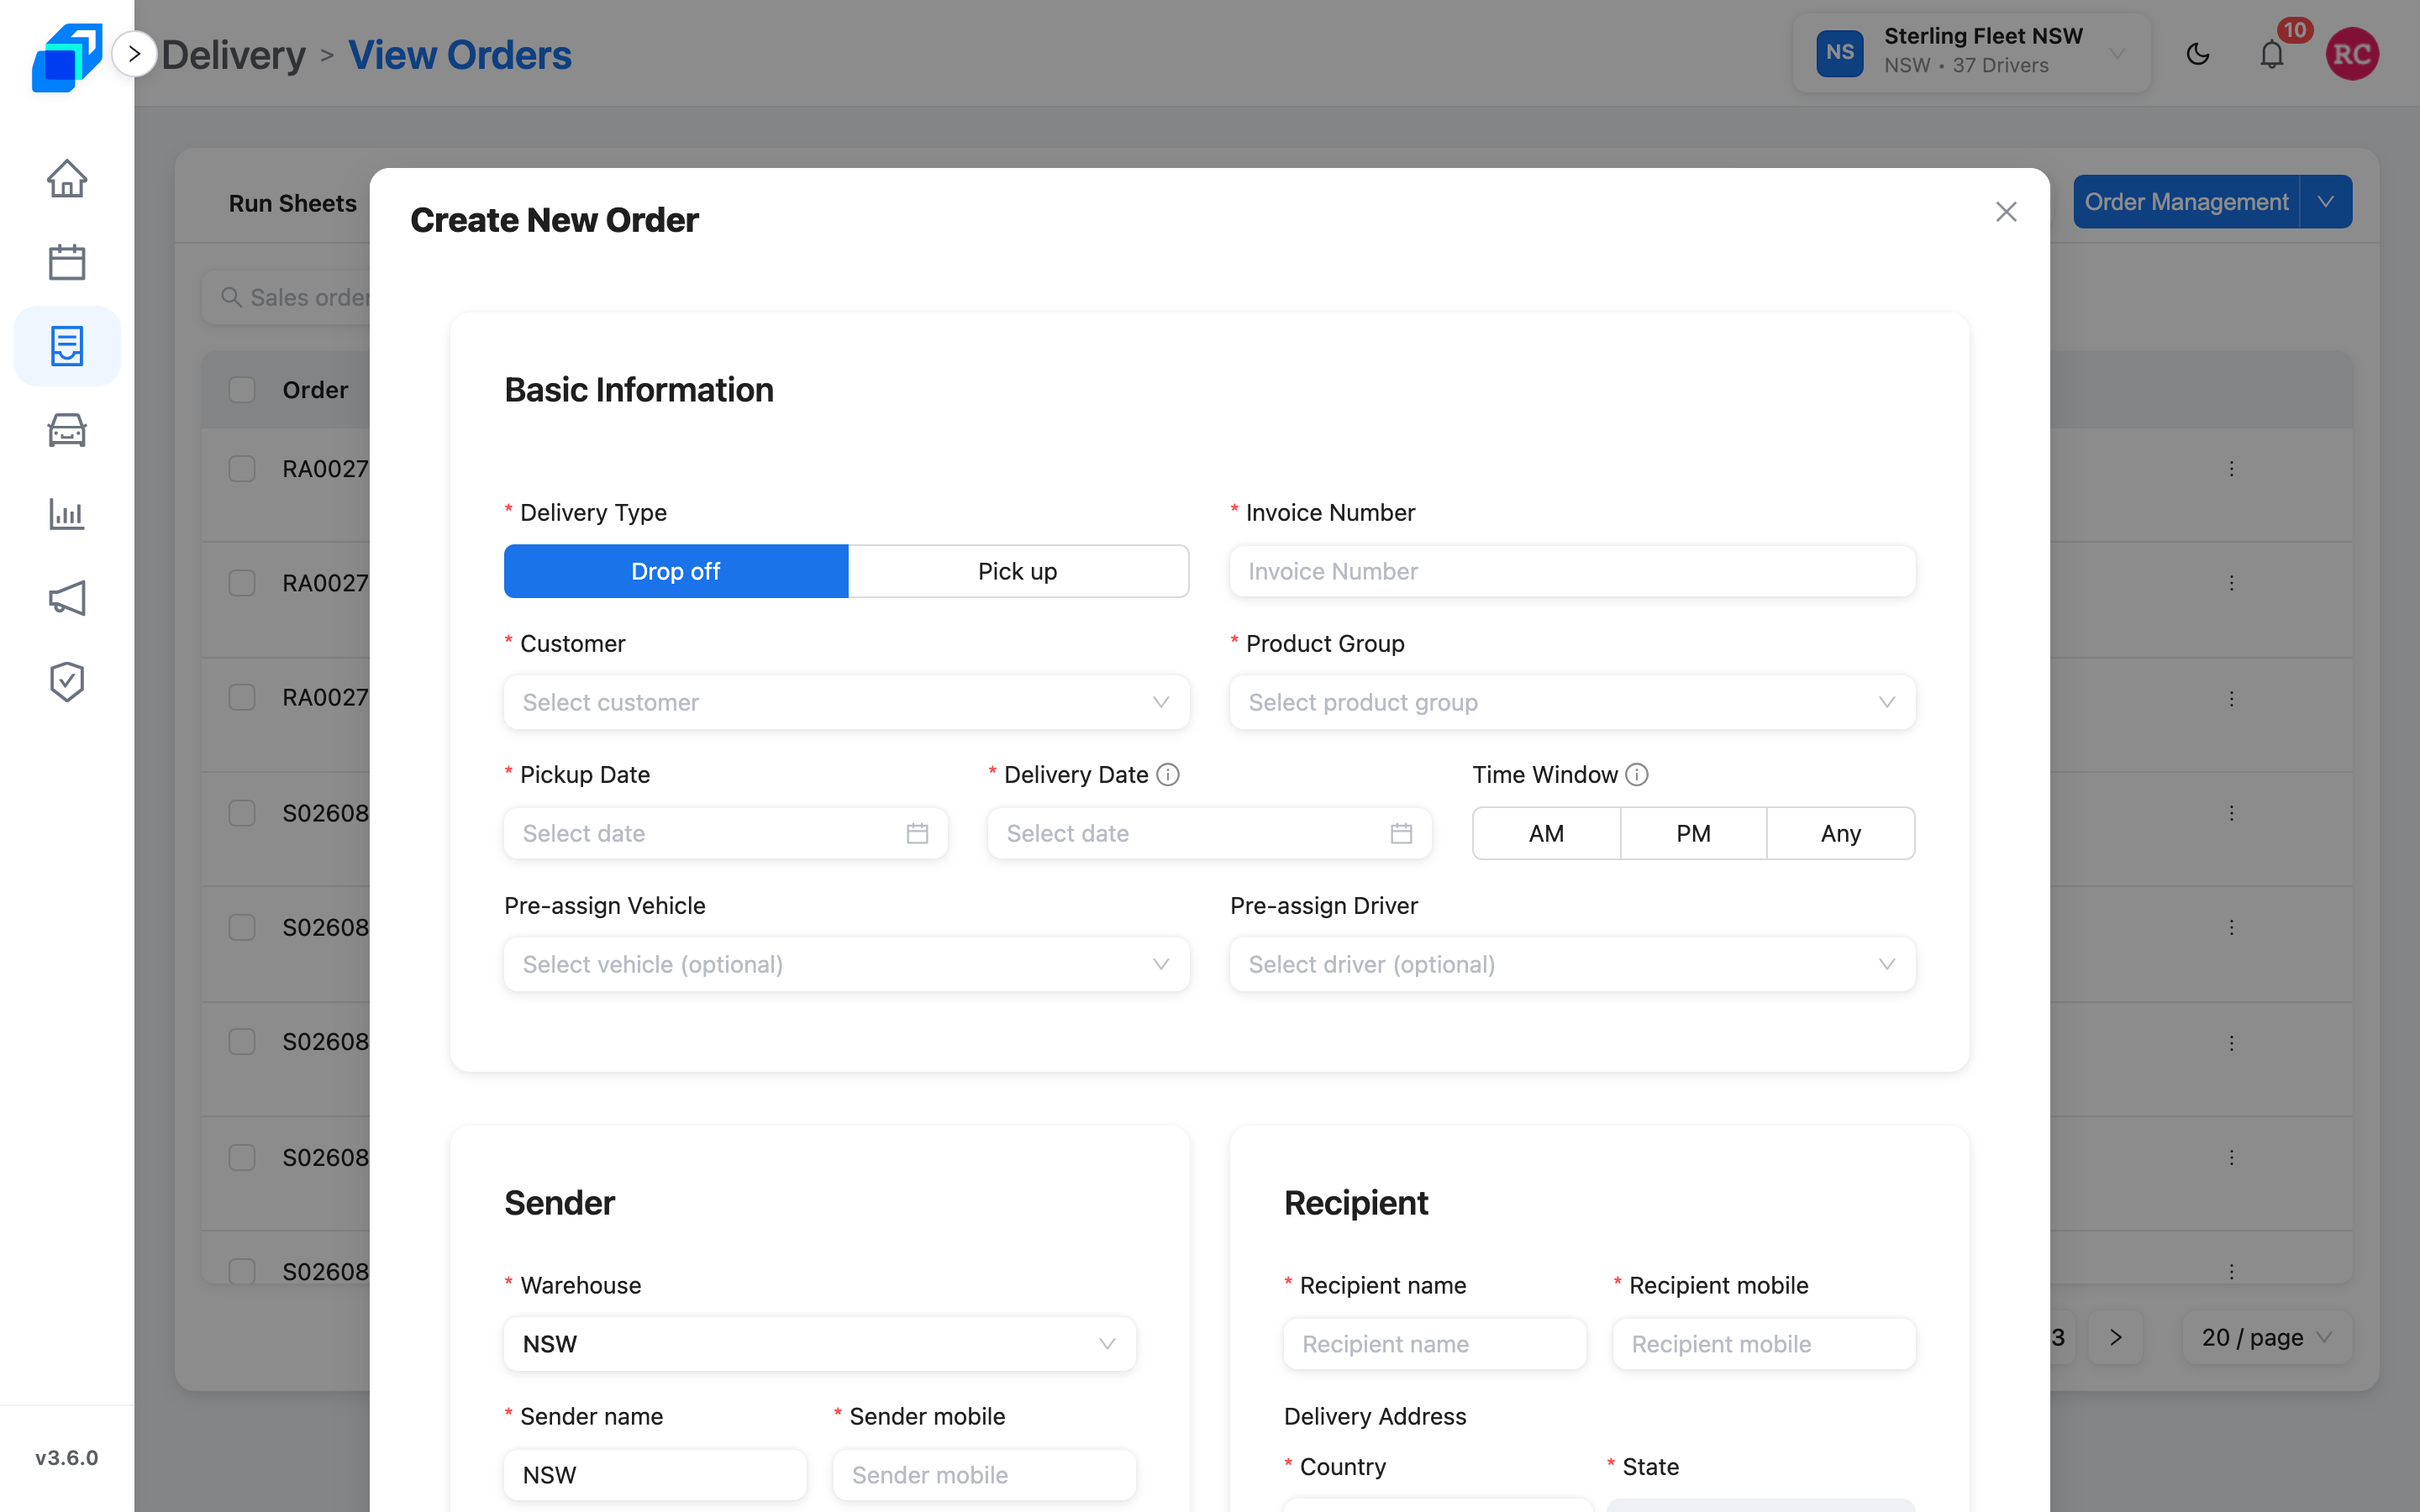
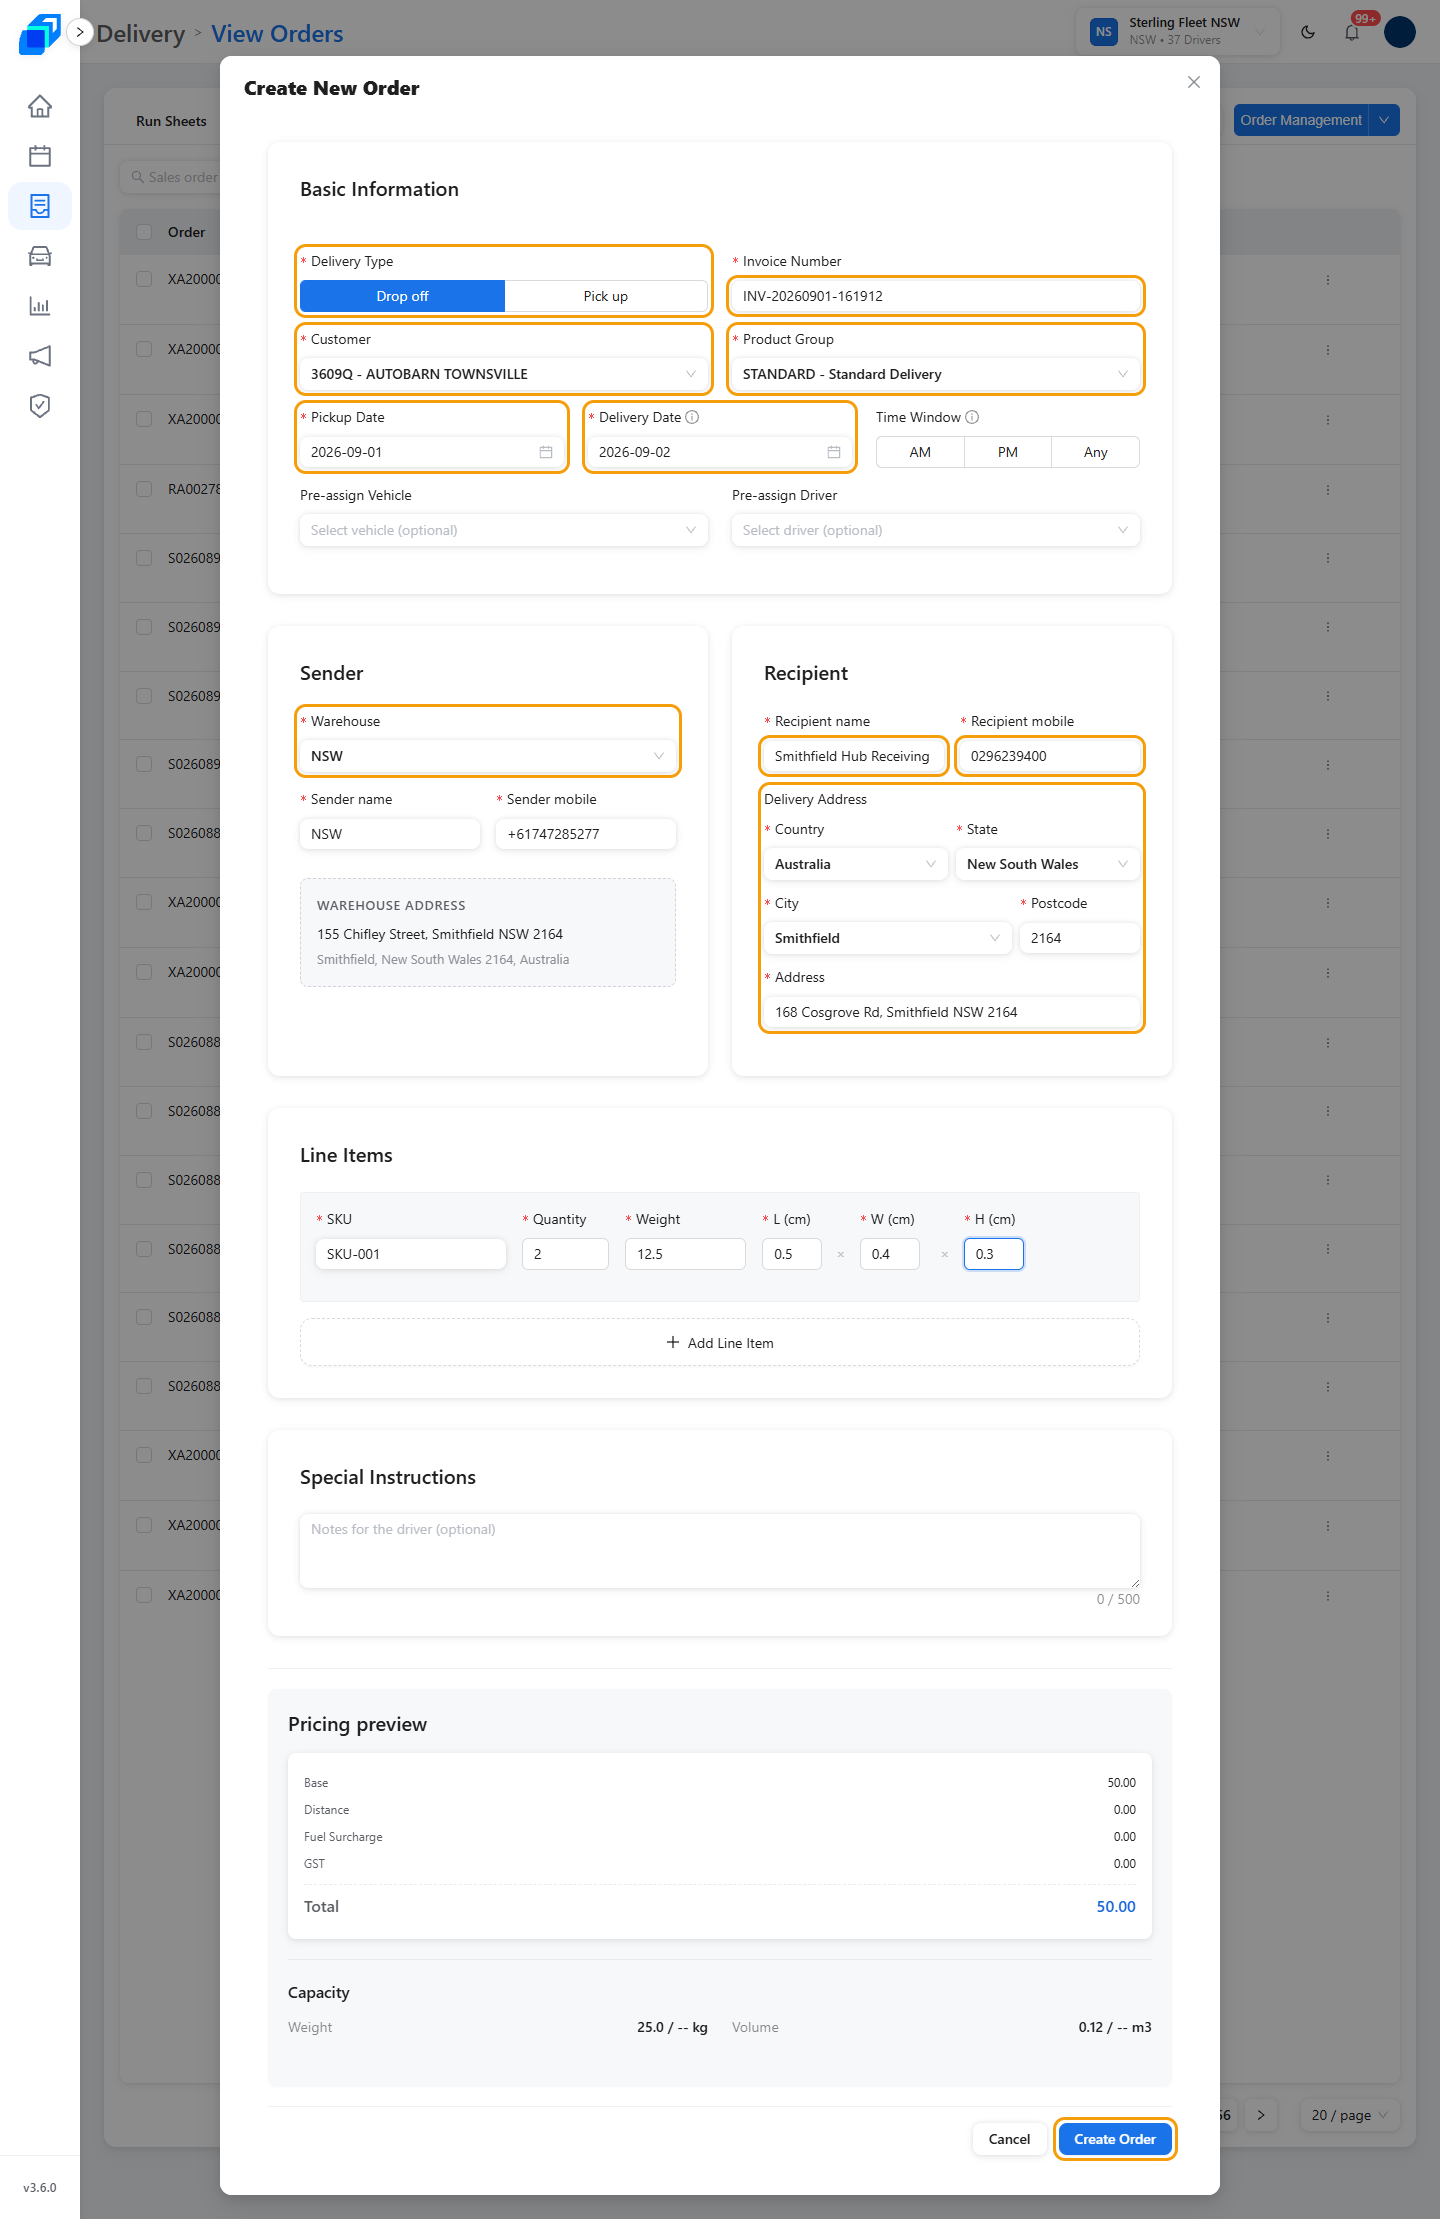
Open Create New Order. Leave Delivery Type on Drop off. Pick a Customer, Product Group and dates – Warehouse is already picked. Fill the recipient. Click Create Order.
What each field needs
A red asterisk marks a required field.
Invoice Number: your own code for this order. It cannot repeat a code already used on your fleet. If it does, This invoice number is already in use for this fleet appears under the field and the form stays open.
Customer: pick one. If the customer has saved defaults, they fill Product Group, the sender's name and mobile, and Pickup Address – but only into fields you have left blank. On a Drop off order the warehouse has usually filled those already, so you will see only Product Group change.
Product Group: pick the group set up for your fleet. Each row is its code and its name.
Pickup Date and Delivery Date: the delivery date must be the pickup date or later. Earlier days are greyed out in the calendar. Push the pickup date past a delivery date you already set, and the field reads Delivery date must be on or after the pickup date.
Time Window: choose AM, PM, or Any. Left alone, the order takes Any, the all-day window.
Pre-assign Vehicle and Pre-assign Driver: pre-assign a vehicle or driver now if you want – both are optional.
Warehouse: already picked – your fleet's own warehouse where it has one, otherwise the first active warehouse. It is the driver's pickup point. Its name and phone (when it has one) fill Sender name and Sender mobile, which stay editable. Pick another warehouse if the order leaves from elsewhere; its name and address follow.
Postcode: SenditGo checks the customer's address against the service area of the warehouse you picked. On a Drop off order that is the delivery address. The warehouse's own address is never checked. An address outside the area shows Out of service area. under the postcode. That never blocks the order – it is still created, and a warning headed Order created — outside service area follows.
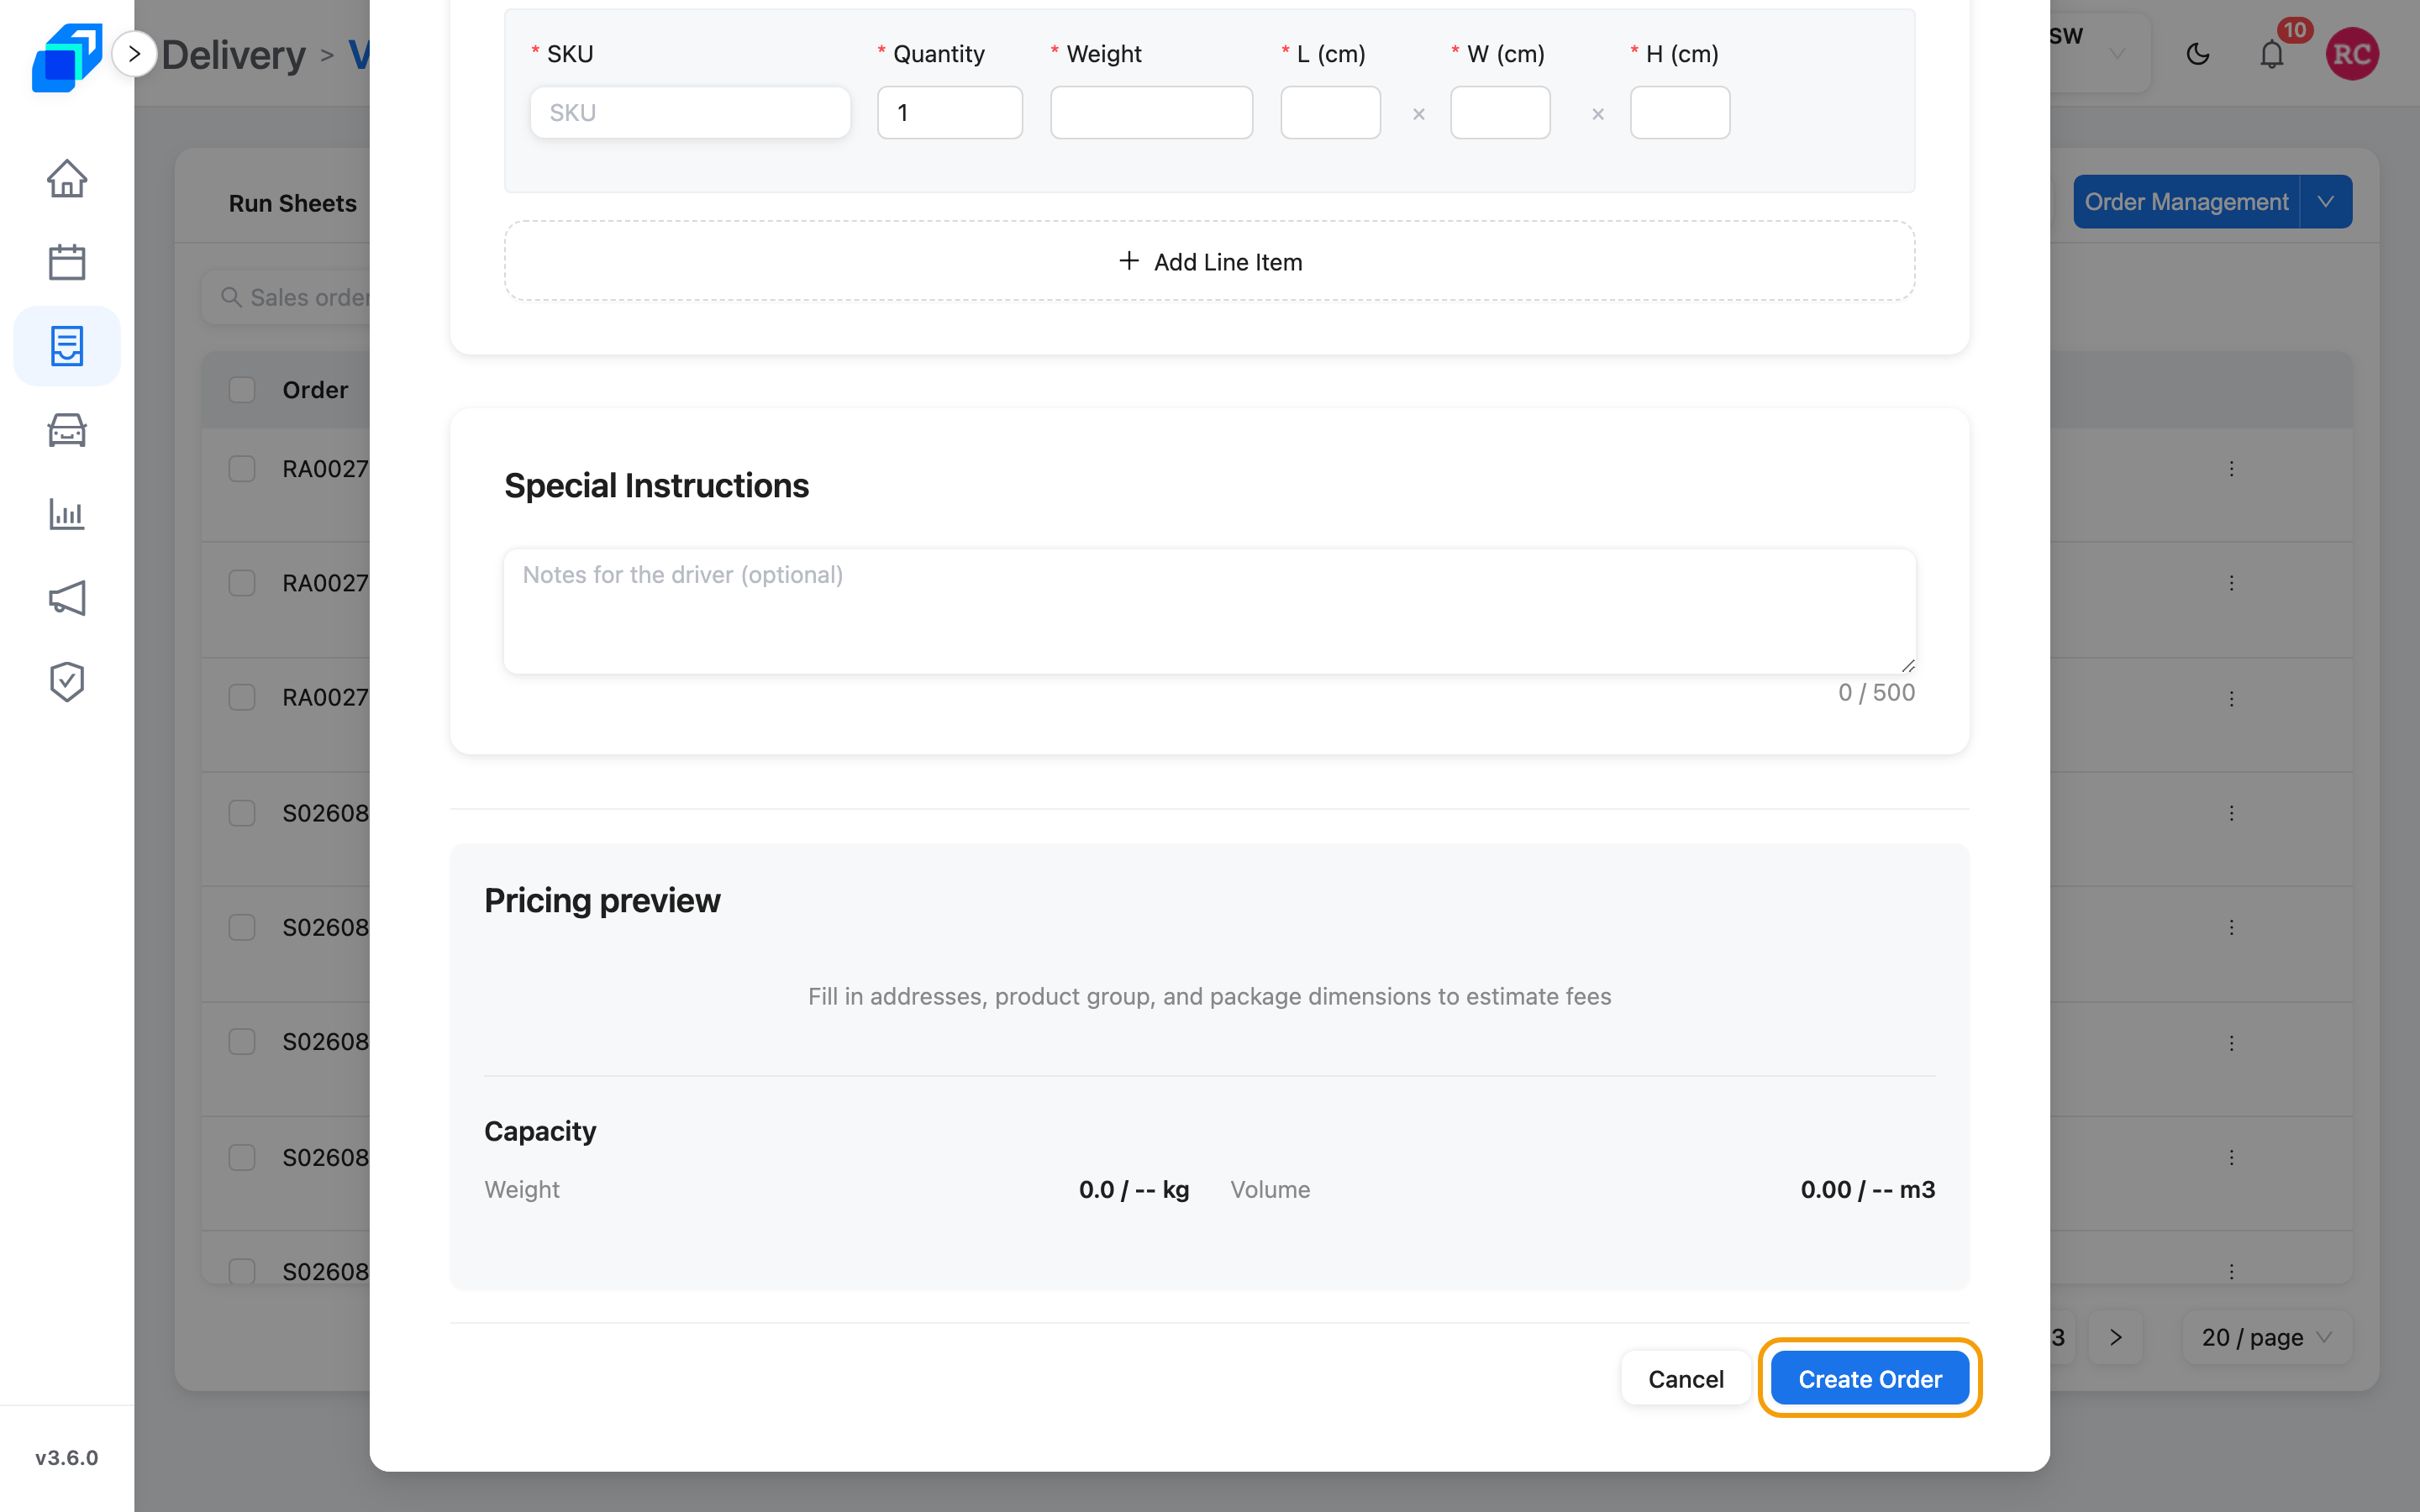
Each package on the order is one line item:
- SKU – the item code.
- Quantity – how many of that item, minimum 1.
- Weight – the weight of a single item, which SenditGo multiplies by Quantity.
- L (cm), W (cm), H (cm) – the size of a single item. Decimals are fine.
Click Add Line Item for a second package. A delete icon appears on every row once there are two, so the only package on an order cannot be removed by accident.
Special Instructions: notes for the driver, up to 500 characters, optional – the empty box reads Notes for the driver (optional).
Pricing preview: the panel at the bottom of the form estimates the fees once every required field is in, and updates as you type. Check Total before you click Create Order.
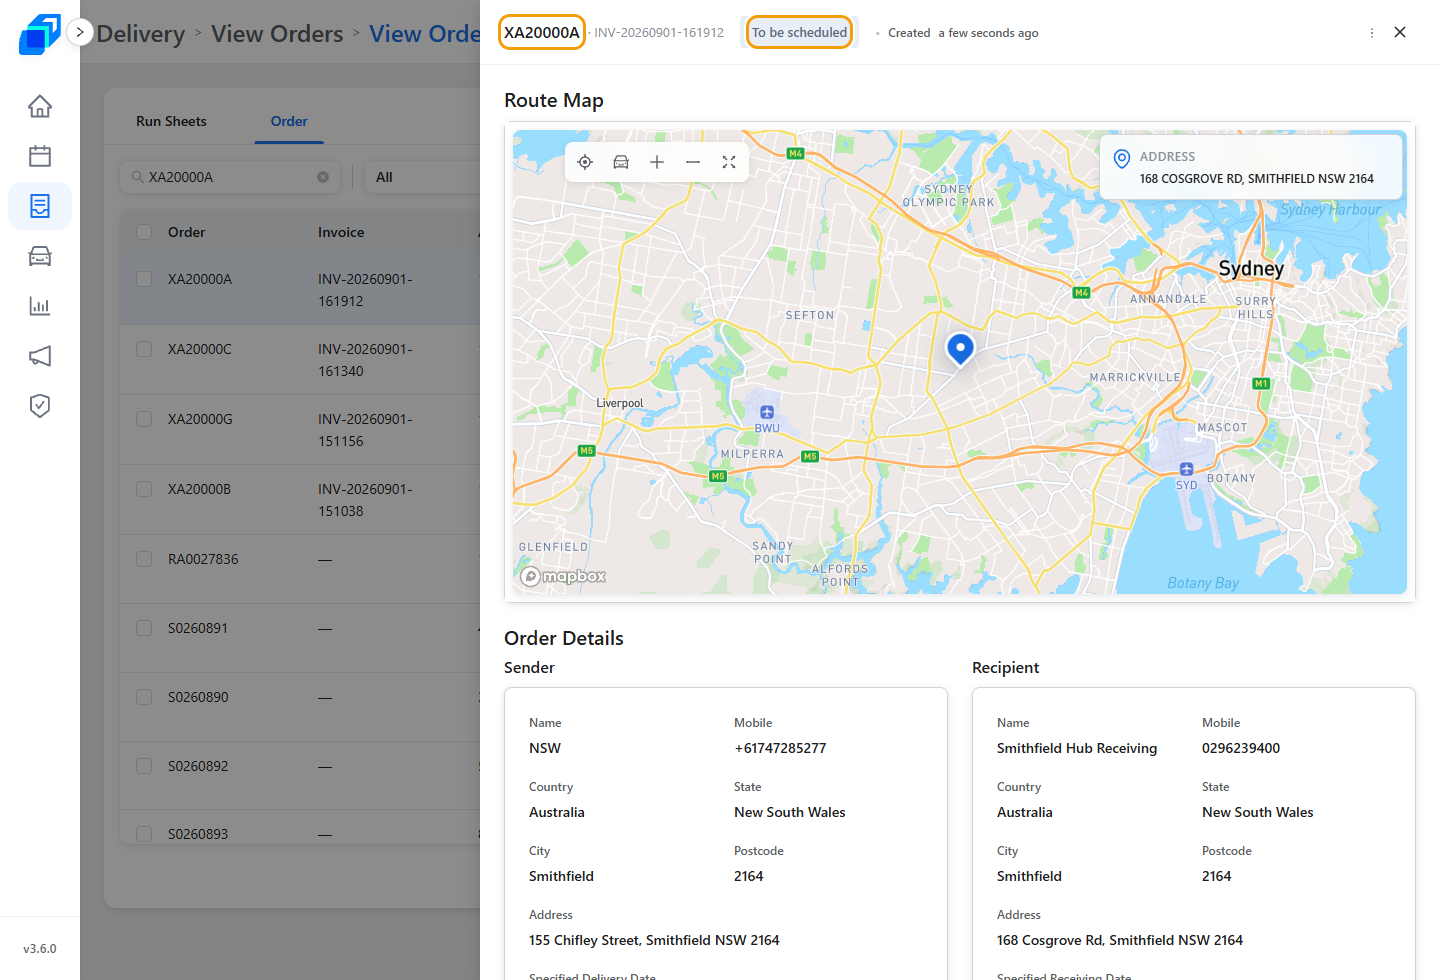
A green message names the new order number and says it was created successfully. The order list then narrows to that one order, with its detail panel already open.
3. See the result – VIEW
The new order opens. Status starts as waiting to be scheduled. You see the map, sender, and recipient.
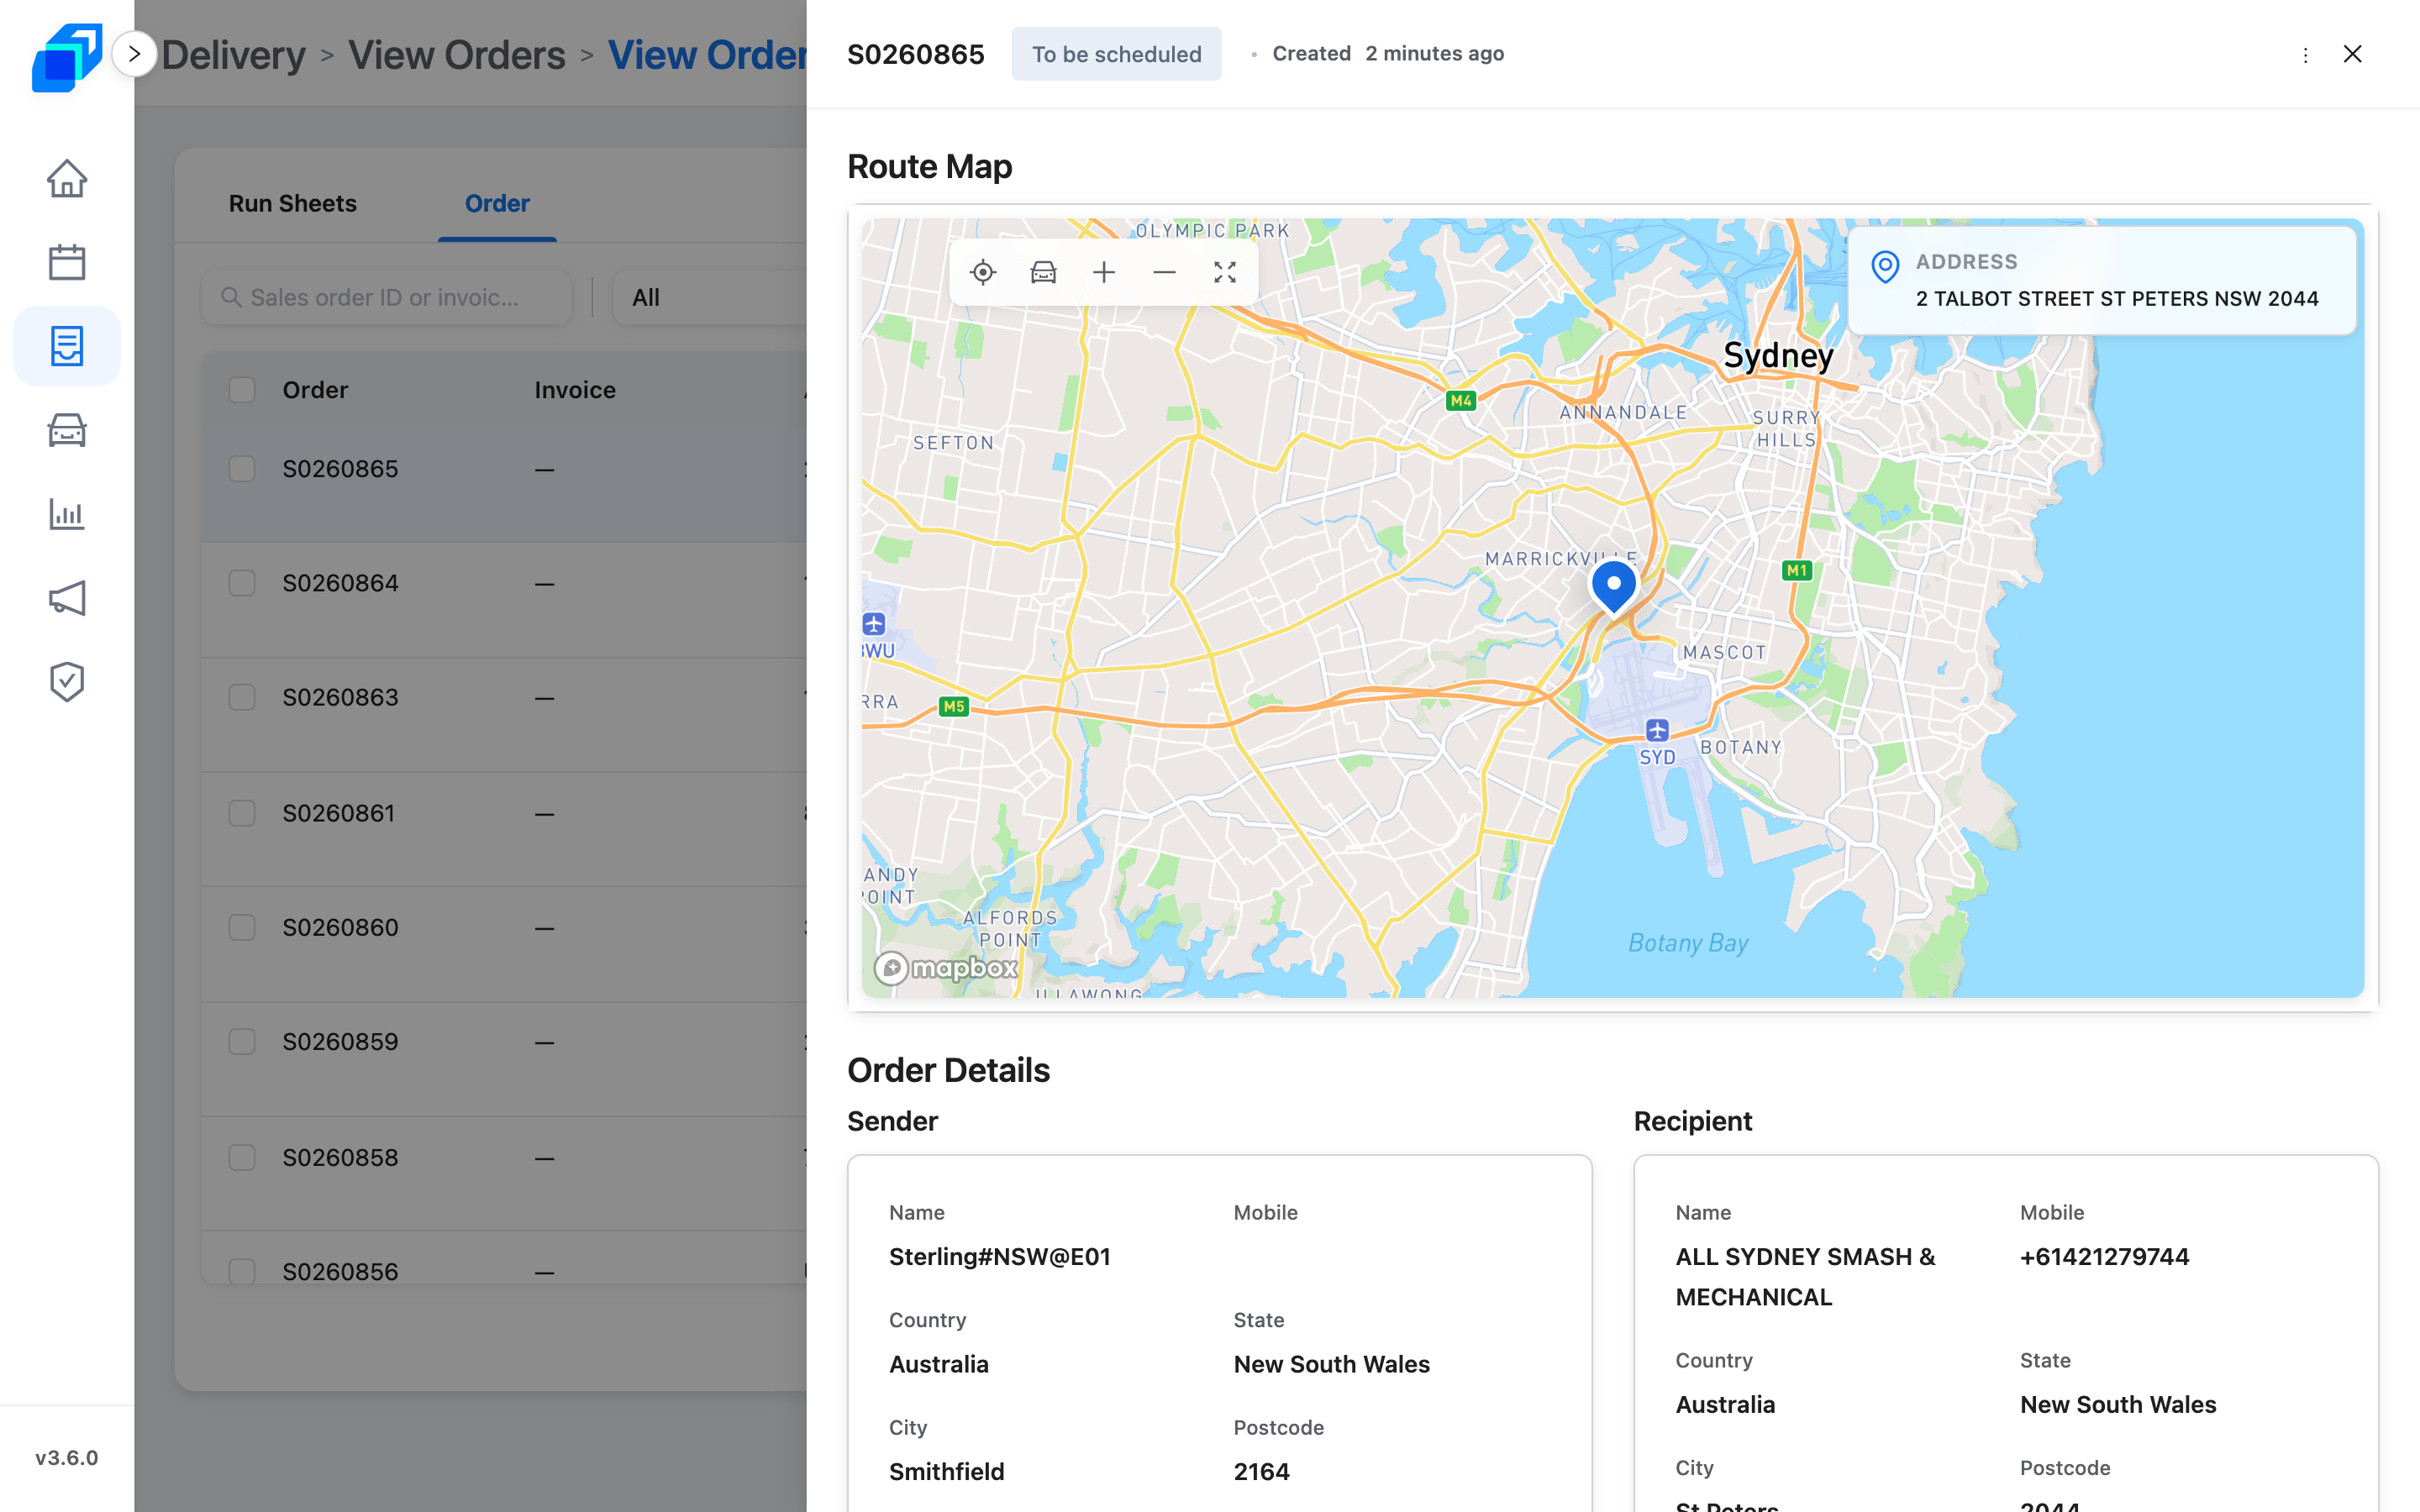
To put it on a Run Sheet, follow Dispatch your first order. The order list then reads Awaiting pickup.
4. Cancel an in-progress order – REMOVE
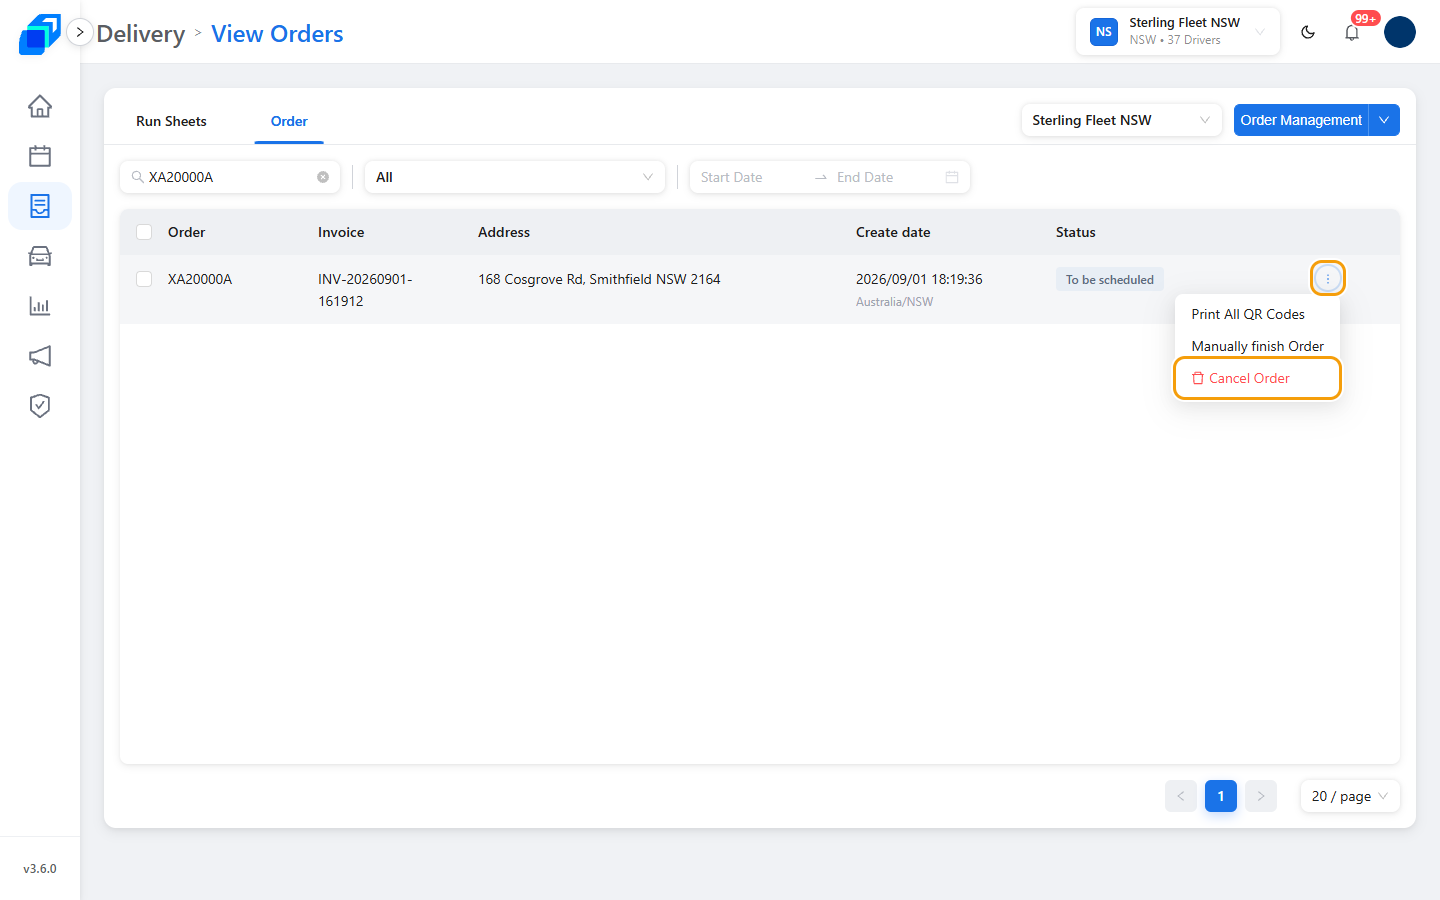
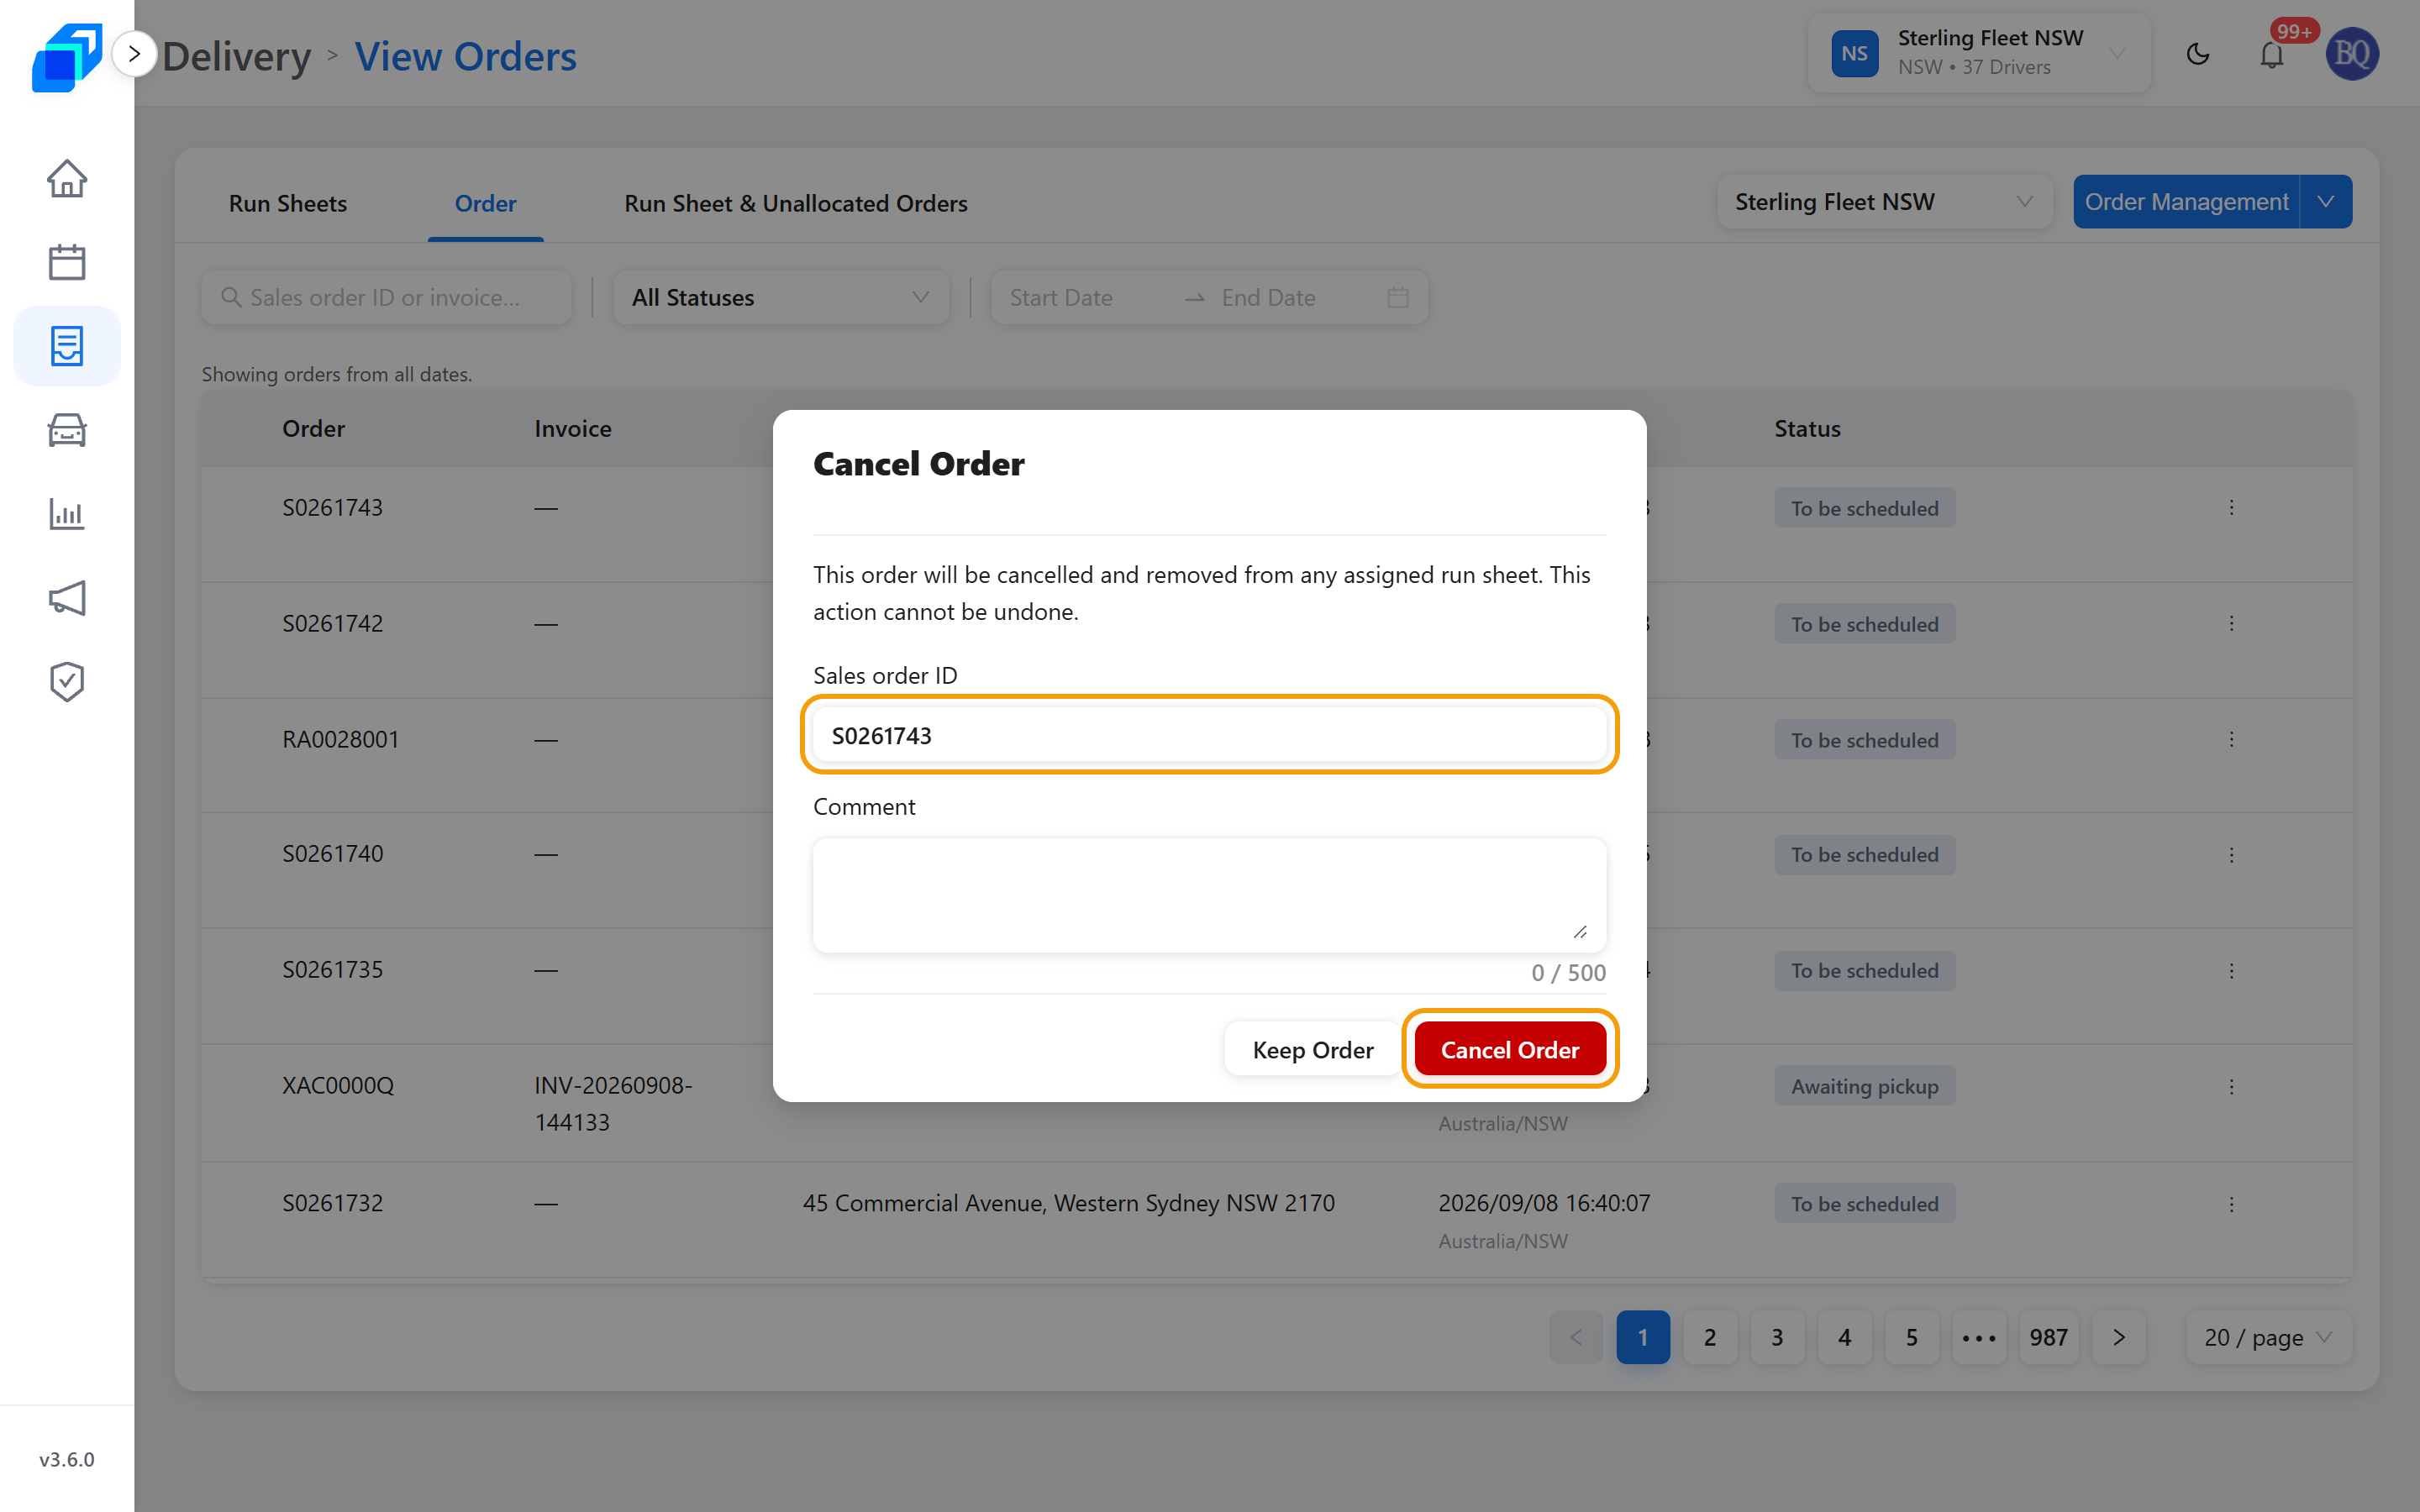
On a row that is still in progress, open the menu (⋮) and click Cancel Order. Delivered orders do not offer it.
The dialog warns that the order is removed from any assigned run sheet and cannot be undone. A Comment is required – up to 500 characters. Keep Order backs out; Cancel Order commits. If the delivery is still needed afterwards, create a new order.
Reschedule is not here. The order list offers it only while a cancellation is still awaiting confirmation. To move an order to another day, use its run sheet: Work a Run Sheet.
5. Finish an order by hand – UPDATE
Use this when the delivery really happened but was never recorded – the driver's app dropped out, or the customer collected in person.
Open the row menu and click Manually finish Order. Add a Comment if it needs explaining – up to 500 characters – then click OK. Cancel backs out.
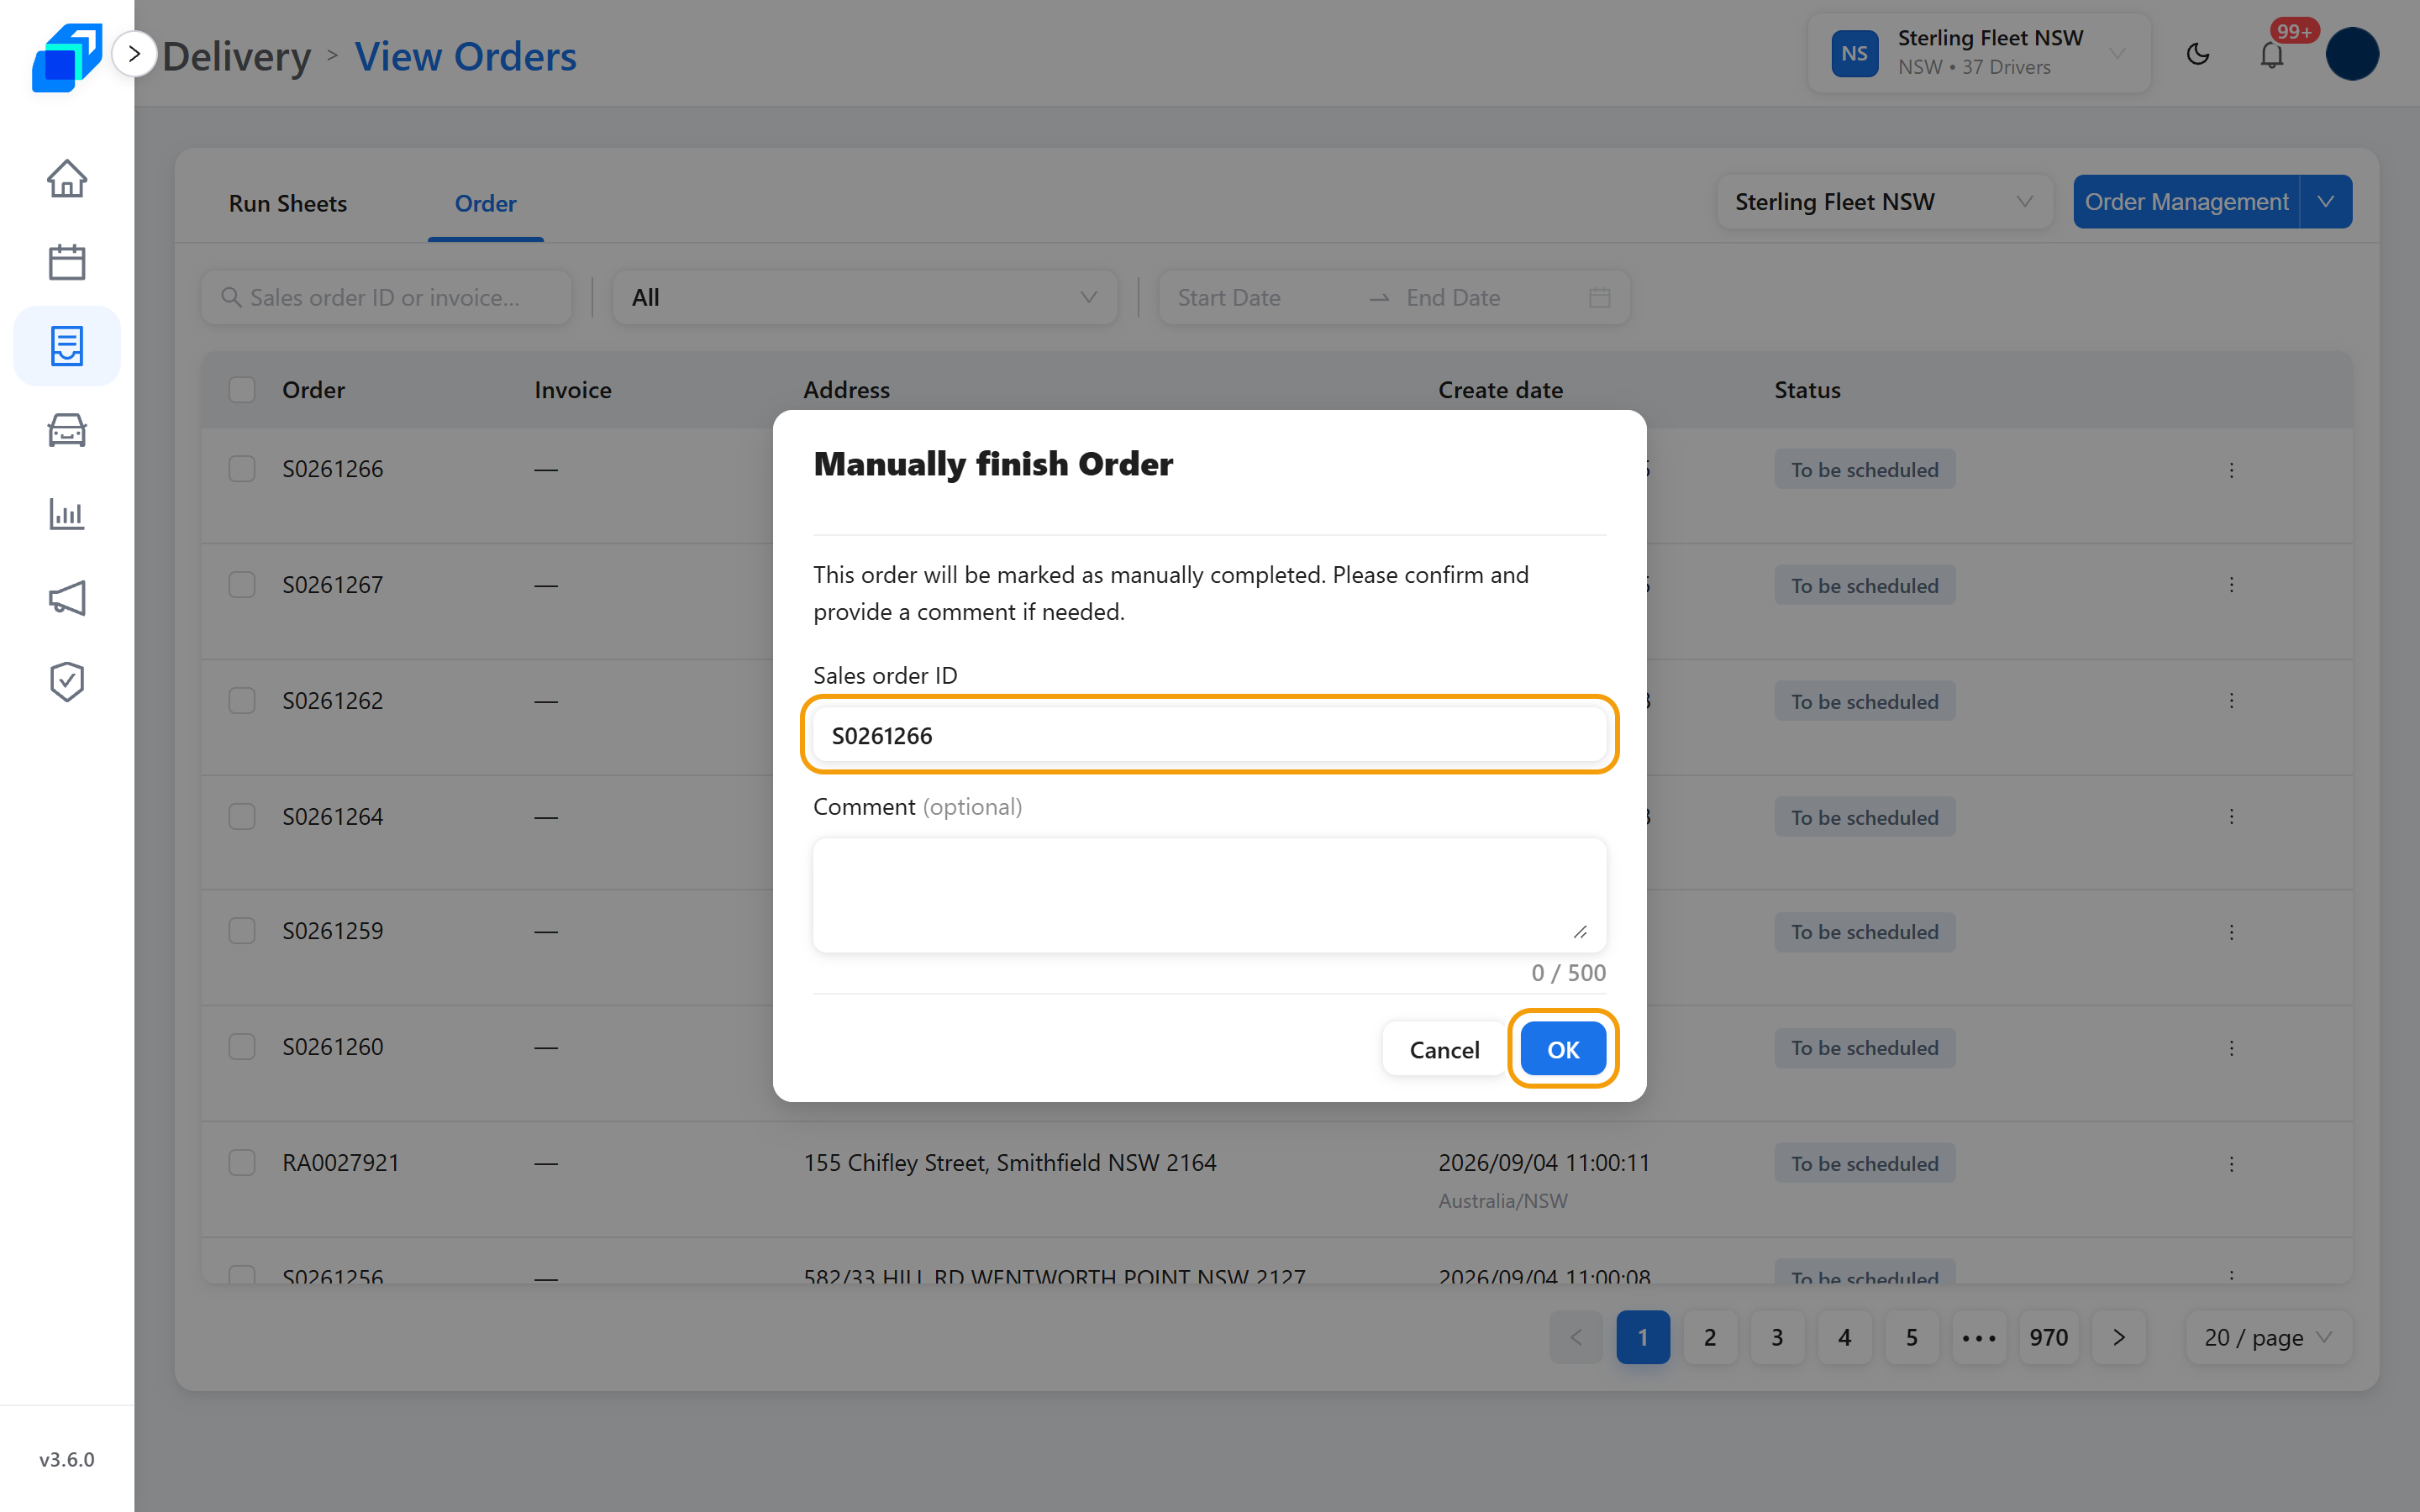
The order moves to Manually Completed and leaves the active list. Like cancelling, it cannot be undone, and orders already delivered or completed do not offer it.
6. See where an order went – VIEW
Once an order has moved past scheduling, its row menu gains View Route. Click it.
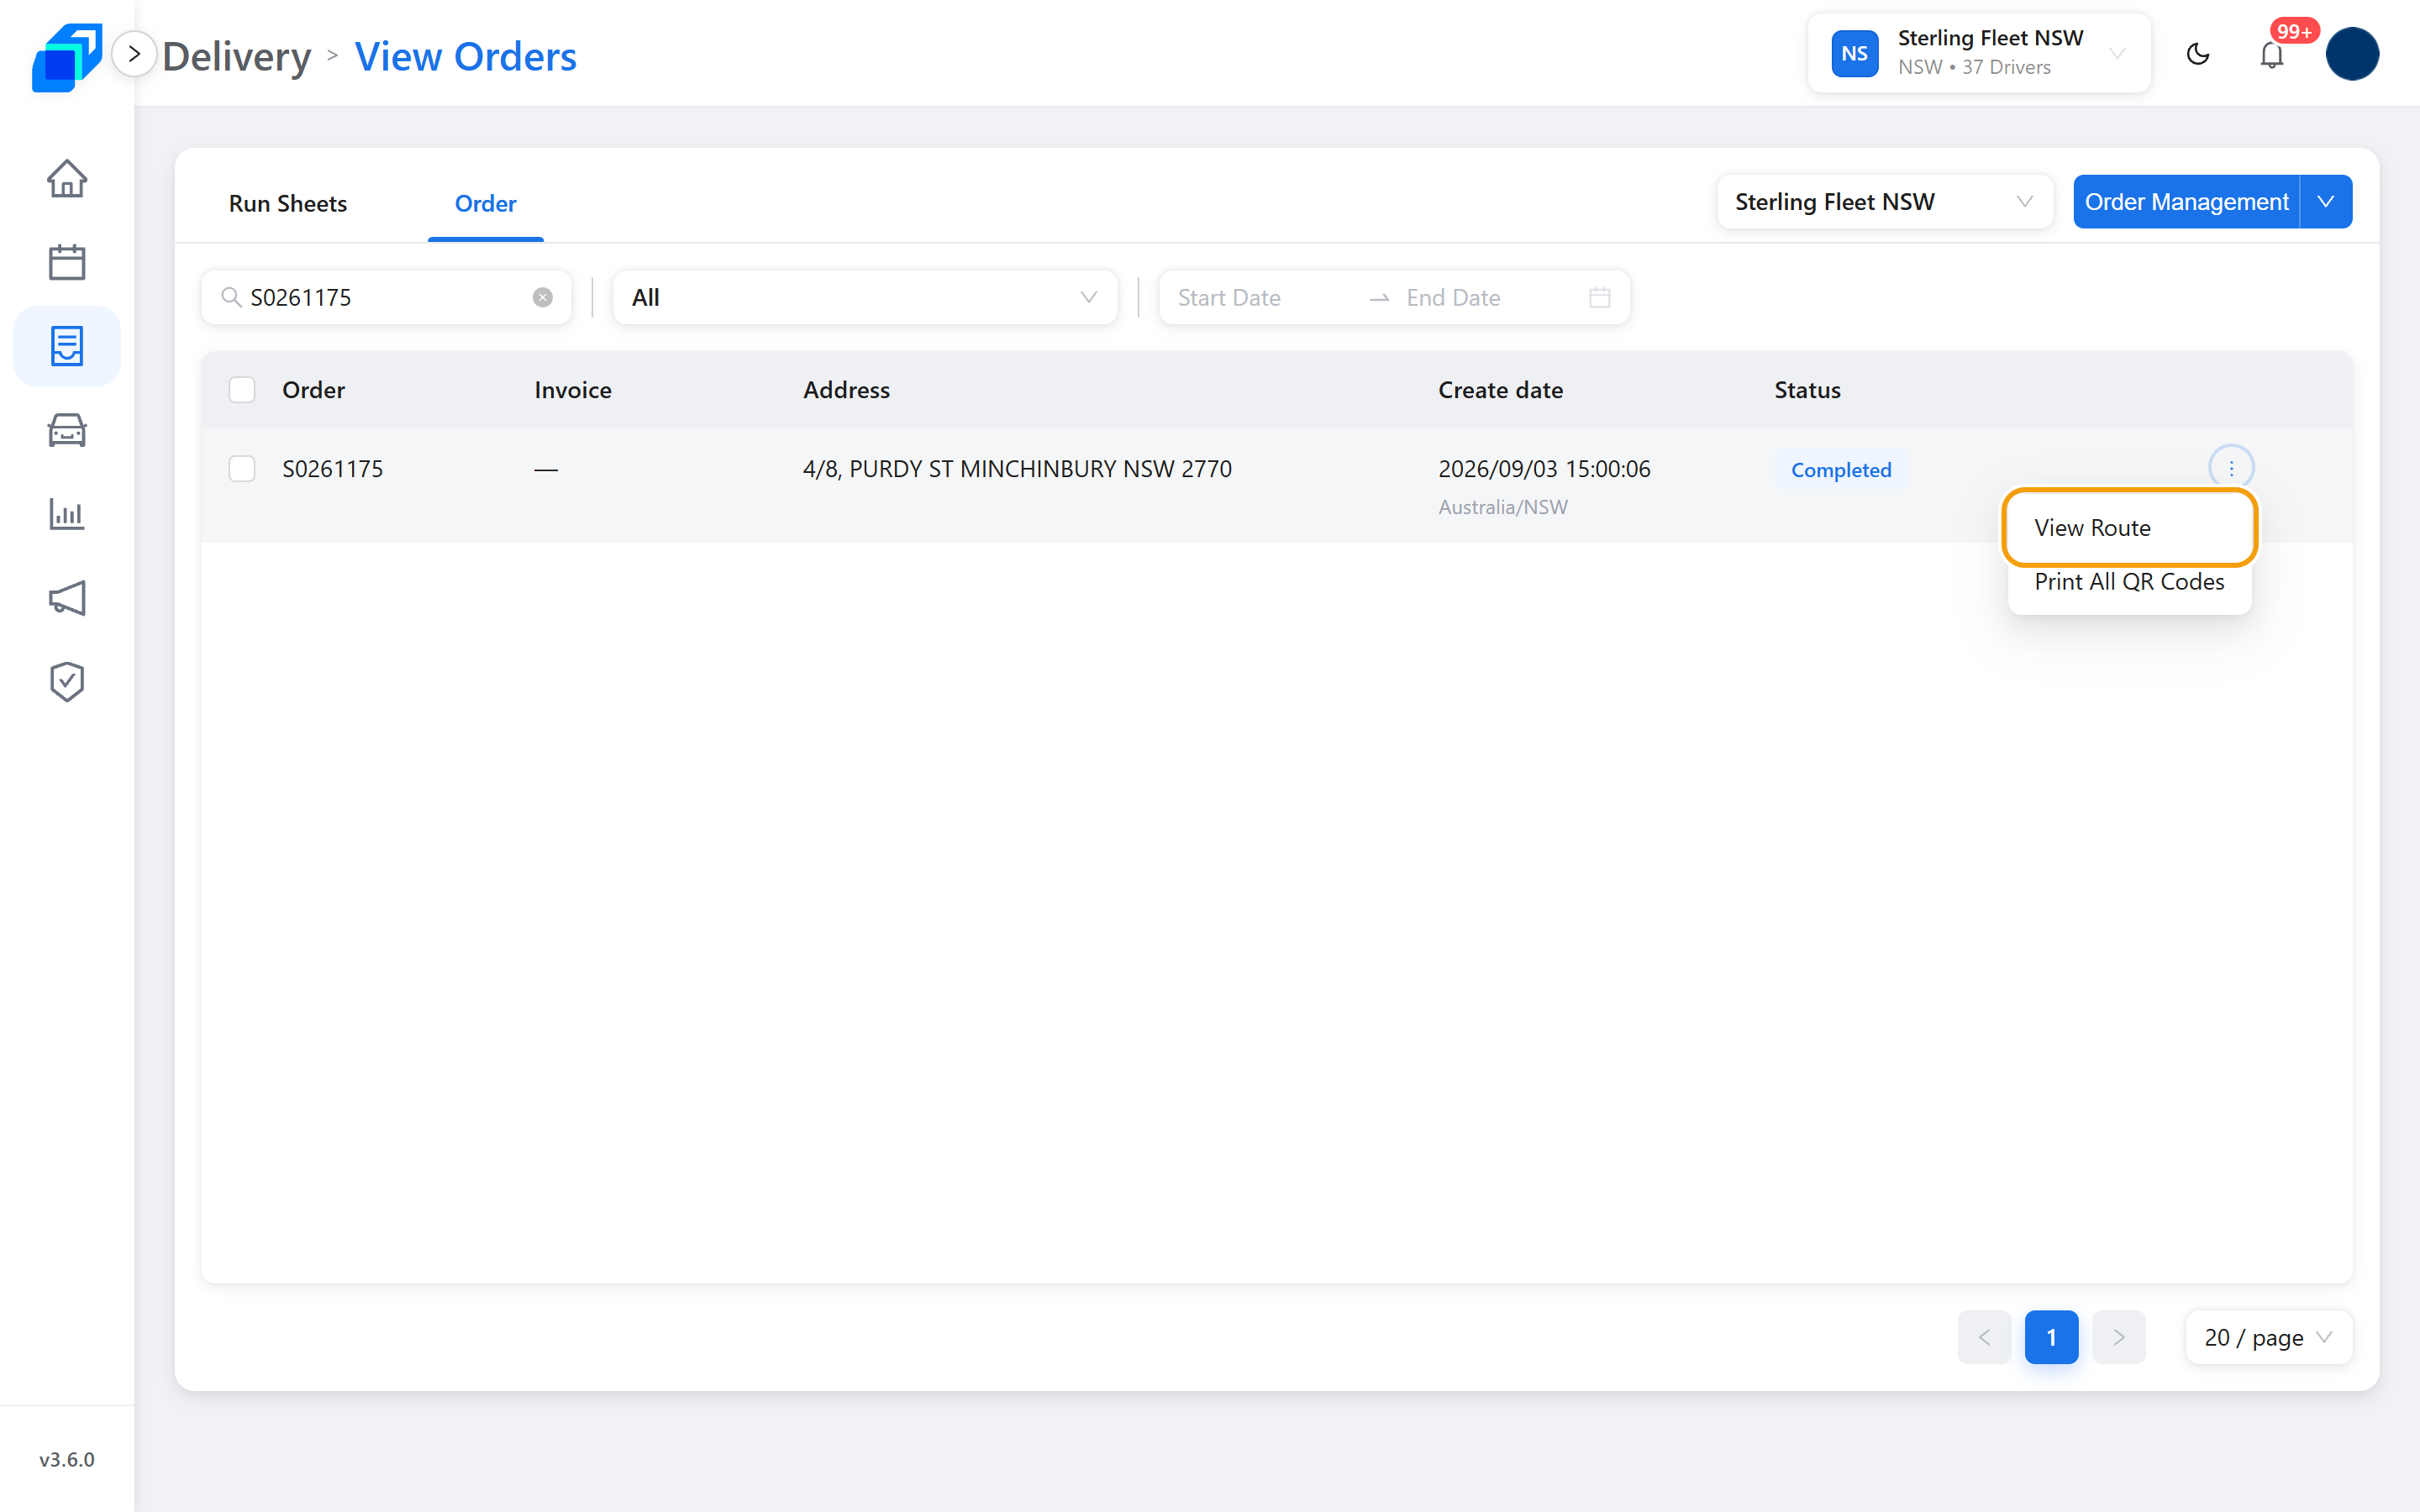
You land on View Transport Records – the menu item and the page title are two names for the same screen.
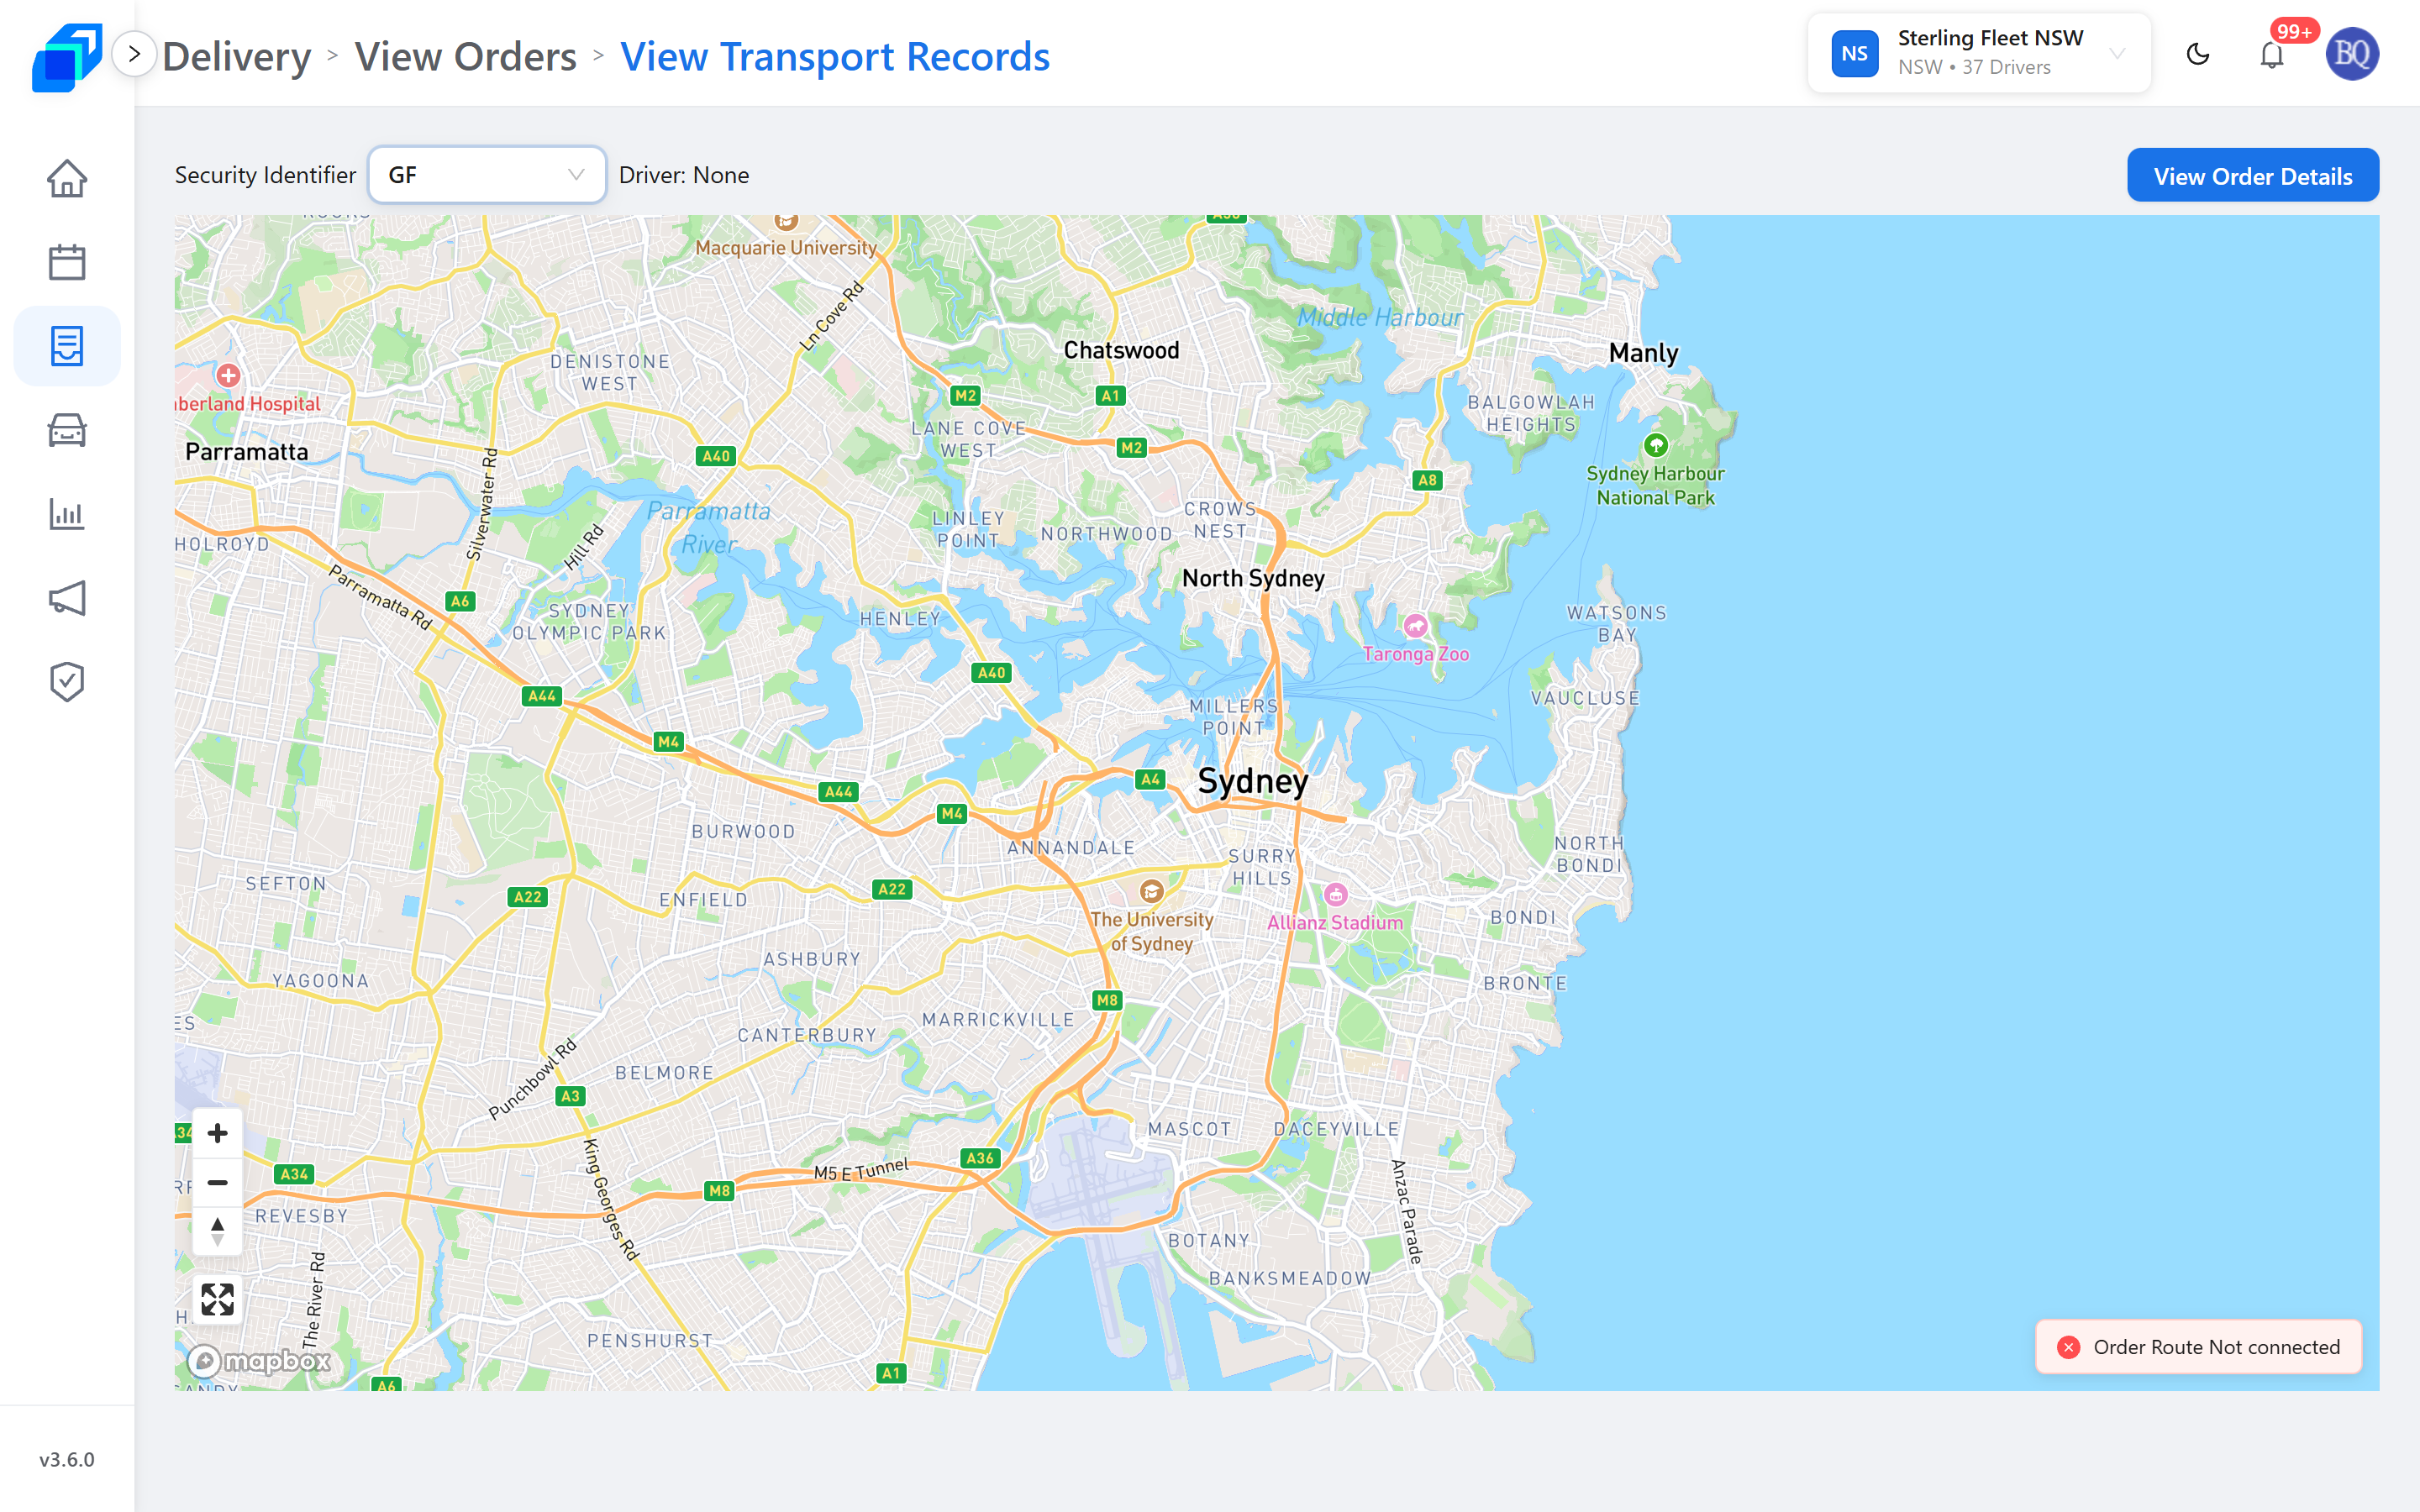
- Security Identifier – pick the package you want to follow. An order with one package has one to choose.
- Driver – who is carrying it.
- Order Route – the badge reads Connected while the driver's phone is sending its position, and Not connected when it is not.
- View Order Details – back to the order itself.
The track is drawn from the driver's live position, so a route only appears while that driver is on the road with the app open. Not connected on a finished order is normal, not a fault.